
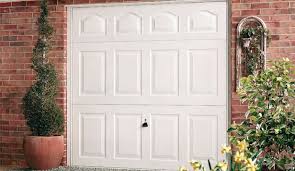
Attaching a banner to your Garage Door Repair Wise County TX is a creative and eye-catching way to display messages, promote events, or celebrate special occasions.
Whether you’re organizing a birthday party, announcing a sale, or supporting your favorite sports team, this guide will provide you with step-by-step instructions on how to securely attach a banner to your garage door. With a few simple tools and materials, you’ll have your banner up in no time.
Materials Needed:
- Banner: Choose a durable and weather-resistant banner that fits the desired size for your garage door.
- Grommets: These small metal or plastic rings reinforce the banner’s edges and provide attachment points.
- Bungee cords or zip ties: These will be used to secure the banner to the garage door.
- Tape measure: To accurately measure the dimensions of your garage door and align the banner.
- Scissors or utility knife: For cutting and trimming the banner and any excess materials.
- Ladder or step stool: Depending on the height of your garage door, you may need assistance reaching higher areas.
- Optional: Adhesive hooks or clips for additional support (if needed).
Step-by-Step Instructions:
- Measure your garage door: Start by measuring the dimensions of your garage door to determine the appropriate size for your banner. Consider leaving a border around the edges to ensure visibility and prevent any important information from being obstructed.
- Prepare the banner: Lay the banner flat on a clean surface and trim any excess material using scissors or a utility knife. If your banner doesn’t already have grommets, you can add them using a grommet kit following the manufacturer’s instructions.
- Position the banner: With the help of a ladder or step stool, position yourself at the center of the garage door. Align the banner with the desired placement and make sure it is straight and centered. Enlist the assistance of another person if needed.
- Attach the banner using bungee cords or zip ties: Starting from the top corners of the banner, attach bungee cords or zip ties through the grommets and secure them to the garage door tracks or hinges. Leave enough slack to prevent the banner from tearing in case of strong winds or sudden movements.
- Attach additional support (optional): If you anticipate strong winds or want extra reinforcement, consider attaching adhesive hooks or clips to the top corners of the garage door and secure the banner to them using bungee cords or zip ties. This will help prevent the banner from flapping or detaching.
- Adjust and tighten: Ensure that the banner is taut and properly aligned. Make any necessary adjustments to the tension of the bungee cords or zip ties to achieve a secure fit. Take a step back to assess the visibility and positioning of the banner from different angles.
- Test the installation: Open and close the garage door to check if the banner remains secure and does not interfere with the door’s operation. Make any further adjustments if necessary.
Conclusion: Attaching a banner to your Garage Door Repair Wise County TX can be a fun and effective way to convey messages and create visual impact. By following these step-by-step instructions, you can securely and confidently display your banner while ensuring it withstands various weather conditions. Remember to consider safety precautions, such as using a ladder or step stool correctly, and regularly inspect the installation to maintain its stability.
Wise County Garage & Overhead Doors
Briar, TX
940-360-3638
Leave a Reply