Local Businesses Blog in Texas

Tag: garage door repair Wise County TX

How To Replace Old Style Garage Door Springs – Wise County Door and Gate


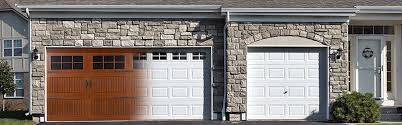
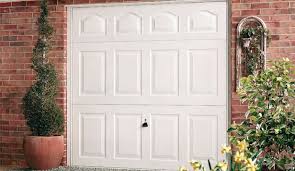
Replacing old-style Wise Country Garage Door Repair, typically known as extension springs or torsion springs, requires careful attention to safety procedures and mechanical know-how.

These springs are under high tension and can cause serious injury if mishandled. If you’re not experienced with garage door repair, it’s highly recommended to hire a professional for this task. However, if you’re confident in your abilities and understand the risks involved, follow these steps to replace old-style garage door springs:

: Gather Necessary Tools and Materials Before you begin, gather the following tools and materials:

  • Replacement garage door springs (ensure they match the type and size of the old springs)
  • Winding bars or winding rods (for torsion springs)
  • Adjustable wrench
  • Vice grips or locking pliers
  • Safety goggles
  • Sturdy ladder or step stool

: Identify the Type of Springs Determine whether your garage door uses extension springs or torsion springs. Extension springs run parallel to the tracks on either side of the door, while torsion springs are mounted horizontally above the door opening.

: Release Tension on the Springs If you’re dealing with extension springs, use vice grips or locking pliers to secure the door in the open position. Then, disconnect the safety cables from the springs and carefully release the tension by unhooking them from the track hangers.

For torsion springs, insert winding bars or rods into the winding cones on each end of the spring. Slowly unwind the spring by turning the bars in the direction specified by the manufacturer until it’s fully relaxed.

: Remove the Old Springs Once the tension is released, use an adjustable wrench to loosen the set screws on the winding cones (for torsion springs) or the safety cables (for extension springs). Be cautious not to remove the screws or cables completely, as they may still be under tension. Once loosened, carefully remove the old springs from their mounting brackets.

: Install the New Springs Slide the new springs into the mounting brackets, ensuring they’re properly seated and aligned. For extension springs, reattach the safety cables to the springs and secure them to the track hangers. For torsion springs, tighten the set screws on the winding cones to secure the springs in place.

: Wind the Springs For torsion springs, use winding bars or rods to wind the new springs in the opposite direction of the unwinding process. Follow the manufacturer’s instructions for the number of turns required to achieve the appropriate tension based on the weight of your garage door.

: Test the Door Once the new springs are installed and properly tensioned, carefully test the operation of the garage door. Open and close the door several times to ensure it moves smoothly and evenly. Make any necessary adjustments to the tension if the door doesn’t operate correctly.

: Reconnect Safety Features Reconnect any safety features or mechanisms that were disconnected during the replacement process, such as safety cables or sensors.

: Perform a Safety Check Perform a final safety check to ensure all components are secure and properly installed. Inspect the garage door tracks, cables, and other hardware for any signs of damage or wear. Address any issues immediately to prevent accidents or further damage.

: Consider Professional Assistance If you encounter any difficulties or feel uncomfortable with any aspect of replacing the garage door springs, it’s best to seek professional assistance. Garage door springs are under extreme tension, and mishandling them can lead to serious injury or damage.

By following these steps carefully and prioritizing safety, you can replace old-style Wise Country Garage Door Repair. If you’re unsure about any part of the process or encounter difficulties, don’t hesitate to seek help from a qualified professional.

Wise County Door and Gate

1-940-304-0821

How to Fix Garage Door Sensors-Wise County Door Company

Garage Door Repair Wise County TX sensors are essential safety features that prevent accidents and ensure the smooth operation of your garage door. When these sensors malfunction, it can lead to inconvenience and potential safety hazards.

In this guide, we will provide step-by-step instructions to help you fix garage door sensors and restore their proper functioning.

Section 1: Understanding Garage Door Sensors Garage door sensors typically consist of two units, one on each side of the garage door. These sensors emit an infrared beam that, when interrupted, signals the door to stop closing or opening. Before attempting any repairs, it is important to familiarize yourself with the different components of the sensors and their functions.

Section 2: Identifying the Problem Start by examining the sensors for any visible signs of damage, such as loose wires, dirt, or misalignment. Common issues include misaligned sensors, dirty lenses, or faulty wiring. Identifying the specific problem will help you determine the appropriate course of action for repair.

Section 3: Cleaning the Sensors Clean the lenses of the sensors using a soft, lint-free cloth and a mild household cleaner. Dirt or debris on the lenses can interfere with the infrared beam and cause malfunctioning. Gently wipe the lenses until they are clean and clear.

Section 4: Aligning the Sensors If the sensors are misaligned, they may fail to detect the infrared beam properly. Start by ensuring that both sensors are securely mounted and not loose. Then, adjust the sensor brackets to align them correctly. Use a level to ensure they are perfectly aligned horizontally and facing each other. Once aligned, tighten the brackets to secure the sensors in place.

Section 5: Verifying the Sensor Alignment To check if the sensors are properly aligned, activate the garage door opener and observe the indicator lights on each sensor. The indicator lights should both be lit and not flickering. If the lights do not indicate proper alignment, recheck the sensor alignment and make necessary adjustments until both lights remain steady.

Section 6: Checking the Wiring Inspect the wiring connecting the sensors to the garage door opener. Look for any loose or damaged wires that could be disrupting the electrical connection. If you find any damaged wires, replace them with new ones. Ensure that all connections are secure and tightly fitted.

Section 7: Testing the Sensors Once you have cleaned, aligned, and checked the wiring, it’s time to test the sensors. Place an obstacle, such as a small box, in the path of the garage door. Activate the door opener to close the door. The door should reverse its movement immediately upon sensing the obstacle. If the door does not reverse or hesitates, there may still be an issue with the sensors.

Section 8: Adjusting the Sensitivity Garage door openers often have sensitivity adjustment controls. If the sensors are properly aligned and cleaned, but the door fails to reverse when obstructed, adjusting the sensitivity might be necessary. Refer to your garage door opener’s manual for instructions on how to adjust the sensitivity settings. Make incremental adjustments until the door responds appropriately to obstacles.

Section 9: Repeating the Test After adjusting the sensitivity, repeat the test with the obstacle. The garage door should now reverse promptly upon contact with the obstacle. If the issue persists, you may need to consult a professional garage door technician for further assistance.

Section 10: Maintenance and Regular Checks To avoid future sensor problems, it is important to conduct regular maintenance. Clean the sensors periodically to prevent dirt buildup. Inspect the wiring and connections for any signs of wear or damage. Perform tests to ensure the sensors are functioning correctly and that the garage door reverses upon obstruction.

Conclusion: Garage Door Repair Wise County TX sensors are crucial safety components that require proper maintenance and occasional troubleshooting. By following the steps outlined in this guide, you can effectively fix common issues with garage door sensors and ensure the safe and efficient operation of your garage door system. Remember, if you encounter more complex problems or are unsure about the repair process, it is always advisable to seek professional assistance.

Wise County Door Company

1-940-304-0821

How to Reset Password on Garage Door Keypad? – Wise County Door and Gate

As a homeowner who recently reset the password on my garage door keypad, I can share my personal experience and offer guidance on how to complete this task effectively.

Here’s a step-by-step account from Garage Door Wise County TX of how I reset the password on my garage door keypad:

  1. Locate the Reset Button: To begin, I carefully examined my garage door keypad to locate the reset button. Depending on the make and model of the keypad, the reset button could be found on the back, inside the keypad compartment, or in another inconspicuous location. I took note of its position for the upcoming steps.
  2. Press and Hold the Reset Button: Using a small tool such as a paperclip or pen, I pressed and held the reset button for approximately 10 seconds. Holding the button triggers the reset process, clearing the existing password and restoring the keypad to its default settings. I made sure to press the button firmly and hold it for the specified duration.
  3. Wait for the Keypad to Reset: After holding the reset button, I patiently waited for the keypad to reset. This process typically takes a few seconds. During this time, I noticed that the lights or indicators on the keypad flashed, turned off, or displayed other signs of resetting. I remained patient until the resetting process was complete.
  4. Enter the Default Code: Once the keypad finished resetting, I was able to enter the default code to regain access. The default code is typically provided in the owner’s manual or can be found on the manufacturer’s website. In my case, I referred to the owner’s manual and found the default code specified. Using the keypad’s buttons, I entered the default code carefully, ensuring that each digit was accurately inputted.
  5. Change the Password: With access restored using the default code, I proceeded to change the password to a new one of my choosing. The exact process for changing the password may vary depending on the specific keypad model. I referred to the owner’s manual for detailed instructions on how to change the password. Following the instructions, I entered the necessary button combinations or followed the on-screen prompts to set a new password.
  6. Test the New Password: After changing the password, I tested it to ensure that it worked properly. I entered the newly set password on the keypad, following the specified sequence or pattern. I observed whether the garage door responded accordingly, either opening or closing. It was important to verify that the new password was functioning as intended.
  7. Additional Troubleshooting: In case of any issues or if the provided steps didn’t work for my specific keypad model, I referred to the owner’s manual or contacted the manufacturer’s customer support. They could provide me with model-specific instructions or assist with troubleshooting any problems I encountered.

Throughout the process, I prioritized following the instructions provided by the manufacturer and exercising caution. It’s essential to keep the new password secure and avoid using easily guessable codes to enhance the security of the garage door.

By following these steps from Garage Door Wise County TX, consulting the owner’s manual, and reaching out to the manufacturer’s customer support if needed, I was able to successfully reset the password on my garage door keypad and regain access to my garage.

Wise County Door and Gate

Wise County, TX

940-304-0821

Can a Smartphone be Used as a Garage Door Opener-Wise County Automatic Gates LLC

In recent years, smartphones have become an integral part of our daily lives, offering a multitude of functionalities beyond their primary communication purposes. As technology advances, the potential applications of smartphones continue to expand. One such area of interest is using smartphones as Garage Door Repair Wise County TX openers.

In this article, we will delve into the feasibility of leveraging smartphones to control garage door systems, examining the advantages, challenges, and potential solutions.

Advantages of Smartphone-Enabled Garage Door Openers:

  1. Convenience: The primary advantage of using a smartphone as a garage door opener is convenience. Most people carry their smartphones with them at all times, making it readily accessible for operating a garage door. This eliminates the need for carrying additional physical devices, such as remote controls or keypads.
  2. Integration and Automation: Smartphones can be seamlessly integrated into existing home automation systems, allowing users to control their garage doors remotely. Integration with voice assistants, such as Amazon Alexa or Google Assistant, enables hands-free operation. Additionally, smartphone apps can be programmed to automatically open or close the garage door based on specified triggers, like proximity to home or scheduled times.
  3. Enhanced Security: Traditional garage door remotes can be easily lost or stolen, potentially compromising the security of your home. Smartphone-based garage door openers can incorporate advanced security measures, such as biometric authentication or encrypted communication protocols, providing an extra layer of protection.
  4. Multi-Device Access: Smartphones offer the flexibility of granting access to multiple users simultaneously. This feature is particularly beneficial for households with multiple family members or when granting temporary access to visitors or service providers. Permissions can be easily managed through the smartphone app, ensuring controlled access to the garage.

Challenges and Solutions:

  1. Compatibility: Garage door systems vary in terms of their technology and communication protocols. To overcome compatibility challenges, manufacturers can develop universal adapter modules that can be installed in existing garage door openers, enabling them to communicate with smartphones via Bluetooth or Wi-Fi. This solution would ensure compatibility across different garage door models and brands.
  2. Security Risks: Utilizing smartphones as garage door openers introduces potential security vulnerabilities. Manufacturers and developers need to implement robust security measures, including encryption, two-factor authentication, and regular software updates, to protect against unauthorized access and hacking attempts.
  3. Connectivity and Reliability: Stable connectivity is crucial for seamless operation. Garage door opener apps should be designed to work offline, utilizing local network connections when internet connectivity is not available. Additionally, manufacturers should prioritize reliability and optimize the app’s performance to ensure smooth and consistent garage door control.
  4. Battery Life: Smartphone battery life is a critical consideration when using it as a garage door opener. To mitigate this concern, low-power communication protocols, such as Bluetooth Low Energy (BLE), can be employed. Furthermore, the garage door opener app can be designed to operate in the background and consume minimal resources, preserving the smartphone’s battery life.

Conclusion: The feasibility of using smartphones as Garage Door Repair Wise County TX openers is not only realistic but also offers numerous benefits. The convenience, integration capabilities, enhanced security, and multi-device access provided by smartphones make them an appealing option for controlling garage door systems. While challenges like compatibility, security risks, connectivity, and battery life exist, they can be addressed through technological advancements, standardized communication protocols, and diligent security measures. As smartphones continue to evolve and integrate with our daily lives, their potential as garage door openers holds promise for a more connected and efficient future.

Wise County Automatic Gates LLC

200 W Main St, Decatur, TX 76234

1-970-703-0776

How to Attach Banner to Garage Door-Wise County Garage & Overhead Doors

Attaching a banner to your Garage Door Repair Wise County TX is a creative and eye-catching way to display messages, promote events, or celebrate special occasions.

Whether you’re organizing a birthday party, announcing a sale, or supporting your favorite sports team, this guide will provide you with step-by-step instructions on how to securely attach a banner to your garage door. With a few simple tools and materials, you’ll have your banner up in no time.

Materials Needed:

  1. Banner: Choose a durable and weather-resistant banner that fits the desired size for your garage door.
  2. Grommets: These small metal or plastic rings reinforce the banner’s edges and provide attachment points.
  3. Bungee cords or zip ties: These will be used to secure the banner to the garage door.
  4. Tape measure: To accurately measure the dimensions of your garage door and align the banner.
  5. Scissors or utility knife: For cutting and trimming the banner and any excess materials.
  6. Ladder or step stool: Depending on the height of your garage door, you may need assistance reaching higher areas.
  7. Optional: Adhesive hooks or clips for additional support (if needed).

Step-by-Step Instructions:

  1. Measure your garage door: Start by measuring the dimensions of your garage door to determine the appropriate size for your banner. Consider leaving a border around the edges to ensure visibility and prevent any important information from being obstructed.
  2. Prepare the banner: Lay the banner flat on a clean surface and trim any excess material using scissors or a utility knife. If your banner doesn’t already have grommets, you can add them using a grommet kit following the manufacturer’s instructions.
  3. Position the banner: With the help of a ladder or step stool, position yourself at the center of the garage door. Align the banner with the desired placement and make sure it is straight and centered. Enlist the assistance of another person if needed.
  4. Attach the banner using bungee cords or zip ties: Starting from the top corners of the banner, attach bungee cords or zip ties through the grommets and secure them to the garage door tracks or hinges. Leave enough slack to prevent the banner from tearing in case of strong winds or sudden movements.
  5. Attach additional support (optional): If you anticipate strong winds or want extra reinforcement, consider attaching adhesive hooks or clips to the top corners of the garage door and secure the banner to them using bungee cords or zip ties. This will help prevent the banner from flapping or detaching.
  6. Adjust and tighten: Ensure that the banner is taut and properly aligned. Make any necessary adjustments to the tension of the bungee cords or zip ties to achieve a secure fit. Take a step back to assess the visibility and positioning of the banner from different angles.
  7. Test the installation: Open and close the garage door to check if the banner remains secure and does not interfere with the door’s operation. Make any further adjustments if necessary.

Conclusion: Attaching a banner to your Garage Door Repair Wise County TX can be a fun and effective way to convey messages and create visual impact. By following these step-by-step instructions, you can securely and confidently display your banner while ensuring it withstands various weather conditions. Remember to consider safety precautions, such as using a ladder or step stool correctly, and regularly inspect the installation to maintain its stability.

Wise County Garage & Overhead Doors

Briar, TX

940-360-3638

How to Frame a Garage Door – Wise County Door and Gate

Framing a garage door repair is an essential part of building a garage. It’s important to make sure the door is framed correctly to ensure that it will function properly and last for many years.

This guide will provide a step-by-step process on how to frame a garage door, including the tools and materials you will need:

Tools and Materials Needed:

  • Lumber (2×4 or 2×6)
  • Plywood
  • Circular saw
  • Measuring tape
  • Hammer
  • Nails (2 1/2 inch framing nails)
  • Level
  • Chalk line
  • Screwdriver
  • Sawhorses

Step 1: Measure the Opening The first step in framing a garage door is to measure the opening. You will need to measure the width and height of the opening to determine the size of the door that you need to purchase. It’s important to measure the opening accurately, as this will determine the size of the frame that you will need to build.

Step 2: Cut the Lumber Once you have measured the opening, you will need to cut the lumber to the appropriate size. You will need two pieces of lumber for the sides of the frame, two pieces for the top, and two pieces for the bottom. The size of the lumber will depend on the size of the opening and the size of the door that you are installing. It’s important to use the correct size lumber for the frame to ensure that it is strong and will support the weight of the door.

Step 3: Build the Frame To build the frame, you will need to attach the pieces of lumber together using nails. Start by nailing the top and bottom pieces to the side pieces. Make sure that the corners are square and that the frame is level. Use a level to ensure that the frame is straight and even.

Step 4: Install the Header The header is the piece of lumber that sits above the door and supports the weight of the roof. It’s important to install the header correctly to ensure that the roof will not collapse. To install the header, measure the length of the opening and cut the header to that length. Then, nail the header to the top of the frame.

Step 5: Install the Tracks The tracks are the pieces of metal that the garage door rollers will run on. It’s important to install the tracks correctly to ensure that the door will operate smoothly. To install the tracks, measure the distance from the floor to the top of the opening and cut the tracks to that length. Then, attach the tracks to the frame using screws.

Step 6: Install the Spring Assembly The spring assembly is the mechanism that allows the door to open and close. It’s important to install the spring assembly correctly to ensure that the door will operate safely. To install the spring assembly, follow the manufacturer’s instructions carefully.

Step 7: Install the Garage Door Opener If you are installing a garage door opener, you will need to follow the manufacturer’s instructions carefully. The opener will need to be attached to the header and the tracks. It’s important to ensure that the opener is securely attached to the frame to prevent it from falling.

Step 8: Install the Garage Door The final step in framing a garage door is to install the door itself. To install the door, place it into the opening and attach it to the tracks. Then, test the door to ensure that it opens and closes smoothly. If the door is not operating correctly, you may need to adjust the tracks or the spring assembly.

Conclusion:

Framing a garage door repair is an important part of building a garage. It’s important to follow the steps carefully to ensure that the door will function properly and last for many years.

Wise County Door and Gate

1-940-304-0821

Powered by WordPress & Theme by Anders Norén