Local Businesses Blog in Texas

Category: general Page 1 of 2

How to Fix a Leaky Faucet? – Corinth’s Best Plumbing & Hydro Jetting

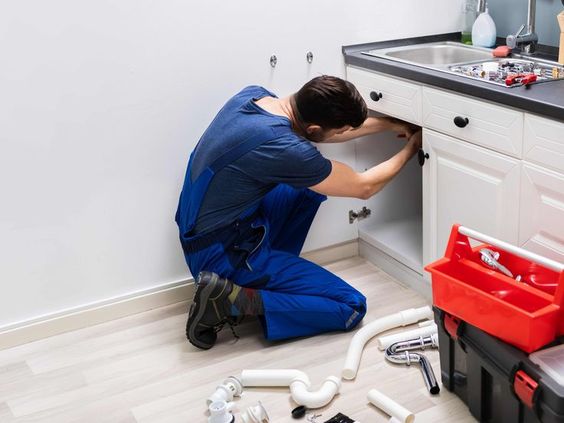
A dripping faucet is not just annoying; it’s wasteful and can lead to increased water bills. Fortunately, you don’t need to be a plumbing expert to fix this common household issue.

I’ll share a step-by-step guide from Plumbing Corinth TX on how to fix a leaky faucet, providing you with the knowledge and confidence to tackle this DIY repair.

Materials You’ll Need

Before you begin, gather the necessary materials and tools:

  1. Adjustable wrench
  2. Phillips and flat-head screwdrivers
  3. Replacement parts (O-rings, washers, and cartridges)
  4. Plumber’s tape
  5. Towels and a bucket

Step 1: Turn Off the Water

Locate the shut-off valves under the sink that control the water supply to the faucet. Turn the valves clockwise to shut off the water completely. If you can’t find these valves, you may need to turn off the main water supply to your home.

Step 2: Close the Drain

To prevent small parts from falling down the drain, close the sink’s drain or place a towel in the sink to cover it.

Step 3: Remove the Handle

Use a Phillips or flat-head screwdriver to remove the screw that holds the faucet handle in place. Once the screw is removed, gently pull off the handle. If the handle is stuck, use an adjustable wrench to carefully loosen it.

Step 4: Access the Cartridge or Valve Stem

Depending on your faucet type, you’ll find either a cartridge or a valve stem. Cartridges are common in single-handle faucets, while valve stems are found in double-handle faucets. Use your wrench to remove the retaining nut or clip that secures the cartridge or valve stem.

Step 5: Inspect and Replace Parts

Examine the cartridge or valve stem for any damage or signs of wear, such as torn O-rings or deteriorated washers. If you find issues, it’s best to replace these parts. Take the damaged parts to your local hardware store to ensure you get the correct replacements.

Step 6: Apply Plumber’s Tape

Before reassembling the faucet, wrap plumber’s tape around the threads of the valve stem or cartridge to create a watertight seal. This step is crucial to prevent future leaks.

Step 7: Reassemble the Faucet

Carefully slide the new cartridge or valve stem back into place, ensuring it’s aligned correctly. Reattach the retaining nut or clip to secure it. Be sure not to overtighten, as this can cause damage.

Step 8: Reattach the Handle

Place the faucet handle back on the valve stem or cartridge and secure it with the screw. Tighten the screw with your screwdriver.

Step 9: Turn On the Water

With the repair completed, it’s time to turn the water supply back on. Slowly open the shut-off valves, and check for any leaks. If you notice any leaks, make sure all connections are tight and the plumber’s tape is properly applied.

Step 10: Test the Faucet

Turn on the faucet and let the water flow. Check for any drips or leaks. If the problem persists, you may need to repeat the repair process or seek professional assistance.

Common Types of Faucet Leaks

Understanding the type of faucet you have and the source of the leak can help you address the issue more effectively.

  1. Ball Faucets: These single-handle faucets are common in many kitchens. Leaks often occur due to worn-out O-rings or springs.
  2. Cartridge Faucets: Typically found in single-handle faucets, leaks can be caused by a faulty cartridge that needs replacement.
  3. Compression Faucets: Common in older homes, these faucets often have separate hot and cold handles. Leaks occur when the rubber washer wears out.
  4. Ceramic-Disk Faucets: These durable faucets are less prone to leaks, but when they do occur, it’s often due to a cracked ceramic disk.
  5. Ball and Sleeve Faucets: Found in newer faucets, these can leak due to a worn-out ball or O-rings.

Additional Tips

  • Be patient and take your time during the repair. Rushing can lead to mistakes.
  • If you encounter any difficulties during the process, consult the faucet’s manufacturer’s manual or a plumbing professional for guidance.
  • Always use high-quality replacement parts to ensure a lasting repair.
  • Regularly check your faucets for leaks and address them promptly to prevent water wastage and higher bills.

Conclusion

By following Plumbing Corinth TX, fixing a leaky faucet is a satisfying DIY project that can save you money and reduce water waste. With the right tools and a methodical approach, you can successfully repair most common faucet leaks. However, if you encounter challenges or have any doubts, don’t hesitate to seek assistance from a professional plumber to ensure a reliable and long-lasting repair.

Corinth’s Best Plumbing & Hydro Jetting

2705 Meadowview Dr, Corinth, TX 76210, United States

940-286-3137

Hiring a Professional Plumber for Faucet Installation: When to Call in the Experts – Addison’s Best Plumbing & Hydro Jetting

As a homeowner who enjoys tackling various DIY projects around the house, I often find myself at a crossroads when it comes to plumbing tasks. Installing a new faucet may seem like a straightforward job, but it can quickly turn into a plumbing puzzle, especially for those who aren’t well-versed in the intricacies of pipes and fixtures. After some experiences that involved leaks, frustration, and the occasional flood in my kitchen, I’ve learned that knowing when to call in the experts is crucial.

I’ll share my insights into faucet installation and provide guidance on when it’s best to hire a professional plumber to ensure a seamless and leak-free installation based from Plumbing Addison TX.

The Appeal of DIY Faucet Installation

There’s an undeniable allure to DIY projects. They save money, offer a sense of accomplishment, and can be a great way to learn new skills. When it comes to faucet installation, many homeowners are tempted to take on the task themselves. After all, how hard can it be to replace a faucet, right? As I’ve learned, it can be more complex than it seems.

When DIY Faucet Installation Works:

For those with some plumbing experience and the right tools, DIY faucet installation can indeed be successful. Here are the scenarios in which it can work well:

  • Replacing an existing faucet with the exact same model or a similar design.
  • Basic tasks like swapping out a bathroom faucet in a sink with accessible connections.
  • When you are confident in your plumbing skills and have successfully completed similar projects in the past.

When DIY Faucet Installation Becomes a Challenge:

Unfortunately, faucet installation can become more challenging under certain circumstances:

  1. Complex Faucet Designs: Modern faucets can feature intricate designs, advanced features, and unique connection systems. These can be daunting for DIY enthusiasts.
  2. Old Plumbing Systems: In older homes, plumbing systems may be outdated, making it difficult to match the new faucet’s connections.
  3. Hidden Complications: Once you start removing the old faucet, you may discover hidden problems such as corroded pipes or loose connections.
  4. Lack of Proper Tools: Faucet installation requires specific tools, and not having them can lead to frustration and mistakes.

Knowing When to Call in the Experts

After a few DIY faucet installation attempts that didn’t go as smoothly as I had hoped, I realized the importance of recognizing when it’s time to bring in a professional plumber. Here are some scenarios in which hiring an expert is the best decision:

  1. Advanced Faucet Features: If you’re installing a faucet with advanced features like touchless technology, built-in filtration, or precise temperature control, it’s wise to let a professional handle it. These features require precise installation and may involve electrical connections.
  2. Custom Faucet Installations: When you’ve chosen a unique or custom faucet that doesn’t fit the standard mold, a professional can ensure it’s seamlessly integrated into your plumbing system.
  3. Complicated Under-Sink Conditions: If the space under your sink is cluttered or cramped, or if you encounter unexpected issues like corroded pipes or outdated connections, a plumber can navigate the challenges effectively.
  4. Preventing Leaks and Water Damage: Ensuring that your new faucet is installed without leaks is crucial to preventing water damage. A professional plumber has the expertise to achieve a leak-free installation.
  5. Water Pressure and Flow Concerns: If you notice changes in water pressure or flow after a DIY faucet installation, it’s best to consult a plumber. They can assess the issue and make necessary adjustments to optimize performance.

The Benefits of Hiring a Professional Plumber

Calling in a professional plumber for faucet installation comes with numerous advantages, including:

  1. Expertise and Experience: Professional plumbers have the knowledge and experience to tackle complex installations and troubleshoot issues effectively.
  2. Proper Tools and Equipment: Plumbers come equipped with the right tools, ensuring a precise and efficient installation.
  3. Compliance with Codes: They are well-versed in local plumbing codes and regulations, ensuring your installation meets all necessary standards.
  4. Peace of Mind: Hiring a plumber provides peace of mind that your faucet will function properly and won’t lead to leaks or water damage in the future.
  5. Time and Energy Savings: While DIY projects can be rewarding, hiring a plumber saves you time and energy, allowing you to focus on other home improvement tasks or leisure activities.

Choosing the Right Professional Plumber

When it comes to hiring a professional plumber, it’s essential to choose the right one for the job. Here are some tips for finding a reliable and skilled plumber:

  1. Ask for Recommendations: Seek recommendations from friends, family, or neighbors who have had plumbing work done recently. Personal referrals can be invaluable.
  2. Check Licensing and Insurance: Ensure the plumber is licensed and has the necessary insurance coverage to protect you in case of accidents or damages during the installation.
  3. Request References: Don’t hesitate to ask for references or read online reviews to gauge the plumber’s reputation and customer satisfaction.
  4. Get Multiple Quotes: Contact several plumbers to obtain quotes for the job. This allows you to compare costs and services to find the best fit for your needs and budget.
  5. Communicate Clearly: When speaking with potential plumbers, clearly communicate your expectations, the type of faucet you’re installing, and any specific requirements.

Conclusion: The Right Decision for a Hassle-Free Installation

Faucet installation can be a rewarding DIY project, but it can also become a source of frustration and potential problems if not executed correctly. Recognizing your limitations and knowing when to call in a professional plumber is essential to ensure a hassle-free installation and peace of mind.

Overall, as stated in Plumbing Addison TX, after learning the hard way, I now appreciate the expertise and precision that a professional plumber brings to faucet installations. Their knowledge, experience, and proper tools make the process smooth and error-free, allowing you to enjoy your new faucet without the worry of leaks or future issues. So, when it comes to faucet installation, making the right decision is the key to a successful and worry-free upgrade in your home.

Home Maintenance Plans: Keeping Your Home in Top Condition – Coppell’s Best Maid Services

As I walk through the rooms of my well-kept home, I can’t help but marvel at how far we’ve come since the day we moved in. It’s not just about the physical structure; it’s about the comfort, security, and pride of homeownership. This sense of accomplishment didn’t come by chance; it’s the result of a well-thought-out home maintenance plan that has kept our home in top condition over the years.

I’ll share my journey with home maintenance plans and how they have been the key to preserving the beauty and functionality of our home based from House Cleaning Coppell TX.

The Importance of Home Maintenance

Owning a home is a significant investment, both financially and emotionally. Your home is not just a structure; it’s a place of refuge, a canvas for your memories, and a haven for your family. To ensure it remains a source of pride and comfort, regular maintenance is crucial.

Home maintenance is not just about fixing things when they break; it’s about taking a proactive approach to prevent issues before they become major problems. It’s about preserving the value of your investment and creating a safe and comfortable living environment.

The Birth of a Home Maintenance Plan

When my family and I moved into our current home, we realized that homeownership came with responsibilities we had not previously experienced as renters. Suddenly, we were the ones responsible for fixing leaky faucets, creaky doors, and the occasional electrical issue. We quickly understood that being proactive was the way to go.

The birth of our home maintenance plan was rooted in a desire to maintain our home’s condition and value. We knew that regular upkeep would not only save us money in the long run but also make our home a safer and more comfortable place to live.

Components of a Home Maintenance Plan

Our home maintenance plan is a comprehensive approach that covers various aspects of our home. Here are the key components:

1. Seasonal Inspections and Maintenance

We conduct seasonal inspections to address specific tasks suitable for that time of year. These tasks include:

  • Spring: Cleaning gutters, checking for any winter-related damage, and preparing the garden for planting.
  • Summer: Inspecting the air conditioning system, cleaning the deck or patio, and performing exterior maintenance.
  • Fall: Cleaning gutters again, checking for roof damage, and ensuring the heating system is ready for winter.
  • Winter: Inspecting the heating system, protecting pipes from freezing, and sealing any drafts or gaps.

2. Regular Cleaning Schedule

Regular cleaning is an integral part of our home maintenance plan. A clean home not only looks better but also prevents dirt and grime from causing damage or wear and tear. This includes:

  • Daily Cleaning: Basic daily tasks like tidying up, sweeping, and wiping down surfaces to maintain cleanliness.
  • Weekly Cleaning: More in-depth cleaning, including vacuuming, mopping, and dusting, to keep the home looking its best.
  • Monthly Cleaning: Tasks like deep-cleaning the kitchen and bathrooms, washing windows, and changing air filters.
  • Quarterly Cleaning: A more extensive cleaning session that includes tasks like carpet cleaning, upholstery cleaning, and thorough dusting of often-neglected areas.

3. Appliance and System Maintenance

Regular maintenance of appliances and systems is vital to keep them in optimal condition. We have a schedule for:

  • HVAC System: Regular inspections and servicing to ensure efficient heating and cooling.
  • Plumbing: Checking for leaks, repairing faucets, and monitoring water pressure.
  • Electrical System: Checking wiring, outlets, and circuits for any issues.
  • Kitchen Appliances: Cleaning and maintaining our refrigerator, oven, dishwasher, and other kitchen appliances.
  • Home Security System: Ensuring our home security system is up to date and functioning correctly.

4. Exterior Maintenance

The exterior of your home is the first line of defense against the elements. Regular maintenance helps protect it from damage. Our plan includes:

  • Roof Inspection: Checking for damaged or missing shingles and repairing them promptly.
  • Siding and Paint: Regular inspections to ensure the siding and paint are in good condition.
  • Landscaping: Pruning trees and shrubs, maintaining the lawn, and protecting outdoor structures.
  • Driveway and Walkways: Sealing the driveway and addressing cracks in walkways to prevent further damage.

5. Budgeting for Home Maintenance

A crucial part of our home maintenance plan is budgeting for these expenses. We set aside a dedicated fund for home maintenance and repairs, so we’re financially prepared for unexpected issues that may arise. This proactive approach helps us avoid dipping into our savings or incurring debt when the need for repairs arises.

The Benefits of a Home Maintenance Plan

The benefits of a well-structured home maintenance plan extend far beyond the surface. Here are some of the key advantages we’ve experienced:

1. Financial Savings

Proactive maintenance is often less costly than emergency repairs. Regular upkeep allows us to catch and address issues early, preventing them from escalating into major, more expensive problems.

2. Increased Home Value

A well-maintained home retains its value and can even appreciate over time. Should we ever decide to sell our home, its condition will be a selling point.

3. Improved Energy Efficiency

Regular maintenance of our heating and cooling systems, as well as sealing drafts, has led to increased energy efficiency and lower utility bills.

4. Comfort and Safety

A well-maintained home is a comfortable and safe place to live. Regular inspections and repairs ensure that our family is secure and that our living environment is pleasant.

5. Peace of Mind

Knowing that we have a plan in place to address home maintenance and repairs gives us peace of mind. We don’t need to worry about unexpected breakdowns or issues.

6. A Home That Feels New

Regular cleaning, painting, and upkeep have our home looking and feeling fresh, almost like new. It’s a place we can be proud of, and that sense of pride reflects in our daily lives.

The Right Approach to Home Maintenance

Creating a home maintenance plan is not about turning into a full-time handyman or spending all your free time on repairs. It’s about taking a proactive approach to ensure your home remains in top condition and continues to be a source of pride, comfort, and security.

Overall, according to House Cleaning Coppell TX, if you’re unsure where to start, consider consulting with professionals or using home maintenance software to help you organize your plan. By implementing a well-structured and manageable approach to home maintenance, you can enjoy the benefits of a well-kept and worry-free living space. After all, a home is not just a place; it’s a reflection of the care and attention you invest in it, and a testament to the love and memories that are created within its walls.

Coppell’s Best Maid Services

440 Shadowcrest Ln, Coppell, TX 75019, United States

469-437-7286

Winter Window Cleaning: Overcoming Seasonal Challenges – DFW Window Cleaning of Irving

As a homeowner who takes great pride in maintaining a clean and welcoming living space, I’ve faced my fair share of challenges when it comes to winter window cleaning. With the cold, icy conditions and limited daylight hours, it can seem like a daunting task. However, I’ve learned that keeping your windows clean during the winter season is essential for maintaining a bright and inviting home.

By following Window Cleaning Irving TX, I’ll share my experiences and insights into overcoming the seasonal challenges of winter window cleaning.

The Importance of Winter Window Cleaning

Maintaining clean windows during the winter season is crucial for several reasons:

1. Natural Light: Clean windows allow more natural light to enter your home, reducing the need for artificial lighting and creating a bright, uplifting ambiance.

2. Health and Comfort: Winter is a time when we spend more hours indoors. Clean windows provide clear, unobstructed views and a cleaner environment, contributing to better mental and physical well-being.

3. Energy Efficiency: Well-maintained windows provide better insulation, helping to regulate indoor temperature and reduce energy costs during the cold months.

4. Curb Appeal: The exterior appearance of your home is influenced by the cleanliness of your windows. Well-kept windows enhance your property’s curb appeal, even in the winter.

Challenges of Winter Window Cleaning

Winter window cleaning presents a unique set of challenges that can make the task more daunting. Here are some of the common challenges:

1. Cold Temperatures: Working in cold weather can be uncomfortable and even dangerous, especially when handling water and cleaning solutions.

2. Limited Daylight: Winter days are shorter, and daylight hours can be scarce. This limited time frame can make it difficult to complete the task.

3. Ice and Snow: Accumulated ice and snow on windows can make the cleaning process more challenging and time-consuming.

4. Frozen Cleaning Solutions: Traditional window cleaning solutions may freeze on the glass before you have a chance to wipe them away.

5. Moisture Buildup: In cold weather, condensation and moisture can accumulate on the glass, making it harder to achieve streak-free results.

6. Risk of Injury: Slippery surfaces and icy conditions can increase the risk of accidents and injuries during winter window cleaning.

Overcoming Winter Window Cleaning Challenges

While winter window cleaning may seem challenging, it’s not impossible with the right approach. Here are some tips and strategies to help you overcome these seasonal challenges:

1. Choose the Right Time: Plan your window cleaning on a day when the weather is milder. A calm, sunny winter day can make the task more manageable.

2. Gather the Necessary Supplies: Before you start, gather all the tools and cleaning supplies you’ll need, such as a squeegee, a soft-bristle brush, a bucket, a microfiber cloth, and a winter-safe window cleaning solution.

3. Work in Sections: Break the task into smaller sections to avoid freezing of cleaning solution on the glass. Clean one section at a time and then move on.

4. Use a Winter-Safe Cleaning Solution: Opt for a winter-safe window cleaning solution that won’t freeze on contact with the cold glass. A mixture of rubbing alcohol and water is a good alternative.

5. Avoid Excessive Water: Use a damp cloth or sponge rather than drenching the windows with water. Excessive water can freeze and make the process more challenging.

6. Clear Snow and Ice: Remove snow and ice from the window surface before you begin cleaning. Use a scraper or a brush to ensure a clean starting point.

7. Pre-Warm Your Tools: Warming your cleaning tools slightly before use can prevent freezing. Run them under warm water or keep them indoors until you’re ready to start.

8. Work in a Team: Cleaning windows in the winter can be more manageable and safer with a partner. One person can handle the cleaning, while the other assists with safety and logistics.

9. Safety First: Be cautious when working on elevated windows. Use a sturdy ladder and ensure it’s placed on a stable surface. Wear slip-resistant shoes and be mindful of icy patches.

10. Dress Warmly: Wear warm and layered clothing, including gloves, to protect yourself from the cold. Dressing warmly is essential for your comfort and safety.

11. Time Management: Plan your window cleaning around the daylight hours. Start early in the day to take advantage of the available natural light.

12. Consider Professional Help: If you find the task too challenging or risky, consider hiring professional window cleaners who have the experience and equipment to handle winter conditions safely.

Winter Window Cleaning Steps

Here’s a step-by-step guide to help you tackle winter window cleaning effectively:

1. Clear Ice and Snow: Begin by removing any ice and snow from the window surface using a scraper or a brush. This step is crucial for a clean starting point.

2. Prepare Your Cleaning Solution: Mix a winter-safe window cleaning solution by combining rubbing alcohol and water in a 1:1 ratio. Pour the solution into a spray bottle for easy application.

3. Apply the Solution: Spray the cleaning solution onto the window surface, working in sections to avoid freezing. Apply the solution evenly to cover the entire area.

4. Gently Scrub: Use a soft-bristle brush or a sponge to gently scrub the window surface, focusing on any stubborn spots or stains.

5. Squeegee Technique: Starting at the top of the window, use a squeegee to remove the cleaning solution. Wipe the squeegee blade with a microfiber cloth after each pass to prevent streaks.

6. Wipe the Edges: Use a microfiber cloth to wipe down the window frames, sills, and edges, ensuring a thorough clean and preventing moisture buildup.

7. Check for Streaks: Inspect the windows for streaks or spots, and use a clean microfiber cloth to wipe them away for a clear, streak-free finish.

8. Move to the Next Section: Once a section is clean and streak-free, move on to the next section and repeat the process.

9. Finish and Inspect: After cleaning all sections, take a final look to ensure that your windows are spotless and free from streaks.

10. Reap the Benefits: Enjoy the benefits of clean and bright windows that enhance your indoor environment and curb appeal, even during the winter season.

Tips for Winter Window Cleaning

Here are some additional tips to make your winter window cleaning experience more successful:

1. Insulate Indoor Windows: Apply clear plastic window film to the interior of your windows to add an extra layer of insulation, reducing the chances of condensation.

2. Use a High-Quality Squeegee: Invest in a high-quality squeegee with a rubber blade for streak-free results.

3. Clear Obstructions: Move furniture or obstacles away from the windows to ensure easy access and thorough cleaning.

4. Avoid Window Condensation: Prevent window condensation by maintaining proper indoor humidity levels and using ventilation.

5. Consistent Maintenance: Make winter window cleaning part of your regular maintenance routine to keep your windows clean and free from condensation throughout the season.

Conclusion

Winter window cleaning may present its share of challenges, but with the right approach, it’s a manageable task that can significantly enhance your living environment. By choosing the right conditions, using the appropriate tools and cleaning solutions, and prioritizing safety, you can enjoy the benefits of clean and bright windows even during the winter season.

According to Window Cleaning Irving TX, remember that clean windows contribute to a healthier and more comfortable home, providing natural light and improving your overall well-being. So, don’t let the winter chill discourage you. Roll up your sleeves, prepare your tools, and embark on your winter window cleaning journey to maintain a welcoming and inviting living space.

DFW Window Cleaning of Irving

600 Burnwood Dr, Irving, TX 75062, United States

972-476-2947

Aluminum Windows: Modern Design and Durability – NTHE Window Replacement Euless

As a homeowner with a penchant for modern design and a desire for durable, low-maintenance solutions, I’ve had my fair share of experiences with various window materials. Among the options available, aluminum windows have emerged as a standout choice that perfectly blends contemporary aesthetics with unmatched durability.

I’ll share my insights into the world of aluminum windows, exploring their design appeal, durability, and why they make a compelling choice for modern homes according to Window Replacement Euless TX.

The Allure of Modern Design

Modern design, with its clean lines, minimalistic approach, and focus on open spaces, has become increasingly popular in today’s homes. This aesthetic aims to create a sense of simplicity, functionality, and an uncluttered living environment. When it comes to windows, aluminum frames align perfectly with these principles.

1. Slim Profiles: Aluminum windows are renowned for their slim, elegant profiles. This minimalistic design allows for larger glass areas, inviting more natural light into your home and creating a seamless connection between indoor and outdoor spaces. The result is a brighter, more open living environment that complements the principles of modern design.

2. Clean Lines: Aluminum windows feature clean, straight lines that add a touch of sophistication to your home’s exterior and interior. These crisp lines contribute to the uncluttered look associated with modern design, ensuring that your windows blend seamlessly with the overall aesthetics of your home.

3. Versatility: Aluminum’s adaptability makes it the perfect choice for creating various window styles, including picture windows, sliding windows, casement windows, and more. This versatility allows you to select the ideal window style to match your home’s architecture while maintaining a modern design sensibility.

4. Contemporary Finishes: Aluminum windows can be customized with a range of contemporary finishes, such as anodized, powder-coated, or even wood-grain finishes. These finishes offer a wide spectrum of colors and textures that can elevate the aesthetics of your windows, ensuring they harmonize with your home’s design vision.

The Unmatched Durability of Aluminum

One of the key reasons I was drawn to aluminum windows is their remarkable durability. As a homeowner, I appreciate materials that require minimal maintenance and can withstand the test of time. Aluminum delivers on both fronts, making it an excellent choice for the long-term investment in your home.

1. Corrosion Resistance: Unlike some other window materials, aluminum is inherently resistant to corrosion and rust. This property makes it an excellent choice for homes in coastal areas or regions with harsh weather conditions. Aluminum windows won’t deteriorate or lose their aesthetic appeal over time, even in the face of exposure to saltwater or heavy rain.

2. Long Lifespan: Aluminum windows are built to last. Their robust frames can withstand decades of use without compromising on performance or appearance. This long lifespan ensures that your investment in aluminum windows is a cost-effective choice for your home.

3. Low Maintenance: Aluminum’s low-maintenance qualities are a homeowner’s dream. Unlike wood, which requires periodic painting and staining, or vinyl, which can become brittle over time, aluminum windows only need occasional cleaning to keep them looking pristine. This means you can enjoy their sleek design without the hassle of continuous upkeep.

4. Structural Integrity: Aluminum is known for its structural strength. The material can support larger glass panes, which not only adds to the aesthetic appeal but also enhances energy efficiency. The robustness of aluminum frames ensures they remain structurally sound for years, with minimal risk of warping or sagging.

Energy Efficiency and Sustainability

While modern design and durability are undoubtedly appealing, the energy efficiency and sustainability of aluminum windows are equally significant. These attributes align with the eco-conscious mindset that many homeowners embrace today.

1. Thermal Performance: Aluminum windows can be designed with thermal breaks or thermal barriers that improve their energy efficiency. These components help reduce heat transfer, making your home more comfortable and lowering your energy bills.

2. Sustainable Material: Aluminum is a highly sustainable material. It is abundant, recyclable, and has a low environmental impact. Choosing aluminum windows demonstrates a commitment to eco-friendliness and sustainability, as the material can be recycled and repurposed repeatedly.

3. Recyclability: When it comes to the end of their lifespan, aluminum windows can be recycled with ease. This recyclability reduces the environmental footprint associated with their disposal, contributing to a greener planet.

Sound Insulation

Modern design isn’t just about aesthetics; it’s also about creating a tranquil living environment that shields you from the noise of the outside world. Aluminum windows, when designed with appropriate features, can effectively insulate against noise pollution.

1. Double Glazing: Aluminum windows can be fitted with double or even triple glazing, enhancing their acoustic insulation properties. This is particularly beneficial for homeowners living in busy urban areas or near noisy streets.

2. Weatherstripping and Seals: Well-designed aluminum windows include weatherstripping and seals that prevent drafts and sound from infiltrating your home. This ensures a quieter, more peaceful living space.

3. Sound Reduction Materials: Special soundproofing materials can be incorporated into the frame design, further enhancing the sound insulation capabilities of aluminum windows.

Security Features

Modern design principles emphasize a seamless connection between indoor and outdoor spaces, but that doesn’t mean sacrificing security. Aluminum windows can be equipped with advanced security features to keep your home safe without compromising aesthetics.

1. Multipoint Locking Systems: Many aluminum windows come with multipoint locking systems, which secure the window sash at multiple points along the frame. This makes it more difficult for intruders to gain access to your home.

2. Laminated Glass: Laminated glass, which is used in some aluminum windows, is designed to be shatter-resistant. This means it’s harder for burglars to break through the glass and gain entry.

3. Reinforced Frames: Some aluminum windows feature reinforced frames that add an extra layer of security, making it even more challenging for potential intruders to breach your home.

A Window for Today’s Homes

Overall, in my journey as a homeowner and by following Window Replacement Euless TX, I’ve come to appreciate the blend of modern design and durability that aluminum windows offer. These windows not only enhance the aesthetics of my home with their sleek lines and slim profiles but also provide a long-lasting, low-maintenance solution that adds value to my property.

Whether you’re renovating your current home or embarking on a new construction project, consider the advantages of aluminum windows. They are a reflection of contemporary living and an investment in the future, providing a fresh, modern, and enduring solution for today’s homes.

NTHE Window Replacement Euless

3752 Trinity Hills Ln, Euless, TX 76040, United States

817-402-3539

Types of Windows for Replacement: Which One Suits Your Home? – NTHE Window Replacement Trophy Club

Choosing the right windows for replacement can be a challenging yet exciting journey for homeowners like me.

I’ll share my experiences and insights into the various types of replacement windows available, helping you make an informed decision about which type best suits your home by following Window Replacement Trophy Club TX.

The Beginning of My Window Replacement Journey

My journey started with the realization that my home needed a fresh look and improved functionality. Many of the existing windows were outdated, inefficient, and no longer met my aesthetic preferences. It was clear that replacement was the solution, but I needed to explore the vast world of window types to find the perfect fit for my home.

1. Double-Hung Windows

I began my exploration with double-hung windows, a classic choice known for their versatility and timeless design. Double-hung windows consist of two sashes that slide vertically, allowing for excellent ventilation control. They are easy to clean, making them a practical choice for multi-story homes. I opted for double-hung windows in my living room and bedrooms, as their elegant appearance and functionality perfectly complemented my home’s traditional style.

2. Casement Windows

Casement windows quickly caught my attention as I continued my research. These windows are hinged on the side and open outward, offering unobstructed views and maximum airflow. Their sleek, modern appearance appealed to me, and I decided to install them in my kitchen. Casement windows are perfect for areas where you want to maximize the view and enjoy a refreshing breeze.

3. Awning Windows

To bring more natural light into my home while maintaining privacy and protection from the rain, I chose to install awning windows in my bathrooms and basement. Awning windows are hinged at the top and open outward from the bottom, creating an “awning” effect. This design allows for ventilation even during light rain. Their compact size and versatility make them a great choice for small spaces.

4. Sliding Windows

Sliding windows were my top pick for the bedrooms of my children. These windows feature one fixed pane and one that slides horizontally. They are easy to operate, making them a safe choice for children’s rooms. Sliding windows offer a contemporary look while providing ample natural light and ventilation.

5. Bay and Bow Windows

To add character and charm to my home’s façade, I considered bay and bow windows. These windows extend outward from the wall, creating a beautiful architectural focal point. Bay windows typically consist of three panels, while bow windows have more, creating a curved appearance. I chose a bay window for my dining area to create a cozy nook for reading and enjoying the view.

6. Picture Windows

Picture windows are ideal for capturing stunning vistas and framing picturesque landscapes. I installed a large picture window in my living room to showcase my beautiful backyard. Picture windows are fixed and do not open, making them perfect for areas where ventilation is not a primary concern but aesthetic appeal is.

7. Garden Windows

Garden windows are a delightful choice for homeowners with green thumbs. These windows feature a shelf or box-like structure that extends outward from the home, providing a sunny spot for plants or herbs. I installed a garden window in my kitchen, where I now enjoy growing fresh herbs and small potted plants.

8. Skylight Windows

For areas that could benefit from additional natural light, I considered skylight windows. Skylights are installed in the roof or ceiling, allowing sunlight to filter into the room. I added skylights in my attic and master bathroom to transform previously dim spaces into bright and inviting areas.

9. Specialty Windows

To infuse my home with character and unique design elements, I explored specialty window options. Round, oval, or custom-shaped windows can serve as focal points and provide creative solutions for specific architectural challenges. I incorporated oval windows in my hallway, adding a touch of elegance and a unique design element.

10. Storm Windows

In my research, I also discovered the practicality of storm windows. While I live in a region with mild weather, I realized the importance of energy efficiency. Storm windows provide an extra layer of insulation and protection, enhancing the performance of existing windows. I decided to install storm windows in my home to improve energy efficiency and reduce heating and cooling costs.

Choosing the Right Replacement Windows

Selecting the right replacement windows for your home involves considering several key factors:

  1. Architectural Style: Choose windows that complement your home’s architectural style, whether it’s traditional, modern, or a specific design like colonial or Victorian.
  2. Functionality: Consider how you use each room and the type of ventilation and natural light you require.
  3. Energy Efficiency: Opt for energy-efficient windows that meet local energy codes and help reduce heating and cooling costs.
  4. Aesthetic Appeal: Window design should enhance your home’s aesthetics, both inside and out.
  5. Budget: Determine your budget and explore options that offer the best value for your investment.
  6. Professional Installation: Ensure that your replacement windows are installed by qualified professionals to maximize their performance and longevity.

Conclusion: A Home Transformed

Overall, based from Window Replacement Trophy Club TX, the process of selecting and installing replacement windows transformed my home into a more comfortable, efficient, and visually appealing living space. Whether you’re drawn to the timeless elegance of double-hung windows, the modern charm of casement windows, or the architectural flair of bay and bow windows, there’s a perfect window type to suit your home’s needs and your personal style. By carefully considering the factors that matter most to you, you can embark on a window replacement journey that revitalizes your home and brings your vision to life.

NTHE Window Replacement Trophy Club

2220 McLean Ave, Trophy Club, TX 76262, United States

817-592-8450

How to Repair Hardwood Floor Scratches and Damage – Floor N More

There’s something undeniably alluring about hardwood floors. The timeless beauty and warmth they bring to a home are second to none. However, like any beautiful thing, hardwood floors are not immune to wear and tear. Scratches, dents, and other damage are an inevitable part of a floor’s life, especially in a busy household. As a proud owner of hardwood floors, I’ve had my fair share of scratched and damaged surfaces.

In hardwood flooring, I’ll share my experience and guide you through the process of repairing hardwood floor scratches and damage, helping you restore your floors to their former glory.

1. Assess the Damage

Before diving into repairs, it’s essential to assess the extent of the damage. This will help you determine the appropriate repair method and materials needed. Here’s how to evaluate the damage:

  • Light Scratches: Light surface scratches typically affect only the finish, not the wood itself. They may appear white or shallow. You can usually fix these with minimal effort.
  • Deeper Scratches: Deeper scratches penetrate the wood, revealing the raw wood underneath the finish. These may require more extensive repairs.
  • Dents: Dents are typically small depressions or divots in the wood. They may or may not involve a breach of the finish.
  • Gouges or Cracks: Gouges and cracks are more significant, requiring more extensive repairs. They may involve actual damage to the wood itself.

2. Repairing Light Surface Scratches

For light surface scratches that haven’t penetrated the wood, you can use these methods to restore the finish:

  • Baking Soda and Water: Create a paste using baking soda and water. Apply it to the scratched area and gently rub it in with a soft cloth. Wipe it clean, and the scratch should be less noticeable.
  • Mineral Spirits: Soak a clean cloth in mineral spirits and gently rub it over the scratched area. This can help dissolve the finish around the scratch and make it less noticeable.
  • Walnut Meat: Believe it or not, a walnut can be used to hide shallow scratches. Rub the meat of the walnut over the scratch, and the natural oils can darken the area.
  • Use a Wood Touch-Up Marker: You can find wood touch-up markers that closely match the color of your hardwood floor. Simply fill in the scratch with the marker, then wipe away any excess.
  • Wood Floor Polish: Apply a wood floor polish to the scratched area, following the manufacturer’s instructions. This can help renew the finish and diminish the appearance of light scratches.

3. Dealing with Deeper Scratches

For scratches that have penetrated the finish and affected the wood underneath, a more involved repair process is necessary. Here’s how to approach deeper scratches:

  • Sand the Area: Carefully sand the scratched area using fine-grit sandpaper. Always sand with the grain of the wood to avoid creating more damage. Once the scratch is less visible, switch to a finer grit for a smoother finish.
  • Fill with Wood Filler: Apply a wood filler that closely matches the color of your hardwood floor. Fill in the scratch and use a putty knife to smooth it out. Allow it to dry according to the manufacturer’s instructions.
  • Sand Again: Once the wood filler is dry, sand the area again to ensure a smooth and level surface. You may need to use progressively finer grits of sandpaper to achieve the desired finish.
  • Stain and Finish: If the scratched area is noticeable after sanding and filling, you can stain and refinish the spot to match the rest of the floor. Apply the stain, let it dry, and then apply a matching finish. Feather the stain and finish into the surrounding floor for a seamless look.

4. Addressing Dents and Gouges

Dents and gouges require a slightly different approach, as they involve depressions in the wood. Here’s how to tackle them:

  • Steam Method: For dents, you can try the steam method. Place a damp cloth over the dent and use an iron on a low setting to apply steam. The steam can help the wood fibers swell and lift the dent.
  • Fill with Wood Filler: For both dents and gouges, you’ll need to use wood filler. Fill the damaged area, smooth it out, and let it dry. Sand the area to achieve a level surface, as mentioned in the previous section.
  • Stain and Finish: Just like with deeper scratches, if the filled area is still noticeable, you can stain and finish it to match the rest of the floor. Apply the stain, let it dry, and then apply a matching finish, feathering it into the surrounding floor.

5. Preventive Measures

Of course, the best way to address hardwood floor damage is to prevent it in the first place. Here are some preventive measures to keep your floors looking their best:

  • Use Rugs and Mats: Place rugs or mats in high-traffic areas to protect your hardwood floors from excess wear. Make sure these have non-slip backing to avoid accidents.
  • Furniture Pads: Attach felt or rubber pads to the legs of your furniture to prevent scratches and dents when moving or rearranging furniture.
  • Regular Maintenance: Maintain a regular cleaning routine to keep dirt and debris from accumulating on the surface. Dust and sweep regularly to avoid abrasive particles.
  • Humidity Control: Maintain proper humidity levels in your home to prevent wood from expanding or contracting excessively. This helps prevent cupping and gapping.
  • Take Care with Pets: Keep your pets’ claws trimmed to minimize scratches, and clean up any accidents promptly to avoid staining and warping.

6. Seek Professional Help

While many minor scratches and damage can be repaired with DIY methods, some situations may require professional intervention. If you have extensive or severe damage to your hardwood floors, or if you’re not confident in your ability to make the necessary repairs, it’s wise to seek the help of a professional flooring specialist. They can assess the damage and provide the best solution to restore your floors to their original splendor.

Conclusion

Hardwood flooring are a beautiful investment in your home, and with proper care and maintenance, they can last for generations. When scratches, dents, or other damage occur, it’s essential to address them promptly and effectively to maintain the floor’s beauty and integrity. By following these repair techniques and preventive measures, you can ensure your hardwood floors continue to be a source of pride and elegance in your home. So, don’t fret over the occasional blemish; instead, take action to restore the elegance of your hardwood floors and enjoy their timeless beauty for years to come.

Floor N More

1621 E Southlake Blvd, Southlake, TX 76092, United States

817-310-6331

The Advantages of Professional Window Replacement – NTHE Window Replacement Mansfield

As a homeowner who has embarked on the journey of improving my living space, I can attest to the significant impact that professional window replacement has had on both the aesthetics and functionality of my home.

By following Window Replacement Mansfield TX, I’ll share my personal experiences and insights into the world of professional window replacement, exploring the numerous advantages it offers and why I believe it’s a worthwhile investment for any homeowner.

Enhancing Energy Efficiency

One of the primary motivations for my decision to invest in professional window replacement was the desire to improve the energy efficiency of my home. Old and inefficient windows can lead to energy wastage and higher utility bills. By opting for energy-efficient windows, I experienced a range of advantages, including:

  1. Lower Utility Bills: Energy-efficient windows, often featuring low-E coatings and double or triple glazing, minimize heat transfer, keeping indoor temperatures stable. This translates to reduced heating and cooling costs, leading to lower monthly utility bills.
  2. Increased Comfort: The improved insulation provided by energy-efficient windows creates a more comfortable living environment. My home felt cozier in the winter and cooler in the summer, enhancing overall comfort.
  3. Environmental Impact: Using less energy for heating and cooling reduces your carbon footprint. I felt a sense of satisfaction knowing that I was contributing to a more sustainable lifestyle.

Enhanced Aesthetics and Curb Appeal

The visual impact of professional window replacement cannot be overstated. The transformation that new windows brought to my home’s aesthetics was truly remarkable. Some advantages include:

  1. Modern Aesthetics: Outdated windows can make a home look tired and uninspiring. Replacing them with modern, stylish designs instantly updated the overall look of my home, both inside and out.
  2. Customization: Professional window replacement allowed me to select window styles, materials, and finishes that perfectly matched my home’s architectural style. The ability to customize the appearance of my windows was a significant advantage.
  3. Curb Appeal: The visual impact of new windows contributed to my home’s curb appeal. Potential buyers and visitors were immediately drawn to the inviting and well-maintained appearance.

Improved Natural Light and Views

Windows are the primary source of natural light in a home. By investing in professional window replacement, I was able to enjoy several advantages in this regard:

  1. Ample Daylight: Energy-efficient windows often feature larger glass areas that allow more natural light to enter your home. This created a brighter and more inviting interior.
  2. Improved Views: The clarity and quality of the glass in new windows significantly improved the views from inside my home. I could enjoy the beauty of my surroundings without any hindrance.
  3. Sunlight Control: Certain window features, such as low-E coatings and tints, allowed me to control the amount of sunlight entering my home, preventing excessive glare and heat gain.

Reduced Maintenance

Old windows often require extensive maintenance, including painting, caulking, and regular inspections. By opting for professional window replacement, I experienced advantages such as:

  1. Minimal Maintenance: New windows are designed to be low-maintenance. I no longer had to worry about repainting or sealing my windows regularly, freeing up my time and reducing maintenance costs.
  2. Durability: Modern windows are constructed with durable materials, ensuring a longer lifespan and less need for repairs. This was a significant advantage in terms of long-term cost savings.

Enhanced Security and Safety

Security is a top priority for homeowners, and professional window replacement can enhance the safety of your home in several ways:

  1. Upgraded Locks and Hardware: New windows often come with advanced locking mechanisms and hardware, providing better security against potential intruders.
  2. Impact Resistance: Some window options, like laminated or tempered glass, offer enhanced impact resistance, reducing the risk of break-ins and damage during severe weather.
  3. Child Safety: Modern window designs often include safety features like childproof locks and easy-to-reach hardware, offering peace of mind for families with young children.

Increased Resale Value

The advantages of professional window replacement extend to the potential resale value of your home:

  1. Higher Appraisal Value: Energy-efficient and well-maintained windows can increase the overall appraisal value of your home. This can be a significant advantage if you decide to sell your property.
  2. Faster Sale: Homes with updated windows often attract more potential buyers and can sell more quickly. The improved aesthetics and energy efficiency of new windows are appealing selling points.

Professional Installation

While professional window replacement offers numerous advantages, the key to realizing these benefits lies in the quality of the installation. Some advantages of professional installation include:

  1. Proper Sealing: Professional installers ensure that your new windows are properly sealed, preventing drafts and water infiltration.
  2. Customization: Experienced professionals can guide you in selecting the right window styles and features to match your home’s unique needs.
  3. Warranty: Many professional installations come with warranties, providing peace of mind knowing that any issues will be addressed promptly.

In conclusion, based from Window Replacement Mansfield TX, professional window replacement has had a profound impact on my home’s comfort, aesthetics, and functionality. The numerous advantages I’ve experienced, from enhanced energy efficiency and aesthetics to increased security and safety, have reinforced my belief in the value of this investment. Whether you’re looking to improve your home for your own enjoyment or considering resale value in the future, professional window replacement is a wise choice that offers both immediate and long-term benefits.

NTHE Window Replacement Mansfield

1771 Calender Rd, Mansfield, TX 76063, United States

817-592-8450

Top Soundproof Window Installation Techniques – Window Replacement Experts Mckinney

As a homeowner in a bustling urban neighborhood, I know firsthand how disruptive noise can affect the tranquility of one’s home. Whether it’s the constant hum of traffic, the occasional blaring sirens, or even just the neighbors’ lively conversations, unwanted noise can be a constant source of frustration. That’s why I decided to explore soundproof window installation techniques to create a quieter and more peaceful living space.

By following Window Replacement McKinney TX, I’ll share my first-person perspective on the various methods and strategies I’ve discovered for soundproofing windows.

1. Identifying the Noise Sources

Before embarking on my journey to soundproof my windows, I needed to identify the sources of the noise. I made a list of all the potential noise culprits, including traffic, neighbors, and outdoor machinery. This step was crucial because it helped me determine the level of soundproofing needed for each window.

2. Double Glazing and Triple Glazing

One of the most effective soundproofing techniques I’ve come across is double glazing or even triple glazing. Double glazing involves using two layers of glass separated by an air gap, while triple glazing adds a third layer. The extra layers of glass and the air gaps between them act as a barrier to sound, significantly reducing noise infiltration. I opted for double glazing for the windows facing the street, and the difference was immediately noticeable.

3. Soundproof Window Inserts

For a more budget-friendly option, I explored soundproof window inserts. These are removable panels that fit snugly over your existing windows. They come in various materials, such as acrylic, glass, and laminated glass, and effectively reduce noise penetration. I found these inserts to be a convenient solution, especially for rooms where I didn’t want to replace the entire window.

4. Weatherstripping and Sealing

Proper sealing is essential for soundproofing. Even the smallest gaps or cracks can allow noise to enter your home. I meticulously checked for any gaps around my window frames and used weatherstripping to seal them. For added protection, I applied acoustic caulk, which not only seals gaps but also absorbs sound vibrations.

5. Acoustic Curtains and Blinds

I discovered that acoustic curtains and blinds are another valuable addition to soundproofing efforts. These window treatments are designed to absorb and block sound waves. I installed acoustic curtains in my bedroom, and they not only enhanced soundproofing but also created a cozy atmosphere.

6. Exterior Noise Barriers

To address outdoor noise sources, I explored the idea of creating exterior noise barriers. While I couldn’t control the street traffic, I installed dense hedges and a garden wall to act as natural sound blockers. This landscaping not only enhanced the aesthetics of my property but also reduced noise pollution.

7. Acoustic Window Films

Acoustic window films are a cost-effective solution for soundproofing. These films are applied to the interior surface of the window and can significantly reduce noise penetration. They are particularly useful for windows that don’t require a complete overhaul.

8. Window Plugs and Draft Stoppers

To address smaller windows, I used window plugs and draft stoppers. These simple yet effective devices can be inserted into the window frame to create an airtight seal. They helped reduce noise and drafts simultaneously.

9. Acoustic Panels and Wall Treatments

In some rooms, I opted for a more holistic approach by incorporating acoustic panels and wall treatments. These not only enhance soundproofing but also add a touch of style to the interior. The panels absorb sound waves, reducing echo and noise within the room.

10. Changing Window Styles

During my soundproofing journey, I realized that different window styles have varying levels of soundproofing capabilities. For example, awning and casement windows, which open outward and have tight seals when closed, are more soundproof than single-hung or double-hung windows. I replaced some of my windows with awning styles, especially in rooms where I needed maximum noise reduction.

11. Window Replacement

In cases where existing windows were beyond repair or didn’t meet my soundproofing needs, I opted for complete window replacement. Modern soundproof windows are designed with advanced materials and construction techniques that significantly reduce noise infiltration. While this can be a more substantial investment, the long-term benefits in terms of peace and quiet are well worth it.

12. Professional Installation

For more complex soundproofing projects or window replacements, I relied on professional installers. Their expertise ensured that the soundproofing solutions were correctly implemented, maximizing their effectiveness.

13. Regular Maintenance

Soundproofing is an ongoing process, and I’ve learned the importance of regular maintenance. Checking for gaps, resealing, and ensuring that all soundproofing elements are in good condition helps maintain a peaceful and quiet living space.

In conclusion, based from Window Replacement McKinney TX, soundproof window installation techniques have transformed my home into a serene retreat from the urban noise. By identifying noise sources, utilizing various soundproofing methods, and carefully implementing each solution, I’ve created a more peaceful and enjoyable living environment. Whether you’re dealing with noisy neighbors, traffic, or other sources of sound pollution, these techniques can help you take control of your home’s acoustic ambiance and enjoy the tranquility you deserve.

Window Replacement Experts Mckinney

9932 Prairie Dog Ln, McKinney, TX 75071, United States

972-895-8221

The Pros and Cons of Aluminum Siding – NTHE Window Replacement Euless

As a homeowner who recently went through the process of choosing new siding for my house, I know just how overwhelming the options can be. From wood to vinyl, fiber cement to aluminum, the choices seem endless.

By following Window Replacement Euless TX, I eventually settled on aluminum siding, and in this article, I’ll share my journey, along with the pros and cons of this versatile siding material to help you make an informed decision for your home.

The Pros of Aluminum Siding

1. Durability: One of the standout features of aluminum siding is its remarkable durability. Aluminum is resistant to many of the common issues that can affect other siding materials, such as rot, insect infestations, and moisture damage. This resilience ensures that your siding will stay in good condition for many years.

2. Low Maintenance: If you’re looking for a low-maintenance siding option, aluminum is an excellent choice. Unlike wood siding, which requires regular staining or painting, aluminum siding is virtually maintenance-free. It doesn’t rot, rust, or fade easily, meaning you won’t need to invest as much time and money in upkeep.

3. Lightweight and Easy to Install: Aluminum siding is relatively lightweight, making it easy to handle and install. This can help reduce installation costs and the amount of time your siding project takes to complete. Its lightweight nature also places less stress on the structural integrity of your home.

4. Variety of Styles and Finishes: Aluminum siding is available in a wide range of styles, profiles, and finishes. Whether you prefer a traditional, contemporary, or modern look, you’ll likely find aluminum siding that suits your aesthetic preferences. The variety of finishes includes smooth, embossed, and textured options, allowing you to create a customized look for your home.

5. Resistant to Fire: Aluminum siding is non-combustible and resistant to fire, providing an added layer of protection for your home. While no siding is entirely fireproof, aluminum’s fire resistance can be a valuable feature in regions prone to wildfires or other fire hazards.

6. Excellent Paint Adhesion: If you decide to paint your aluminum siding, you’ll find that it has excellent paint adhesion. This means that the paint will adhere well and last for a long time, helping to maintain the appearance of your home. Many homeowners choose to paint their aluminum siding to refresh the look or change the color.

7. Environmentally Friendly: Aluminum is a highly recyclable material, and the recycling process consumes significantly less energy compared to producing new aluminum. This eco-friendliness appeals to environmentally conscious homeowners who want to reduce their ecological footprint.

The Cons of Aluminum Siding

1. Vulnerable to Dents and Scratches: Despite its durability, aluminum siding is susceptible to dents and scratches. Hailstorms, fallen branches, and other impacts can mar the surface of your siding, affecting its appearance. However, this vulnerability can be mitigated with thicker gauges of aluminum siding.

2. No Insulation: Unlike some other siding materials, aluminum siding doesn’t provide insulation on its own. You’ll need to consider additional insulation options to improve the energy efficiency of your home. This may include adding foam board insulation or using insulated aluminum siding, which comes with a layer of foam insulation attached to the back.

3. Susceptible to Fading: While aluminum siding is relatively resistant to fading, it’s not entirely immune to the effects of UV exposure. Over time, you may notice some fading, particularly in areas with intense sunlight. Regular cleaning and maintenance can help mitigate this issue.

4. More Expensive Than Vinyl: Aluminum siding is generally more expensive than vinyl siding. If you’re on a tight budget, this cost difference can be a deciding factor. However, it’s essential to consider the long-term benefits and durability of aluminum siding, which can outweigh the initial expense.

5. Expansion and Contraction: Aluminum has a higher coefficient of expansion and contraction compared to other siding materials. In extreme temperature fluctuations, such as during the transition from winter to summer, this expansion and contraction can lead to the siding buckling or warping. Proper installation techniques can help minimize this issue.

6. Noise Transmission: Aluminum siding can transmit noise from outside into your home more easily than other materials. If you live in a noisy neighborhood or near busy streets, this might be a concern. Adding insulation can help reduce noise transmission.

7. Limited Color Options: While aluminum siding offers a range of color options, it doesn’t have as extensive a color palette as vinyl siding. If you have a specific color in mind for your home’s exterior, you may need to compromise or consider painting your aluminum siding.

8. Oxidation and Chalking: Over time, aluminum siding can develop oxidation and chalking, which can affect its appearance. Oxidation may create a white, powdery residue on the surface, while chalking can result in a slightly faded look. Regular cleaning can help minimize these effects.

The Verdict: Is Aluminum Siding Right for You?

Ultimately, the decision to choose aluminum siding for your home depends on your specific needs and priorities. If you’re looking for a durable, low-maintenance siding material with a variety of style options and fire resistance, aluminum is an excellent choice. Its eco-friendliness and paint adhesion further add to its appeal.

However, it’s important to consider the potential downsides, such as vulnerability to dents and scratches, the need for additional insulation, and a higher initial cost compared to vinyl. You should also weigh the pros and cons against your local climate, as extreme temperature fluctuations and frequent hailstorms may impact the performance of aluminum siding.

In summary, according to Window Replacement Euless TX, before making your final decision, consult with a professional siding contractor or installer who can assess your specific needs and provide guidance on the best siding material for your home. Keep in mind that proper installation and regular maintenance are crucial for maximizing the lifespan and appearance of your aluminum siding. With the right care, it can be an excellent, long-lasting choice for enhancing your home’s exterior.

NTHE Window Replacement Euless

3752 Trinity Hills Ln, Euless, TX 76040, United States

817-402-3539

Page 1 of 2

Powered by WordPress & Theme by Anders Norén