Local Businesses Blog in Texas

Month: July 2023 Page 1 of 6

Mastering the Craft: The Skills and Training of Garage Door Professionals – Hesperia Overhead & Garage Doors

As a garage door professional, I take immense pride in mastering the craft of installing, maintaining, and repairing garage doors. It’s a career that demands a unique combination of technical aptitude, mechanical finesse, and a commitment to customer service and safety. Over the years, I have honed my skills through extensive training, continuous learning, and hands-on experience, making me confident in handling various garage door systems and addressing a wide range of issues.

According to Garage Door Repair, my journey into becoming a garage door professional began with a fascination for mechanics and the desire to work with my hands. I underwent rigorous training, where I learned the intricate workings of garage door components, from springs and cables to tracks and openers. Understanding how each part contributes to the smooth operation of a garage door was a crucial foundation for my craft.

One of the aspects I take great pride in is my ability to troubleshoot garage door issues efficiently. It’s like solving a puzzle – analyzing symptoms, identifying the root cause, and implementing the right solution. My diagnostic skills have been honed through countless hours of hands-on experience, allowing me to quickly pinpoint the source of problems and apply the necessary fixes.

Safety is of utmost importance in our profession, and I approach each job with a deep sense of responsibility. Working with heavy garage doors and powerful springs requires strict adherence to safety protocols. My training has ingrained safety practices in me, ensuring that I take all necessary precautions to prevent accidents and injuries, both for myself and the homeowners I serve.

Being a garage door professional also means staying adaptable and continuously learning. The garage door industry is ever-evolving, with new technologies and materials emerging regularly. To remain at the forefront of my craft, I actively participate in workshops, attend seminars, and seek out additional training to stay informed about the latest advancements and best practices.

Customer service and effective communication are essential aspects of my work. I understand that clear communication with homeowners is crucial in understanding their needs and providing them with the best solutions. Listening to their concerns and taking the time to explain the issues and repair options not only ensures their satisfaction but also empowers them to make informed decisions about their garage doors.

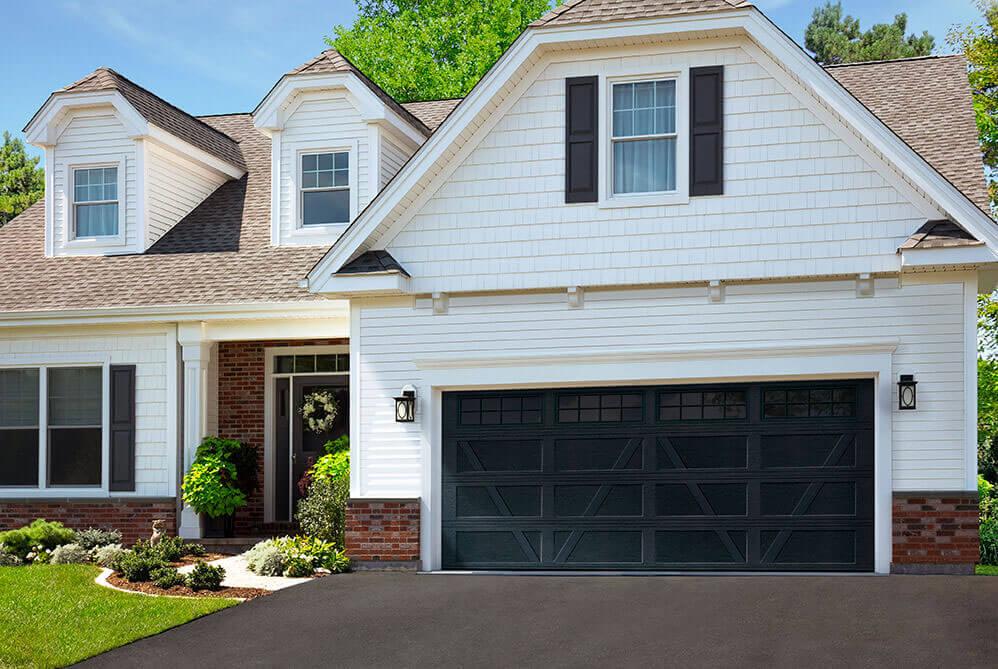
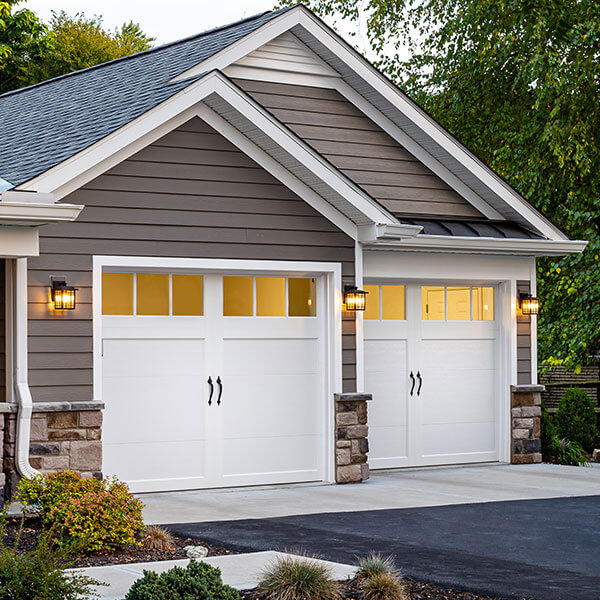
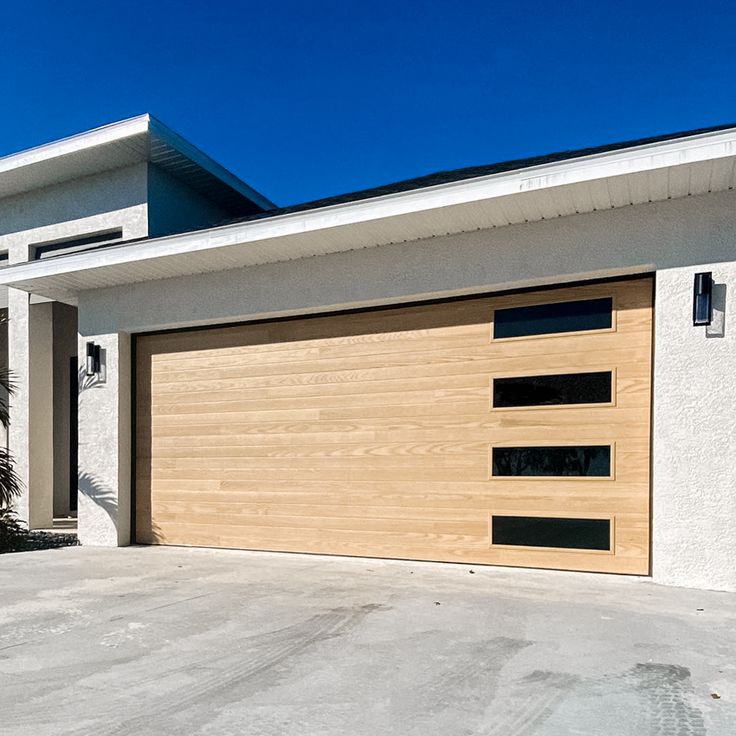
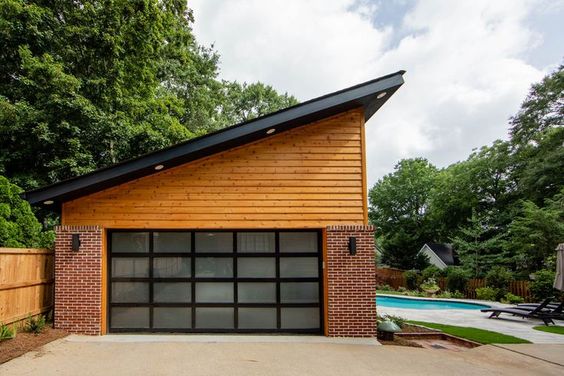
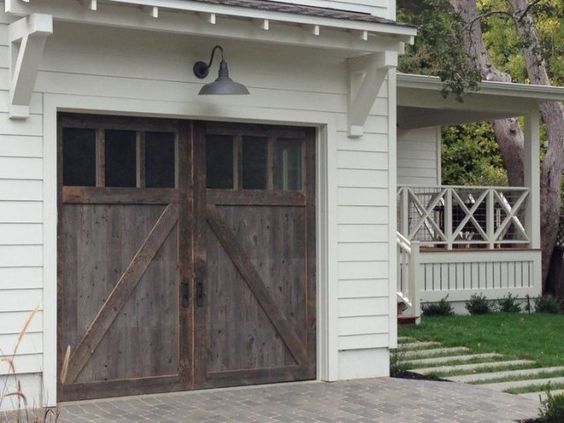
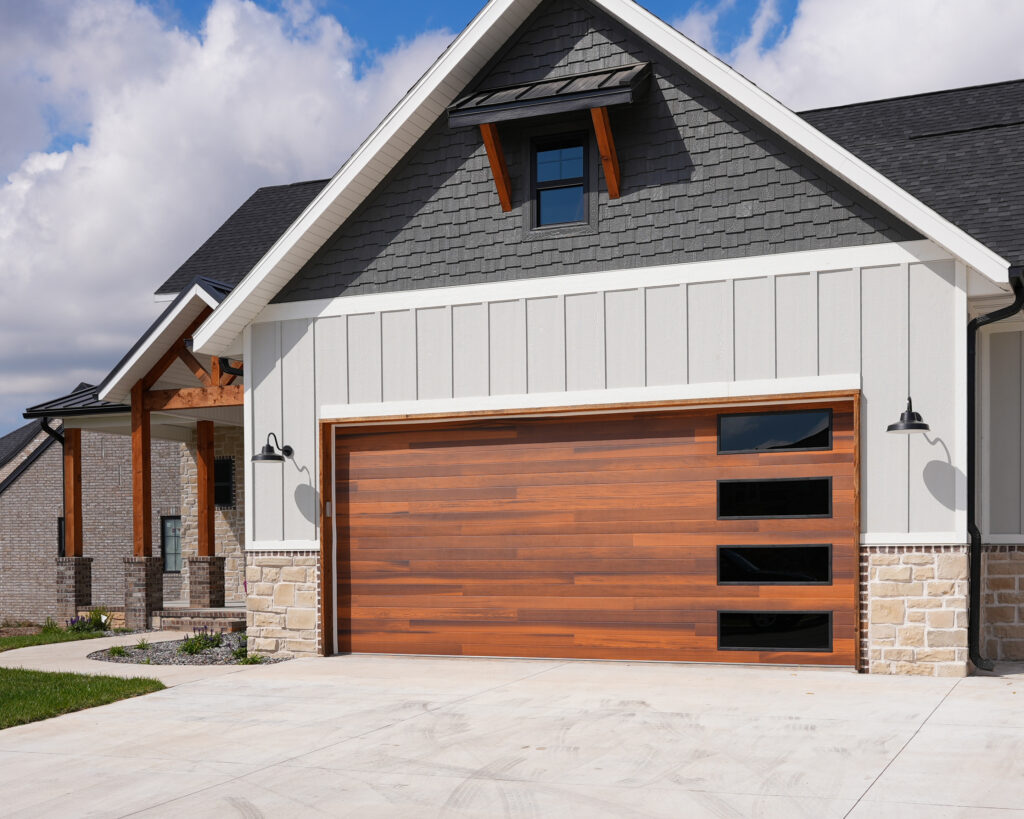
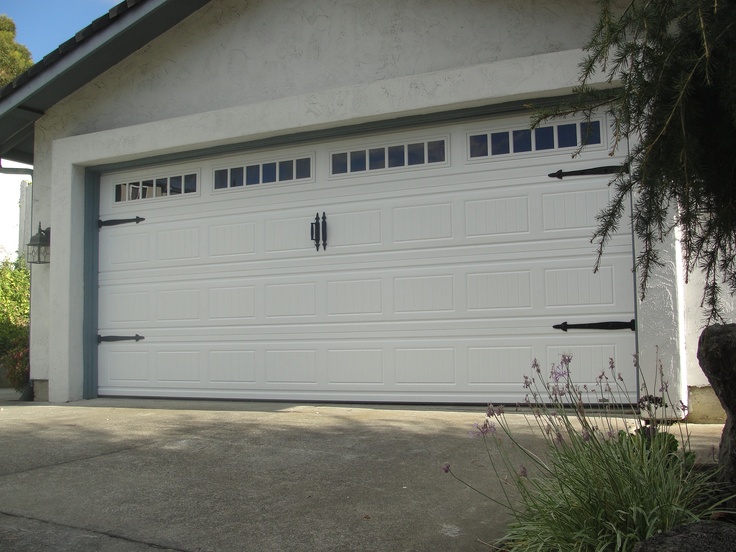
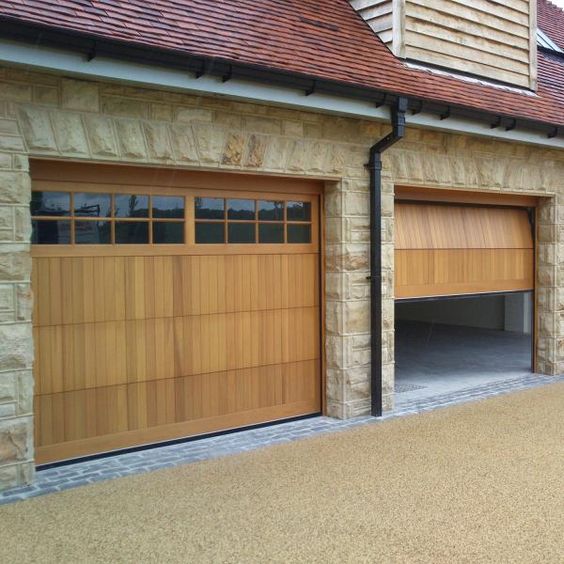
As a master garage door professional, I am well-versed in various garage door components and systems. I can confidently handle different garage door materials and styles, guiding homeowners in selecting the perfect door that suits their preferences and budget. Whether it’s a classic steel door, an elegant wooden door, or a contemporary glass door, I ensure that each installation is carried out with precision and attention to detail.

One of the most fulfilling aspects of my job is witnessing the transformation that a properly functioning garage door can bring to a home. Seeing the smiles on homeowners’ faces as they experience the convenience and security of their new or repaired garage door is incredibly rewarding.

In addition to installations, my role as a garage door professional involves maintaining and repairing garage doors to prolong their lifespan and ensure their continued optimal performance. Regular maintenance and lubrication help prevent issues and extend the longevity of the door. When problems do arise, my expertise allows me to tackle various repairs efficiently, whether it’s replacing a broken spring, realigning tracks, or fixing a malfunctioning opener.

Above all, based from Garage Door Repair, I take immense pride in being a trusted partner for homeowners, ensuring that their garage doors are not just a functional aspect of their homes but also a well-maintained and secure feature. My dedication to excellence, commitment to safety, and continuous pursuit of knowledge define my passion for mastering the craft of being a garage door professional. It’s a role that brings satisfaction, knowing that I contribute to making people’s lives more convenient, safe, and enjoyable.

Hesperia Overhead & Garage Doors

18361 Bear Valley Rd # 4, Hesperia, CA 92345, United States

760-990-1054

How To Repair Bottom Of Garage Door – Torrey Pines Garage & Overhead Doors

A Garage Door Repair La Jolla CA is an essential component of any property, providing security and protection for vehicles and stored items. Over time, the bottom of the garage door may become damaged due to wear and tear or external factors. Repairing the bottom of the garage door is crucial to maintaining its functionality and ensuring the safety of the items stored inside.

In this guide, we will outline a step-by-step process for repairing the bottom of a garage door, addressing common issues such as dents, rust, and worn-out weatherstripping.

  1. Safety First

Before starting any repairs, prioritize safety. Ensure the garage door is fully closed and disconnected from the opener. Use a sturdy ladder and wear appropriate safety gear, including safety goggles and work gloves, to protect yourself from potential injuries.

  1. Assess the Damage

Carefully inspect the bottom of the garage door to identify the extent of the damage. Common issues include dents, rust, and worn-out weatherstripping. Understanding the problem will help you select the appropriate repair methods and materials.

  1. Repairing Dents

Dents on the garage door can often be repaired without replacing the entire panel. Here’s how to do it:

  • Clean the dented area: Use a mild detergent and water to clean the affected area thoroughly. Remove any debris or dirt that may interfere with the repair process.
  • Use a heat source: Apply a heat source, such as a heat gun, to the dent for several minutes until the metal becomes warm but not too hot. This will make the metal more pliable for the next step.
  • Use a rubber mallet or wooden block: Gently tap the dented area with a rubber mallet or place a wooden block against the backside of the dent and gently tap it from the opposite side to push the metal back into shape.
  • Check the results: Inspect the dent and repeat the process if necessary until the metal is restored to its original shape.
  1. Dealing with Rust

Rust can significantly weaken the structural integrity of the garage door. To repair rusted areas:

  • Sand the rusted surface: Use medium-grit sandpaper to remove the rust and create a smooth surface. Wipe away the dust with a clean cloth.
  • Apply a rust converter: Use a rust converter product to treat the affected area. The rust converter will transform the remaining rust into a stable compound, preventing further corrosion.
  • Apply primer and paint: Once the rust converter has dried, apply a primer suitable for metal surfaces, followed by a coat of paint that matches the garage door’s color. This will provide a protective barrier against future rusting.
  1. Replacing Worn-out Weatherstripping

Weatherstripping along the bottom of the garage door helps seal gaps and prevent drafts, water, and pests from entering the garage. To replace worn-out weatherstripping:

  • Remove the old weatherstripping: Gently pull the old weatherstripping off the bottom of the garage door. Use a putty knife or scraper to assist in the process.
  • Measure and cut the new weatherstripping: Purchase a new weatherstripping kit and cut it to fit the width of the garage door. Ensure the cut is precise for a proper seal.
  • Attach the new weatherstripping: Use the adhesive provided with the weatherstripping kit to secure the new weatherstripping along the bottom edge of the garage door. Press firmly to ensure a strong bond.

Conclusion:

Repairing the bottom of a Garage Door Repair La Jolla CA is essential for maintaining its functionality and ensuring the safety of stored items. By following these steps, you can address common issues such as dents, rust, and worn-out weatherstripping. Remember to prioritize safety, assess the damage, and use appropriate tools and materials for each repair. Regular maintenance and prompt repairs will extend the life of your garage door, saving you time and money in the long run.

Torrey Pines Garage & Overhead Doors

8980 Villa La Jolla Dr #5, La Jolla, CA 92037, Estados Unidos

858-207-4777

How To Gel Stain A Garage Door – Carlsbad Garage & Overhead Doors

Gel staining is an excellent way to revamp the appearance of your Garage Door Repair Carlsbad CA and give it a fresh, new look. It’s a straightforward process that can be accomplished with the right tools, preparation, and technique.

In this guide, we’ll take you through the steps required to gel stain your garage door effectively, creating a durable and attractive finish that will stand the test of time.

Materials and Tools Needed:

Before you begin, gather the following materials and tools:

  1. Gel stain (appropriate for exterior use)
  2. Sandpaper (grit varying from 120 to 220)
  3. Tack cloth or microfiber cloth
  4. Painter’s tape
  5. Drop cloths or plastic sheeting
  6. Paintbrushes (synthetic or natural bristles)
  7. Paint tray or container
  8. Clean rags
  9. Safety gear (gloves, goggles, and a mask)
  10. Paint thinner or mineral spirits (for cleanup)

Step 1: Prepare the Garage Door

Start by cleaning the garage door thoroughly. Use a mild detergent and water solution to remove dirt, grime, and any loose paint. Rinse it off and allow it to dry completely before moving on to the next step. Cover the surrounding area with drop cloths or plastic sheeting to protect it from potential stains.

Step 2: Sand the Surface

Lightly sand the entire garage door surface with sandpaper. This step ensures that the gel stain adheres properly and also helps to remove any remaining loose paint or imperfections. Always sand in the direction of the wood grain to avoid damaging the door’s surface. After sanding, use a tack cloth or microfiber cloth to remove dust and debris.

Step 3: Apply Painter’s Tape

Carefully apply painter’s tape around the edges and hardware of the garage door, such as handles and windows. This precaution prevents the gel stain from accidentally getting onto areas you don’t want to stain.

Step 4: Stir the Gel Stain

Thoroughly stir the gel stain in the container using a stir stick or an old paintbrush. Make sure to mix the stain well to achieve a consistent color throughout the application.

Step 5: Test the Gel Stain

Before applying the gel stain to the entire garage door, perform a small test on a hidden or inconspicuous area. This allows you to check the color and ensure you are satisfied with the results before proceeding.

Step 6: Apply the Gel Stain

Dip the paintbrush into the gel stain and apply it evenly to the garage door, working in small sections. Always follow the wood grain, using long, smooth strokes. Work methodically from the top of the garage door to the bottom to avoid streaks and drips. Apply a thin layer of stain, as thick coats can lead to uneven drying and potential issues.

Step 7: Wipe Off Excess Stain

After applying the gel stain to a section, take a clean rag and gently wipe off any excess stain. This process enhances the wood’s natural texture and prevents the stain from pooling or forming blotches.

Step 8: Continue Staining

Repeat the staining process until the entire garage door is covered. Take your time and be patient, ensuring each section is stained and wiped evenly.

Step 9: Allow to Dry

After applying the gel stain, let the garage door dry according to the manufacturer’s instructions. This period usually takes a few hours, but it’s best to avoid touching the surface until it’s fully dried.

Step 10: Apply a Second Coat (Optional)

If you desire a darker or richer finish, you can apply a second coat of gel stain after the first coat has dried. Remember to wipe off any excess stain as before.

Step 11: Remove Painter’s Tape

Once the gel stain has thoroughly dried, carefully remove the painter’s tape from the edges and hardware of the garage door.

Conclusion:

By following these steps, you can successfully gel stain your Garage Door Repair Carlsbad CA, giving it a beautiful, long-lasting finish. Regular maintenance and proper care will ensure that your stained garage door remains an attractive focal point for your home’s exterior for years to come. Happy staining!

Carlsbad Garage & Overhead Doors

300 Carlsbad Village Dr 108a 205, Carlsbad, CA 92008, United States

760-350-3536

Garage Door Brands: Comparing Quality and Reputation – Highland Garage Doors & Gate

As a homeowner researching garage door options, I’ve delved into the world of garage door brands to find the best fit for my home. Selecting a garage door brand is not a decision to be taken lightly, as it impacts not only the aesthetics of my property but also its security and functionality.

To make an informed choice, I’ve thoroughly compared various garage door brands based on their product quality and reputation as stated in Garage Door Repair.

Among the top garage door brands, Clopay caught my attention due to its extensive selection of styles, materials, and designs. Their range of options, from traditional steel doors to custom-made wood and composite doors, appealed to my desire for versatility. What impressed me the most was Clopay’s commitment to durability and reliability. Their doors are crafted with high-quality materials and innovative manufacturing techniques, ensuring that they stand the test of time and weather the elements effectively. Moreover, the positive customer reviews and industry recognition they have received further solidified their reputation as a reliable and reputable brand.

Amarr, with its rich history of over 60 years in the garage door industry, also stood out in my research. They offer a diverse range of garage doors, from traditional to contemporary styles, catering to various aesthetic preferences. Amarr’s craftsmanship and incorporation of cutting-edge technology appealed to my desire for a garage door that not only looks good but also functions flawlessly. Positive customer reviews about their product quality and design options further validated Amarr’s reputation in the market.

Wayne Dalton, with its 65 years of experience, emerged as another noteworthy brand. Their innovative designs and emphasis on energy efficiency piqued my interest. Living in a region with fluctuating weather, the idea of an energy-efficient and well-insulated garage door appealed to me greatly. As I researched more about Wayne Dalton, I found their reputation to be strong, with customers appreciating their dedication to customer satisfaction and ability to cater to various preferences.

The long-standing legacy of Overhead Door Corporation, one of the oldest garage door manufacturers in the United States, also intrigued me. Their wide range of garage doors, including sectional, rolling, and high-speed doors, cater to residential and commercial needs alike. As a homeowner concerned about security, their emphasis on manufacturing safe and reliable garage doors reassured me. The trust and respect they have garnered from customers and industry professionals alike further reinforced their positive reputation.

Raynor Garage Doors, known for its innovation and technological advancements, offered a unique perspective in my research. Their commitment to continuous improvement and cutting-edge features appealed to my desire for a modern and forward-looking garage door. Positive customer reviews regarding their technological prowess and design versatility reaffirmed Raynor’s reputation as a brand that delivers quality products and excellent customer service.

CHI Overhead Doors, a family-owned company with over 35 years of experience, also captured my attention. Their diverse range of garage doors, from steel to fiberglass and aluminum, offered a plethora of options to suit different architectural designs. Their emphasis on quality and craftsmanship resonated with my desire for a durable and reliable garage door. Positive feedback from satisfied customers underscored CHI Overhead Doors’ reputation as a trustworthy brand in the garage door industry.

Finally, Pella Garage Doors, known for its high-quality windows and doors, presented an intriguing option. While their primary focus is on windows, their garage doors also offered a cohesive look for homeowners seeking a unified exterior design. Pella’s reputation for excellence and innovation in the windows industry added credibility to their garage doors, making them a contender in my search for the perfect brand.

In conclusion, according to Garage Door Repair and my research into garage door brands based on their product quality and reputation has been enlightening. Each brand offers unique features and strengths, catering to different preferences and needs. As I weigh the style preferences, climate conditions, and budget considerations, I am confident that I will find the ideal garage door brand that complements the aesthetics of my home, enhances its curb appeal, and provides reliable security and functionality.

Highland Garage Doors & Gate

28355 Base Line St, Highland, CA 92346, United States

909-315-4678

Tips to Avoid Costly Garage Door Repair – Newport Beach Garage Doors & Gate

As a homeowner, I have learned the value of taking proactive measures to avoid costly garage door repairs. Over the years, I’ve experienced the benefits of maintaining my garage door regularly and implementing simple yet effective strategies to ensure its longevity and smooth operation.

Here’s the practical tips from Garage Door Repair I’ve discovered that have helped me steer clear of expensive garage door repairs and maintain the security and functionality of this essential part of my home.

  1. Regular Inspection – The first step I take to prevent costly garage door repairs is conducting regular inspections. I make it a point to inspect my garage door’s hardware, including springs, rollers, tracks, and hinges, at least twice a year. During these inspections, I carefully examine each component for signs of wear and tear, rust, or damage. Identifying potential issues early on allows me to address them promptly before they escalate into major problems.
  2. Lubrication of Moving Parts – Proper lubrication is vital for keeping my garage door running smoothly and reducing friction among moving parts. I use a high-quality silicone-based lubricant to grease the springs, rollers, hinges, and other moving components regularly. This simple maintenance task not only ensures the door operates quietly but also prevents premature wear and tear.
  3. Tightening Loose Hardware – To maintain the stability and proper functioning of my garage door, I routinely check and tighten all the nuts, bolts, and screws that hold its components in place. Vibration from regular use can cause hardware to become loose over time, so keeping them secure helps avoid potential problems down the road.
  4. Clean Tracks – Keeping the tracks clean is essential for the smooth movement of my garage door. Dirt, debris, and small rocks can accumulate in the tracks, leading to misalignment and strain on the door’s components. Regularly cleaning the tracks with a cloth or brush ensures smooth and efficient door operation.
  5. Test Door Balance – A well-balanced garage door not only extends its lifespan but also puts less strain on the opener. To test the balance, I disconnect the automatic opener and manually lift the door about halfway. If the door stays in place, it is properly balanced. If it moves up or down, I know that the door requires adjustment, which I seek professional help to address.
  6. Replace Worn Weather Stripping – Weather stripping around the garage door helps maintain energy efficiency and protect the interior from the elements. To avoid costly repairs caused by drafts and moisture, I regularly inspect the weather stripping and replace any damaged or worn parts promptly.
  7. Avoid Slamming the Door – I remind all family members to close the garage door gently and avoid slamming it shut. Slamming the door can lead to unnecessary stress on its components, causing premature wear and tear. By teaching everyone in the household to treat the door with care, we prevent potential damage and save on repair expenses.
  8. Clean and Inspect Sensors – If my garage door is equipped with safety sensors, I ensure they are clean and properly aligned. Regularly wiping the sensors with a soft cloth removes dust and dirt that may obstruct their function. I also check for any misalignment to prevent costly repairs caused by sensor malfunctions.
  9. Protect from Extreme Weather – During extreme weather conditions, such as strong winds or heavy rain, I take extra precautions to protect my garage door. Installing a bracing system can reinforce the door and safeguard it from potential damage. Additionally, keeping the door closed during storms prevents debris from hitting it and causing harm.
  10. Educate Family Members – Educating all family members about the proper operation and maintenance of the garage door is essential. I make sure everyone knows how to use the opener and remote controls correctly. By raising awareness about best practices, we collectively contribute to the garage door’s longevity.
  11. Schedule Professional Maintenance – While I perform many maintenance tasks myself, I also understand the importance of scheduling professional maintenance at least once a year. A qualified garage door technician can thoroughly inspect all components, make necessary adjustments, and identify potential issues that may not be visible to me. Regular professional maintenance is a worthwhile investment that prevents expensive repairs in the long run.
  12. Respond Promptly to Issues – Lastly, if I notice any unusual noises, jerky movements, or other signs of trouble with my garage door, I don’t hesitate to address them promptly. Waiting to fix problems can lead to more extensive damage and higher repair costs. By taking immediate action, I can save money and ensure the continued smooth functioning of my garage door.

In conclusion, based from Garage Door Repair, avoiding costly garage door repairs is a matter of taking proactive steps to maintain the door’s components regularly. Regular inspections, lubrication, and tightening of loose hardware are simple yet effective tasks that prevent premature wear and tear. Cleaning the tracks and ensuring the door’s balance are essential for smooth operation and alignment. Replacing worn weather stripping and educating family members about proper garage door usage maintain energy efficiency and prevent damage. Additionally, protecting the door from extreme weather and scheduling professional maintenance play crucial roles in avoiding costly repairs. Responding promptly to any issues that arise helps prevent further damage and ensures the safety and functionality of the garage door. By implementing these practical tips, I’ve been able to save money on repairs and enjoy a reliable and efficient garage door for many years.

Newport Beach Garage Doors & Gate

308 Marine Ave, Newport Beach, CA 92662, United States

949-776-9845

Upgrading to a Modern Glass Garage Door: My Journey to Style and Sophistication – Rancho Park Garage & Overhead Doors

As a homeowner who loves contemporary design and natural light, I couldn’t help but be drawn to the idea of upgrading my garage door to a modern glass option. The prospect of transforming the facade of my property with sleek aesthetics and an indoor-outdoor connection was truly exciting. However, before taking the plunge, I wanted to thoroughly explore the pros and cons of modern glass garage doors to ensure it was the right choice for my home.

Join me on my journey as I share the insights I gained, the design ideas that inspired me, and how this upgrade added a touch of style and sophistication to my home by following Garage Door Repair.

Pros of Modern Glass Garage Doors

  1. Contemporary Aesthetics: One of the primary reasons I was drawn to modern glass garage doors was their chic and sophisticated appearance. The clean lines and transparent glass exuded a modern charm that complemented my home’s architectural style perfectly.
  2. Abundance of Natural Light: The promise of natural light flooding into my garage space was a significant advantage. It not only reduced the need for artificial lighting during the day but also created a bright and welcoming atmosphere.
  3. Seamless Indoor-Outdoor Connection: I loved the idea of blurring the boundaries between my indoor and outdoor spaces. The glass garage door provided a seamless transition, allowing me to enjoy the beauty of the outdoors from the comfort of my garage.
  4. Versatility in Design: The wide range of design options available for modern glass garage doors impressed me. Whether I wanted full-view glass panels or frosted glass for added privacy, there was a design to suit my preferences.
  5. Increased Property Value: As a homeowner, I always consider the long-term value of any upgrade. Upgrading to a modern glass garage door not only enhanced my home’s curb appeal but also increased its resale value—a win-win situation.

Cons of Modern Glass Garage Doors

  1. Limited Insulation: I was aware that glass is not as insulating as other materials like steel or wood. This meant that I might experience some heat loss during colder months, leading to higher energy consumption for climate control.
  2. Privacy Concerns: While the idea of natural light was enticing, I couldn’t overlook the privacy concerns. I needed to find a balance between transparency and seclusion, as my garage was often used for storage.
  3. Higher Cost: The cost of modern glass garage doors was slightly higher than traditional materials. The initial investment, installation, and potential customization needed to be factored into my budget.
  4. Maintenance and Cleaning: Another consideration was the regular maintenance and cleaning that glass doors require. I knew I would need to invest time in keeping the glass panels looking pristine and free from dust and fingerprints.

Design Ideas for Modern Glass Garage Doors

  1. Frosted Glass Elegance: I decided to go for frosted glass panels to address the privacy concerns. The frosted finish offered a touch of elegance while maintaining the functionality of my garage.
  2. Aluminum Frame Accents: To add a hint of industrial modernity, I chose aluminum frames to complement the glass panels. The sleek and minimalistic design perfectly balanced the transparency of the glass.
  3. Full-View Glass Panes: The allure of unobstructed views was hard to resist. I opted for full-view glass panels to maximize natural light and create a seamless connection between my indoor and outdoor spaces.
  4. Tinted Glass: To control the amount of sunlight entering my garage and reduce glare, I considered tinted glass options. The tinted effect added an extra layer of privacy while enhancing the overall aesthetics.
  5. Customizable Patterns and Designs: The creative side of me loved the idea of adding a personal touch to my garage door. I explored customizable patterns and designs etched onto the glass surface, creating a unique and personalized statement piece.

Overall, by following Garage Door Repair and based on my journey to upgrading to a modern glass garage door was both thrilling and enlightening. After carefully considering the pros and cons, I knew that the benefits of natural light and contemporary aesthetics outweighed any challenges. The frosted glass panels offered the perfect blend of elegance and privacy, while the aluminum frame added a touch of modernity. Now, every time I look at my modern glass garage door, I’m reminded of the style and sophistication it has brought to my home. It truly is a testament to how a simple upgrade can transform a space and elevate the overall appeal of a property.

Rancho Park Garage & Overhead Doors

2522 Aiken Ave, Los Angeles, CA 90064, United States

213-238-6483

How To Configure A Garage Door Remote – Tarrant County Door & Gate

A Garage Door Repair North Richland Hills TX remote is a convenient and essential device that allows you to open and close your garage door without manual effort. Configuring the remote properly ensures seamless functionality and enhances the security of your garage.

In this guide, we will walk you through a step-by-step process to configure a garage door remote effectively.

  1. Check Compatibility: Before you begin configuring the remote, ensure that it is compatible with your garage door opener. Read the manufacturer’s instructions or consult the user manual to confirm compatibility. Some garage door openers require specific remotes, so it is crucial to verify compatibility to prevent any issues during the configuration process.
  2. Gather Information: Make sure to gather all the necessary information before starting the configuration. This includes the make and model of your garage door opener and the remote, as well as any specific codes or frequencies required for programming.
  3. Access the Programming Mode: Most modern garage door openers come with a programming mode that allows you to sync the remote with the opener. To access the programming mode, locate the programming button on the opener, usually located near the motor housing or on the rear side of the control panel.
  4. Clear Existing Codes (if needed): If you are configuring a new remote or reprogramming an existing one, it is essential to clear any existing codes on the opener. To do this, press and hold the programming button until the indicator light blinks or turns off, indicating that the previous codes have been cleared.
  5. Set the Remote to Programming Mode: Next, put the remote into programming mode. This process varies depending on the remote’s model. Usually, you need to press a combination of buttons or hold down specific buttons for a few seconds until the LED light on the remote starts flashing.
  6. Sync the Remote with the Opener: Once both the opener and the remote are in programming mode, press the desired button on the remote that you wish to use to operate the garage door. At the same time, press and hold the programming button on the opener. The LED light on the opener should flash to indicate that the synchronization process has started.
  7. Test the Remote: After syncing the remote and the opener, test the remote’s functionality by pressing the programmed button. The garage door should respond by opening or closing accordingly. If it doesn’t work, repeat the synchronization process.
  8. Program Additional Buttons (if applicable): Many remotes have multiple buttons that can be programmed to control different doors or features. Repeat the syncing process for each button to configure them accordingly.
  9. Security Features: To enhance security, some garage door openers offer rolling codes or dip switches. Rolling codes change with each use, while dip switches allow you to set a unique code for the remote. Ensure you understand these features and utilize them if available to prevent unauthorized access.
  10. Final Checks: After configuring the remote, conduct a final check to ensure everything is functioning correctly. Test each programmed button multiple times to confirm the reliability of the remote’s functionality.

Conclusion:

Configuring a Garage Door Repair North Richland Hills TX remote is a straightforward process that, when done correctly, brings great convenience and security to your daily life. By following the steps outlined in this guide, you can easily set up your remote and enjoy the ease of remotely operating your garage door. Always refer to the manufacturer’s instructions for specific details and troubleshooting, if needed. With a properly configured remote, you’ll have peace of mind knowing that your garage and its contents are secure with just a click of a button.

Tarrant County Door & Gate

6408 Marlette Ct, North Richland Hills, TX 76182, Estados Unidos

817-456-2958

How To Reset Limits On Garage Door – Decatur Door & Gate

A Garage Door Repair Decatur TX is an essential component of any residential or commercial property, providing security, convenience, and protection for vehicles and belongings. Over time, garage door limits may become misaligned due to various reasons, such as changes in weather, mechanical wear and tear, or accidental adjustments. When these limits are off, the door may not open or close properly, posing safety risks and inconveniences.

In this comprehensive guide, we will walk you through the step-by-step process of resetting limits on a garage door. Before we begin, it is crucial to emphasize that garage doors can be heavy and pose potential dangers, so always prioritize safety throughout the process. If you are unsure or uncomfortable with the task, consider hiring a professional garage door technician.

Section 1: Safety Precautions

1.1 Safety Gear: Before starting any work on the garage door, ensure you have the necessary safety equipment, including safety glasses, gloves, and sturdy footwear.

1.2 Disconnect Power: Unplug the garage door opener or disconnect it from the power source to prevent any accidental activation while working on the limits.

1.3 Emergency Release: Locate the emergency release cord or handle on the garage door opener system, and learn how to use it in case of an emergency or power failure.

Section 2: Identify the Type of Garage Door Opener

2.1 Chain Drive: A chain drive garage door opener operates using a metal chain to lift and lower the door.

2.2 Belt Drive: Belt drive openers use a rubber belt to perform the same lifting and lowering functions with quieter operation compared to chain drives.

2.3 Screw Drive: Screw drive openers function with a threaded steel rod, offering smooth operation with minimal maintenance requirements.

Section 3: Locate and Access the Limit Adjustment Screws

3.1 Consult the Manual: Refer to the garage door opener’s manual to identify the location of the limit adjustment screws specific to your model.

3.2 Cover Removal: If needed, remove the cover of the garage door opener to access the limit adjustment screws.

Section 4: Adjusting the Limit Settings

4.1 Closing Limit Adjustment: To adjust the closing limit, use a screwdriver to turn the appropriate screw in small increments. Test the door after each adjustment by closing it to see if it stops at the desired position. Repeat the process until the door closes securely without excessive force.

4.2 Opening Limit Adjustment: Similarly, adjust the opening limit by turning the appropriate screw in small increments. Test the door’s opening motion to ensure it stops at the correct height and doesn’t reverse unexpectedly.

Section 5: Testing and Fine-Tuning

5.1 Test the Door: After adjusting the limits, test the garage door’s operation multiple times to verify that it stops and reverses correctly when encountering obstacles.

5.2 Weather Considerations: Keep in mind that extreme temperatures can affect the garage door’s performance, so make adjustments accordingly if necessary.

Section 6: Additional Troubleshooting

6.1 Sensor Alignment: Check the alignment of the safety sensors, which are usually mounted on the door tracks. They should face each other and have an unobstructed line of sight.

6.2 Lubrication: Regularly lubricate the moving parts of the garage door system to ensure smooth and efficient operation.

Conclusion:

By following this comprehensive guide, you should be able to reset the limits on your Garage Door Repair Decatur TX effectively and safely. Always prioritize safety, and if you encounter any difficulties or uncertainties during the process, it is best to seek professional assistance. Properly adjusted garage door limits will ensure smooth and secure operation, enhancing the overall functionality and longevity of your garage door system.

Decatur Door & Gate

1200 FM 51 Suite F, Decatur, TX 76234, United States

1-940-283-6188

How To Replace Overhead Garage Door Spring – Salado Garage Doors

The Garage Door Repair Salado TX spring plays a critical role in the proper functioning of an overhead garage door. These springs counterbalance the weight of the door, making it easy to open and close manually or with a garage door opener. However, due to wear and tear, springs may break or lose their tension over time, necessitating replacement. While replacing garage door springs can be a challenging task, with the right tools and knowledge, it can be done safely and effectively.

In this guide, we will walk you through the process of replacing overhead garage door springs step-by-step.

  1. Safety Precautions

Safety is paramount when dealing with garage door springs, as they are under immense tension and can cause serious injuries if mishandled. Before beginning any work, ensure you have the following safety equipment:

  • Safety glasses
  • Heavy-duty work gloves
  • Stepladder or sturdy platform
  • C-clamps or vice grips
  1. Identify the Spring Type

There are two main types of overhead garage door springs: torsion springs and extension springs. Torsion springs are mounted above the door, while extension springs are located on either side. Identify the type of springs your garage door uses before proceeding with the replacement.

  1. Gather Necessary Tools

For replacing garage door springs, you will need the following tools:

  • Winding bars (for torsion springs)
  • Adjustable wrench
  • Socket set
  • Vice grips or locking pliers
  • Safety cables (optional but recommended for torsion springs)
  • New garage door springs (ensure they match the old ones in size and weight capacity)
  1. Release Tension (Torsion Springs)

To avoid injury, you must release the tension in the old torsion springs before removing them. This can be done using winding bars and following these steps:

a. Disconnect the garage door opener and unplug it from the power source.

b. Open the garage door fully to relieve some of the tension on the springs.

c. Place vice grips or C-clamps on the garage door track to prevent it from moving.

d. Insert the winding bars into the winding cone holes on the spring and slowly unwind the spring by turning the bars away from the center.

e. Once the tension is released, remove the old springs carefully.

  1. Remove Extension Springs

For extension springs, follow these steps:

a. Open the garage door fully and secure it in place with C-clamps or vice grips.

b. Detach the safety cables if your garage door has them.

c. Use an adjustable wrench or socket set to loosen the nuts securing the springs to the brackets.

d. Slowly release the tension by gently lowering the garage door until the springs are completely relaxed.

e. Slide the old extension springs off the brackets.

  1. Install New Springs

a. Install Torsion Springs: i. Slide the new springs onto the torsion tube. ii. Wind the springs using the winding bars in the opposite direction to that used for removal. iii. Reconnect the safety cables if applicable.

b. Install Extension Springs: i. Place the new springs onto the brackets. ii. Slowly lift the garage door to apply tension to the springs. iii. Secure the springs to the brackets with nuts.

  1. Test the Garage Door

With the new springs in place, test the garage door’s operation manually and with the garage door opener (if applicable). Ensure it opens and closes smoothly and without any unusual noises.

Conclusion:

Replacing overhead Garage Door Repair Salado TX springs requires careful attention to safety and proper technique. Always remember to follow safety precautions, identify the spring type, and use the right tools. If you’re uncertain about the process, it’s best to seek professional assistance to ensure a safe and successful replacement. With this step-by-step guide, you can confidently tackle the task of replacing overhead garage door springs and maintain the smooth operation of your garage door for years to come.

Salado Garage Doors

229 N Main St, Salado, TX 76571, United States

1-254-345-4058

How To Make Garage Door Unturned – Blue Mound Garage Door & Gate Company

A Garage Door Repair Blue Mound TX is an essential part of any residential property, providing security and easy access to your garage space. An unturned garage door refers to a manually operated door without the need for automated systems. If you’re interested in making a garage door unturned, you’ll need some basic tools, materials, and a bit of patience.

This step-by-step guide will walk you through the process of creating an unturned garage door, ensuring a functional and cost-effective solution for your home.

Step 1: Safety Precautions

Before you start any DIY project, safety should be your top priority. Ensure you have the necessary safety gear, such as gloves, safety glasses, and a dust mask, to protect yourself during the process. Additionally, have a first-aid kit on hand and a fire extinguisher nearby in case of emergencies.

Step 2: Gather Tools and Materials

To build an unturned garage door, you’ll need the following tools and materials:

Tools:

  • Measuring tape
  • Pencil
  • Circular saw or hand saw
  • Drill
  • Screwdriver set
  • Hammer
  • Chisel
  • Level

Materials:

  • Plywood or sturdy wooden panels (according to your garage door’s dimensions)
  • Hinges and screws
  • Latch and handle set
  • Weather stripping
  • Paint and primer (optional)

Step 3: Take Accurate Measurements

Measure the width and height of your garage opening to determine the required dimensions for your unturned garage door. Make sure to measure twice to avoid errors.

Step 4: Cut the Wood Panels

Using a circular saw or a hand saw, cut the plywood or wooden panels to the measured dimensions. Ensure the edges are smooth and free from splinters.

Step 5: Create Hinge Placements

On one side of the wooden panels, mark the hinge placements. Typically, three hinges evenly spaced along the height of the door should be sufficient for stability. Use a pencil to mark the spots where the hinges will be attached.

Step 6: Install Hinges

Align the hinges with the marked spots and secure them in place using screws and a drill. Ensure that the hinges are attached firmly, allowing the door to swing open and closed smoothly.

Step 7: Attach Latch and Handle Set

On the opposite side of the hinges, mark the placement for the latch and handle set. Use a chisel to create the necessary recess for the latch and handle components. Once the recess is complete, attach the latch and handle set securely to the door.

Step 8: Weather Stripping Installation

To prevent drafts and keep your garage insulated, apply weather stripping along the edges of the door. Weather stripping helps to create a tight seal when the door is closed.

Step 9: Finishing Touches (Optional)

If desired, you can paint the garage door to match your home’s exterior. Use a primer first, followed by the paint color of your choice. Allow sufficient drying time between coats.

Step 10: Hang the Door

With the help of a friend, carefully lift the completed unturned garage door and hang it on the garage door frame. Check for smooth operation and make any necessary adjustments.

Conclusion:

Building an unturned Garage Door Repair Blue Mound TX is a satisfying DIY project that provides a cost-effective and functional solution for your garage. By following this step-by-step guide and taking safety precautions, you can successfully create an unturned garage door that complements your home’s aesthetic while offering convenience and security. Always remember to measure accurately, use the right tools, and pay attention to the details for a successful and durable outcome. Happy DIY-ing!

Blue Mound Garage Door & Gate Company

1609 Tyson St #5, Blue Mound, TX 76131

817-631-5688

Page 1 of 6

Powered by WordPress & Theme by Anders Norén