Local Businesses Blog in Texas

Author: blogadmin Page 1 of 73

How Can I Improve My Car’s Fuel Efficiency? – Circle S Auto Service

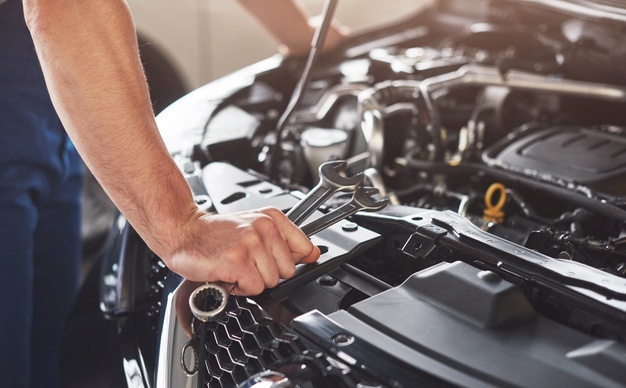
Maintaining optimal Auto Services Fort Worth TX is not only beneficial for your wallet but also for the environment.

Fortunately, there are numerous steps you can take to improve your car’s fuel efficiency, from simple changes in driving habits to regular maintenance tasks. In this comprehensive guide, we’ll explore various strategies to help you get the most out of every gallon of fuel your car consumes.

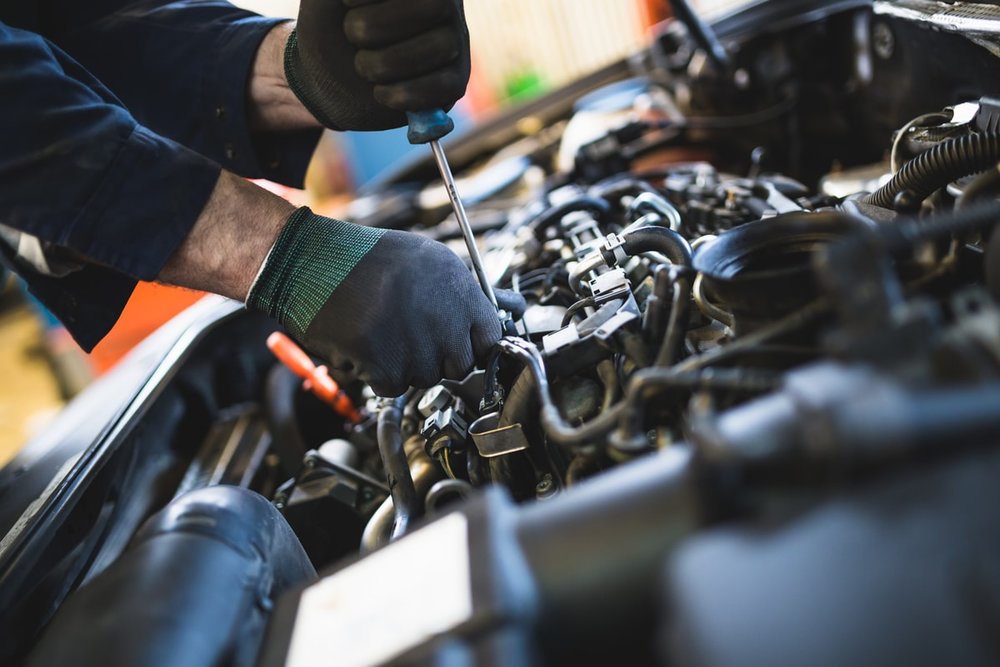
1. Keep Your Vehicle Well-Maintained

Regular maintenance is essential for maximizing fuel efficiency. Here are some maintenance tasks to prioritize:

  • Check and Replace Air Filters: A clogged or dirty air filter restricts airflow to the engine, reducing fuel efficiency. Replace your air filter according to the manufacturer’s recommendations.
  • Maintain Proper Tire Pressure: Under-inflated tires increase rolling resistance, making your engine work harder and consuming more fuel. Check your tire pressure regularly and inflate them to the recommended PSI (pounds per square inch).
  • Tune-Up Your Engine: Regular tune-ups, including spark plug replacement and ignition system checks, can improve engine performance and fuel efficiency.
  • Use the Right Motor Oil: Using the manufacturer-recommended motor oil can reduce friction and improve engine efficiency. Look for oil labeled “energy-conserving” for better fuel economy.

2. Practice Efficient Driving Habits

Your driving habits play a significant role in fuel consumption. Adopting the following habits can help improve fuel efficiency:

  • Drive Smoothly: Avoid aggressive driving behaviors such as rapid acceleration, hard braking, and excessive speeding. Accelerate gradually and anticipate stops to minimize fuel consumption.
  • Maintain a Consistent Speed: Driving at a steady speed on the highway can improve fuel efficiency compared to frequent acceleration and deceleration. Use cruise control when appropriate to help maintain a constant speed.
  • Reduce Idling: Idling consumes fuel unnecessarily. Avoid extended idling periods by turning off your engine when parked or waiting for an extended period.
  • Plan Efficient Routes: Choose routes with less traffic congestion and fewer stops to minimize fuel consumption. Use navigation apps to find the most efficient routes and avoid unnecessary detours.

3. Reduce Aerodynamic Drag

Reducing aerodynamic drag can improve fuel efficiency, especially at higher speeds. Consider the following tips:

  • Remove Roof Racks and Cargo Carriers: Roof-mounted accessories increase aerodynamic drag and reduce fuel efficiency, especially at highway speeds. Remove them when not in use to improve aerodynamics.
  • Close Windows at High Speeds: Driving with windows open at high speeds increases drag and reduces fuel efficiency. Use your vehicle’s ventilation system or air conditioning instead.
  • Keep Your Vehicle Clean: A clean exterior reduces drag and improves aerodynamics. Regularly wash and wax your vehicle to maintain optimal aerodynamic efficiency.

4. Lighten Your Load

Reducing excess weight in your vehicle can improve fuel efficiency. Here are some tips to lighten your load:

  • Remove Excess Cargo: Remove unnecessary items from your vehicle, especially heavy cargo that adds unnecessary weight and increases fuel consumption.
  • Empty Your Trunk: Avoid storing heavy items in your trunk unless necessary. Every additional pound of weight reduces fuel efficiency, especially in smaller vehicles.
  • Use Lightweight Materials: If possible, opt for lightweight materials when carrying cargo or transporting items. For example, use plastic storage bins instead of heavy metal containers.

5. Use Fuel-Efficient Driving Aids

Modern vehicles often come equipped with fuel-saving technologies and driving aids that can help improve fuel efficiency:

  • Eco Mode: Many newer vehicles feature an “Eco” mode that adjusts engine and transmission settings for improved fuel efficiency. Activate Eco mode when driving in traffic or on highways to save fuel.
  • Hybrid and Electric Vehicles: Consider switching to a hybrid or electric vehicle for even greater fuel savings. These vehicles use advanced technologies such as regenerative braking and electric propulsion to maximize efficiency.

Conclusion:

Improving your car’s fuel efficiency is a combination of adopting efficient driving habits, maintaining your vehicle properly, and making smart choices about vehicle accessories and cargo. By implementing the strategies outlined in this guide, you can reduce fuel consumption, save money on fuel costs, and minimize your environmental impact.

Circle S Auto Service

12195 N Saginaw Blvd #120, Fort Worth, TX 76179, United States

1-817-439-8020

How Long Does A Liftmaster Garage Door Opener Last – Denzel Garage Doors

Garage Door Repair Marina Del Rey have become an integral part of modern living, offering convenience and security to homeowners. Among the leading brands in the market, LiftMaster is renowned for its reliability and performance.

However, like any mechanical device, LiftMaster garage door openers have a finite lifespan. In this comprehensive guide, we will explore the factors that influence the longevity of LiftMaster garage door openers, provide insights into their average lifespan, and offer tips on how to maximize their durability.

Understanding the Lifespan of Garage Door Openers

Before delving into the specifics of LiftMaster garage door openers, it’s crucial to understand the factors that affect the lifespan of these essential devices. Several variables play a role in determining how long a garage door opener will last:

Usage Frequency: The frequency with which you use your garage door opener can significantly impact its lifespan. A garage door opener that is used multiple times a day is likely to wear out faster than one that is used sparingly.

Maintenance: Regular maintenance is key to prolonging the lifespan of any mechanical device, including garage door openers. Lubricating moving parts, inspecting for wear and tear, and addressing any issues promptly can help extend the life of your LiftMaster garage door opener.

Environmental Conditions: The environment in which your garage door opener operates can also affect its longevity. Extreme temperatures, humidity, and exposure to elements such as dust and debris can accelerate wear and tear on the device.

Installation Quality: The quality of the installation plays a crucial role in the performance and durability of a garage door opener. Proper installation by trained professionals ensures that the device operates smoothly and efficiently, minimizing the risk of premature failure.

Model and Build Quality: LiftMaster offers a range of garage door openers tailored to different needs and budgets. Higher-end models with advanced features and robust construction are likely to have a longer lifespan than basic models.

Average Lifespan of LiftMaster Garage Door Openers

LiftMaster is known for producing high-quality garage door openers designed to withstand daily use and harsh conditions. On average, a well-maintained LiftMaster garage door opener can be expected to last between 10 to 15 years. However, the actual lifespan may vary depending on factors such as usage patterns, maintenance practices, and environmental conditions.

Different Models and Their Durability

LiftMaster offers a diverse range of garage door openers, from residential to commercial-grade models. While residential garage door openers are designed for typical household use, commercial-grade models are built to withstand heavy-duty applications. As a result, commercial-grade LiftMaster garage door openers tend to have a longer lifespan due to their rugged construction and enhanced features.

Signs That Indicate Your LiftMaster Garage Door Opener Needs Replacement

Despite their durability, LiftMaster garage door openers may eventually reach the end of their lifespan. Recognizing the signs of a failing garage door opener can help you determine when it’s time to replace it:

Performance Issues: Slow operation, erratic behavior, and inconsistent response to remote commands are all indicators of a failing garage door opener.

Noise Levels: Unusual noises such as grinding, scraping, or excessive vibration during operation may signal worn-out components or mechanical issues.

Safety Concerns: Malfunctioning safety features, such as sensors that fail to detect obstacles or an unresponsive emergency release mechanism, pose a safety risk and warrant immediate attention.

Tips to Extend the Lifespan of LiftMaster Garage Door Openers

While LiftMaster garage door openers are built to last, proper maintenance and care are essential to maximizing their lifespan. Here are some tips to help extend the life of your LiftMaster garage door opener:

Regular Maintenance: Perform routine maintenance tasks such as lubricating moving parts, inspecting for wear and tear, and cleaning the tracks and sensors.

Upgrading to Newer Models: Consider upgrading to a newer model with advanced features and improved performance. Newer models often incorporate technological advancements that enhance reliability and durability.

Professional Inspection and Servicing: Schedule regular inspections by trained technicians to identify and address any potential issues before they escalate. Professional servicing can help prolong the lifespan of your LiftMaster garage door opener and ensure optimal performance.

Conclusion:

In conclusion, LiftMaster garage door openers are designed to provide years of reliable service, but their lifespan ultimately depends on various factors such as usage, maintenance, and environmental conditions. By understanding these factors and following the tips outlined in this guide, you can maximize the lifespan of your LiftMaster garage door opener and enjoy uninterrupted convenience and security for years to come.

Denzel Garage Doors

17841 Welby Way Reseda , CA 91335

619-496-9419

How To Change Code On Craftsman Garage Door Opener Keypad – A 24 Hour Door Service

Your Garage Door Repair Madison MS provides convenient access to your garage, but changing the access code regularly is essential for home security.

If you’re looking to change the code on your Craftsman garage door opener keypad, you’re in the right place. In this comprehensive guide, we’ll walk you through each step of the process to ensure a successful code change and provide peace of mind for you and your family.

1. Understand the Importance of Changing the Access Code

Before we dive into the steps for changing the code, let’s briefly discuss why it’s crucial:

  • Enhanced security: Changing the access code regularly helps prevent unauthorized entry into your garage and home.
  • Personalized security: By changing the code, you can create a unique combination that is easy for you to remember but difficult for others to guess.
  • Peace of mind: Knowing that your garage door opener keypad’s access code is up-to-date provides peace of mind, especially when you’re away from home.

2. Locate the “Reset” Button

The first step in changing the access code for your Craftsman garage door opener keypad is to locate the “Reset” button:

  • The “Reset” button is typically located on the back or side of the keypad.
  • It may be small and recessed, requiring a paperclip or similar tool to press.

3. Choose a New Code

Before proceeding with the code change process, decide on a new access code:

  • Choose a combination that is easy for you to remember but difficult for others to guess.
  • Avoid using obvious combinations such as birthdates or sequential numbers.
  • Opt for a code that is at least four digits long for optimal security.

4. Reset the Keypad

Now, let’s reset the keypad to clear any existing codes and prepare it for the new code:

  • Press and hold the “Reset” button on the keypad for about 10 seconds.
  • Release the button once you see the keypad’s lights flash, indicating that the reset process is complete.

5. Enter the New Code

With the keypad reset, it’s time to enter the new access code:

  • Enter the new access code on the keypad using the numerical buttons.
  • Press the “Enter” or “Program” button on the keypad to confirm the new code.

6. Test the New Code

Once you’ve entered the new code, it’s essential to test it to ensure that it has been programmed successfully:

  • Close the garage door using the existing code or remote control.
  • Wait for the garage door to close completely, then enter the new access code on the keypad.
  • Press the “Enter” button to confirm the code. If the code is accepted, the garage door should open.

7. Secure the Keypad

After successfully programming the new access code, it’s crucial to secure the keypad to prevent unauthorized access:

  • Ensure that the keypad is securely mounted to the wall and that there are no loose wires or connections.
  • If necessary, use screws or adhesive to secure the keypad in place.

8. Update Remote Controls (if applicable)

If you have remote controls for your Craftsman garage door opener, it’s essential to update them with the new access code:

  • Refer to the manufacturer’s instructions for your specific remote control model.
  • Follow the provided steps to program the remote control with the new access code.

9. Test Remote Controls (if applicable)

After programming the remote controls, test them to ensure that they are working correctly with the new access code:

  • Stand at a reasonable distance from the garage door opener and press the button on the remote control.
  • The garage door should open or close in response to the remote control command.

10. Maintain Regular Code Changes

To maintain optimal security for your garage and home, consider changing the access code for your Craftsman garage door opener keypad regularly:

  • Set a schedule for changing the code, such as every few months or after any significant events, such as moving into a new home.
  • Keep a record of previous access codes and the dates they were changed for reference.

By following these steps and maintaining regular code changes, you can enhance the security of your Craftsman garage door opener keypad and enjoy peace of mind knowing that your home and belongings are protected.

A 24 Hour Door Service

417 Post Oak Cove, Madison, MS 39110, United States

1-601-664-8935

How Does One Request Transportation Assistance From Handi-Care? – Handi-Care Transportation

For individuals with disabilities, accessing reliable transportation can be a challenge. Fortunately, Handi-Care Transportation Service Tuscaloosa AL tailored to meet the unique needs of this community.

In this guide, we’ll explore how to request transportation assistance from Handi-Care and navigate the process with ease.

Understanding the Need for Transportation Assistance

Challenges Faced by Individuals with Disabilities

Individuals with disabilities often encounter barriers when it comes to transportation. Whether it’s inaccessible vehicles, lack of assistance, or limited options, getting from point A to point B can be a daunting task. Handi-Care understands these challenges and provides a solution tailored to meet the specific needs of its passengers.

Services Offered by Handi-Care

Specialized Transportation Services

Handi-Care offers a range of specialized transportation services designed to accommodate individuals with disabilities. From wheelchair-accessible vehicles to trained drivers and personalized assistance, they go above and beyond to ensure a comfortable and safe journey for every passenger.

Door-to-Door Service

One of the key features of Handi-Care is its door-to-door service. This means that passengers can request assistance not only with transportation but also with getting to and from their doorstep. Whether it’s helping with luggage or navigating obstacles, Handi-Care’s drivers are there to lend a hand every step of the way.

How to Request Transportation Assistance

Contact Handi-Care

The first step in requesting transportation assistance from Handi-Care is to contact them directly. This can be done by phone, email, or through their website. Provide details such as your name, contact information, pickup location, and desired destination.

Provide Necessary Information

When contacting Handi-Care, be sure to provide any necessary information about your specific needs or requirements. This may include details about mobility aids, assistance needed during boarding and disembarking, or any other accommodations you may require.

Schedule Pickup

Once you’ve provided the necessary information, Handi-Care will work with you to schedule a pickup time that fits your needs. They understand that timing is important, especially for appointments or other time-sensitive engagements, and will do their best to accommodate your schedule.

Confirm Details

Before the scheduled pickup, be sure to confirm all details with Handi-Care to ensure everything is in order. This includes double-checking the pickup location, destination, and any special instructions or accommodations you may have requested.

Accessibility Features of Handi-Care Vehicles

Wheelchair Accessibility

Handi-Care vehicles are equipped with ramps or lifts to accommodate passengers who use wheelchairs or other mobility aids. This ensures that everyone can board and disembark safely and comfortably, without any barriers or obstacles.

Securement Systems

To ensure the safety of passengers and their mobility aids during transit, Handi-Care vehicles are equipped with state-of-the-art securement systems. These systems keep wheelchairs and other mobility aids securely in place, providing peace of mind for passengers and their loved ones.

Trained and Compassionate Drivers

Professional Training

Handi-Care drivers undergo rigorous training to ensure they are equipped to assist passengers with professionalism, empathy, and respect. From defensive driving techniques to handling emergency situations, drivers are prepared to provide a safe and comfortable journey for all passengers.

Compassionate Service

In addition to their professional training, Handi-Care drivers are known for their compassionate service and willingness to go above and beyond to assist passengers. Whether it’s helping with boarding, providing directions, or simply offering a friendly smile, Handi-Care drivers are there to make the journey as pleasant as possible.

Cost and Coverage Options

Insurance Coverage

Handi-Care works with various insurance providers to offer coverage for transportation services. This means that some or all of the cost of transportation assistance may be covered by insurance, depending on your policy and individual circumstances.

Payment Options

In addition to insurance coverage, Handi-Care offers flexible payment options to accommodate passengers’ financial needs. Whether it’s paying out-of-pocket or setting up a payment plan, Handi-Care strives to make their services accessible and affordable for everyone who needs them.

Conclusion:

Requesting transportation assistance from Handi-Care is a straightforward process that begins with contacting them directly and providing necessary information about your needs and schedule. With specialized vehicles, trained drivers, and a commitment to compassionate service, Handi-Care ensures a comfortable and safe journey for individuals with disabilities. So don’t let transportation barriers hold you back – reach out to Handi-Care and get the assistance you need to live life to the fullest.

Handi-Care Transportation

2018 Inverness Pkwy, Tuscaloosa, AL 35405, United States

1-205-391-7994

How To Reset Liftmaster Garage Door Opener – Denzel’s Garage Door

Garage Door Repair Santa Monica CA is a straightforward process that can help resolve various issues such as programming errors, remote control malfunctions, or keypad glitches. Whether you’re experiencing trouble with your garage door opener or simply want to start fresh with a clean slate, resetting the opener can often solve the problem.

In this comprehensive guide, we’ll walk you through the step-by-step process of resetting a LiftMaster garage door opener, including preparation, accessing the control panel, and performing the reset.

Understanding Your LiftMaster Garage Door Opener

Before you begin resetting your LiftMaster garage door opener, it’s essential to understand the basic components and functionality of the device.

Components of a LiftMaster Garage Door Opener

A LiftMaster garage door opener typically consists of a motorized unit, a control panel, and various accessories such as remote controls, keypads, and safety sensors.

Functionality

The LiftMaster garage door opener is responsible for opening and closing the garage door in response to signals from the remote control, keypad, or wall-mounted button. The control panel allows you to program and customize settings, including the access code and remote control programming.

Preparation for Reset

Before you start resetting your LiftMaster garage door opener, take some preparatory steps to ensure a smooth process.

Gather Necessary Materials

You’ll need a ladder, a screwdriver, and the instruction manual for your LiftMaster garage door opener. If you’re using a remote control or keypad, make sure you have access to them as well.

Clear the Area

Ensure that the area around the garage door opener is clear of any obstructions, and position the ladder securely for safe access to the control panel.

Resetting the LiftMaster Garage Door Opener

Now that you’re prepared, let’s walk through the process of resetting your LiftMaster garage door opener step by step.

Step 1: Access the Control Panel

Locate the control panel on your LiftMaster garage door opener. This is typically located on the ceiling of the garage near the motorized unit. Use the ladder to reach the control panel safely.

Step 2: Locate the Learn Button

On the control panel, you’ll find a button labeled “Learn” or “Program.” This button is used to enter programming mode and perform various functions, including resetting the opener.

Step 3: Press and Hold the Learn Button

Press and hold the Learn button on the control panel for approximately 6-10 seconds. You may need to consult your instruction manual for the specific duration required for your model of LiftMaster garage door opener.

Step 4: Release the Learn Button

After holding the Learn button for the specified duration, release it and wait for the indicator light on the control panel to turn off. This indicates that the opener has been successfully reset.

Step 5: Reprogram Remote Controls and Keypads (if necessary)

If you’ve reset your LiftMaster garage door opener, you’ll need to reprogram any remote controls or keypads that were previously linked to the opener. Follow the instructions in your manual to reprogram these devices.

Step 6: Test the Opener

Once you’ve completed the reset process and reprogrammed any accessories, test the garage door opener to ensure that it operates correctly. Use the remote control, keypad, or wall-mounted button to open and close the garage door, and verify that it responds as expected.

Tips for Troubleshooting and Maintenance

Perform Regular Maintenance

Regularly inspect and maintain your LiftMaster garage door opener to ensure optimal performance and longevity. Clean the control panel and sensors regularly, and replace batteries in remote controls and keypads as needed.

Consult the Instruction Manual

If you encounter any issues or have questions about resetting your LiftMaster garage door opener, consult the instruction manual for your specific model. The manual contains detailed information and troubleshooting tips to help you resolve common problems.

Contact Customer Support

If you’re unable to resolve the issue on your own, contact LiftMaster customer support for assistance. They can provide expert guidance and troubleshooting advice to help you get your garage door opener back up and running smoothly.

Conclusion:

Resetting your LiftMaster garage door opener is a simple yet effective way to resolve common issues and ensure optimal performance. By following the steps outlined in this guide and implementing maintenance best practices, you can keep your garage door opener operating smoothly for years to come.

Denzel’s Garage Door

17841 Welby Way Reseda , CA 91335

1-619-496-9419

How Much Does A Double Garage Door Cost To Replace – All American Doors

Garage Door Repair Miami FL are a common feature in many homes, providing convenient access to a two-car garage space.

Over time, garage doors may experience wear and tear due to factors such as weather exposure, frequent use, and aging, necessitating replacement to maintain functionality, security, and curb appeal.

Factors Affecting the Cost of Double Garage Door Replacement

Several factors influence the cost of replacing a double garage door, including:

  1. Material: Double garage doors are available in various materials, each with its own cost implications. Common materials include steel, aluminum, wood, and composite materials. Steel doors are typically the most affordable option, while wood and composite doors tend to be more expensive due to their premium quality and aesthetics.
  2. Design and Style: The design and style of the garage door play a significant role in determining its cost. Basic, no-frills designs are generally more affordable, while custom designs, decorative elements, and window inserts can increase the overall cost of the door.
  3. Insulation: Insulated garage doors offer improved energy efficiency and temperature regulation, making them a popular choice for homeowners. Insulated doors typically cost more upfront but can result in long-term energy savings and increased comfort.
  4. Size: The size of the double garage door, including its width and height, influences the cost of replacement. Standard-sized doors are more affordable compared to custom-sized doors, which may require special ordering and installation.
  5. Installation Costs: Installation costs vary depending on factors such as labor rates, the complexity of the installation, and any additional services required, such as removing the old door, framing adjustments, and hardware installation.

Cost Range of Double Garage Door Replacement

The cost of replacing a double garage door varies depending on the aforementioned factors and can range from $800 to $5000 or more. Here’s a breakdown of the cost range based on different considerations:

  1. Material:
    • Steel Doors: $800 to $1500
    • Aluminum Doors: $1000 to $2000
    • Wood Doors: $1500 to $5000
    • Composite Doors: $2000 to $5000
  2. Design and Style:
    • Basic Designs: $800 to $1500
    • Custom Designs: $1500 to $5000
  3. Insulation:
    • Non-insulated Doors: $800 to $2000
    • Insulated Doors: $1000 to $5000
  4. Size:
    • Standard-sized Doors: $800 to $3000
    • Custom-sized Doors: $1500 to $5000 or more
  5. Installation Costs:
    • Installation costs typically range from $200 to $1000 or more, depending on factors such as labor rates, the complexity of the installation, and any additional services required.

Additional Costs and Considerations

In addition to the cost of the garage door itself, there may be additional costs and considerations to factor in:

  • Hardware and Accessories: Hardware such as hinges, rollers, tracks, and springs may need to be replaced along with the door. Additionally, accessories such as decorative handles, window inserts, and insulation kits may incur additional costs.
  • Professional Installation: While some homeowners may choose to install the garage door themselves to save money, professional installation is recommended for optimal results. Professional installers have the necessary skills, tools, and experience to ensure proper installation and functionality of the door.
  • Removal of Old Door: If replacing an existing garage door, the cost of removing the old door and disposing of it may need to be factored into the overall cost of replacement.
  • Permit Fees: Depending on local building codes and regulations, permit fees may be required for garage door replacement projects. Check with your local authorities to determine if any permits are needed and factor the associated fees into your budget.

Conclusion:

In conclusion, the cost of replacing a double garage door varies depending on factors such as material, design, insulation, size, installation costs, and additional considerations. By carefully considering your preferences, budget, and long-term needs, you can choose a replacement garage door that enhances the functionality, security, and aesthetic appeal of your home.

All American Doors

8155 NW 93rd St, Medley, FL 33166, United States

1-305-885-8088

How Program Craftsman Garage Door Opener – Anna’s Best Garage & Overhead Doors

Garage Door Repair Anna TX allows you to conveniently open and close your garage door with ease.

Whether you’re setting up a new remote or reprogramming an existing one, this step-by-step guide will walk you through the process to ensure smooth operation of your garage door opener.

1. Locate the “Learn” Button on Your Craftsman Garage Door Opener

The first step in programming your Craftsman garage door opener remote is to locate the “Learn” button on the motor unit of your opener. This button is typically found near the antenna wire and may be labeled as “Learn” or “Smart” depending on the model of your opener.

2. Press the “Learn” Button

Once you’ve located the “Learn” button, press it firmly and release it. You’ll notice that the indicator light on the motor unit will begin to blink, indicating that the opener is in programming mode and ready to learn the code from your remote.

3. Press the Button on Your Remote

Next, grab your Craftsman garage door opener remote and press the button that you want to program to open and close your garage door. Hold down the button until you see the indicator light on the remote flash or hear a beep, indicating that the remote’s code has been transmitted to the garage door opener.

4. Test the Remote

After programming the remote, it’s essential to test it to ensure that it’s working correctly. Stand inside your garage and press the button on the remote. If the programming was successful, your garage door should open or close smoothly in response to the remote’s command.

5. Repeat for Additional Remotes (If Necessary)

If you have multiple Craftsman garage door opener remotes that you want to program to your opener, simply repeat the process outlined above for each remote. Press the “Learn” button on the opener, then press the button on the remote that you want to program, and test each remote to ensure that they’re all functioning correctly.

6. Erase Existing Codes (Optional)

If you’re replacing an old remote or want to reset the programming on your opener, you may need to erase existing codes before programming new remotes. To do this, locate the “Learn” button on the opener and press it for about 6-8 seconds until the indicator light turns off. This action erases all existing codes from the opener’s memory, allowing you to start fresh with programming new remotes.

7. Secure Your Remote

Once you’ve programmed your Craftsman garage door opener remote, be sure to keep it in a safe and secure location, such as your car’s glove compartment or a designated spot inside your home. Avoid leaving the remote in plain sight, where it could be easily stolen or accessed by unauthorized individuals.

Conclusion:

Programming your Craftsman garage door opener remote is a simple process that allows you to enjoy convenient access to your garage. By following the steps outlined in this guide, you can quickly set up your remote and ensure smooth operation of your garage door opener. If you encounter any difficulties during the programming process, refer to your opener’s user manual for troubleshooting tips, or contact Craftsman’s customer support for assistance.

Anna’s Best Garage & Overhead Doors

1009 Mathew Dr, Anna, TX 75049, United States

1-469-224-1335

How Should I Change My Car’s oil, and What Type of Oil Is Best? – Circle S Auto Service

Auto Service Fort Worth TX are essential for maintaining the health and longevity of your vehicle’s engine. Not only does fresh oil lubricate engine components, but it also helps to remove contaminants and prevent buildup that can lead to engine damage over time.

In this comprehensive guide, we’ll walk you through the step-by-step process of changing your car’s oil, along with recommendations for selecting the best type of oil for your vehicle.

1. Gather the Necessary Tools and Materials

Before you begin, gather all the tools and materials you’ll need for the oil change:

  • Fresh engine oil (check your vehicle’s owner’s manual for the recommended viscosity and type).
  • Oil filter (make sure it’s compatible with your vehicle’s make and model).
  • Oil filter wrench.
  • Oil drain pan.
  • Socket wrench set.
  • Funnel.
  • Oil filter pliers (if necessary).
  • Oil filter drain tool (if applicable).
  • Disposable gloves.
  • Jack stands or ramps (if lifting the vehicle is required).
  • Wheel chocks.

2. Prepare Your Vehicle

Ensure your vehicle is parked on a level surface and the engine is cool before beginning the oil change process. If necessary, use wheel chocks to prevent the vehicle from rolling. If you’ll be lifting the vehicle, safely elevate it using jack stands or ramps and secure it in place before proceeding.

3. Drain the Old Oil

Locate the oil drain plug underneath your vehicle’s engine and position the oil drain pan beneath it to catch the old oil. Use a socket wrench to loosen the drain plug, then carefully remove it by hand. Allow the old oil to drain completely into the pan.

4. Replace the Oil Filter

While the old oil is draining, locate the oil filter, which is typically located near the bottom of the engine. Use an oil filter wrench to loosen the filter, then carefully remove it by hand. Be prepared for some oil to spill out when removing the filter. Before installing the new filter, apply a thin coat of oil to the rubber gasket to ensure a proper seal. Install the new filter by hand, tightening it according to the manufacturer’s instructions.

5. Refill with Fresh Oil

Once the old oil has finished draining and the new filter is installed, it’s time to refill the engine with fresh oil. Use a funnel to pour the appropriate amount of oil into the engine, as specified in your vehicle’s owner’s manual. Be careful not to overfill the engine, as this can cause damage.

6. Check the Oil Level

After refilling the engine with oil, replace the oil filler cap and start the engine briefly to circulate the oil. Allow the engine to run for a few minutes, then turn it off and wait for a few minutes to allow the oil to settle. Check the oil level using the dipstick, adding more oil if necessary to bring it to the correct level.

7. Dispose of Old Oil Properly

Once the oil change is complete, dispose of the old oil and filter responsibly. Many auto parts stores and recycling centers accept used motor oil for recycling. Never dump used oil down a drain or onto the ground, as it can harm the environment.

Selecting the Best Type of Oil

Choosing the right type of oil for your vehicle is crucial for optimal engine performance and longevity. When selecting oil, consider factors such as viscosity, performance specifications, and manufacturer recommendations. Here are some common types of motor oil and their characteristics:

  • Conventional Oil: Conventional motor oil is the most affordable option and suitable for older vehicles with lower mileage. It provides adequate lubrication and protection for most engines but may require more frequent oil changes.
  • Synthetic Oil: Synthetic motor oil offers superior performance and protection, especially in extreme temperatures and high-performance engines. It flows more freely at low temperatures and maintains its viscosity better at high temperatures, resulting in better engine protection and longer oil change intervals.
  • High-Mileage Oil: High-mileage motor oil is specifically formulated for vehicles with over 75,000 miles on the odometer. It contains additives designed to condition and protect seals and gaskets, reduce oil consumption, and prevent leaks in older engines.
  • Diesel Oil: Diesel motor oil is formulated specifically for diesel engines, which operate at higher temperatures and pressures than gasoline engines. It provides enhanced protection against soot buildup, wear, and oxidation, ensuring optimal performance and longevity for diesel engines.

When choosing the best type of oil for your vehicle, refer to your vehicle’s owner’s manual for manufacturer recommendations and specifications. Consider factors such as climate, driving conditions, and maintenance intervals when making your selection.

By following these steps and selecting the appropriate type of oil for your vehicle, you can perform an oil change confidently and maintain the health and performance of your car’s engine for years to come.

Circle S Auto Service

12195 N Saginaw Blvd #120, Fort Worth, TX 76179, United States

1-817-439-8020

How To Program A Genie Garage Door Opener – MF Solutions


How to Program a Genie Garage Door Opener: A Step-by-Step Guide

If you have ChatGPT 4, then try this: https://bit.ly/Jumma_GPTs


Garage Door Repair Nile IL  allows you to synchronize it with your garage door system, enabling seamless operation and convenient access to your home. Whether you’re setting up a new Genie garage door opener or reprogramming an existing one, the process can be completed quickly and easily with the right instructions.

In this comprehensive guide, we’ll walk you through the step-by-step process of programming a Genie garage door opener, ensuring that you can enjoy smooth and reliable performance for years to come.

1. Gather Required Materials

Before you begin programming your Genie garage door opener, gather the necessary materials:

  • Genie garage door opener unit
  • Remote control transmitter or keypad
  • Ladder (if needed)
  • Pen and paper (optional, for note-taking)

Ensure that you have access to the learn button on your Genie garage door opener unit, as this will be used during the programming process.

2. Put the Garage Door Opener into Programming Mode

To begin programming your Genie garage door opener, follow these steps:

  1. Locate the “learn” or “program” button on the opener unit. This button is typically located on the back panel or side of the opener motor housing.
  2. Press and release the learn button to put the opener into programming mode. The indicator light on the opener may flash or blink to indicate that it is ready to receive programming signals.

3. Program the Remote Control

Once the Genie garage door opener is in programming mode, you can program your remote control transmitter to work with the opener. Follow these steps:

  1. Hold the remote control transmitter within range of the opener unit, typically within a few feet.
  2. Press and hold the button on the remote control that you want to use to operate the garage door.
  3. While holding the button on the remote control, press and release the learn button on the opener unit.
  4. Release the button on the remote control. The indicator light on the opener should flash or blink to indicate that the programming was successful.

4. Program the Keypad (If Applicable)

If your Genie garage door opener is equipped with a keypad for keyless entry, you can program it to work with the opener using a similar process. Follow these steps:

  1. Enter the access code into the keypad that you want to use to operate the garage door.
  2. After entering the code, press the “Enter” or “Send” button on the keypad.
  3. Then, press and release the learn button on the opener unit.
  4. The indicator light on the opener should flash or blink to indicate that the programming was successful.

5. Test the Garage Door Opener

After programming the remote control and keypad, it’s important to test the Genie garage door opener to ensure that it operates correctly. Stand within range of the opener and press the button on the remote control or keypad that you programmed. The garage door should open or close in response to the signal from the device, indicating that the programming was successful.

6. Additional Programming Options

Depending on the model of your Genie garage door opener, you may have additional programming options available, such as setting up additional remotes, adjusting the open and close limits, or activating vacation mode. Refer to the user manual for your specific opener model for detailed instructions on these additional programming options.

7. Perform Regular Maintenance

To ensure continued reliable operation of your Genie garage door opener, perform regular maintenance and inspections. Check the batteries in remote controls and keypads regularly and replace them as needed to prevent signal loss or weak transmission. Additionally, clean the contacts on the devices and the opener unit to maintain optimal connectivity.

8. Seek Professional Assistance if Needed

If you encounter difficulties or have concerns about programming your Genie garage door opener, don’t hesitate to seek professional assistance. Contact Genie customer support or a reputable garage door technician for guidance on programming the device safely and effectively.

By following these steps and exercising proper caution, you can successfully program a Genie garage door opener to work with your remote control or keypad and enjoy convenient access to your garage with just the push of a button. Whether you’re setting up a new opener or reprogramming an existing one, knowing how to program your Genie garage door opener ensures seamless integration and enhanced convenience for your daily routine.

MF Solutions

302 Cherrywood Rd. City, St. Zip: Buffalo Grove, IL 60089

1-224-434-1780

How To Program Subaru Garage Door Opener – Ryder Garage Doors

Garage Door Repair Vancouver WA allows for seamless integration, enabling you to open and close your garage door with the push of a button from the convenience of your vehicle.

Subaru vehicles come equipped with a built-in HomeLink system, which can be programmed to work with most garage door openers. In this guide, we’ll walk you through the step-by-step process of programming a Subaru garage door opener, ensuring that you can enjoy convenient access to your garage with ease.

1. Identify the HomeLink Buttons in Your Subaru

Most Subaru vehicles come equipped with a HomeLink system, which consists of three buttons located on the overhead console or rearview mirror. These buttons can be programmed to control various home automation devices, including garage door openers.

2. Clear Existing Programming (If Needed)

If your Subaru’s HomeLink system is already programmed to work with a different garage door opener, you may need to clear the existing programming before proceeding. Consult your vehicle’s owner’s manual for instructions on how to clear existing programming from the HomeLink system.

3. Put the Garage Door Opener into Programming Mode

Next, put your garage door opener into programming mode by following the instructions provided in the opener’s user manual. This typically involves pressing and holding a button on the opener unit until the indicator light flashes or a beep is heard, indicating that the opener is ready to receive programming signals.

4. Program the HomeLink Buttons in Your Subaru

With the garage door opener in programming mode, press and hold one of the HomeLink buttons in your Subaru. While holding the button, simultaneously press and release the button on the garage door opener unit. You may need to repeat this step multiple times to ensure successful programming.

5. Test the Garage Door Opener

After programming the HomeLink button in your Subaru, test the garage door opener to ensure that it operates correctly. Park your car within range of the garage door opener and press the programmed button on the HomeLink system. The garage door should open or close in response to the signal from your Subaru, indicating that the programming was successful.

6. Repeat the Programming Process (If Needed)

If you have multiple garage doors or if you’re programming additional buttons on the HomeLink system to work with the same garage door opener, repeat the programming process for each button individually. Ensure that each button is programmed to the correct garage door opener to avoid confusion and ensure seamless operation.

7. Perform Regular Maintenance

To ensure continued reliable operation of your programmed garage door opener, perform regular maintenance and inspections. Check the batteries in the HomeLink system regularly and replace them as needed to prevent signal loss or weak transmission. Additionally, clean the contacts on the HomeLink buttons and the garage door opener unit to maintain optimal connectivity.

8. Seek Professional Assistance if Needed

If you encounter difficulties or have concerns about programming your Subaru’s garage door opener, don’t hesitate to seek professional assistance. Contact a reputable garage door technician or Subaru dealership to inspect the opener unit and provide guidance on programming the HomeLink system safely and effectively.

By following these steps and exercising proper caution, you can successfully program a garage door opener to your Subaru and enjoy convenient access to your garage with just the push of a button. Whether you’re programming a new vehicle or adding additional buttons to your existing HomeLink system, knowing how to program your Subaru’s garage door opener ensures seamless integration and enhanced convenience for your daily routine.

Ryder Garage Doors

PO Box 5474 Vancouver, WA 98668

1-360-843-7981

Page 1 of 73

Powered by WordPress & Theme by Anders Norén