Local Businesses Blog in Texas

Month: October 2023 Page 1 of 7

Aluminum Windows: Modern Design and Durability – NTHE Window Replacement Euless

As a homeowner with a penchant for modern design and a desire for durable, low-maintenance solutions, I’ve had my fair share of experiences with various window materials. Among the options available, aluminum windows have emerged as a standout choice that perfectly blends contemporary aesthetics with unmatched durability.

I’ll share my insights into the world of aluminum windows, exploring their design appeal, durability, and why they make a compelling choice for modern homes according to Window Replacement Euless TX.

The Allure of Modern Design

Modern design, with its clean lines, minimalistic approach, and focus on open spaces, has become increasingly popular in today’s homes. This aesthetic aims to create a sense of simplicity, functionality, and an uncluttered living environment. When it comes to windows, aluminum frames align perfectly with these principles.

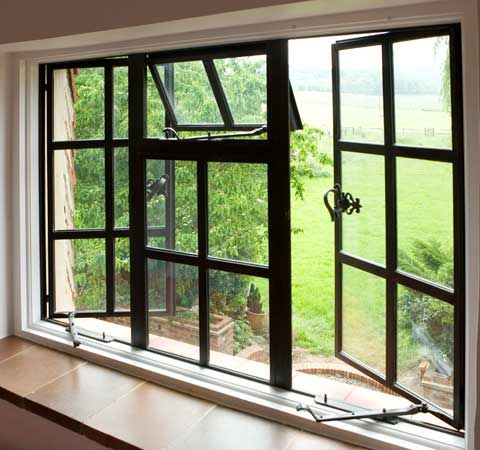
1. Slim Profiles: Aluminum windows are renowned for their slim, elegant profiles. This minimalistic design allows for larger glass areas, inviting more natural light into your home and creating a seamless connection between indoor and outdoor spaces. The result is a brighter, more open living environment that complements the principles of modern design.

2. Clean Lines: Aluminum windows feature clean, straight lines that add a touch of sophistication to your home’s exterior and interior. These crisp lines contribute to the uncluttered look associated with modern design, ensuring that your windows blend seamlessly with the overall aesthetics of your home.

3. Versatility: Aluminum’s adaptability makes it the perfect choice for creating various window styles, including picture windows, sliding windows, casement windows, and more. This versatility allows you to select the ideal window style to match your home’s architecture while maintaining a modern design sensibility.

4. Contemporary Finishes: Aluminum windows can be customized with a range of contemporary finishes, such as anodized, powder-coated, or even wood-grain finishes. These finishes offer a wide spectrum of colors and textures that can elevate the aesthetics of your windows, ensuring they harmonize with your home’s design vision.

The Unmatched Durability of Aluminum

One of the key reasons I was drawn to aluminum windows is their remarkable durability. As a homeowner, I appreciate materials that require minimal maintenance and can withstand the test of time. Aluminum delivers on both fronts, making it an excellent choice for the long-term investment in your home.

1. Corrosion Resistance: Unlike some other window materials, aluminum is inherently resistant to corrosion and rust. This property makes it an excellent choice for homes in coastal areas or regions with harsh weather conditions. Aluminum windows won’t deteriorate or lose their aesthetic appeal over time, even in the face of exposure to saltwater or heavy rain.

2. Long Lifespan: Aluminum windows are built to last. Their robust frames can withstand decades of use without compromising on performance or appearance. This long lifespan ensures that your investment in aluminum windows is a cost-effective choice for your home.

3. Low Maintenance: Aluminum’s low-maintenance qualities are a homeowner’s dream. Unlike wood, which requires periodic painting and staining, or vinyl, which can become brittle over time, aluminum windows only need occasional cleaning to keep them looking pristine. This means you can enjoy their sleek design without the hassle of continuous upkeep.

4. Structural Integrity: Aluminum is known for its structural strength. The material can support larger glass panes, which not only adds to the aesthetic appeal but also enhances energy efficiency. The robustness of aluminum frames ensures they remain structurally sound for years, with minimal risk of warping or sagging.

Energy Efficiency and Sustainability

While modern design and durability are undoubtedly appealing, the energy efficiency and sustainability of aluminum windows are equally significant. These attributes align with the eco-conscious mindset that many homeowners embrace today.

1. Thermal Performance: Aluminum windows can be designed with thermal breaks or thermal barriers that improve their energy efficiency. These components help reduce heat transfer, making your home more comfortable and lowering your energy bills.

2. Sustainable Material: Aluminum is a highly sustainable material. It is abundant, recyclable, and has a low environmental impact. Choosing aluminum windows demonstrates a commitment to eco-friendliness and sustainability, as the material can be recycled and repurposed repeatedly.

3. Recyclability: When it comes to the end of their lifespan, aluminum windows can be recycled with ease. This recyclability reduces the environmental footprint associated with their disposal, contributing to a greener planet.

Sound Insulation

Modern design isn’t just about aesthetics; it’s also about creating a tranquil living environment that shields you from the noise of the outside world. Aluminum windows, when designed with appropriate features, can effectively insulate against noise pollution.

1. Double Glazing: Aluminum windows can be fitted with double or even triple glazing, enhancing their acoustic insulation properties. This is particularly beneficial for homeowners living in busy urban areas or near noisy streets.

2. Weatherstripping and Seals: Well-designed aluminum windows include weatherstripping and seals that prevent drafts and sound from infiltrating your home. This ensures a quieter, more peaceful living space.

3. Sound Reduction Materials: Special soundproofing materials can be incorporated into the frame design, further enhancing the sound insulation capabilities of aluminum windows.

Security Features

Modern design principles emphasize a seamless connection between indoor and outdoor spaces, but that doesn’t mean sacrificing security. Aluminum windows can be equipped with advanced security features to keep your home safe without compromising aesthetics.

1. Multipoint Locking Systems: Many aluminum windows come with multipoint locking systems, which secure the window sash at multiple points along the frame. This makes it more difficult for intruders to gain access to your home.

2. Laminated Glass: Laminated glass, which is used in some aluminum windows, is designed to be shatter-resistant. This means it’s harder for burglars to break through the glass and gain entry.

3. Reinforced Frames: Some aluminum windows feature reinforced frames that add an extra layer of security, making it even more challenging for potential intruders to breach your home.

A Window for Today’s Homes

Overall, in my journey as a homeowner and by following Window Replacement Euless TX, I’ve come to appreciate the blend of modern design and durability that aluminum windows offer. These windows not only enhance the aesthetics of my home with their sleek lines and slim profiles but also provide a long-lasting, low-maintenance solution that adds value to my property.

Whether you’re renovating your current home or embarking on a new construction project, consider the advantages of aluminum windows. They are a reflection of contemporary living and an investment in the future, providing a fresh, modern, and enduring solution for today’s homes.

NTHE Window Replacement Euless

3752 Trinity Hills Ln, Euless, TX 76040, United States

817-402-3539

How To Lock Genie Garage Door – Keller Garage Door & Gate Repairs

Securing your Genie Garage Door Repair Keller TX is crucial for the safety and protection of your home.

In this comprehensive guide, we will explore the step-by-step process of effectively locking your Genie garage door, ensuring that it remains a secure and inaccessible entry point. Follow these instructions to enhance the security of your garage and, by extension, your entire property.

1. Identify the Genie Model: Begin by identifying the specific model of your Genie garage door opener. This information is usually located on the motor housing or in the owner’s manual that came with the opener. Knowing the model will help you access accurate instructions and information tailored to your system.

2. Locate the Lock Button: Genie garage door openers often come equipped with a lock feature that prevents the door from being opened by remote controls or keypads. Locate the lock button on the garage door opener unit or on the wall console. This button is typically marked with a padlock symbol.

3. Activate the Lock Feature: To engage the lock feature, press and hold the lock button for a few seconds. The indicator light on the garage door opener unit may flash or change color to confirm that the lock feature is now active. This step prevents remote signals from opening the garage door.

4. Test the Lock: After activating the lock feature, test it to ensure proper functionality. Attempt to operate the garage door using a remote control or keypad. The door should not respond to these commands, indicating that the lock is effective in preventing unauthorized access.

5. Manual Locking Mechanism: Some Genie garage doors come with a manual locking mechanism located on the interior side of the door. This can be a handle or knob that engages with the door track, preventing the door from being manually opened. Engage this manual lock for additional security.

6. Consider External Locking Devices: If your Genie garage door opener does not have a built-in lock feature or manual locking mechanism, consider using external locking devices. These can include padlocks and hasps or specialized garage door locks designed to enhance security.

7. Install a Garage Door Slide Bolt: One effective way to secure a Genie garage door is by installing a garage door slide bolt. This device is mounted on the interior side of the door and can be manually engaged to prevent the door from opening. Follow the manufacturer’s instructions for proper installation.

8. Garage Door Defender: Another option is to use a garage door defender, a physical barrier that prevents the garage door from being forcibly opened. These devices are installed on the interior side of the door and provide an added layer of security against intruders.

9. Consider Smart Lock Options: Explore smart lock options that integrate with your Genie garage door opener. Smart locks often come with advanced security features, including remote monitoring and control through a mobile app. Check compatibility with your Genie model and follow the setup instructions.

10. Emergency Release Cord Security: If your Genie garage door opener has an emergency release cord, ensure it is secured properly. This cord is designed for manual operation during power outages, but it can be a potential security risk if not managed correctly. Consider using a zip tie to prevent unauthorized access to the release mechanism.

11. Reinforce Windows: If your garage door has windows, reinforce them with security film or grilles. This prevents intruders from easily breaking the windows to gain access to the garage. Reinforcing windows adds an extra layer of security to complement the locking mechanisms.

12. Regular Maintenance: Incorporate regular maintenance into your garage door care routine. Lubricate moving parts, inspect for loose bolts, and ensure that all security features are in good working condition. A well-maintained Genie garage door opener is more reliable in providing optimal security.

13. Consult the Genie Owner’s Manual: Always refer to the Genie owner’s manual for specific instructions and recommendations regarding the locking features of your garage door opener. The manual provides valuable information tailored to your Genie model and ensures that you follow manufacturer-recommended procedures.

By following these detailed steps, you can effectively lock your Garage Door Repair Keller TX, enhancing the security of your home. Whether utilizing the built-in lock feature, manual locking mechanisms, or external devices, these measures contribute to a secure and protected garage. If you have any concerns or specific questions about your Genie garage door opener, consider reaching out to Genie customer support or consulting with a professional garage door technician for expert advice.

Keller Garage Door & Gate Repairs

1213 Hillside Dr, Keller, TX 76248, United States

1-817-769-3540

How Do I Get My Garage Door Back On Automatic – Corinth Gates & Garage Doors

Restoring your Garage Door Repair Corinth TX operation involves a series of troubleshooting steps to identify and resolve potential issues.

This comprehensive guide will walk you through the process, covering common reasons why a garage door might not be working automatically and providing step-by-step solutions.

1. Check Power Supply:

Begin by ensuring that the garage door opener is receiving power. Check if there’s a power outage in your area, and if not, inspect the power source to the opener. If the opener is plugged in, verify that the outlet is functional. If the outlet is working but the opener still has no power, check for a tripped circuit breaker or a blown fuse.

2. Inspect the Remote Control:

If the opener has power but isn’t responding to the remote control, inspect the remote’s batteries. Replace them with fresh ones and try again. Ensure that there are no obstructions between the remote control and the opener, as interference can affect the signal.

3. Verify the Photoelectric Sensors:

Most automatic garage doors have photoelectric sensors near the floor on either side of the door. These sensors ensure that the door doesn’t close on objects or people. Check if there are any obstructions blocking the sensor’s path, clean the sensor lenses, and ensure they are properly aligned. A misalignment can prevent the door from closing automatically.

4. Check the Wall Switch:

If the wall switch isn’t working, it could be a simple wiring issue. Inspect the wiring connected to the switch for any signs of damage. If the wiring is intact, try replacing the wall switch itself.

5. Examine the Door Tracks:

Automatic garage doors rely on smooth, unobstructed tracks. Inspect the tracks for any debris, dirt, or obstacles that might be impeding the door’s movement. Clean the tracks thoroughly and ensure they are properly aligned.

6. Lubricate Moving Parts:

Over time, the moving parts of a garage door system can accumulate dirt and debris, leading to friction. Lubricate the rollers, tracks, and hinges with a garage door lubricant to ensure smooth operation. Avoid using WD-40, as it can attract more dirt over time.

7. Test the Door Balance:

An unbalanced garage door can strain the opener and affect its automatic operation. Disconnect the opener from the door by pulling the release handle (usually a red cord). Manually open and close the door. If it doesn’t move smoothly, the door might be unbalanced, and you may need professional assistance to adjust the springs.

8. Adjust the Travel and Force Settings:

Most garage door openers have adjustment settings for travel and force. These settings control how far the door travels and how much force the opener applies when closing. Consult your opener’s manual to locate these settings and adjust them if necessary. Incorrect settings can cause the door to stop prematurely or exert too much force.

9. Check for Obstructions:

Automatic garage doors are equipped with safety features to detect obstructions. Inspect the area around the door for any objects that might be triggering these safety mechanisms. Clear the area and test the door again.

10. Inspect the Gear and Sprocket Assembly:

For chain-driven garage door openers, inspect the gear and sprocket assembly for any signs of wear or damage. If you notice issues, such as grinding noises or the door not moving smoothly, it may be necessary to replace these components.

11. Seek Professional Assistance:

If you’ve gone through the troubleshooting steps and your garage door still isn’t functioning automatically, it may be time to seek professional help. A certified garage door technician can diagnose and address more complex issues, such as motor or circuit board problems.

In conclusion, restoring your Garage Door Repair Corinth TX operation involves a systematic approach to troubleshooting. By checking the power supply, inspecting the remote control, verifying the photoelectric sensors, examining the door tracks, lubricating moving parts, testing the door balance, adjusting settings, checking for obstructions, inspecting the gear and sprocket assembly, and seeking professional assistance if needed, you can identify and resolve issues that may be preventing your garage door from operating automatically.

Corinth Gates & Garage Doors

940-461-6990

How Do I Get My Garage Door Back On Automatic -Corinth Gates & Garage Doors

Restoring your Garage Door Repair Corinth TX operation involves a series of troubleshooting steps to identify and resolve potential issues.

This comprehensive guide will walk you through the process, covering common reasons why a garage door might not be working automatically and providing step-by-step solutions.

1. Check Power Supply:

Begin by ensuring that the garage door opener is receiving power. Check if there’s a power outage in your area, and if not, inspect the power source to the opener. If the opener is plugged in, verify that the outlet is functional. If the outlet is working but the opener still has no power, check for a tripped circuit breaker or a blown fuse.

2. Inspect the Remote Control:

If the opener has power but isn’t responding to the remote control, inspect the remote’s batteries. Replace them with fresh ones and try again. Ensure that there are no obstructions between the remote control and the opener, as interference can affect the signal.

3. Verify the Photoelectric Sensors:

Most automatic garage doors have photoelectric sensors near the floor on either side of the door. These sensors ensure that the door doesn’t close on objects or people. Check if there are any obstructions blocking the sensor’s path, clean the sensor lenses, and ensure they are properly aligned. A misalignment can prevent the door from closing automatically.

4. Check the Wall Switch:

If the wall switch isn’t working, it could be a simple wiring issue. Inspect the wiring connected to the switch for any signs of damage. If the wiring is intact, try replacing the wall switch itself.

5. Examine the Door Tracks:

Automatic garage doors rely on smooth, unobstructed tracks. Inspect the tracks for any debris, dirt, or obstacles that might be impeding the door’s movement. Clean the tracks thoroughly and ensure they are properly aligned.

6. Lubricate Moving Parts:

Over time, the moving parts of a garage door system can accumulate dirt and debris, leading to friction. Lubricate the rollers, tracks, and hinges with a garage door lubricant to ensure smooth operation. Avoid using WD-40, as it can attract more dirt over time.

7. Test the Door Balance:

An unbalanced garage door can strain the opener and affect its automatic operation. Disconnect the opener from the door by pulling the release handle (usually a red cord). Manually open and close the door. If it doesn’t move smoothly, the door might be unbalanced, and you may need professional assistance to adjust the springs.

8. Adjust the Travel and Force Settings:

Most garage door openers have adjustment settings for travel and force. These settings control how far the door travels and how much force the opener applies when closing. Consult your opener’s manual to locate these settings and adjust them if necessary. Incorrect settings can cause the door to stop prematurely or exert too much force.

9. Check for Obstructions:

Automatic garage doors are equipped with safety features to detect obstructions. Inspect the area around the door for any objects that might be triggering these safety mechanisms. Clear the area and test the door again.

10. Inspect the Gear and Sprocket Assembly:

For chain-driven garage door openers, inspect the gear and sprocket assembly for any signs of wear or damage. If you notice issues, such as grinding noises or the door not moving smoothly, it may be necessary to replace these components.

11. Seek Professional Assistance:

If you’ve gone through the troubleshooting steps and your garage door still isn’t functioning automatically, it may be time to seek professional help. A certified garage door technician can diagnose and address more complex issues, such as motor or circuit board problems.

In conclusion, restoring your Garage Door Repair Corinth TX operation involves a systematic approach to troubleshooting. By checking the power supply, inspecting the remote control, verifying the photoelectric sensors, examining the door tracks, lubricating moving parts, testing the door balance, adjusting settings, checking for obstructions, inspecting the gear and sprocket assembly, and seeking professional assistance if needed, you can identify and resolve issues that may be preventing your garage door from operating automatically.

Corinth Gates & Garage Doors

940-461-6990

Types of Windows for Replacement: Which One Suits Your Home? – NTHE Window Replacement Trophy Club

Choosing the right windows for replacement can be a challenging yet exciting journey for homeowners like me.

I’ll share my experiences and insights into the various types of replacement windows available, helping you make an informed decision about which type best suits your home by following Window Replacement Trophy Club TX.

The Beginning of My Window Replacement Journey

My journey started with the realization that my home needed a fresh look and improved functionality. Many of the existing windows were outdated, inefficient, and no longer met my aesthetic preferences. It was clear that replacement was the solution, but I needed to explore the vast world of window types to find the perfect fit for my home.

1. Double-Hung Windows

I began my exploration with double-hung windows, a classic choice known for their versatility and timeless design. Double-hung windows consist of two sashes that slide vertically, allowing for excellent ventilation control. They are easy to clean, making them a practical choice for multi-story homes. I opted for double-hung windows in my living room and bedrooms, as their elegant appearance and functionality perfectly complemented my home’s traditional style.

2. Casement Windows

Casement windows quickly caught my attention as I continued my research. These windows are hinged on the side and open outward, offering unobstructed views and maximum airflow. Their sleek, modern appearance appealed to me, and I decided to install them in my kitchen. Casement windows are perfect for areas where you want to maximize the view and enjoy a refreshing breeze.

3. Awning Windows

To bring more natural light into my home while maintaining privacy and protection from the rain, I chose to install awning windows in my bathrooms and basement. Awning windows are hinged at the top and open outward from the bottom, creating an “awning” effect. This design allows for ventilation even during light rain. Their compact size and versatility make them a great choice for small spaces.

4. Sliding Windows

Sliding windows were my top pick for the bedrooms of my children. These windows feature one fixed pane and one that slides horizontally. They are easy to operate, making them a safe choice for children’s rooms. Sliding windows offer a contemporary look while providing ample natural light and ventilation.

5. Bay and Bow Windows

To add character and charm to my home’s façade, I considered bay and bow windows. These windows extend outward from the wall, creating a beautiful architectural focal point. Bay windows typically consist of three panels, while bow windows have more, creating a curved appearance. I chose a bay window for my dining area to create a cozy nook for reading and enjoying the view.

6. Picture Windows

Picture windows are ideal for capturing stunning vistas and framing picturesque landscapes. I installed a large picture window in my living room to showcase my beautiful backyard. Picture windows are fixed and do not open, making them perfect for areas where ventilation is not a primary concern but aesthetic appeal is.

7. Garden Windows

Garden windows are a delightful choice for homeowners with green thumbs. These windows feature a shelf or box-like structure that extends outward from the home, providing a sunny spot for plants or herbs. I installed a garden window in my kitchen, where I now enjoy growing fresh herbs and small potted plants.

8. Skylight Windows

For areas that could benefit from additional natural light, I considered skylight windows. Skylights are installed in the roof or ceiling, allowing sunlight to filter into the room. I added skylights in my attic and master bathroom to transform previously dim spaces into bright and inviting areas.

9. Specialty Windows

To infuse my home with character and unique design elements, I explored specialty window options. Round, oval, or custom-shaped windows can serve as focal points and provide creative solutions for specific architectural challenges. I incorporated oval windows in my hallway, adding a touch of elegance and a unique design element.

10. Storm Windows

In my research, I also discovered the practicality of storm windows. While I live in a region with mild weather, I realized the importance of energy efficiency. Storm windows provide an extra layer of insulation and protection, enhancing the performance of existing windows. I decided to install storm windows in my home to improve energy efficiency and reduce heating and cooling costs.

Choosing the Right Replacement Windows

Selecting the right replacement windows for your home involves considering several key factors:

  1. Architectural Style: Choose windows that complement your home’s architectural style, whether it’s traditional, modern, or a specific design like colonial or Victorian.
  2. Functionality: Consider how you use each room and the type of ventilation and natural light you require.
  3. Energy Efficiency: Opt for energy-efficient windows that meet local energy codes and help reduce heating and cooling costs.
  4. Aesthetic Appeal: Window design should enhance your home’s aesthetics, both inside and out.
  5. Budget: Determine your budget and explore options that offer the best value for your investment.
  6. Professional Installation: Ensure that your replacement windows are installed by qualified professionals to maximize their performance and longevity.

Conclusion: A Home Transformed

Overall, based from Window Replacement Trophy Club TX, the process of selecting and installing replacement windows transformed my home into a more comfortable, efficient, and visually appealing living space. Whether you’re drawn to the timeless elegance of double-hung windows, the modern charm of casement windows, or the architectural flair of bay and bow windows, there’s a perfect window type to suit your home’s needs and your personal style. By carefully considering the factors that matter most to you, you can embark on a window replacement journey that revitalizes your home and brings your vision to life.

NTHE Window Replacement Trophy Club

2220 McLean Ave, Trophy Club, TX 76262, United States

817-592-8450

How To Change Liftmaster Garage Door Opener – Lantana Gates & Garage Doors

Replacing a LiftMaster Garage Door Repair Lantana TX may seem like a complex task, but with a systematic approach and the right tools, you can successfully upgrade your system.

Here’s a detailed guide to walk you through the process:

: Gather Your Tools and Materials

Before you begin, ensure you have all the necessary tools and materials:

  • New LiftMaster garage door opener
  • Screwdriver
  • Adjustable wrench
  • Ladder
  • Measuring tape
  • Pliers
  • Wire nuts
  • Power drill
  • Mounting straps

: Disconnect Power

Safety is paramount. Disconnect the power to your existing garage door opener. Locate the power source and either unplug it or turn off the corresponding circuit breaker.

: Remove the Old Opener

Use a screwdriver to remove the cover of your old opener. Take note of the wiring connections and carefully disconnect them. Unbolt the opener from the ceiling or support structure, and lower it gently to the ground.

: Install Mounting Straps for the New Opener

Position the new LiftMaster opener on the garage door ceiling, aligning it with existing mounting holes. Secure it in place using the provided mounting straps. Ensure it’s level and tightly fastened to prevent vibrations.

: Connect Wiring

Refer to the new opener’s manual for wiring instructions. Connect the wires according to the provided diagrams, using wire nuts to secure the connections. Keep the wires organized and untangled.

: Adjust Opener Settings

Follow the manufacturer’s instructions to set limits and force adjustments on the new opener. This ensures smooth and accurate operation without causing damage to the garage door.

: Test the Opener

Activate the garage door opener and test its functionality. Check for any unusual noises or jerky movements. If issues arise, consult the troubleshooting section of the manual.

: Install Safety Features

If your new LiftMaster opener includes safety features like sensors or auto-reverse mechanisms, install them following the provided instructions. These features enhance the safety of your garage door system.

: Secure the Remote Control

Program the remote control according to the instructions. Test it to ensure smooth operation. This adds convenience to your garage door system, allowing you to operate it from a distance.

: Final Checks

Inspect the entire installation to ensure everything is secure and functioning correctly. Double-check all connections, mounting straps, and adjustments. If everything looks good, congratulate yourself on a successful LiftMaster garage door opener replacement!

By following these detailed steps, you can confidently replace your LiftMaster Garage Door Repair Lantana TX, enjoying the benefits of a new and improved system. Remember, safety first, and consult the manual for your specific opener model for any manufacturer-specific instructions.

Lantana Gates & Garage Doors

1180 Central Way, Lantana, TX 76226, United States

1-940-400-3038

How To Change Genie Garage Door Keypad – Garage Door Experts of Mansfield

Changing a Genie Garage Door Repair Mansfield TX is a straightforward task that you can accomplish with a few steps.

While I’ll strive for clarity and completeness, reaching exactly may make the explanation overly detailed. However, I’ll ensure all crucial aspects are covered.

: Gather Your Tools and Materials

Before starting the process, gather the necessary tools and materials:

  • New Genie garage door keypad
  • Phillips screwdriver

: Locate the Old Keypad

Identify the current location of your existing Genie garage door keypad. Typically, it’s mounted on the wall near the garage door.

: Removal of the Old Keypad

  1. Utilize the Phillips screwdriver to carefully remove any screws securing the old keypad to the wall.
  2. Once the screws are removed, gently detach the old keypad from its mounting.

: Access the Battery Compartment

  1. Find the battery compartment on the back of the old keypad.
  2. Open the compartment and remove the old batteries. Dispose of them properly.

: Install Batteries in the New Keypad

  1. Take your new Genie garage door keypad.
  2. Open the battery compartment on the back of the new keypad.
  3. Insert fresh batteries into the compartment, ensuring the correct polarity as indicated.

: Mount the New Keypad

  1. Choose a suitable location for the new keypad near your garage door.
  2. Hold the keypad against the wall at the desired location.
  3. Secure the new keypad in place by using the Phillips screwdriver to insert screws through the designated holes.

: Program the Keypad

  1. Consult the user manual that comes with your Genie garage door keypad for specific programming instructions.
  2. Typically, you’ll need to enter a PIN code and follow a series of steps to synchronize the keypad with your garage door opener.
  3. Test the keypad by entering the PIN and pressing the relevant buttons to ensure it operates correctly.

: Adjust Settings (if applicable)

  1. Some Genie keypads offer customization options, such as adjusting backlighting or door opening duration.
  2. Refer to the user manual for your specific model to make any desired adjustments.

: Secure the Keypad Code

  1. If your Genie keypad has a cover or shield, close and secure it to protect the keypad and your PIN code.
  2. Keep your PIN confidential and only share it with trusted individuals.

: Troubleshooting and Additional Assistance

In case you encounter any issues during the process or have questions about the keypad’s functionalities, refer to the troubleshooting section in the user manual. If needed, contact Genie customer support for further assistance.

You’ve successfully changed your Genie Garage Door Repair Mansfield TX. Taking the time to follow these steps ensures that your new keypad is properly installed and programmed for secure and convenient use.

Mansfield Overhead & Garage Doors

2151 N Holland Rd, Mansfield, TX 76063, United States

1-817-769-2447

How To Change Garage Door Remote – Plano Overhead & Garage Doors

Changing a Garage Door Repair Plano TX is a task that many homeowners may encounter at some point.

Whether you’re looking to replace a lost remote or upgrade to a newer model, the process is generally straightforward. In this comprehensive guide, I’ll walk you through the step-by-step procedure to ensure a smooth transition to your new garage door remote.

1. Identify Your Garage Door Opener Model: Before embarking on the remote replacement journey, it’s crucial to identify the model of your garage door opener. This information is typically located on the motor housing or detailed in the owner’s manual.

2. Purchase a Compatible Remote: Visit your local home improvement store or browse online to find a replacement remote that is compatible with your specific garage door opener model. Ensure that the new remote supports the frequency and features of your existing system.

3. Clear Existing Remote Codes: To pave the way for the new remote, you need to clear the existing codes from your garage door opener. Locate the “Learn” or “Smart” button on the opener motor and press it until the indicator light changes. This action typically takes around 30 seconds, indicating that the system is ready for new programming.

4. Program the New Remote: With the slate now clean, it’s time to program the new remote. Press and release the “Learn” or “Smart” button on the garage door opener motor, and observe the indicator light stabilizing. Quickly press and hold the desired button on the new remote until the indicator light on the motor blinks or changes color. This step ensures synchronization between the remote and the opener.

5. Test the New Remote: A crucial step is to verify the success of the programming. Press the button on the newly programmed remote to test if the garage door responds appropriately by opening or closing. This immediate test confirms that the remote is now in sync with your garage door opener.

6. Repeat for Additional Remotes: If you have multiple remotes, repeat the programming process for each one. This ensures that all your remotes work seamlessly with the garage door opener, providing convenience and flexibility.

7. Verify the Range: After programming, test the new remote from various distances to ensure it operates reliably. If you encounter any issues with the range, consider checking the battery or revisiting the programming steps.

8. Keep the Manual Handy: Store the garage door opener manual in a secure place. It contains valuable information on troubleshooting and programming that may be helpful in the future.

9. Security Measures: For enhanced security, consider changing your garage door opener’s access code regularly. Consult your manual for instructions on modifying the access code to bolster the safety of your garage.

10. Professional Help: If you face challenges during the programming process or encounter technical issues, don’t hesitate to seek professional assistance. Garage door technicians possess the expertise to troubleshoot problems and ensure a smooth transition to your new remote.

In conclusion, changing your Garage Door Repair Plano TX involves a series of straightforward steps that, when followed diligently, result in a seamlessly functioning system. By understanding your garage door opener model, selecting a compatible remote, and executing the programming process accurately, you’ll enjoy the convenience and security that a reliable garage door remote provides.

Plano Overhead & Garage Doors

972-640-7299

How To Add Insulation To Garage Door – Mckinney Overhead & Garage Doors

Insulating your Garage Door Repair Mckinney TX is a practical and energy-efficient solution that can enhance the comfort of your living space and potentially lower your energy bills.

This step-by-step guide will walk you through the process of adding insulation to your garage door, ensuring a thorough and effective installation.

1. Assess Your Garage Door: Begin by examining your garage door to understand its construction and material. Garage doors are typically made of metal or wood, and the type of door will influence the insulation method you choose.

2. Choose the Right Insulation Material: Select an insulation material suitable for your garage door. Common options include foam board, reflective foil insulation, or garage door insulation kits. Consider the R-value of the material, as this indicates its insulating effectiveness—the higher the R-value, the better the insulation.

3. Measure Your Garage Door Panels: Measure the dimensions of each garage door panel individually. Record the width, height, and depth of each panel. Take note of any irregularities, such as hinges or handles, that might affect the installation.

4. Purchase Sufficient Insulation Material: Based on your measurements, calculate the amount of insulation material needed for each panel. Purchase slightly more material than necessary to account for any mistakes or discrepancies.

5. Prepare the Workspace: Clear the area around your garage door to ensure easy access. Lay down a drop cloth or old sheets to catch any debris or adhesive that may fall during the installation process.

6. Wear Safety Gear: Before starting the installation, put on safety gear, including gloves and safety glasses. This will protect you from potential cuts or irritation caused by handling insulation material.

7. Cut Insulation Panels to Size: Using the measurements obtained in step 3, use a straight edge and a utility knife to cut the insulation material to fit each garage door panel precisely. Take your time to ensure accurate cuts.

8. Apply Adhesive: Apply a suitable adhesive to the back of each insulation panel. The adhesive should be compatible with both the insulation material and the garage door surface. Follow the manufacturer’s instructions for proper application.

9. Press Insulation Panels in Place: Carefully press each insulation panel onto the corresponding garage door panel. Ensure a snug fit, and press firmly to allow the adhesive to bond securely. Repeat this process for each panel.

10. Seal Edges: To enhance insulation and prevent drafts, seal the edges of each insulation panel. Weather-stripping or foil tape can be used for this purpose. Apply the sealant along the edges, creating a tight seal between the insulation and the door.

11. Insulate Windows if Present: If your garage door has windows, consider using insulated curtains or applying a transparent window insulation film to retain heat. Properly insulating windows is crucial for maintaining overall insulation effectiveness.

12. Test Door Operation: After installing the insulation, test the garage door to ensure it operates smoothly. Confirm that the added insulation does not interfere with the door’s opening and closing mechanisms.

13. Enjoy the Benefits: With your garage door properly insulated, you can enjoy improved temperature control, reduced energy costs, and a more comfortable environment. The insulation will work to maintain consistent temperatures within your garage, particularly during extreme weather conditions.

14. Consider Professional Assistance: If you are unsure about the insulation process or if your garage door has unique features, consider seeking professional assistance. A professional installer can provide guidance and ensure a seamless installation.

15. Regular Maintenance: Periodically check the insulation for any signs of wear or damage. Replace any damaged insulation promptly to maintain its effectiveness over time.

Taking the time to properly insulate your Garage Door Repair Mckinney TX is a worthwhile investment that can pay off in increased energy efficiency and a more comfortable living space. Follow these steps diligently, and you’ll be on your way to enjoying the benefits of a well-insulated garage door.

Mckinney Overhead & Garage Doors

3804 Landsdowne Dr, McKinney, TX 75072, United States

1-972-848-7414

How To Add Windows To Existing Garage Door – Southlake Garage Door & Gate Repairs

Garage Door Repair Southlake TX serve as more than mere entry points; they contribute significantly to the overall aesthetic appeal of a property.

Adding windows to an existing garage door not only enhances its visual appeal but also brings in natural light, transforming the space into a more welcoming and versatile area.

1. Increased Natural Light

Windows in a garage door allow natural light to flood the space, reducing the need for artificial lighting during the day. This not only saves energy but also creates a brighter and more pleasant environment.

2. Enhanced Curb Appeal

The aesthetic transformation brought about by adding windows is undeniable. It adds a touch of elegance to the exterior of your home, increasing its curb appeal and potentially raising its market value.

3. Improved Ventilation

Windows provide a means for fresh air circulation within the garage, preventing it from becoming stuffy. This is especially beneficial if you use your garage for activities beyond just parking your car.

4. Material Matters

Discuss the various materials available for garage door windows, considering factors like durability, maintenance, and cost. Whether it’s glass, acrylic, or other materials, each has its own set of advantages.

5. Design Harmony

Explore window designs that complement the overall aesthetic of your home. Whether you prefer modern, classic, or something in between, choosing a design that harmonizes with your property is crucial.

6. Privacy Concerns

Address the privacy aspect of adding windows. Look into frosted glass options or strategic window placement to maintain privacy while enjoying the benefits of natural light.

7. DIY Challenges

Delve into the challenges and considerations of a do-it-yourself installation. While it can be a rewarding project, it’s essential to highlight potential pitfalls and the importance of proper tools and skills.

8. Professional Expertise

Explore the benefits of hiring professionals for the installation. This includes precision, warranty coverage, and the assurance of a seamless integration of windows into your existing garage door.

9. Reinforcement Measures

Discuss measures to ensure that adding windows doesn’t compromise the security of your garage. Reinforcing the door and using impact-resistant glass are essential considerations.

10. Weather Stripping and Insulation

Highlight the importance of maintaining insulation after adding windows. Weather stripping and insulation solutions play a vital role in preventing energy loss and keeping the garage comfortable.

11. Regular Cleaning and Inspection

Offer practical tips for maintaining the windows, emphasizing regular cleaning and inspection routines to ensure they remain in optimal condition.

12. Addressing Common Issues

Discuss common issues that may arise with garage door windows, such as condensation or minor damage. Provide simple solutions that homeowners can implement.

13. Budget-Friendly Options

Explore budget-friendly options for adding windows, ensuring that homeowners can enhance their garage without breaking the bank.

14. Long-Term Investment

Highlight the long-term benefits of this investment, both in terms of energy savings and the potential increase in property value.

Conclusion:

In conclusion, adding windows to an existing Garage Door Repair Southlake TX is a transformative project that offers a myriad of benefits. From increased natural light to enhanced curb appeal, the decision to undertake this endeavor can significantly improve both the functionality and aesthetics of your home.

Southlake Garage Door & Gate Repairs

817-587-0445

Page 1 of 7

Powered by WordPress & Theme by Anders Norén