Local Businesses Blog in Texas

Month: October 2023 Page 2 of 7

How to Repair Hardwood Floor Scratches and Damage – Floor N More

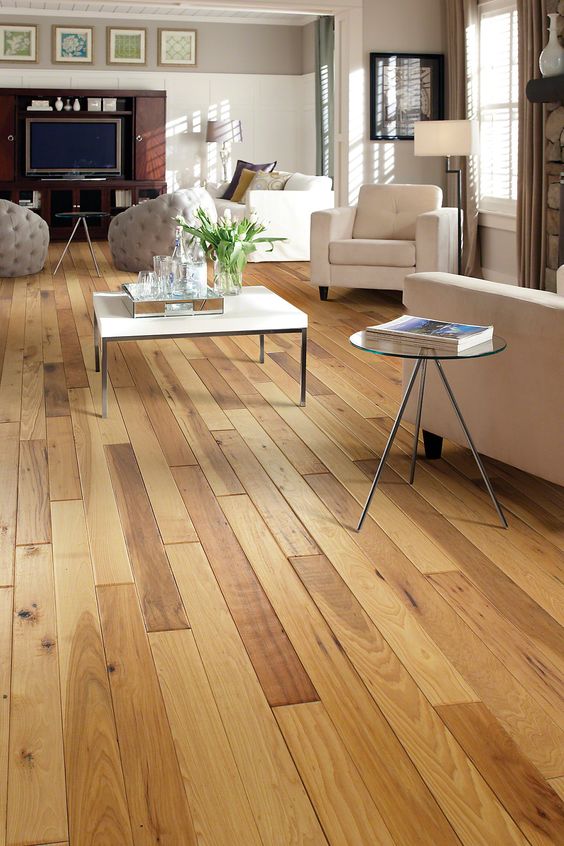
There’s something undeniably alluring about hardwood floors. The timeless beauty and warmth they bring to a home are second to none. However, like any beautiful thing, hardwood floors are not immune to wear and tear. Scratches, dents, and other damage are an inevitable part of a floor’s life, especially in a busy household. As a proud owner of hardwood floors, I’ve had my fair share of scratched and damaged surfaces.

In hardwood flooring, I’ll share my experience and guide you through the process of repairing hardwood floor scratches and damage, helping you restore your floors to their former glory.

1. Assess the Damage

Before diving into repairs, it’s essential to assess the extent of the damage. This will help you determine the appropriate repair method and materials needed. Here’s how to evaluate the damage:

  • Light Scratches: Light surface scratches typically affect only the finish, not the wood itself. They may appear white or shallow. You can usually fix these with minimal effort.
  • Deeper Scratches: Deeper scratches penetrate the wood, revealing the raw wood underneath the finish. These may require more extensive repairs.
  • Dents: Dents are typically small depressions or divots in the wood. They may or may not involve a breach of the finish.
  • Gouges or Cracks: Gouges and cracks are more significant, requiring more extensive repairs. They may involve actual damage to the wood itself.

2. Repairing Light Surface Scratches

For light surface scratches that haven’t penetrated the wood, you can use these methods to restore the finish:

  • Baking Soda and Water: Create a paste using baking soda and water. Apply it to the scratched area and gently rub it in with a soft cloth. Wipe it clean, and the scratch should be less noticeable.
  • Mineral Spirits: Soak a clean cloth in mineral spirits and gently rub it over the scratched area. This can help dissolve the finish around the scratch and make it less noticeable.
  • Walnut Meat: Believe it or not, a walnut can be used to hide shallow scratches. Rub the meat of the walnut over the scratch, and the natural oils can darken the area.
  • Use a Wood Touch-Up Marker: You can find wood touch-up markers that closely match the color of your hardwood floor. Simply fill in the scratch with the marker, then wipe away any excess.
  • Wood Floor Polish: Apply a wood floor polish to the scratched area, following the manufacturer’s instructions. This can help renew the finish and diminish the appearance of light scratches.

3. Dealing with Deeper Scratches

For scratches that have penetrated the finish and affected the wood underneath, a more involved repair process is necessary. Here’s how to approach deeper scratches:

  • Sand the Area: Carefully sand the scratched area using fine-grit sandpaper. Always sand with the grain of the wood to avoid creating more damage. Once the scratch is less visible, switch to a finer grit for a smoother finish.
  • Fill with Wood Filler: Apply a wood filler that closely matches the color of your hardwood floor. Fill in the scratch and use a putty knife to smooth it out. Allow it to dry according to the manufacturer’s instructions.
  • Sand Again: Once the wood filler is dry, sand the area again to ensure a smooth and level surface. You may need to use progressively finer grits of sandpaper to achieve the desired finish.
  • Stain and Finish: If the scratched area is noticeable after sanding and filling, you can stain and refinish the spot to match the rest of the floor. Apply the stain, let it dry, and then apply a matching finish. Feather the stain and finish into the surrounding floor for a seamless look.

4. Addressing Dents and Gouges

Dents and gouges require a slightly different approach, as they involve depressions in the wood. Here’s how to tackle them:

  • Steam Method: For dents, you can try the steam method. Place a damp cloth over the dent and use an iron on a low setting to apply steam. The steam can help the wood fibers swell and lift the dent.
  • Fill with Wood Filler: For both dents and gouges, you’ll need to use wood filler. Fill the damaged area, smooth it out, and let it dry. Sand the area to achieve a level surface, as mentioned in the previous section.
  • Stain and Finish: Just like with deeper scratches, if the filled area is still noticeable, you can stain and finish it to match the rest of the floor. Apply the stain, let it dry, and then apply a matching finish, feathering it into the surrounding floor.

5. Preventive Measures

Of course, the best way to address hardwood floor damage is to prevent it in the first place. Here are some preventive measures to keep your floors looking their best:

  • Use Rugs and Mats: Place rugs or mats in high-traffic areas to protect your hardwood floors from excess wear. Make sure these have non-slip backing to avoid accidents.
  • Furniture Pads: Attach felt or rubber pads to the legs of your furniture to prevent scratches and dents when moving or rearranging furniture.
  • Regular Maintenance: Maintain a regular cleaning routine to keep dirt and debris from accumulating on the surface. Dust and sweep regularly to avoid abrasive particles.
  • Humidity Control: Maintain proper humidity levels in your home to prevent wood from expanding or contracting excessively. This helps prevent cupping and gapping.
  • Take Care with Pets: Keep your pets’ claws trimmed to minimize scratches, and clean up any accidents promptly to avoid staining and warping.

6. Seek Professional Help

While many minor scratches and damage can be repaired with DIY methods, some situations may require professional intervention. If you have extensive or severe damage to your hardwood floors, or if you’re not confident in your ability to make the necessary repairs, it’s wise to seek the help of a professional flooring specialist. They can assess the damage and provide the best solution to restore your floors to their original splendor.

Conclusion

Hardwood flooring are a beautiful investment in your home, and with proper care and maintenance, they can last for generations. When scratches, dents, or other damage occur, it’s essential to address them promptly and effectively to maintain the floor’s beauty and integrity. By following these repair techniques and preventive measures, you can ensure your hardwood floors continue to be a source of pride and elegance in your home. So, don’t fret over the occasional blemish; instead, take action to restore the elegance of your hardwood floors and enjoy their timeless beauty for years to come.

Floor N More

1621 E Southlake Blvd, Southlake, TX 76092, United States

817-310-6331

How To Adjust An Uneven Garage Door – Lake Arlington Gates & Garage Doors

Adjusting an uneven Garage Door Repair Lake Arlington TX is a task that can be tackled with a bit of patience and the right set of tools.

A misaligned garage door not only affects its aesthetic appeal but also poses potential operational issues. Here’s a comprehensive guide with step-by-step instructions on how to adjust an uneven garage door.

: Safety First

Before diving into any adjustments, prioritize safety. Disconnect the power to the garage door opener. Most openers have a release cord that allows you to operate the door manually when pulled. This ensures that the door won’t unexpectedly move during adjustments.

: Identify the Issue

Examine your garage door to determine which side is causing the imbalance. Note whether the left or right side is higher or lower than the other. Understanding the specific problem will guide your adjustments.

: Inspect the Tracks

Garage door tracks are crucial for smooth operation. Inspect both sides for any obstructions, debris, or damage. Use a mild cleaner and a brush to clean the tracks thoroughly. Ensure that the tracks are free from any hindrances.

: Check for Loose Hardware

Tighten all the nuts, bolts, and screws on the garage door. Pay special attention to the ones securing the tracks, rollers, and hinges. Over time, vibrations can cause hardware to loosen, contributing to an uneven door.

: Adjust the Tracks

Loosen the screws or bolts securing the tracks to the garage door frame. Gently tap the misaligned track with a rubber mallet to bring it back into alignment. Use a level to ensure that the tracks are straight and then tighten the screws or bolts.

: Adjust the Rollers

Inspect the rollers on the side of the door that is uneven. Worn or damaged rollers can contribute to misalignment. If needed, replace them. Loosen the screws holding the roller brackets in place. Adjust the rollers to make them level with the opposite side and then tighten the screws.

: Adjust the Spring Tension

Garage doors operate with the help of tension springs. If one side of the door is lower than the other, it might be due to uneven spring tension. Adjust the tension on the springs, but exercise caution, as these springs are under high tension and can be dangerous. Consult the manufacturer’s instructions for guidance or consider seeking professional help for this step.

: Lubricate Moving Parts

Proper lubrication is essential for the smooth operation of a garage door. Apply a silicone-based lubricant to all moving parts, including rollers, hinges, and springs. This reduces friction, allowing the door to move more smoothly and preventing future alignment issues.

: Test the Door

After making adjustments, manually operate the garage door and use the opener to check for smooth and even movement. Pay attention to any unusual sounds or jerky movements. If the door still appears uneven, repeat the necessary adjustments until it operates properly.

: Professional Assistance

If, after multiple attempts, you’re unable to correct the unevenness, or if you’re uncomfortable with certain adjustments, it’s advisable to seek professional help. Garage door professionals have the expertise and tools to address complex issues safely.

Conclusion:

Adjusting an uneven Garage Door Repair Lake Arlington TX is a task that requires attention to detail and a systematic approach. By following these steps, you can ensure that your garage door operates smoothly and evenly, enhancing both its functionality and lifespan. Remember to prioritize safety throughout the process and seek professional assistance if needed. Regular maintenance and periodic checks can prevent future alignment issues, keeping your garage door in top-notch condition.

Lake Arlington Gates & Garage Doors

4101 W Green Oaks Blvd #305-318, Arlington, TX 76016, United States

1-817-993-6623

The Advantages of Professional Window Replacement – NTHE Window Replacement Mansfield

As a homeowner who has embarked on the journey of improving my living space, I can attest to the significant impact that professional window replacement has had on both the aesthetics and functionality of my home.

By following Window Replacement Mansfield TX, I’ll share my personal experiences and insights into the world of professional window replacement, exploring the numerous advantages it offers and why I believe it’s a worthwhile investment for any homeowner.

Enhancing Energy Efficiency

One of the primary motivations for my decision to invest in professional window replacement was the desire to improve the energy efficiency of my home. Old and inefficient windows can lead to energy wastage and higher utility bills. By opting for energy-efficient windows, I experienced a range of advantages, including:

  1. Lower Utility Bills: Energy-efficient windows, often featuring low-E coatings and double or triple glazing, minimize heat transfer, keeping indoor temperatures stable. This translates to reduced heating and cooling costs, leading to lower monthly utility bills.
  2. Increased Comfort: The improved insulation provided by energy-efficient windows creates a more comfortable living environment. My home felt cozier in the winter and cooler in the summer, enhancing overall comfort.
  3. Environmental Impact: Using less energy for heating and cooling reduces your carbon footprint. I felt a sense of satisfaction knowing that I was contributing to a more sustainable lifestyle.

Enhanced Aesthetics and Curb Appeal

The visual impact of professional window replacement cannot be overstated. The transformation that new windows brought to my home’s aesthetics was truly remarkable. Some advantages include:

  1. Modern Aesthetics: Outdated windows can make a home look tired and uninspiring. Replacing them with modern, stylish designs instantly updated the overall look of my home, both inside and out.
  2. Customization: Professional window replacement allowed me to select window styles, materials, and finishes that perfectly matched my home’s architectural style. The ability to customize the appearance of my windows was a significant advantage.
  3. Curb Appeal: The visual impact of new windows contributed to my home’s curb appeal. Potential buyers and visitors were immediately drawn to the inviting and well-maintained appearance.

Improved Natural Light and Views

Windows are the primary source of natural light in a home. By investing in professional window replacement, I was able to enjoy several advantages in this regard:

  1. Ample Daylight: Energy-efficient windows often feature larger glass areas that allow more natural light to enter your home. This created a brighter and more inviting interior.
  2. Improved Views: The clarity and quality of the glass in new windows significantly improved the views from inside my home. I could enjoy the beauty of my surroundings without any hindrance.
  3. Sunlight Control: Certain window features, such as low-E coatings and tints, allowed me to control the amount of sunlight entering my home, preventing excessive glare and heat gain.

Reduced Maintenance

Old windows often require extensive maintenance, including painting, caulking, and regular inspections. By opting for professional window replacement, I experienced advantages such as:

  1. Minimal Maintenance: New windows are designed to be low-maintenance. I no longer had to worry about repainting or sealing my windows regularly, freeing up my time and reducing maintenance costs.
  2. Durability: Modern windows are constructed with durable materials, ensuring a longer lifespan and less need for repairs. This was a significant advantage in terms of long-term cost savings.

Enhanced Security and Safety

Security is a top priority for homeowners, and professional window replacement can enhance the safety of your home in several ways:

  1. Upgraded Locks and Hardware: New windows often come with advanced locking mechanisms and hardware, providing better security against potential intruders.
  2. Impact Resistance: Some window options, like laminated or tempered glass, offer enhanced impact resistance, reducing the risk of break-ins and damage during severe weather.
  3. Child Safety: Modern window designs often include safety features like childproof locks and easy-to-reach hardware, offering peace of mind for families with young children.

Increased Resale Value

The advantages of professional window replacement extend to the potential resale value of your home:

  1. Higher Appraisal Value: Energy-efficient and well-maintained windows can increase the overall appraisal value of your home. This can be a significant advantage if you decide to sell your property.
  2. Faster Sale: Homes with updated windows often attract more potential buyers and can sell more quickly. The improved aesthetics and energy efficiency of new windows are appealing selling points.

Professional Installation

While professional window replacement offers numerous advantages, the key to realizing these benefits lies in the quality of the installation. Some advantages of professional installation include:

  1. Proper Sealing: Professional installers ensure that your new windows are properly sealed, preventing drafts and water infiltration.
  2. Customization: Experienced professionals can guide you in selecting the right window styles and features to match your home’s unique needs.
  3. Warranty: Many professional installations come with warranties, providing peace of mind knowing that any issues will be addressed promptly.

In conclusion, based from Window Replacement Mansfield TX, professional window replacement has had a profound impact on my home’s comfort, aesthetics, and functionality. The numerous advantages I’ve experienced, from enhanced energy efficiency and aesthetics to increased security and safety, have reinforced my belief in the value of this investment. Whether you’re looking to improve your home for your own enjoyment or considering resale value in the future, professional window replacement is a wise choice that offers both immediate and long-term benefits.

NTHE Window Replacement Mansfield

1771 Calender Rd, Mansfield, TX 76063, United States

817-592-8450

How To Reset Password On Liftmaster Garage Door Opener – Trophy Club Overhead & Garage Doors

Resetting the password on your LiftMaster Garage Door Repair Trophy Club TX is a straightforward process that involves accessing the control panel, entering programming mode, selecting the password option, resetting the password, and then testing the new password.

Follow these detailed steps to ensure a successful password reset, enhancing the security of your garage door opener system.

: Accessing the Control Panel

Begin by locating the control panel on your LiftMaster garage door opener. This panel is typically situated on the side or near the motor unit. Open the control panel cover to reveal the programming buttons and display.

: Entering Programming Mode

Press and hold the “Program” button on the control panel until the LED light illuminates. This indicates that the unit is now in programming mode.

: Selecting the Password Option

Navigate through the programming options using the arrow or scroll buttons on the control panel. Look for the “Password” or “PIN” setting and select it.

: Resetting the Password

If prompted, enter the current password. If you are unsure of the current password, consult your owner’s manual for default passwords or procedures to reset.

After entering the current password, you will likely be prompted to enter a new password. Choose a strong and secure password that is both memorable for you and difficult for others to guess.

Follow any additional on-screen instructions to confirm the new password.

: Exiting Programming Mode

Once the password is successfully reset, exit programming mode. This can usually be done by pressing the “Program” button again or following on-screen prompts. The LED light should turn off, indicating that the unit is no longer in programming mode.

: Testing the New Password

Close the control panel cover and test the new password by entering it on the keypad or remote control associated with your LiftMaster garage door opener. Ensure that the garage door opens and closes as expected with the new password.

: Updating Remote Controls

If you use remote controls to operate your garage door, it may be necessary to sync them with the new password. Consult your owner’s manual for specific instructions on updating remote control settings.

: Documentation

Record the new password in a secure location for future reference. This documentation will prove helpful in case you forget the password again or need to share it with trusted individuals.

By following these detailed steps, you can successfully reset the password on your LiftMaster Garage Door Repair Trophy Club TX, contributing to the overall security of your home. Regularly updating passwords is a good practice to ensure the safety and privacy of your garage space.

Trophy Club Overhead & Garage Doors

2412 Trophy Club Dr, Trophy Club, TX 76262, United States

1-817-646-5315

How To Reset Sears Garage Door Keypad – Arlington Overhead & Garage Doors

The Garage Door Repair Arlington TX serves as a convenient means of accessing your garage without the need for traditional keys.

A malfunctioning keypad can lead to inconvenience and potential security risks.

Overview of the Sears garage door keypad

Sears, a trusted name in home appliances, offers a reliable and user-friendly garage door keypad. Understanding its features and the reset process is crucial for homeowners.

Understanding the Need to Reset

Common issues requiring a reset

Over time, garage door keypads may face issues such as unresponsiveness, connectivity problems, or the need for a change in security PIN. Resetting becomes necessary to address these issues effectively.

Benefits of a reset

A periodic reset not only resolves technical glitches but also enhances the overall security of your garage. It ensures that your keypad operates at its optimal level.

Step-by-Step Guide for Resetting Sears Garage Door Keypad

Locating the reset button

The first step involves locating the reset button on your Sears garage door opener. This is typically found on the back or side of the motor unit.

Pressing the reset button

Once located, press and hold the reset button until the LED light on the keypad begins to blink. This indicates that the keypad is ready for a reset.

Entering a new PIN

Follow the manufacturer’s instructions to enter a new PIN. Choose a combination that is easy for you to remember but challenging for others to guess.

Troubleshooting Tips

Dealing with unresponsive keypads

If your keypad remains unresponsive after the reset, check the battery and ensure there are no obstructions hindering button functions.

Addressing connectivity issues

In cases of connectivity problems, check for interference from other electronic devices. Repositioning the keypad may also improve signal reception.

Regular Maintenance for Optimal Performance

Cleaning the keypad

Regularly clean the keypad using a soft, damp cloth to remove dirt and debris. This simple practice contributes to the longevity of the keypad.

Checking for physical damage

Inspect the keypad for any signs of physical damage. Promptly address issues like worn-out buttons or cracked casing to avoid further complications.

Advanced Settings and Customization

Exploring additional features

Take advantage of advanced features such as vacation mode or one-button closing. Refer to the user manual for instructions on customization.

Setting up temporary PINs

For added security, set up temporary PINs for guests or service providers. Remove these temporary codes once their purpose is served.

Security Measures

Importance of a secure PIN

Emphasize the importance of choosing a secure PIN. Avoid easily guessable combinations, such as birthdates or consecutive numbers.

Changing the PIN periodically

For enhanced security, change your garage door keypad PIN periodically. This practice prevents unauthorized access and adds an extra layer of protection.

In conclusion, resetting your Sears Garage Door Repair Arlington TX is a simple yet crucial task to ensure the continued functionality and security of your garage. By following these steps and incorporating regular maintenance practices, you can enjoy the convenience and peace of mind that a well-functioning keypad provides.

Arlington Overhead & Garage Doors

817-646-2532

How To Reset The Genie Garage Door Keypad – Haslet Gates & Garage Doors

Garage Door Repair Haslet TX have revolutionized the way we access our homes, providing convenience and security.

However, encountering issues with your Genie garage door keypad can be frustrating. Fear not, as we embark on a detailed journey to guide you through the process of resetting your Genie garage door keypad, ensuring seamless access to your garage.

Understanding the Genie Garage Door Keypad

Before we delve into the reset process, it’s essential to understand the basics of how the Genie garage door keypad operates. Genie keypads are designed to communicate with Genie garage door openers, offering a secure and keyless entry method. Knowing this foundation is crucial as we troubleshoot and reset the keypad.

Reasons for Resetting

Various issues might prompt you to reset your Genie garage door keypad. Forgotten codes, technical glitches, or the need for enhanced security are common reasons. Resetting the keypad is a proactive measure to address these issues promptly, preventing any inconvenience in the future.

Step-by-Step Guide to Resetting Your Genie Garage Door Keypad

: Locate the Reset Button

The reset button is the key to initiating the reset process. On Genie keypads, you’ll typically find this button on the back or side of the device. Take a moment to inspect your keypad and locate the reset button.

: Press and Hold the Reset Button

Once you’ve found the reset button, press and hold it down for approximately 10 seconds. As you do this, observe the lights on the keypad; they should start flashing, indicating that the keypad has entered reset mode.

: Release the Reset Button

As the lights flash, release the reset button. This action signals that the keypad is ready for a new code. The reset process is now initiated, and you’re one step closer to regaining control of your garage door access.

: Enter a New Code

With the keypad in reset mode, it’s time to establish a new code. Use the numbered buttons on the keypad to input your desired code. Once you’ve entered the new code, press the “Enter” or “Set” button to confirm.

: Test the New Code

To ensure the reset was successful, test the new code by entering it on the keypad and pressing “Enter” or “Open.” The garage door should respond accordingly, confirming that the new code is now in effect.

Troubleshooting Tips

Keypad Not Responding

If the keypad doesn’t respond after the reset, the first thing to check is the battery. Replace it if necessary, and ensure the keypad is within range of the Genie garage door opener.

Forgotten Code

If you’ve forgotten your code, consult the Genie garage door opener’s manual for instructions on code recovery. You can also contact Genie customer support for assistance.

Lights Not Flashing

If the lights on the keypad don’t flash during the reset, double-check that you’re holding down the reset button for the recommended 10 seconds. If issues persist, refer to the Genie manual for additional troubleshooting tips.

The Importance of Regular Maintenance

While the reset process is a powerful tool for addressing immediate issues, regular maintenance is the key to preventing future problems. Periodically check your Genie garage door keypad for any signs of wear, clean the keypad, and ensure all buttons are functioning correctly.

Conclusion:

In conclusion, resetting your Genie Garage Door Repair Haslet TX is a straightforward process that can save you from the frustration of access issues. By following the step-by-step guide and implementing troubleshooting tips, you’ll not only reset the keypad but also enhance the security and convenience of your garage door entry.

Haslet Gates & Garage Doors

817-482-3394

Top Soundproof Window Installation Techniques – Window Replacement Experts Mckinney

As a homeowner in a bustling urban neighborhood, I know firsthand how disruptive noise can affect the tranquility of one’s home. Whether it’s the constant hum of traffic, the occasional blaring sirens, or even just the neighbors’ lively conversations, unwanted noise can be a constant source of frustration. That’s why I decided to explore soundproof window installation techniques to create a quieter and more peaceful living space.

By following Window Replacement McKinney TX, I’ll share my first-person perspective on the various methods and strategies I’ve discovered for soundproofing windows.

1. Identifying the Noise Sources

Before embarking on my journey to soundproof my windows, I needed to identify the sources of the noise. I made a list of all the potential noise culprits, including traffic, neighbors, and outdoor machinery. This step was crucial because it helped me determine the level of soundproofing needed for each window.

2. Double Glazing and Triple Glazing

One of the most effective soundproofing techniques I’ve come across is double glazing or even triple glazing. Double glazing involves using two layers of glass separated by an air gap, while triple glazing adds a third layer. The extra layers of glass and the air gaps between them act as a barrier to sound, significantly reducing noise infiltration. I opted for double glazing for the windows facing the street, and the difference was immediately noticeable.

3. Soundproof Window Inserts

For a more budget-friendly option, I explored soundproof window inserts. These are removable panels that fit snugly over your existing windows. They come in various materials, such as acrylic, glass, and laminated glass, and effectively reduce noise penetration. I found these inserts to be a convenient solution, especially for rooms where I didn’t want to replace the entire window.

4. Weatherstripping and Sealing

Proper sealing is essential for soundproofing. Even the smallest gaps or cracks can allow noise to enter your home. I meticulously checked for any gaps around my window frames and used weatherstripping to seal them. For added protection, I applied acoustic caulk, which not only seals gaps but also absorbs sound vibrations.

5. Acoustic Curtains and Blinds

I discovered that acoustic curtains and blinds are another valuable addition to soundproofing efforts. These window treatments are designed to absorb and block sound waves. I installed acoustic curtains in my bedroom, and they not only enhanced soundproofing but also created a cozy atmosphere.

6. Exterior Noise Barriers

To address outdoor noise sources, I explored the idea of creating exterior noise barriers. While I couldn’t control the street traffic, I installed dense hedges and a garden wall to act as natural sound blockers. This landscaping not only enhanced the aesthetics of my property but also reduced noise pollution.

7. Acoustic Window Films

Acoustic window films are a cost-effective solution for soundproofing. These films are applied to the interior surface of the window and can significantly reduce noise penetration. They are particularly useful for windows that don’t require a complete overhaul.

8. Window Plugs and Draft Stoppers

To address smaller windows, I used window plugs and draft stoppers. These simple yet effective devices can be inserted into the window frame to create an airtight seal. They helped reduce noise and drafts simultaneously.

9. Acoustic Panels and Wall Treatments

In some rooms, I opted for a more holistic approach by incorporating acoustic panels and wall treatments. These not only enhance soundproofing but also add a touch of style to the interior. The panels absorb sound waves, reducing echo and noise within the room.

10. Changing Window Styles

During my soundproofing journey, I realized that different window styles have varying levels of soundproofing capabilities. For example, awning and casement windows, which open outward and have tight seals when closed, are more soundproof than single-hung or double-hung windows. I replaced some of my windows with awning styles, especially in rooms where I needed maximum noise reduction.

11. Window Replacement

In cases where existing windows were beyond repair or didn’t meet my soundproofing needs, I opted for complete window replacement. Modern soundproof windows are designed with advanced materials and construction techniques that significantly reduce noise infiltration. While this can be a more substantial investment, the long-term benefits in terms of peace and quiet are well worth it.

12. Professional Installation

For more complex soundproofing projects or window replacements, I relied on professional installers. Their expertise ensured that the soundproofing solutions were correctly implemented, maximizing their effectiveness.

13. Regular Maintenance

Soundproofing is an ongoing process, and I’ve learned the importance of regular maintenance. Checking for gaps, resealing, and ensuring that all soundproofing elements are in good condition helps maintain a peaceful and quiet living space.

In conclusion, based from Window Replacement McKinney TX, soundproof window installation techniques have transformed my home into a serene retreat from the urban noise. By identifying noise sources, utilizing various soundproofing methods, and carefully implementing each solution, I’ve created a more peaceful and enjoyable living environment. Whether you’re dealing with noisy neighbors, traffic, or other sources of sound pollution, these techniques can help you take control of your home’s acoustic ambiance and enjoy the tranquility you deserve.

Window Replacement Experts Mckinney

9932 Prairie Dog Ln, McKinney, TX 75071, United States

972-895-8221

How To Program Garage Door Opener To Remote – Bedford Gates & Garage Doors

I’m standing in my Garage Door Repair Bedford TX, remote control in hand, ready to make my life a bit more convenient.

The first thing I do is grab the manual for my garage door opener – you know, that booklet that always seems to be hiding when you need it.

After a bit of a hunt, I find it and flip through the pages until I locate the promised land – the section on programming the remote. Now, my garage door opener has this elusive “Learn” button. I imagine it’s like the wizard behind the curtain, holding the key to a magical connection between my remote and the garage door.

I press and hold the “Learn” button, watching as the little indicator light comes to life, telling me it’s ready to absorb the wisdom of my remote. But wait, there’s a twist! If this remote had a past life with another garage door, I have to wipe its memory clean. So, I press and hold that “Learn” button a bit longer until the light decides to take a nap.

Now comes the fun part – choosing a PIN. It’s like giving my remote its secret handshake. I settle on a number combo that feels just right – easy to remember, but not too obvious. With my PIN in hand, I press the “Learn” button again, and the indicator light is back in action, waiting for my next move.

Time to program this bad boy. I press and hold the button on my remote that I want to dedicate to the garage door. I keep my finger on it until the indicator light on the opener blinks, signaling that the magic has happened. My remote and garage door are officially best buds.

Feeling triumphant, I step into the garage and hit that programmed button. Lo and behold, the garage door responds, obediently lifting itself up. Success! But, just to be sure, I repeat the process for any other remotes I have lying around.

I bask in the glory of my newfound garage door control, making mental notes of where I stashed the manual for safekeeping. And just to be extra sure my castle is secure, I check if there’s a way to lock out other remotes. I follow the manual’s instructions like a sacred text, ensuring that only my trusted remotes hold the keys to my garage kingdom.

With everything set up, I stand back, remote in hand, marveling at my Garage Door Repair Bedford TX newfound obedience. Life just got a bit more high-tech in my corner of the world, all thanks to a little button called “Learn” and a PIN with personality.

Bedford Gates & Garage Doors

817-886-3064

Maintaining Your Wooden Garage Door: A Care Guide – Sanger Garage Door Experts

As a homeowner with a deep appreciation for the classic charm of a wooden garage door, I’ve learned that maintaining its beauty and functionality is a labor of love. Wooden garage doors add character and warmth to a home’s facade, but they also require regular care to stay in optimal condition.

In reference to Garage Door Repair Sanger TX, I’ll share my first-person perspective on the art of maintaining a wooden garage door, from routine tasks to addressing common issues.

The Allure of Wooden Garage Doors

Wooden garage doors have an undeniable appeal. They exude a timeless elegance that enhances a home’s curb appeal, adding a touch of rustic charm or classic sophistication, depending on the style of the door. However, their natural beauty comes with a few challenges. Wood is a material that can be affected by the elements and requires consistent care to maintain its appearance and functionality.

Regular Maintenance Routine

Maintaining a wooden garage door is an ongoing process. A well-established maintenance routine ensures that your door stays in excellent condition and continues to be a source of pride for your home. Here’s how I approach this routine:

1. Cleaning and Inspection:

I start with a thorough cleaning and inspection. Using a gentle detergent and water, I clean the surface of the door to remove dirt and grime. While cleaning, I keep an eye out for any signs of damage, such as cracks, rot, or peeling paint.

2. Sanding and Refinishing:

If I notice any imperfections during the inspection, I address them promptly. Sanding away rough spots and applying a fresh coat of paint or stain helps maintain the door’s protective barrier and its visual appeal. Sanding also helps to prepare the surface for refinishing.

3. Refinishing:

Refinishing is a crucial step in preserving the wood. Depending on the type of finish your garage door has, this can involve applying a new coat of paint, stain, or sealant. A high-quality finish not only enhances the appearance but also protects the wood from moisture and UV damage.

4. Weather Stripping:

To keep out drafts and prevent moisture from seeping into the garage, I ensure that the weather stripping along the bottom and sides of the door is in good condition. If it’s damaged or worn, I replace it to maintain an effective seal.

5. Lubrication:

To prevent friction and ensure smooth operation, I lubricate the moving parts of the garage door, including hinges, rollers, and tracks. I use a high-quality, non-silicone-based garage door lubricant for this purpose.

Common Wooden Garage Door Issues and Solutions

Wooden garage doors are prone to specific issues due to their natural composition. Over the years, I’ve encountered and successfully addressed several common problems:

1. Rot and Water Damage:

Wood is susceptible to rot and water damage, especially in humid or rainy climates. I’ve learned to be diligent in inspecting for any signs of rot and addressing them promptly. When detected early, rot can often be repaired by removing the affected section and replacing it with a new piece of wood.

2. Paint or Stain Peeling:

Peeling paint or stain can make your door look tired and worn. When I notice peeling, I take the time to sand the affected areas and reapply the paint or stain. A well-executed refinishing job can breathe new life into the door’s appearance.

3. Warping or Swelling:

Changes in humidity and temperature can cause wooden garage doors to warp or swell. If the door becomes difficult to open or close, I often adjust the tension in the springs or tracks to compensate for the changes. In some cases, slight warping can be corrected through careful adjustments.

4. Insect Infestations:

Insects, particularly wood-boring ones, can damage the wood over time. I regularly inspect for signs of insect activity, such as small holes or sawdust-like debris. If I suspect an infestation, I seek professional pest control assistance to address the issue.

5. Aged Hardware:

The hardware on a wooden garage door, including hinges and rollers, can deteriorate over time. When I notice signs of aging, such as rust or reduced functionality, I replace the hardware to ensure the door operates smoothly and safely.

Investing in a Garage Door Cover

To further protect my wooden garage door from the elements, I’ve invested in a high-quality garage door cover. These covers are designed to shield the door from rain, snow, and UV rays. They act as an additional layer of protection, helping to extend the life of the wood and reduce the frequency of refinishing.

Conclusion

Overall, according to Garage Door Repair Sanger TX, maintaining a wooden garage door is a labor of love, but the results are more than worth the effort. The timeless beauty and elegance of a wooden door can transform the curb appeal of your home, but it requires regular attention to keep it in peak condition. By following a consistent maintenance routine and addressing common issues promptly, you can enjoy the aesthetic and functional benefits of your wooden garage door for years to come. I’ve found that the care I invest in my wooden garage door is not only a source of pride but also a testament to the enduring value of classic craftsmanship in the modern world.

Sanger Garage Door Experts

600 N Stemmons St, Sanger, TX 76266, United States

940-308-2092

Why It’s Essential to Balance Your Garage Door? – Coppell Gates & Garage Doors

I have always been a proactive homeowner, taking care of various maintenance tasks around the house. Whether it’s fixing a leaky faucet or painting a room, I enjoy the sense of accomplishment that comes with DIY projects. However, one day, I encountered a unique challenge – my garage door started making strange noises, and I could tell something was amiss. After a little investigation, I realized that the source of the problem was the garage door springs.

By following Garage Door Repair Coppell TX, I’d heard that garage door springs are a critical component of the system, and when they malfunction, it can be a major issue. As I stood there, pondering my options, I thought, “Can I repair my garage door spring on my own, or do I need professional help?”

So, I embarked on a journey to understand the complexities of garage door springs, the potential risks, and the decision-making process.

The Garage Door Spring Conundrum

Before delving into the repair, I wanted to understand what garage door springs were all about. Garage doors typically have two types of springs – torsion springs and extension springs. These springs serve the crucial role of counterbalancing the weight of the garage door.

Why the Springs Matter

The springs are essential because they offset the immense weight of the garage door, making it possible to lift and lower the door with relative ease. If the springs are in good condition and properly adjusted, the door moves smoothly and responds to the garage door opener without exerting too much force on the system.

However, when the springs break or lose tension, the garage door can become extremely heavy and challenging to operate. Attempting to lift or lower it manually can be dangerous, and relying on the garage door opener to do all the work can place a significant strain on the opener, potentially leading to further issues.

The DIY Dilemma

As I contemplated the idea of repairing the garage door spring myself, I came across several significant considerations:

1. Safety First: One of the first lessons I learned was that garage door spring repair can be incredibly hazardous. These springs are wound with a significant amount of tension. Attempting to adjust or replace them without the proper knowledge and tools could result in severe injuries or property damage.

2. Specialized Knowledge: Garage door spring repair is not your typical DIY project. It requires a specific skill set and a deep understanding of the mechanics involved. Attempting the repair without this knowledge could lead to complications or make the situation worse.

3. Tools and Equipment: Properly adjusting or replacing garage door springs requires specialized tools and safety equipment, which most homeowners don’t have readily available. Without the right tools, the task becomes even riskier.

4. The Tension Factor: Adjusting the tension of garage door springs is a delicate process. The amount of tension in the springs needs to be just right to ensure the door is properly balanced. An incorrect adjustment could lead to safety hazards or damage to the door and opener.

The Professional Perspective

To get a better understanding of what I was dealing with, I decided to consult a professional garage door technician. The technician explained the risks associated with garage door spring repair and emphasized the importance of safety precautions and expertise in handling these springs.

Here are some insights I gained from this conversation:

1. Safety Measures: Garage door technicians use protective gear and follow strict safety protocols when working on springs. They are trained to anticipate potential dangers and take precautions to avoid accidents.

2. Expertise Matters: Garage door technicians have the experience and knowledge to assess the condition of the springs, determine the required repairs, and execute them accurately. Their expertise ensures that the garage door operates safely and efficiently.

3. Specialized Tools: Professionals have access to the specialized tools required for working on garage door springs. These tools enable them to make precise adjustments and replacements.

The Decision

After careful consideration, I chose to have the garage door technician repair the broken spring. I realized that the risks associated with DIY garage door spring repair were not worth it. The professional had the knowledge, experience, and safety measures to complete the repair effectively.

The Repair Process

The technician skillfully replaced the broken garage door spring, adjusting the tension to ensure the door was balanced. He performed a thorough inspection of the entire garage door system to confirm that no other issues were present.

The garage door was once again in proper working order, opening and closing smoothly and safely.

Key Takeaways

My experience with the garage door spring repair taught me several important lessons:

1. Safety First: Safety should always be the top priority when dealing with garage door spring repairs. The risks associated with these springs are substantial, and any attempts to repair them should be approached with extreme caution.

2. Professional Expertise: Garage door spring repair is not a DIY project. Professionals have the knowledge, training, and tools to perform the repair safely and effectively.

3. Maintaining Balance: Garage door springs play a crucial role in maintaining the balance of the door. When one spring breaks, it’s essential to address the issue promptly to prevent further damage and ensure the door’s proper function.

4. Long-Term Reliability: Hiring a professional for the garage door spring repair ensures that the job is done correctly, promoting the long-term reliability of the garage door.

In conclusion, according to Garage Door Repair Coppell TX, the garage door spring repair experience was a stark reminder that some tasks around the house should be left to professionals. Safety, expertise, and the risk of further damage to the door are compelling reasons to opt for professional assistance. My journey into this complex repair left me with a greater appreciation for the specialized skills of garage door technicians and a heightened awareness of the importance of safety when dealing with potentially dangerous home maintenance tasks.

Coppell Gates & Garage Doors

755 Blue Jay Ln, Coppell, TX 75019, United States

972-449-7776

Page 2 of 7

Powered by WordPress & Theme by Anders Norén