Local Businesses Blog in Texas

Month: December 2022

How Much Does a New Garage Door Cost? – Camco Commercial Door Company

When I was looking to replace my garage door, I researched extensively to get an idea of the cost involved. The price of a new garage door can vary depending on several factors, including the material, size, design, insulation, and additional features you choose.

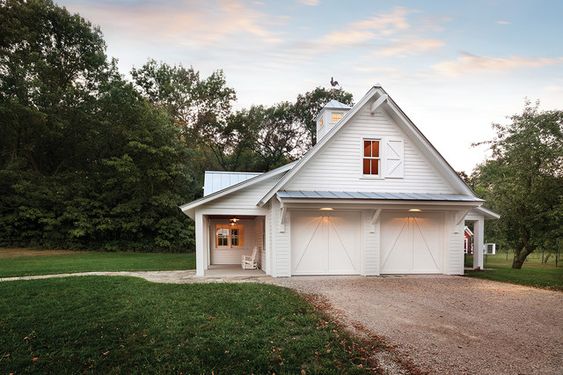
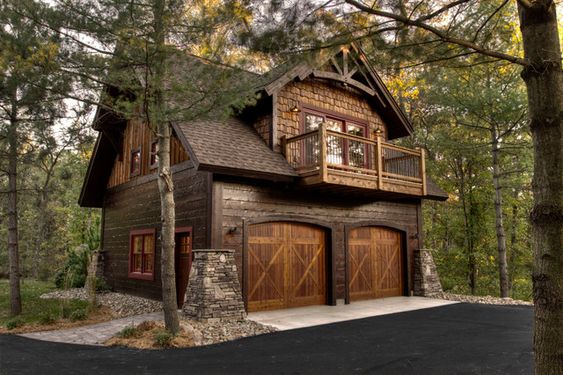
First and foremost, as stated in Garage Door Repair, the material of the garage door plays a significant role in determining the cost. I discovered that steel doors are often the most affordable option, while wood doors tend to be more expensive due to their natural beauty and craftsmanship. Aluminum and fiberglass doors fall somewhere in between in terms of cost.

The size of the garage door is another crucial factor. Standard-sized doors are generally more affordable, but if you have a larger garage or require a custom-sized door, the price will likely increase accordingly.

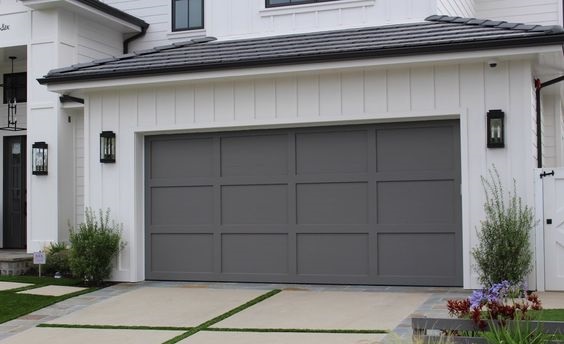
Design and style also impact the cost of a garage door. Basic, plain panel designs are typically more budget-friendly, while doors with decorative elements, windows, or unique designs can be pricier.

Insulation is an important consideration, especially if you live in a region with extreme temperatures. Insulated garage doors are more expensive than non-insulated ones but provide better temperature regulation and energy efficiency. Considering the long-term benefits, I decided to invest in an insulated door.

Additional features and options can add to the overall cost. For example, adding windows to the garage door for natural light or opting for decorative hardware can increase the price. I also discovered that garage doors equipped with smart technology, such as Wi-Fi connectivity or smartphone control, tend to be more expensive due to the advanced features they offer.

The installation cost is another factor to consider. While it’s possible to install a garage door yourself, I chose to hire a professional installer for safety and peace of mind. The installation cost can vary depending on the complexity of the job, any modifications required, and the location.

Finally, regional pricing variations and the reputation of the brand can also influence the cost. It’s essential to research and compare prices from different dealers and manufacturers to get the best value for your money.

Based on my research and discussions with garage door professionals, I found that the cost of a new garage door can range from a few hundred dollars for a basic, non-insulated, single-car steel door to several thousand dollars for a high-end, custom-designed, insulated wooden door with added features.

To get an accurate cost estimate for your specific needs, I recommend reaching out to local garage door dealers or manufacturers. They can provide you with detailed quotes based on the size, material, design, insulation, and additional features you desire.

In conclusion, based from Garage Door Repair, remember to consider not only the upfront cost but also the long-term durability, maintenance requirements, and energy efficiency of the door. Investing in a high-quality garage door that fits your budget and meets your needs is crucial to ensure the security and aesthetics of your home.

Camco Commercial Door Company

853 East Wolf Valley Rd. Heiskell, TN 37754

865-776-9455

How to Attach Banner to Garage Door – Southern Home Creations Garage Doors & Openers

Attaching a banner to a garage door can be a great way to display messages, advertise events, or show support for a cause.

Here’s how I went about it by following steps from Garage Door Repair Services:

First, I chose the perfect banner for my purpose. I carefully selected one that was the right size, made of durable outdoor material, and had grommets for easy attachment. I wanted something eye-catching and readable from a distance.

With my banner in hand, I gathered all the necessary tools and materials for the task. I made sure to have rope, bungee cords, a ladder, measuring tape, scissors, and a few hooks as my preferred methods of attachment.

Before attaching the banner, I cleaned the surface of the garage door where it would be displayed. Using a mild detergent and water, I wiped away any dirt, dust, or debris. It was important to have a clean and dry surface for optimal adhesion.

Next, I measured the dimensions of the banner and carefully planned the placement. I considered the visibility and readability of the message, ensuring it would be easily seen by anyone passing by. I marked the desired location on the garage door using a light pencil.

Now it was time to choose the attachment method that suited my banner and preferences. I decided to use rope and hooks for a secure and straightforward installation. I threaded the rope through the grommets evenly spaced along the banner’s edges. I attached each end of the rope to sturdy fixed points on the garage door using the hooks.

With the banner attached to the hooks, I carefully positioned it on the garage door according to my markings. I started at one corner and worked my way across, making sure the banner was straight and taut. It was important to keep an eye on the alignment to ensure a professional and polished look.

Once I was satisfied with the banner’s placement, I secured the attachment. I tightened the ropes, making sure they were securely fastened to the hooks. This ensured that the banner would withstand wind and other weather conditions without coming loose.

To achieve a clean finish, I used scissors to trim any excess material or hanging edges from the banner. This step added to the overall aesthetic appeal of the display.

To test the installation, I gave the banner a gentle tug to ensure it was securely attached and wouldn’t come loose easily. I stepped back and admired my work from a distance, ensuring the banner was straight and easily readable.

I understood the importance of regular maintenance, so I periodically inspected the attachment points to ensure they remained secure. If the banner became damaged or torn, I promptly replaced it to maintain a high-quality display. When the time came to remove the banner, I carefully detached it from the garage door and stored it appropriately for future use.

Overall, based from Garage Door Repair Services, attaching a banner to my garage door allowed me to express myself, share a message, or promote an event. It added a touch of creativity and personalization to my space, catching the attention of anyone passing by.

Southern Home Creations Garage Doors & Openers

4110 Tench Rd Suite D, Suwanee, GA 30024, United States

770-831-0301

How to Program Linear Garage Door Opener – CCM Overhead Doors

When it comes to programming a Linear garage door opener, I’ve had the opportunity to do it a few times, and it’s a relatively straightforward process. While the specific steps may vary depending on the model and features of your Linear garage door opener, I’ll share the general steps that have worked for me. Keep in mind that it’s always important to consult the instruction manual specific to your Linear garage door opener for accurate programming instructions.

Here’s how I typically program my Linear garage door opener as stated in Garage Door Repair Services:

First, I locate the programming button on the opener unit. In most cases, this button is either labeled as “Learn” or “Program” and can be found near the antenna wire or on the back panel of the opener. It’s important to identify the correct button before proceeding.

If I’m reprogramming the garage door opener or using a pre-owned unit, I make sure to clear any existing codes. This step is crucial to ensure that I start with a clean slate and can program new remote controls. The process of clearing existing codes may vary depending on the model of the Linear opener, so I refer to the instruction manual for specific instructions.

Once I’m ready to program a remote control, I press and release the programming button on the opener unit. This action puts the opener into programming mode, and the indicator light on the unit should turn on or start flashing. This mode typically remains active for a limited time, usually around 30 seconds.

With the opener in programming mode, I prepare the remote control that I want to program. If it’s a new remote, I remove any battery tabs or protective covers and ensure that the battery is fresh and functioning. If it’s an existing remote, I double-check that the battery is in good condition.

To sync the remote control with the opener, I press and release the button on the remote control that corresponds to the desired function (such as opening or closing the garage door). I do this within the timeframe of the programming mode. As I press the button, I pay attention to the indicator light on the opener unit. It should flash or change its behavior to indicate that it has received the signal from the remote control. This step usually takes a few seconds.

Once I’ve successfully synced the remote control, I test its functionality by pressing the programmed button. The garage door should respond accordingly, either opening or closing. If the door doesn’t move or if there are any issues, I repeat the programming process from the beginning, starting with activating the programming mode on the opener unit.

If I have multiple remote controls that I want to program, I repeat the previous steps for each one. Each remote control is programmed individually, but I make sure to complete the process within the allowed timeframe of the programming mode.

After programming all the desired remote controls, I exit the programming mode. To do this, I press the programming button on the opener unit again or wait for the programming mode to automatically exit. The indicator light on the unit should turn off or stop flashing, indicating that the programming mode has been successfully exited.

It’s important to note that these steps are general guidelines based on my experience, and the specific procedures may vary depending on the model and features of your Linear garage door opener. It’s always recommended to consult the instruction manual provided by Linear for accurate programming instructions tailored to your specific model.

In case you encounter any difficulties during the programming process or if your Linear garage door opener has advanced programming features, I suggest reaching out to the manufacturer’s support or contacting a professional garage door technician for assistance.

By following the instruction manual and these general steps from Garage Door Repair Services, I’ve been able to successfully program my Linear garage door opener and enjoy the convenience of operating my garage door with ease using the remote.

CCM Overhead Doors

1000 NW 80th St, Oklahoma City, OK 73114, United States

405-563-8982

How to Open Liftmaster Garage Door Opener – Arnold’s Garage Door Service

To open a LiftMaster garage door opener, follow these steps from Garage Door Repair:

First, I locate the LiftMaster garage door opener unit mounted on the ceiling of my garage. It’s usually situated near the center of the door. I take a moment to familiarize myself with the buttons or controls on the opener unit.

Next, I ensure that the garage door opener is powered on. I check that it is properly connected to a power source, such as an electrical outlet, and that the power supply is active.

Now, I decide whether to use the control buttons on the opener unit or the remote control to open the garage door. In this case, I choose to use the remote control for convenience.

I check that the remote control has a working battery and is ready to use. With the remote in hand, I press the button designated for opening the garage door. This button is usually marked with an upward arrow or an icon representing a garage door opening.

After pressing the button, I wait for the garage door to respond. I hear the motor of the opener engaging, and the door begins to open. I keep a close eye on the movement of the door to ensure it operates smoothly and without any obstructions.

As the door opens, I monitor its progress. If necessary, I can adjust the opening height to stop the door at a specific position. This is particularly useful if I want to partially open the door for ventilation or other purposes. I follow the instructions provided by LiftMaster to set the desired opening limit.

Once the door is fully open, I enjoy the convenience of having an open garage space. However, I remain cautious and mindful of potential safety hazards that an open garage door may present, such as tripping or accidental entry.

It’s important to note that these steps are a general guide from Garage Door Repair for opening a LiftMaster garage door opener, and the specific instructions may vary depending on the model and features of your particular opener. Always refer to the owner’s manual or consult the manufacturer’s instructions for your specific LiftMaster garage door opener to ensure proper and safe operation.

Arnold’s Garage Door Service

2129 Tippy Ter, Fort Worth, TX 76134

682-261-6268

Powered by WordPress & Theme by Anders Norén