Local Businesses Blog in Texas

Month: June 2023 Page 1 of 5

How to Fix Your AC at Home – Bedford AC & Heat

When it comes to fixing my air conditioner at home, I’ve had some success with troubleshooting and resolving minor issues. While I’m not an HVAC professional, I have learned a few steps that can help address common AC problems.

Based from Air Conditioning Repair Bedford TX, keep in mind that these are general guidelines, and it’s important to consult your user manual or seek professional advice if you’re unsure about any step or if the problem seems complex.

  1. Ensuring safety is my top priority. Before starting any repairs, I always turn off the power supply to the air conditioner. I locate the circuit breaker that controls the AC unit and switch it off to avoid any potential electrical accidents during the repair process.
  2. Assessing the problem is the first step. I carefully observe the symptoms of the air conditioner to determine the nature of the issue. Is it not cooling properly? Is there a strange noise? Is it not turning on at all? Identifying the specific problem helps me narrow down the potential causes and find an appropriate solution.
  3. Checking the basics is crucial. I start by examining the thermostat settings and ensuring they are correctly configured. If the air conditioner is not cooling adequately, I check if the air filter is clean and free from debris. If it’s dirty or clogged, I clean or replace it to ensure proper airflow.
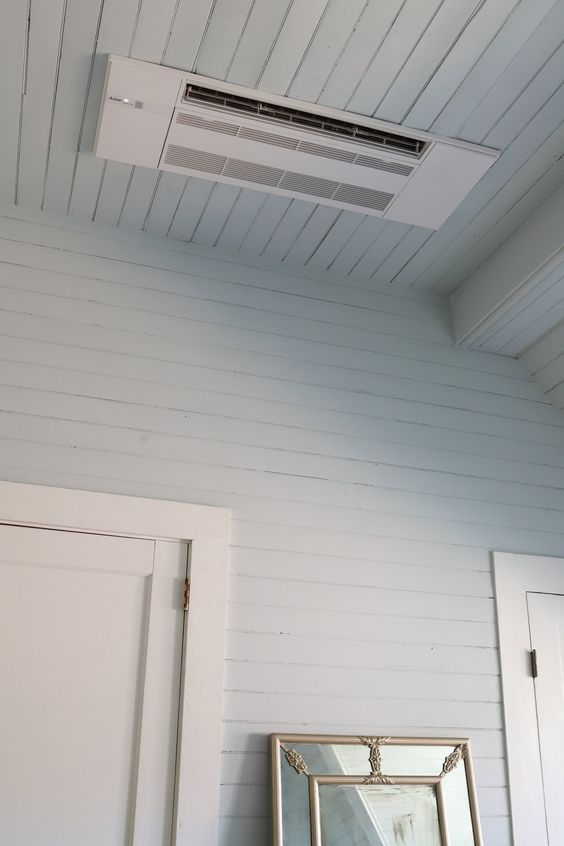
  4. Inspecting the air vents and ducts is another important step. I examine the air vents and ductwork for any obstructions or blockages. If I find any debris, dust, or objects hindering the airflow, I clear them away to restore optimal airflow.
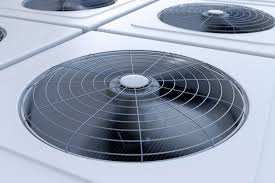
  5. I move on to inspecting the outdoor condenser unit. If the unit is not functioning properly, I check for any debris, such as leaves, grass, or dirt, that may be blocking the airflow. I gently clean the condenser fins using a soft brush or a vacuum cleaner to remove any accumulated dirt or debris.
  6. I’m cautious when it comes to refrigerant leaks. If I suspect a refrigerant leak, I don’t attempt to fix it myself. Handling refrigerant requires specialized knowledge and equipment, so I contact a qualified technician to address the issue. It’s important to remember that refrigerant leaks should be handled by professionals to prevent further damage and ensure safe handling of the refrigerant.
  7. Inspecting electrical connections is an essential step. I examine the electrical connections of the air conditioner, including wires, terminals, and capacitors. If I notice any loose connections, frayed wires, or burnt components, I contact a professional to handle the repairs. Dealing with electrical work can be dangerous, so it’s best to leave it to the experts.
  8. I also test the motor and fan for proper operation. I listen for any unusual noises or vibrations. If the motor or fan is not functioning correctly, I prefer to contact a professional for repairs or replacements, as these components require specialized attention.
  9. Cleaning the evaporator coil is an important maintenance task, but it can be complex. If I notice that the evaporator coil is dirty, I prefer to hire a professional to clean it. They have the necessary expertise, tools, and equipment to clean the coil effectively.
  10. After addressing the identified issues, I turn the power supply back on and test the air conditioner. I observe its performance and check if the problem has been resolved. If the issue persists or if I encounter any difficulties during the repair process, I prefer to seek professional assistance.

By following steps from Air Conditioning Repair Bedford TX, while I’ve had success with these steps for minor AC issues, I always remind myself that air conditioning systems can be complex. If I’m unsure or uncomfortable with any aspect of the repair process, I know it’s best to contact a qualified HVAC professional. They have the necessary expertise, tools, and experience to handle repairs safely and effectively, ensuring the optimal functioning of my air conditioner.

Bedford AC & Heat

3901 Airport Fwy #322, Bedford, TX 76021, United States

817-623-5210

How do you Program a Wayne Dalton Garage Door Opener-Team Taylor Garage Doors

Programming a Wayne Dalton Garage Door Repair Harrisonville MO opener involves several steps.

Below is a detailed guide on how to program a Wayne Dalton garage door opener.

Step 1: Prepare for Programming Before starting the programming process, make sure you have the necessary tools and equipment. You will need a ladder to access the garage door opener and a small step stool or something similar to reach the programming button on the opener itself. Also, ensure that the garage door is closed during the programming process.

Step 2: Locate the Programming Button The location of the programming button may vary depending on the model of your Wayne Dalton garage door opener. Typically, the programming button is found on the motor unit of the opener, near the antenna wire. It may be labeled as “Program,” “Learn,” or have a similar designation.

Step 3: Clear the Opener’s Memory To begin programming, you need to clear the memory of the opener. Press and hold the programming button until the indicator light on the opener turns off. This usually takes about 6-10 seconds. Releasing the button will erase any previously stored codes.

Step 4: Choose a Remote Control Button Decide which button on the remote control you want to use to operate the garage door. It is advisable to select a button that is easily accessible and not likely to be accidentally pressed.

Step 5: Program the Opener Press and release the programming button on the motor unit. The indicator light will illuminate, indicating that the opener is ready to receive a new code.

Step 6: Program the Remote Control Within 30 seconds of pressing the programming button, press and hold the desired button on the remote control. Keep holding the button until the indicator light on the opener blinks or flashes, usually after a few seconds. This indicates that the remote control has been successfully programmed.

Step 7: Test the Remote Control To ensure successful programming, test the remote control by pressing the button you programmed. The garage door should respond by opening or closing. If it doesn’t, repeat the programming process from Step 3 onwards.

Step 8: Program Additional Remote Controls (Optional) If you have multiple remote controls that you want to program, repeat Step 6 for each additional remote control within 30 seconds of programming the previous one. The opener can usually store multiple codes, allowing multiple remote controls to operate the garage door.

Step 9: Finalize the Programming After programming all the remote controls, press the programming button on the motor unit once again to exit the programming mode. The indicator light should turn off, indicating that the programming process is complete.

Note: The programming process may vary slightly depending on the specific model of your Wayne Dalton garage door opener. Always refer to the manufacturer’s manual or instructions for your particular model for detailed programming steps and any additional requirements.

In conclusion, programming a Wayne Dalton Garage Door Repair Harrisonville MO opener involves preparing for programming, locating the programming button, clearing the opener’s memory, choosing a remote control button, programming the opener, testing the remote control, programming additional remote controls (if desired), and finalizing the programming. Following these steps should allow you to successfully program your Wayne Dalton garage door opener.

Team Taylor Garage Doors

1004 W Mechanic St #12, Harrisonville, MO 64701, United States

1-816-239-2371

How Much Does a Garage Door Service Cost? – Celina Garage Doors Co

as a professional in the garage door industry, I can provide you with information about the cost of garage door services. Garage door services can vary in cost depending on the type of service needed, the complexity of the job, the location, and the service provider.

Allow me to give you a comprehensive breakdown of the pricing range for different garage door services according to Garage Door Celina TX.

  1. Routine Maintenance and Inspection: Regular maintenance and inspection are essential for keeping your garage door in good condition and preventing potential issues. The cost of routine maintenance can vary depending on the specific tasks involved and the service provider. Typically, basic maintenance services can range from $80 to $150. This includes tasks such as lubrication, adjustment of springs and tracks, tightening of hardware, inspection of cables and rollers, and testing of safety features. If any parts need replacement, there may be additional costs.
  2. Garage Door Repair: The cost of garage door repair can vary significantly depending on the nature and extent of the problem. Common repairs include fixing broken springs, replacing damaged panels, repairing faulty openers, addressing sensor issues, and resolving track misalignment. The price range for garage door repair can start at around $150 for minor issues and go up to $500 or more for complex repairs. Factors such as the type of repair, the required parts, and the labor involved will affect the overall cost.
  3. Garage Door Opener Installation and Repair: Installing or repairing a garage door opener is another common service provided by garage door professionals. The cost can vary based on factors such as the type of opener, horsepower, features (like Wi-Fi connectivity or battery backup), and the complexity of the installation or repair. On average, installing a new garage door opener can range from $200 to $600, including the opener unit, necessary hardware, and labor. Repairing a faulty opener can cost between $100 and $300, depending on the issue and any required replacement parts.
  4. Garage Door Spring Replacement: Garage door springs are crucial for supporting the weight of the door and ensuring smooth operation. When a spring breaks, it needs to be replaced promptly to restore proper functionality and safety. The cost of spring replacement depends on factors such as the type of spring (torsion or extension), the size of the door, and the number of springs involved. On average, replacing a single garage door spring can cost between $150 and $300, including the cost of the spring itself and the labor.
  5. Emergency Services: In urgent situations where immediate assistance is required, such as a malfunctioning garage door that needs urgent repair or opening a door that is stuck or off its tracks, emergency services may be necessary. The cost of emergency services can vary depending on the service provider and the time of service. Typically, emergency service fees range from $100 to $300, in addition to the specific repair or maintenance costs required.

It’s important to note that the prices mentioned here are approximate ranges based on industry standards and my experience. The actual cost of a garage door service can vary depending on various factors, including your location, the pricing structure of the service provider, the complexity of the job, and any additional factors specific to your situation. To get accurate pricing, I recommend reaching out to reputable garage door service companies in your area and requesting quotes.

To summarize, as stated in Garage Door Celina TX, the cost of garage door services can vary depending on the type of service, the complexity of the job, the location, and the service provider. Routine maintenance can range from $80 to $150, while garage door repairs can start at $150 and go up to $500 or more. Garage door opener installation or repair can range from $200 to $600, while spring replacement can cost between $150 and $300. Emergency service fees typically range from $100 to $300. Remember to consider the reputation and experience of the service provider to ensure quality service.

Celina Garage Doors Co

312 W Walnut St #12, Celina, TX 75009, United States

214-833-9968

How Many Watts Does a Garage Door Use? – Parma Overhead & Garage Door

As a homeowner who has a garage door and has paid attention to energy consumption, I understand the importance of knowing the wattage used by a garage door. It helps in understanding the energy requirements and making informed decisions about energy efficiency. In this article, I will share my first-hand experience and knowledge regarding the wattage used by garage doors, factors that can impact energy consumption, and tips for optimizing energy efficiency.

Based on my personal experience and as stated in Garage Door Parma OH, the wattage used by a standard residential garage door opener typically ranges from 600 to 800 watts during operation. This range can vary depending on the specific type of garage door opener, the size and weight of the door, and how frequently it is used.

The type of garage door opener plays a significant role in determining the wattage consumption. Different types, such as chain drive, belt drive, and screw drive openers, have varying power requirements. In my case, I have a belt drive opener, which is known to be more energy-efficient compared to chain drive openers. Belt drive openers tend to consume slightly less power while providing smooth and quiet operation.

The size and weight of the garage door also impact energy consumption. Larger and heavier doors generally require more power to operate. For instance, if you have a double garage door as opposed to a single door, you can expect a slightly higher wattage consumption due to the additional weight and size.

The frequency of use is another factor to consider. If you frequently open and close your garage door throughout the day, the overall energy consumption will be higher compared to a door that is used less frequently. Each time the door is operated, the opener motor engages, drawing power from the electrical supply. Therefore, if you have a busy household or use your garage frequently, it’s important to be mindful of the energy consumed.

It’s important to note that the wattage mentioned above refers to the power consumed during the actual operation of the garage door. Once the door reaches its fully open or closed position, the power consumption significantly decreases as the motor is no longer actively engaged. However, some garage door openers may still draw a small amount of power while in standby mode, usually ranging from 1 to 10 watts. This power is used to maintain essential features like remote control functionality and safety sensors.

To optimize energy efficiency and reduce the overall energy consumption of your garage door, consider the following tips:

  1. Choose an energy-efficient garage door opener: When selecting or upgrading your garage door opener, look for models that are specifically designed for energy efficiency. These models often come with energy-saving features and technologies that help minimize power consumption.
  2. Insulate your garage: Proper insulation of the garage helps regulate temperature and reduces the strain on heating or cooling systems. This indirectly affects the energy required to operate the garage door, as a well-insulated space is more energy-efficient overall.
  3. Perform regular maintenance: Regular maintenance of your garage door system ensures that all components, including the opener, are working optimally. Lubricate moving parts, check for any loose or worn-out components, and keep the system clean. A well-maintained system operates more efficiently and requires less energy.
  4. Consider LED lighting: If you have lighting fixtures in your garage, replace traditional incandescent bulbs with energy-efficient LED bulbs. LED bulbs consume significantly less energy and have a longer lifespan, contributing to overall energy savings.
  5. Utilize energy-saving features: Many modern garage door openers come with energy-saving features such as timers or motion sensors. These features allow you to set specific time intervals for the door to operate or activate the opener only when motion is detected, reducing unnecessary power consumption.

By implementing these energy-saving practices, you can optimize the energy efficiency of your garage door system and reduce power consumption.

In conclusion, according to Garage Door Parma OH ad based on my personal experience, a standard residential garage door opener typically uses around 600 to 800 watts during operation. Factors such as the type of opener, size and weight of the door, and frequency of use can influence the actual wattage. By choosing energy-efficient openers, insulating the garage, conducting regular maintenance, using LED lighting, and utilizing energy-saving features, you can optimize the energy efficiency of your garage door system and reduce power consumption. Being mindful of energy usage not only benefits the environment but also contributes to cost savings in the long run.

Parma Overhead & Garage Door

1440 Rockside Rd #331, Parma, OH 44134, United States

440-271-8916

Why is My Garage Door Light Blinking? – Decatur Door & Gate

When your garage door light is blinking, it can be quite concerning. From my experience, there are a few potential reasons for this issue.

Here are some possibilities to consider based from Garage Door Decatur TX:

  1. Obstruction Detected: One common reason for a blinking light on a garage door opener is the detection of an obstruction. Many garage door openers have sensors that detect objects or obstructions in the path of the door. If these sensors detect something in the way, the light will blink as a safety precaution. Check the area near the sensors and remove any objects or debris that may be triggering the obstruction detection.
  2. Sensor Misalignment or Malfunction: The sensors on the sides of the garage door are essential for ensuring safe operation. If they are misaligned or malfunctioning, it can cause the light to blink. Check the alignment of the sensors and make sure they are facing each other and not obstructed by anything. Clean the sensor lenses with a soft cloth to ensure they are free from dirt or debris. If the problem persists, the sensors may need to be adjusted or replaced.
  3. Wiring Issues: Another possible cause of a blinking light is wiring problems within the garage door opener system. Inspect the wiring connections to ensure they are secure and free from damage. Look for any loose or frayed wires that may be causing an intermittent connection. If you find any issues with the wiring, it’s best to consult a professional technician to properly repair or replace the wiring.
  4. Power Interruption or Voltage Fluctuations: A blinking light can also indicate power-related issues. Check the power supply to the garage door opener, including the power cord and outlet. Make sure the power cord is securely plugged in and the outlet is functioning properly. If there have been recent power outages or voltage fluctuations, it’s possible that the opener’s light is blinking as a result. In such cases, a power cycle or resetting the opener may resolve the issue.
  5. Opener Malfunction: A malfunctioning garage door opener can also cause the light to blink. This could be due to a problem with the logic board, motor, or other components. In such cases, it’s best to consult the manufacturer’s documentation or contact their customer support for troubleshooting guidance. They may be able to provide specific instructions or recommend professional assistance for repair or replacement.

In summary, according to Garage Door Decatur TX, please note that these are general explanations, and the specific cause of a blinking light can vary depending on the make and model of your garage door opener. If you’re unsure or unable to identify the problem, it’s always recommended to consult a professional garage door technician. They have the expertise and knowledge to diagnose and resolve the issue, ensuring the safe and proper functioning of your garage door system.

Decatur Door & Gate

1200 FM 51 Suite F, Decatur, TX 76234, United States

940-283-6188

How to Determine Garage Door Spring Size? – First Call Garage Doors

When it comes to determining the size of my garage door spring, I know that accuracy is essential for safe and efficient door operation. While it’s always best to consult a professional garage door technician for an accurate assessment.

I can follow these steps from Garage Door Houston TX to help determine the appropriate spring size:

  1. Gathering Information: I start by collecting all the necessary information about my garage door. This includes the height, width, and material of the door. Additionally, I note whether it’s a single-car or double-car garage door and the type of spring system it utilizes, such as torsion or extension springs.
  2. Calculating the Door Weight: To determine the spring size, I need to know the weight of my garage door. If I have access to the manufacturer’s specifications, I can find the exact weight there. Alternatively, I can use a bathroom scale to measure the door’s weight. If that’s not possible, I can estimate the weight based on the door material. For example, a standard single-car steel door typically weighs between 150 and 200 pounds (68-91 kg), while a double-car steel door can weigh between 300 and 400 pounds (136-181 kg).
  3. Identifying the Spring System: I take note of the type of spring system used in my garage door. Torsion springs are usually mounted above the door, while extension springs are located on the sides or above the horizontal tracks. Each type requires a different approach for determining the spring size.
  4. Calculating Torsion Spring Size: If I have a torsion spring system, I know that the spring size is determined by the torque or moment required to counterbalance the weight of the door. This calculation considers factors such as the door weight, drum size, and cable drum placement. Since these calculations can be complex, I understand that it’s best to rely on the expertise of a professional garage door technician who can accurately calculate the required spring size based on these factors.
  5. Determining Extension Spring Size: For extension spring systems, the spring size is determined by their length and weight capacity. If I have existing extension springs, I measure their length. If not, I consult the manufacturer’s specifications to determine the recommended length. Next, I use the weight of the door to determine the appropriate weight capacity for the extension springs. Most manufacturers provide a chart or calculation formula that matches the weight of the door with the required extension spring size.
  6. Seeking Professional Assistance: While I can follow these steps to get a general idea of the spring size, I understand that determining the exact size and ensuring proper installation are best left to a professional garage door technician. They have the expertise, knowledge, and specialized tools to accurately assess my specific door and its components. By consulting a professional, I can ensure that the springs are properly calibrated and installed for safe and efficient door operation.

Overall, as stated in Garage Door Houston TX, I always prioritize safety when working with garage door springs. If I am unsure or uncomfortable with any step of the process, I know it’s best to seek professional assistance to avoid any injuries or potential damage to the door. Professional garage door technicians have the necessary skills and experience to handle spring installations and adjustments safely and effectively.

First Call Garage Doors

12505 Memorial Dr #246, Houston, TX 77024, United States

713-597-4617

How to Remove Dents from Garage Door? – First Call Garage Doors

Removing dents from a garage door is a task that can be accomplished with the right tools and techniques.

First, according to Garage Door Katy TX, I carefully assess the damage on my garage door, examining the size and severity of the dent. This allows me to determine the best method for repairing it.

Next, I gather all the necessary tools and materials for the job. I make sure to have a clean cloth or sponge, a bucket of soapy water, a plunger (for smaller dents), a heat source like a hairdryer or heat gun, compressed air (optional), a rubber mallet or hammer with a rubber or wooden block, aluminum foil, dry ice (for metal doors only), automotive body filler (for larger or more severe dents), sandpaper or a sanding block, and paint that matches the color of my garage door.

To begin the dent removal process, I clean the dented area using a clean cloth or sponge and a bucket of soapy water. This step ensures that there is no dirt or debris that could interfere with the repair process.

For smaller, shallower dents, I grab a plunger. I wet the dent and the rubber portion of the plunger with water to create a good seal. Then, I press the plunger firmly against the dent and apply steady pressure. I pull the plunger back quickly to create a suction effect. I repeat this process several times until the dent pops out.

If my garage door is made of metal, I can try using heat to remove the dent. I grab a hairdryer or heat gun and start heating the dented area, moving the heat source back and forth over the dent. As the metal becomes hot, I put on gloves and use a rubber mallet or a hammer with a rubber or wooden block to gently push the dent from the inside. I apply gradual pressure until the dent is either fully or partially removed.

If the dent persists after applying heat, I can try using compressed air. I place a piece of aluminum foil over the dent to protect the surrounding area. Then, I hold a can of compressed air upside down and spray it directly onto the aluminum foil. The sudden temperature change may cause the dent to pop out. I remove the foil and assess the results.

Another method for metal garage doors involves using dry ice. I put on protective gloves and hold a piece of dry ice against the dent. I move it around in a circular motion for several minutes. The extreme cold causes the metal to contract, helping the dent to pop out. I handle the dry ice with caution and follow safety guidelines throughout the process.

For wood garage doors, I can use a rubber mallet or a hammer with a rubber or wooden block. I position the block against the inside of the door, directly behind the dent. With gentle taps, I strike the outer surface of the dent using the rubber mallet or hammer. I gradually increase the force until the dent starts to come out. I am careful not to hit too hard and cause further damage to the wood.

After successfully removing the dent, I assess the overall appearance of my garage door. If necessary, I use sandpaper or a sanding block to smooth out any rough edges or imperfections. Then, I apply a matching paint color to restore the door’s aesthetic appeal.

Overall, based from Garage Door Katy TX, throughout the dent removal process, I take my time and exercise patience to ensure a successful outcome. If I encounter a larger or more severe dent that requires professional attention, I don’t hesitate to seek the assistance of a garage door repair specialist.

First Call Garage Doors

5007 E 3rd St #102, Katy, TX 77493, United States

281-572-5307

How to Put a Window in a Garage Door? – Medina Garage & Overhead Doors

As someone who has installed a window in my garage door, I can share my personal experience and the steps I followed.

Please note that these steps are from Garage Door Medina OH and based on my own experience, and you may need to adapt them to suit your specific garage door and window type.

  1. Choose the Window:
    • I selected a window that matched the style and dimensions of my garage door. I considered factors such as the material, design, and insulation properties of the window.
    • I measured the dimensions of the window opening on the garage door to ensure a proper fit.
  2. Gather the Tools and Materials:
    • I gathered the necessary tools and materials for the installation, including a tape measure, marker or pencil, safety glasses, gloves, screwdriver, drill, jigsaw or reciprocating saw, caulking gun, silicone caulk, mounting brackets or clips, screws, and a level.
  3. Prepare the Garage Door:
    • I opened the garage door and secured it in place using clamps or locking mechanisms to prevent accidental closure during the installation process.
    • I cleaned the area where the window would be installed, removing any dirt or debris.
  4. Mark the Window Opening:
    • Using a tape measure, level, and marker or pencil, I measured and marked the desired location of the window on the garage door.
    • I took into account any horizontal reinforcements in the garage door and made sure to avoid cutting through them.
  5. Cut the Opening:
    • I put on safety glasses and gloves to protect myself during the cutting process.
    • I used a drill to create pilot holes in the corners of the marked window opening.
    • With a jigsaw or reciprocating saw, I carefully cut along the marked lines, following a steady and controlled motion.
    • I removed any cut pieces and smoothed the edges of the opening with sandpaper or a file.
  6. Install the Window:
    • I applied a bead of silicone caulk around the outer edge of the window frame.
    • I positioned the window into the opening, ensuring proper alignment.
    • I secured the window in place using mounting brackets or clips, following the manufacturer’s instructions for the specific mounting method.
    • I checked that the window was level and plumb, making any necessary adjustments.
    • Using a screwdriver, I attached the mounting brackets or clips to the garage door, ensuring a secure fit.
    • I wiped away any excess caulk with a clean cloth or rag.
  7. Seal the Window:
    • I applied a generous bead of silicone caulk around the perimeter of the window frame, sealing the gap between the frame and the garage door.
    • I smoothed the caulk using a caulk smoothing tool or a finger dipped in soapy water to create a neat and uniform seal.
  8. Test and Clean Up:
    • I carefully opened and closed the garage door to ensure smooth operation and that the window did not interfere with its movement.
    • I removed any protective coverings or tapes from the window and cleaned both the interior and exterior surfaces.

Please remember that these steps are from Garage Door Medina OH and based on my personal experience, and it’s essential to refer to the manufacturer’s instructions and guidelines for your specific garage door and window model. If you are unsure or uncomfortable with the installation process, it is always recommended to seek the assistance of a professional installer or a garage door specialist who can ensure a safe and proper installation of the window in your garage door.]

Medina Garage & Overhead Doors

3745 Medina Rd Suite H, Medina, OH 44256, United States

330-785-7630

The Air Handler-Bedford AC & Heat

Air Conditioning Repair Bedford TX is an essential component of heating, ventilation, and air conditioning (HVAC) systems. It plays a crucial role in circulating and distributing conditioned air throughout a building or space.

In this article, we will explore the air handler in detail, discussing its functions, components, and importance.

An air handler, also known as an air handling unit (AHU), is responsible for regulating and maintaining indoor air quality and comfort. It works in conjunction with other HVAC components such as the furnace, air conditioner, and ductwork to ensure proper airflow and temperature control.

Functionally, the air handler performs several key tasks. Firstly, it draws in air from the surrounding environment through the return air ducts. This air can be a combination of fresh outdoor air and recirculated indoor air. The air then passes through various filters to remove impurities like dust, pollen, and allergens, improving the overall air quality.

Once filtered, the air moves into the heat exchange section of the air handler. This section consists of a coil system that can be either a heating coil or a cooling coil, depending on the HVAC system’s mode of operation. If heating is required, the heating coil warms the air using a heat source such as a gas burner or electric heating elements. Conversely, if cooling is needed, the cooling coil removes heat from the air, typically by circulating refrigerant through the coil.

After being conditioned by the coil system, the air is propelled by a fan within the air handler. The fan creates the necessary airflow to distribute the conditioned air throughout the building. This airflow is facilitated by a network of ducts, which carry the air to individual rooms or zones.

The air handler also plays a crucial role in controlling humidity levels. In addition to the heating or cooling coil, it can feature a separate humidification or dehumidification system. These systems add or remove moisture from the air to maintain optimal humidity levels for comfort and health.

To ensure efficient operation, the air handler incorporates various components. These include the fan, which can be centrifugal or axial, and is responsible for moving the air. The filters, as mentioned earlier, remove airborne particles. Additionally, the air handler contains dampers that regulate the amount of outside air intake, as well as sensors and controls to monitor and adjust temperature, humidity, and air quality.

The importance of a well-functioning air handler cannot be overstated. It is a critical component in maintaining a comfortable and healthy indoor environment. By properly filtering, conditioning, and distributing air, the air handler helps remove pollutants, control temperature and humidity, and provide adequate ventilation. This contributes to improved indoor air quality, reduced allergens, and enhanced occupant comfort.

In conclusion, Air Conditioning Repair Bedford TX is a fundamental part of HVAC systems, responsible for circulating and conditioning air within a building. Its functions include filtering, heating or cooling, humidity control, and airflow distribution. By performing these tasks effectively, the air handler ensures a comfortable and healthy indoor environment.

Bedford AC & Heat

3901 Airport Fwy #322, Bedford, TX 76021, United States

1-817-623-5210

How Long Does a Garage Door Motor Last? – Team Taylor Garage Doors

As someone who has owned and maintained a garage door motor for a number of years, I can share my personal experience regarding its lifespan and provide some insights on what to expect.

As stated in Garage Door Harrisonville MO, when I first installed my garage door opener, I made sure to choose a reputable brand and model known for its reliability. I understood the importance of investing in a high-quality motor that would stand the test of time. By opting for a trusted manufacturer, I hoped to maximize the lifespan of the motor and minimize the chances of premature failure.

The frequency of use is a key factor in determining how long a garage door motor will last. In my case, the motor is used on a daily basis as my family and I frequently access the garage. The motor has proven to be robust and reliable, handling the regular opening and closing of the garage door without any issues. However, I’m aware that motors used more frequently, such as in busy commercial settings, may experience more wear and tear and may have a shorter lifespan as a result.

Maintenance has played a crucial role in prolonging the life of my garage door motor. I make it a point to regularly inspect and lubricate the moving parts of the motor, including the gears and drive mechanism. This helps reduce friction and prevents premature wear. I also ensure that the motor and its surroundings are kept clean and free from dirt and debris, as this can affect the motor’s performance. Regular inspections and adjustments, such as checking the mounting brackets and making necessary tightening, have been part of my routine to maintain optimal operation.

Environmental conditions can impact the lifespan of a garage door motor. Fortunately, my garage is well-insulated and protected from extreme temperatures and harsh weather conditions. This has likely contributed to the longevity of the motor. Extreme heat or cold, high humidity, or exposure to direct sunlight can affect the motor’s internal components and potentially lead to accelerated wear and a shorter lifespan. Taking measures to protect the motor from such conditions, such as proper insulation and ventilation, can help extend its life.

Based on my personal experience, a well-maintained garage door motor can last anywhere from 10 to 15 years or more. However, it’s important to note that individual cases may vary. Factors such as the brand and quality of the motor, frequency of use, maintenance practices, and environmental conditions all play a role in determining its lifespan.

There are certain signs that may indicate the motor is nearing the end of its lifespan. Unusual noises during operation, slower response times, or inconsistent opening and closing can be indicators that the motor is wearing out. If any of these signs are observed, it’s advisable to consult with a professional technician to assess the motor’s condition and determine whether a replacement is necessary.

In conclusion, according to Garage Door Harrisonville MO and based on my personal experience and observations, a well-maintained garage door motor can last around 10 to 15 years or more. By choosing a reliable brand, practicing regular maintenance, and being mindful of environmental factors, I’ve been able to enjoy smooth and reliable operation from my garage door motor for an extended period of time.

Team Taylor Garage Doors

1004 W Mechanic St #12, Harrisonville, MO 64701, United States

816-239-2371

Page 1 of 5

Powered by WordPress & Theme by Anders Norén