Local Businesses Blog in Texas

Month: January 2023

How Tall is a Garage Door? – Ohio Garage Door Repair

The height of a garage door can vary depending on different factors. In residential settings, standard garage doors typically have a height of 7 feet or 8 feet. These heights are designed to accommodate most vehicles, providing enough clearance for cars, SUVs, and small trucks.

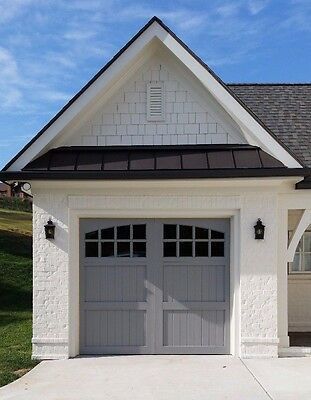
In my personal experience and by following Garage Door Repair, I’ve seen many residential garage doors with a height of 7 feet. This is the most common height and is suitable for everyday vehicles. It allows for easy entry and exit without scraping the top of the vehicle against the door.

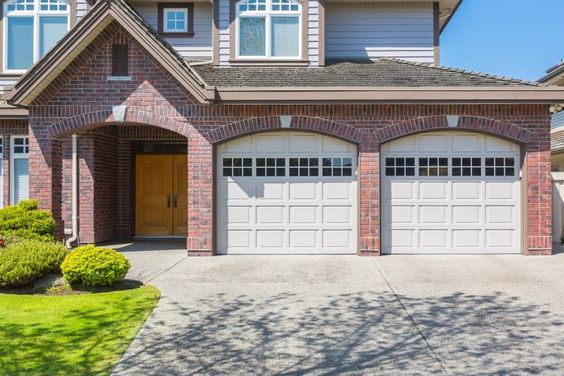
However, I’ve also come across homeowners who prefer taller garage doors. An 8-foot garage door provides additional height clearance, making it ideal for larger vehicles such as vans, trucks, or recreational vehicles (RVs). Some homeowners also opt for taller garage doors to create more headroom inside the garage for storage or other purposes.

It’s worth noting that customized garage door heights are possible as well. Homeowners can work with manufacturers to create garage doors with heights beyond the standard 8 feet. These custom sizes are often required for specialized vehicles or unique architectural designs. Depending on the specific needs, custom garage doors can range from 9 feet to 12 feet or even higher.

In commercial and industrial settings, garage doors are typically larger to accommodate the needs of various vehicles and equipment. The height of commercial and industrial garage doors can vary significantly based on the specific requirements of the establishment. It’s not uncommon to see garage doors with heights ranging from 10 feet to 24 feet or more. These taller doors are designed to accommodate delivery trucks, commercial vans, forklifts, and other large vehicles commonly found in commercial or industrial settings.

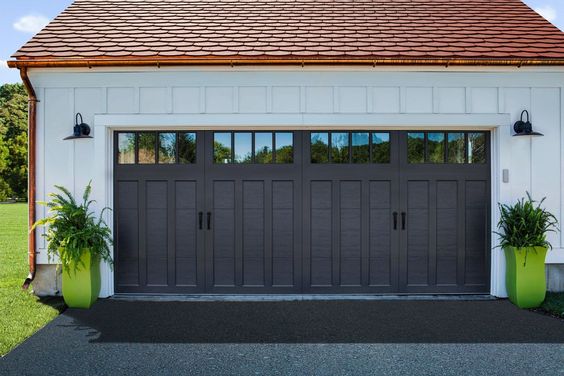
While the height of a garage door is important, it’s also crucial to consider the width of the door. The width is equally significant, as it determines the number and size of vehicles that can enter or exit the garage. Standard widths for residential garage doors typically range from 8 feet to 18 feet or more, depending on the specific needs of the homeowner.

When selecting a garage door, it’s essential to consider both the height and width requirements based on the vehicles and equipment that will be stored or accessed. Consulting with a garage door professional or manufacturer can help ensure that the chosen size meets the specific needs of the project.

Overall, based from Garage Door Repair, please note that the information provided here is based on general observations and industry standards. Actual garage door heights may vary depending on the manufacturer, region, and specific requirements of each project.

Ohio Garage Door Repair

7201 Longview Dr, Solon, OH 44139

440-773-2246

How to Fix Garage Door Cable – First Call Garage Doors

When it comes to fixing a garage door cable, it’s important to approach the task with caution.

Here’s how I would go about it by following Garage Door Repair Services:

Step 1: Prioritize Safety Before starting any repairs, I always make sure to prioritize safety. I disconnect the power to the garage door opener and ensure the door is fully closed. Wearing protective gloves and safety goggles is a must to protect myself from any potential hazards.

Step 2: Assess the Damage I carefully inspect the cables to determine the extent of the damage. I look for any signs of fraying, broken strands, or cables that have come off the drum or pulley. This helps me understand the scope of the repair and what needs to be done.

Step 3: Release Cable Tension To release the tension on the cable, I locate the winding cone on the torsion spring and insert a winding bar into one of the holes. With a firm grip on the bar, I slowly unwind the spring in small increments until there is no more tension on the cable. This step requires caution and may be best left to a professional if you’re unsure.

Step 4: Disconnect the Cable Using pliers, I carefully disconnect the damaged cable from the bottom bracket. The bottom bracket is typically located near the bottom corner of the garage door. I ensure the cable is completely detached before proceeding.

Step 5: Remove the Cable from the Drum or Pulley Next, I carefully remove the cable from the drum or pulley at the top of the door. This may require loosening the set screws that secure the cable in place. Once the cable is free, I gently pull it out from the drum or pulley.

Step 6: Install the New Cable With the old cable removed, I take the new cable and thread it through the pulley or drum at the top of the door. I make sure it is properly aligned and securely in place. Then, I attach the cable to the bottom bracket, ensuring it is firmly fastened.

Step 7: Re-tension the Cable Now comes the crucial step of re-tensioning the cable. I slowly wind the torsion spring using the winding bars, following the manufacturer’s instructions for the number of turns needed to achieve the correct tension. If I’m not confident in my ability to handle the torsion spring, I seek professional assistance to ensure safety.

Step 8: Test the Door Once the cable is installed and properly tensioned, I carefully test the garage door’s operation. I open and close the door multiple times to ensure it moves smoothly and without any issues. If there are any problems or concerns, I revisit the previous steps to make adjustments as necessary.

Step 9: Regular Maintenance To prevent future cable issues, I understand the importance of regular maintenance. This includes lubricating the cables, inspecting them for wear, and addressing any problems promptly. By taking care of my garage door and its cables, I can ensure its longevity and optimal performance.

While it’s possible to fix a garage door cable on your own, it’s important to remember that working with cables can be dangerous due to the high tension involved. If you’re unsure or uncomfortable with performing these repairs, it’s always best to contact a professional garage door technician. They have the expertise and tools to handle cable repairs safely and effectively.

Overall, according to Garage Door Repair Services, safety should always be the top priority when working on garage door repairs, and if in doubt, it’s best to seek professional assistance.

First Call Garage Doors

20527 FM1093 Unit B205, Richmond, TX 77407

713-248-2684

How to Program LiftMaster Garage Door Opener – Affordable Garage Door Repairs of Indianapolis, LLC

When I purchased my LiftMaster garage door opener, I needed to program it to work with my remote control. Here’s a step-by-step account of how I successfully programmed it according to Garage Door Repair Services:

  1. Clearing the memory: To start fresh, I cleared the existing memory of the opener. I located the “Learn” button on the opener motor unit, which was usually near the hanging antenna wire or on the back of the unit. I pressed and held this button for about 10 seconds until the indicator light turned off or started blinking, indicating that the memory had been cleared.
  2. Choosing the remote control: I selected the remote control that I wanted to program to my LiftMaster garage door opener. I made sure to check that the remote had fresh batteries to ensure a smooth programming process.
  3. Accessing programming mode: Following the instructions in the LiftMaster opener’s manual, I accessed the programming mode. On my model, I needed to press and release the “Learn” button on the motor unit within 30 seconds of clearing the memory. As I did so, the indicator light on the motor unit turned on, indicating that the opener was in programming mode.
  4. Programming the remote control: With the opener in programming mode, I programmed the remote control by following these steps:
    • Method 1: Holding the remote control close to the opener motor unit, I pressed the specific button I wanted to program on the remote. As soon as I pressed the button, the indicator light on the motor unit flashed or blinked, indicating that the programming was successful.
    • Method 2: On some models, I needed to press the button on the opener motor unit first and then press the button on the remote control within a few seconds. This sequence allowed the opener to recognize the remote control. Once again, the indicator light or a beep confirmed successful programming.
  5. Testing the remote control: After programming the remote control, I tested it to ensure that it worked correctly. I stood within range of the opener and pressed the programmed button on the remote. The garage door responded by either opening or closing, confirming that the programming was successful.
  6. Programming additional remotes: If I had additional remotes to program, I repeated the same steps for each remote within the limited time frame provided by the opener. This ensured that all my remotes were programmed and synchronized with the opener.
  7. Optional: Programming additional features: Depending on the model of the LiftMaster opener, there might be additional features to program, such as wireless keypads or smartphone control. I referred to the opener’s manual for specific instructions on programming these features and followed the steps provided.
  8. Finalizing the programming: Once I had finished programming all the remotes and additional features, I exited the programming mode. I pressed the “Learn” or “Smart” button on the opener motor unit again, and the indicator light turned off or stopped flashing, indicating that the programming mode had ended.

In conclusion, based from Garage Door Repair Services, programming my LiftMaster garage door opener was a straightforward process that allowed me to easily connect my remote control and other features to the opener. By following the instructions provided in the manual and paying attention to the indicator lights and programming sequences, I was able to set up my opener in no time.

Affordable Garage Door Repairs of Indianapolis, LLC

Indianapolis, IN

317-372-5337

How to Maintain Garage Door – Denzel’s Garage Doors

As a proud homeowner, I understand the importance of maintaining my garage door. It provides security, convenience, and adds value to my property. With regular maintenance, I can ensure that my garage door functions properly and lasts for years to come. In this personal guide, I will share the step-by-step process I follow to maintain my garage door effectively.

By implementing these maintenance tips from Garage Door Repair, I have minimized the risk of unexpected breakdowns, saved on costly repairs, and improved the overall safety and performance of my garage door.

Section 1

Inspection and Cleaning When it comes to maintaining my garage door, the first step I take is a thorough inspection. I visually examine the entire garage door system, paying close attention to tracks, rollers, hinges, springs, cables, and panels. I look for any signs of wear and tear, rust, loose components, or damaged parts. Additionally, I check the weatherstripping and seals for any cracks or gaps. Once I’ve identified any issues, I proceed to clean the exterior of the garage door. Using a mild detergent, water, and a soft brush or sponge, I remove debris, dust, cobwebs, and other dirt accumulation. I also ensure the tracks and rollers are free from debris and lubricant buildup, as this can affect the smooth operation of the door.

Section 2

Lubrication and Tightening To keep my garage door running smoothly, I prioritize lubrication and tightening. Using a silicone-based lubricant, I apply it to all moving parts such as hinges, rollers, tracks, springs, and cables. This helps reduce friction and ensures the components operate seamlessly. I make sure to remove any excess lubricant with a rag to prevent buildup. Additionally, I inspect and tighten all nuts, bolts, and screws on the garage door, tracks, and opener. This step is crucial to maintain the stability of the entire system. I pay special attention to track alignment and securely fasten any loose or sagging cables.

Section 3

Balance and Spring Adjustment Maintaining the balance and spring adjustment of my garage door is vital for its proper functioning. To check the balance, I disconnect the garage door opener by pulling the release handle. Then, I manually lift the door halfway and release it. If it stays in place or moves smoothly, the door is balanced. However, if it falls or rises, it indicates an imbalance, and I seek professional assistance. Regarding spring adjustment, I know that torsion springs require professional handling due to the high tension involved. For extension springs, I refer to the manufacturer’s manual or seek professional guidance to adjust the tension accordingly.

Section 4

Safety and Opener Testing Ensuring the safety features of my garage door are in working order is essential. I regularly test the sensors by placing an object in the door’s path while closing it. The door should immediately reverse upon contact with the object. This test ensures that the safety sensors are functioning correctly and prevent accidents or damage. Additionally, I test the opener’s automatic reversal system by placing a 2×4 board on the floor where the door closes. If the door fails to reverse upon contact with the board, I adjust the opener’s force and travel settings or consult a professional for assistance.

Section 5

Lastly, according to Garage Door Repair, seasonal Maintenance Seasonal maintenance helps me keep my garage door in top shape throughout the year. I inspect the weatherstripping and seals, looking for any signs of damage or wear. If necessary, I replace them to maintain a tight seal against the elements, preventing drafts and moisture from entering the garage. Additionally, if my garage door has a wooden surface, I inspect it for peeling paint or signs of rot. I remove any loose paint

Denzel’s Garage Doors

Marina Del Ray, CA

619-496-9419

How to Reset Your Genie Garage Door Opener-Atlas Door Company

Resetting a Genie Garage Door Repair opener is a fairly simple process that can be done by following a few steps.

Below are the instructions to reset your Genie garage door opener:

  1. Identify the type of Genie garage door opener you have: Before starting the reset process, it’s important to determine the type of Genie garage door opener you own. Genie produces various models, and the reset process may vary slightly depending on the specific model.
  2. Locate the “Learn” or “Program” button: Look for a small button on the motor unit of your Genie garage door opener. This button is typically located on the back or side of the unit. It is often labeled as “Learn” or “Program.”
  3. Prepare the remote control: Make sure you have the remote control that operates the garage door opener. If you have multiple remotes, you can use any one of them for the reset process.
  4. Clear the remote control’s memory: Press and hold the “Learn” or “Program” button on the motor unit until the LED light beside it turns on and then off. This clears the memory of the opener, removing any previously programmed remotes.
  5. Program the remote control: Within 30 seconds of clearing the memory, press and release the “Learn” or “Program” button once again. The LED light should turn on.
  6. Press the button on the remote control: Hold the remote control close to the motor unit and press the button you wish to program on the remote. The LED light on the motor unit should flash or blink to indicate that it has received the signal from the remote.
  7. Test the remote control: Stand clear of the garage door and press the programmed button on the remote control. The door should respond by opening or closing. If it doesn’t, repeat the programming process, ensuring that you follow each step accurately.
  8. Repeat for additional remotes: If you have more than one remote control, repeat steps 6 and 7 for each remote to program them to the garage door opener.
  9. Confirm successful programming: Once you have programmed all the remotes, test each one to ensure they are functioning correctly. Open and close the garage door using each remote to verify that they are working as expected.
  10. Resetting the keypad (if applicable): If your Genie garage door opener has a keypad, you may need to reset it separately. Refer to the manufacturer’s instructions specific to your model to learn how to reset the keypad.

Remember that these instructions provide a general guideline for resetting a Genie Garage Door Repair opener. The exact process may vary depending on the model and specific features of your opener. Always consult the manufacturer’s manual or website for detailed instructions tailored to your specific model.

Atlas Door Company

6817 Sundance Cir W, Joshua, TX 76058, United States

1-817-295-3660

Powered by WordPress & Theme by Anders Norén