Local Businesses Blog in Texas

Month: January 2024 Page 1 of 2

How Does Maintenance Contribute To The Durability Of A Garage Door Opener? – CCM Overhead Doors

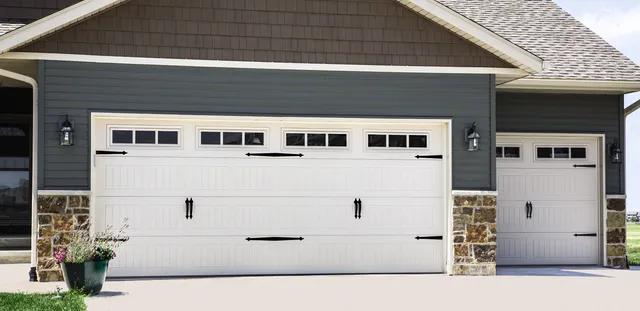
A Garage Door Opener Oklahoma City OK is a modern convenience that adds efficiency and ease to our daily lives.

To ensure its reliable performance over the years, proper maintenance is essential. In this comprehensive guide, we will explore how regular maintenance contributes to the durability of a garage door opener, covering key aspects such as preventive care, lubrication, safety checks, and troubleshooting.

1. Preventive Care:

Preventive care is the cornerstone of maintaining a durable garage door opener. Rather than waiting for issues to arise, proactive measures can prevent potential problems, extending the lifespan of the opener. Here’s how preventive care plays a crucial role:

Visual Inspection: Regularly inspect the entire garage door opener system, including the motor, drive mechanism, and safety features. Look for any signs of wear, loose components, or misalignments.

Tightening and Adjustment: Ensure that all nuts, bolts, and screws are securely tightened. Check the alignment of the opener rail and make any necessary adjustments to maintain proper functionality.

Electrical Connections: Examine electrical connections for signs of corrosion or damage. Loose or corroded wires can lead to malfunctions and reduce the overall lifespan of the opener.

Sensor Alignment: Confirm that the safety sensors are properly aligned. Misaligned sensors can cause the door to behave erratically or fail to close, posing a safety risk.

2. Lubrication:

Lubrication is a critical aspect of garage door opener maintenance that often goes overlooked. Proper lubrication reduces friction and wear on moving parts, ensuring smooth operation. Consider the following lubrication practices:

Chain or Belt Lubrication: If your garage door opener operates with a chain or belt drive, regularly lubricate these components with a high-quality garage door lubricant. This minimizes noise and reduces stress on the opener motor.

Rollers and Hinges: Lubricate the rollers and hinges on the garage door itself. This not only aids in smooth movement but also prevents excess strain on the opener as the door opens and closes.

Opener Rail: Apply lubricant to the opener rail or drive screw. This enhances the efficiency of the opener’s lifting mechanism, reducing wear on crucial components.

3. Safety Checks:

Regular safety checks are integral to maintaining the durability of a garage door opener. Ensuring that safety features are in optimal condition not only protects your opener but also safeguards your home and family. Key safety checks include:

Auto-Reverse Mechanism: Test the auto-reverse feature by placing an object, such as a piece of wood, in the path of the closing door. The door should immediately reverse its direction upon contact with the obstruction.

Photoelectric Sensors: Confirm that the photoelectric sensors are clean and aligned. These sensors prevent the door from closing if an object or person is detected in the door’s path.

Emergency Release: Test the emergency release mechanism to ensure it functions correctly. This feature allows manual operation of the garage door in the event of a power outage.

4. Troubleshooting and Prompt Repairs:

Timely troubleshooting and repair of any issues that arise are vital for maintaining the durability of a garage door opener. Ignoring problems or delaying repairs can lead to more significant issues and a shortened lifespan for the opener. Here’s how to approach troubleshooting and repairs:

Unusual Noises: If you notice unusual noises during operation, investigate the source promptly. Noises can indicate worn components, misalignments, or insufficient lubrication.

Slow Operation: A garage door opener that operates slowly may have issues with the motor or drive mechanism. Addressing this promptly prevents additional stress on the opener.

Inconsistent Movement: If the garage door moves inconsistently or hesitates during operation, it could be a sign of worn-out gear or sprocket. Prompt replacement of these components can prevent further damage.

Remote Control Issues: If remote controls or keypads are malfunctioning, check and replace the batteries. If issues persist, inspect the opener’s antenna for damage or interference.

5. Weather Stripping Maintenance:

Weather-stripping around the garage door is a crucial component in protecting the opener and the overall garage environment. Proper maintenance of weather stripping contributes to opener durability by preventing exposure to the elements. Consider the following:

Inspect for Wear: Regularly inspect the weather stripping for signs of wear, cracks, or damage. Damaged weather stripping can allow moisture and debris to enter the garage, potentially affecting the opener.

Replacement: If weather stripping shows signs of wear, replace it promptly. New weather stripping helps maintain a controlled environment within the garage, protecting the opener from adverse weather conditions.

6. Professional Maintenance Services:

While homeowners can perform many aspects of garage door opener maintenance, seeking professional maintenance services periodically provides an added layer of expertise. Trained technicians can conduct comprehensive inspections and address issues that may go unnoticed during routine homeowner maintenance. Professional maintenance services typically include:

Motor Inspection: Trained technicians can inspect the motor for signs of wear or overheating, ensuring the longevity of this critical component.

Drive Mechanism Assessment: Professionals can assess the condition of the opener’s drive mechanism, including chains, belts, or screws, and make adjustments as needed.

Opener Programming: Technicians can check and reprogram opener settings, ensuring optimal performance and compatibility with various garage door configurations.

Safety Feature Evaluation: Professionals can thoroughly test and evaluate safety features, providing homeowners with peace of mind regarding the safe operation of their Garage Door Opener Oklahoma City OK.

CCM Overhead Doors

1000 NW 80th St, Oklahoma City, OK 73114, United States

1-405-563-8982

Top 3 Risks Doing DIY Garage Door Repair – BH Garage Doors and Gates

The Rockwall Garage Door Repair is a vital component of your home, providing security, convenience, and curb appeal. When faced with issues, the temptation to embark on DIY garage door repair may seem appealing.

However, it’s crucial to recognize the potential risks associated with attempting repairs without professional expertise. In this article, we’ll explore the top three risks of DIY garage door repair and highlight why seeking professional help is the safer and more effective choice.

1. Personal Safety Hazards:

One of the primary risks of DIY garage door repair is the potential for personal safety hazards. Garage doors are heavy and operate under tension, especially when it comes to components like springs and cables. Mishandling these components without the proper knowledge and precautions can lead to accidents and injuries.

a. Spring Tension:

Garage door springs are under significant tension to counterbalance the weight of the door. If not handled correctly, releasing or adjusting the tension on springs can result in severe injuries. The force exerted by garage door springs is powerful enough to cause fractures, bruises, or even more critical injuries. Professional technicians are trained to handle spring-related tasks safely, minimizing the risk of accidents.

b. Falling Doors:

Attempting to repair a garage door without proper support and precautions can lead to the door unexpectedly falling. This is especially true if the door is not adequately secured during repairs. A falling garage door poses a significant risk of injury, potentially causing fractures, bruises, or even more severe harm. Professional technicians employ safety measures and support systems to prevent the door from falling during repairs.

c. Pinch Points and Moving Parts:

Garage doors have numerous moving parts, including rollers, hinges, and cables. DIY repair attempts without a thorough understanding of these components can result in pinch points and entanglements. Accidental contact with moving parts can cause injuries, ranging from minor cuts and bruises to more severe harm. Professional technicians are trained to work around these components safely and know how to avoid potential hazards.

2. Lack of Expertise:

DIY enthusiasts may possess various skills, but garage door repair requires specific expertise and knowledge of the system’s intricacies. Lack of expertise is a significant risk when attempting DIY garage door repairs, as it can lead to improper diagnoses, ineffective solutions, and further damage to the door.

a. Inaccurate Diagnoses:

Identifying the root causes of garage door issues requires a comprehensive understanding of the system. DIY attempts may result in inaccurate diagnoses, addressing only the visible symptoms rather than the underlying problems. Without the proper expertise, homeowners may end up applying temporary fixes that fail to address the actual issues, leading to recurring problems.

b. Incorrect Repairs:

Garage doors are equipped with various components, each serving a specific purpose. Performing repairs without a clear understanding of these components and their functions can lead to incorrect repairs. Misaligning tracks, improperly adjusting spring tension, or using the wrong tools can exacerbate issues and cause further damage to the door. Professional technicians are trained to accurately diagnose problems and implement precise repairs.

c. Compromised Safety Features:

Garage doors often come with safety features such as photo-eye sensors that detect obstacles in the door’s path. DIY repairs may inadvertently compromise these safety features, posing risks to both individuals and property. Professional technicians are well-versed in the intricacies of garage door safety features and ensure that repairs are conducted without compromising these critical elements.

3. Increased Costs and Additional Damage:

While the initial intent of DIY garage door repair may be to save money, it can lead to increased costs in the long run. The risk of causing additional damage, the potential for inaccurate repairs, and the need for professional intervention after DIY attempts can result in higher overall expenses.

a. Additional Damage:

DIY repairs carry the risk of causing additional damage to the garage door system. A well-intentioned attempt to fix a specific issue may inadvertently lead to new problems. For example, using incorrect tools or applying excessive force during repairs can damage components, exacerbating the original issue and necessitating more extensive repairs.

b. Complications and Delays:

Inaccurate DIY repairs often result in complications and delays. If the initial repair attempts prove ineffective, homeowners may need to seek professional assistance to address the lingering problems. This not only extends the repair timeline but also increases the overall costs associated with fixing the garage door.

c. Voided Warranties:

Many garage doors and components come with warranties that are contingent on professional installation and repairs. DIY attempts may void these warranties, leaving homeowners responsible for the full cost of any necessary repairs or replacements. Seeking professional help ensures that repairs are conducted in a manner that preserves warranties and guarantees.

In conclusion, the risks of DIY Rockwall Garage Door Repair extend beyond the potential for personal injury. Lack of expertise can lead to inaccurate diagnoses, incorrect repairs, and compromised safety features. The increased costs associated with additional damage, complications, and voided warranties make DIY attempts less cost-effective in the long run. Prioritizing safety, accuracy, and efficiency underscores the importance of seeking professional help for garage door repairs. Professional technicians bring the required expertise, safety protocols, and a track record of successful repairs, ensuring that your garage door operates optimally and safely. When it comes to the functionality and safety of your garage door, professional intervention is the wise and secure choice.

BH Garage Doors and Gates

1-214-206-5231

How To Install Cable On Garage Door Springs – Affordable Garage Door Repairs of Indianapolis, LLC

Installing cables on Garage Door Repair Indianapolis IN is a task that requires careful attention to detail and safety precautions.

The cables play a crucial role in the counterbalance system of the garage door, helping distribute the weight and tension created by the springs. Follow this step-by-step guide to safely and effectively install cables on garage door springs:

: Gather Materials and Tools

Before you begin, gather all the necessary materials and tools. You will need replacement cables, winding bars, safety gloves, a ladder, adjustable wrench, and a cable tension monitor if available.

: Understand the Garage Door System

Before attempting any work on the garage door springs, it’s crucial to understand the type of springs your garage door has. There are two common types: torsion springs and extension springs. Torsion springs are mounted above the door, while extension springs are located on either side. Ensure you know the specific type and have the right replacement cables.

: Disconnect the Garage Door Opener

For safety reasons, disconnect the garage door opener from the power source. This prevents any unintentional movement of the door during the cable installation process.

: Release Tension from the Springs

If you have torsion springs, use winding bars to release tension from the springs. Insert the winding bars into the winding cones on each side of the spring and carefully unwind the spring. Follow the manufacturer’s instructions to release tension safely. If you have extension springs, open the garage door fully to relieve tension.

: Remove Old Cables

If there are existing cables, carefully remove them from the pulleys and any other connection points. Use caution, as there may still be some tension in the springs.

: Attach New Cables to the Bottom Bracket

Secure one end of the new cable to the bottom bracket of the garage door. Use the provided hardware and ensure a tight connection. Repeat this process for both sides if your garage door has two cables.

: Thread Cables through Pulleys

Guide the cables through the pulleys attached to the garage door tracks. Ensure the cables are properly seated in the pulleys and move freely without any kinks or twists.

: Wind Torsion Springs (If Applicable)

If you have torsion springs, use the winding bars to wind the springs back to the appropriate tension. Follow the manufacturer’s guidelines for the number of turns required based on the weight of your garage door.

: Secure Cables to Cable Drums (Torsion Springs)

For torsion springs, secure the cables to the cable drums on each side. Make sure the cables are properly wrapped around the drums and are not overlapping.

: Adjust Cable Tension

Carefully adjust the tension on the cables to ensure they are evenly distributed. Use a cable tension monitor if available to measure and adjust the tension accurately.

: Test the Garage Door

Manually operate the garage door to ensure smooth movement and proper cable function. Check for any unusual sounds or resistance and make adjustments if necessary.

: Reconnect Garage Door Opener

If you disconnected the garage door opener, reconnect it to the power source. Test the opener to ensure it works smoothly with the newly installed cables.

: Final Inspection

Perform a final inspection of the entire system. Check for any loose connections, proper cable alignment, and the overall balance of the garage door. Make any necessary adjustments for optimal performance.

: Lubricate Moving Parts (Optional)

Consider lubricating the moving parts of the garage door, including the pulleys and springs, to ensure smooth operation and prolong the lifespan of the components.

By following these detailed steps and adhering to safety guidelines, you can successfully install cables on Garage Door Repair Indianapolis IN. If you are unsure about any step in the process or if you encounter difficulties, it’s advisable to consult a professional garage door technician for assistance. Safety should always be a top priority when working with garage door components.

Affordable Garage Door Repairs of Indianapolis, LLC

1-317-372-5337

How To Fix Rust On Bottom Of Garage Door – Veterans Garage Door

Rust is a common problem, especially in areas with high humidity or where Garage Door Repair Sarasota FL are exposed to the elements.

Addressing rust promptly is crucial to prevent further deterioration. This guide aims to provide you with detailed instructions on how to fix rust on the bottom of your garage door, ensuring both functionality and curb appeal.

Materials and Tools You’ll Need

Before starting the rust removal process, gather the following materials and tools:

  • Protective gear (gloves, safety glasses, mask)
  • Wire brush or steel wool
  • Sandpaper (medium and fine grit)
  • Rust converter or rust dissolver
  • Primer
  • Exterior paint or rust-resistant coating
  • Drop cloths or plastic sheeting
  • Painter’s tape

: Assess the Rust Damage

Begin by thoroughly inspecting the rusted areas on the bottom of your garage door. Identify the extent of the rust and whether it has caused any structural damage. This assessment will guide you in determining the appropriate restoration steps.

: Prepare the Workspace

To protect your surroundings, lay down drop cloths or plastic sheeting around the garage door. Use painter’s tape to secure the covering and prevent any accidental splatter on adjacent surfaces.

: Remove Loose Rust with Wire Brush or Steel Wool

Using a wire brush or steel wool, gently scrub the rusted areas to remove loose rust flakes and surface oxidation. Be thorough in this process, ensuring that you reach all the corroded spots. This step prepares the surface for more in-depth rust removal.

: Sand the Rusted Areas

Once you’ve removed the loose rust, use medium-grit sandpaper to sand the rusted areas. Sanding helps smooth the surface and prepares it for the rust converter or dissolver. Follow up with fine-grit sandpaper for a smoother finish.

: Apply Rust Converter or Rust Dissolver

Apply a rust converter or rust dissolver to the sanded areas following the product’s instructions. These solutions chemically transform rust into a stable compound, preventing further corrosion. Allow the converter or dissolver to sit for the recommended time, ensuring that it penetrates and neutralizes the rust.

: Wipe and Clean the Surface

After the rust converter or dissolver has done its job, use a clean, damp cloth to wipe away any residue. Ensure that the surface is thoroughly cleaned and free from any remaining rust particles or solution.

: Apply Primer to the Treated Surface

To enhance adhesion and protect against future rusting, apply a rust-inhibiting primer to the treated surface. Use a brush or spray primer, following the manufacturer’s instructions. Allow the primer to dry completely before moving on to the next step.

: Sand the Primed Surface

Once the primer is dry, lightly sand the primed surface with fine-grit sandpaper. This step smoothens the surface, preparing it for the final coat of paint or rust-resistant coating.

: Apply Exterior Paint or Rust-Resistant Coating

Choose a high-quality exterior paint or rust-resistant coating suitable for metal surfaces. Apply an even coat to the primed and sanded areas, ensuring complete coverage. Follow the recommended drying times between coats and apply additional coats if necessary.

: Allow Sufficient Drying Time

Allow the final coat of paint or rust-resistant coating to dry completely. Avoid using the garage door until the coating has cured to ensure a durable and long-lasting finish.

: Regular Maintenance

To prevent future rusting, perform regular maintenance on your garage door. Inspect it periodically for signs of rust or wear, and address any issues promptly. Regular cleaning and protective coatings can extend the life of your garage door.

Conclusion:

Fixing rust on the bottom of your Garage Door Repair Sarasota FL is a proactive and achievable task with the right approach. By following these step-by-step instructions, you can effectively remove rust and restore your garage door’s appearance and functionality. Remember to prioritize safety during the restoration process, and consult professionals for extensive rust damage or if you’re unsure about certain aspects of the restoration.

Veterans Garage Door

6497 Parkland Dr F, Sarasota, FL 34243, United States

1-941-699-6198

How Much Does A Broken Garage Door Spring Cost – Little Elm Gates & Garage Door Repair

The cost of Garage Door Repair Little Elm TX can vary based on several factors, including the type of spring, the size and weight of the garage door, whether you replace both springs, and whether you opt for professional repair services.

Garage door springs are essential components that counterbalance the weight of the door, facilitating smooth and controlled movement. When a spring breaks, prompt repair is necessary for the door’s safe and efficient operation. In this comprehensive guide, we’ll explore the factors influencing the cost of repairing a broken garage door spring and provide insights into the various options available.

1. Types of Garage Door Springs: Garage doors typically use two types of springs:

  • Torsion Springs: Mounted horizontally above the garage door, torsion springs are wound tightly to store energy. They are considered more durable and provide smoother door operation.
  • Extension Springs: Mounted on the sides of the garage door, extension springs stretch and contract as the door moves. While common in older garage door systems, they are generally less expensive but have a shorter lifespan than torsion springs.

2. Extent of Damage: The extent of damage to the garage door spring can vary, affecting the repair cost. Common issues include:

  • Torsion Spring Issues: Fractures, rust, or misalignment can occur, leading to difficulties in opening and closing the door.
  • Extension Spring Issues: Over time, extension springs may lose tension or suffer from wear and tear, resulting in imbalances.

3. Single vs. Double Spring Repair: Garage doors often have two springs, and it’s common to repair or replace both even if only one has failed. This ensures balanced tension and prevents uneven wear. Repairing both springs can add to the overall cost.

4. Professional Repair Services: While some homeowners may attempt DIY repairs, professional repair services are often recommended for garage door springs. The high tension in the springs poses safety risks, and professionals have the expertise and tools to perform repairs safely.

5. Emergency vs. Non-Emergency Repair: If a garage door spring fails suddenly, emergency repair services may be required. Emergency services may incur additional charges, so scheduling non-emergency repairs can be more cost-effective.

6. Brand and Quality: Different brands offer garage door springs with varying levels of quality and durability. Higher-quality springs may have higher upfront costs but can provide better performance and a longer lifespan.

7. Warranty: Consider the warranty offered by the manufacturer or repair service for the garage door spring repair. A longer warranty period can provide peace of mind and contribute to the overall value of the repair.

8. Local Market Conditions: Local factors, such as labor costs and market demand, can influence the overall price of garage door spring repair services.

9. DIY vs. Professional Repair: While some minor repairs may be possible for homeowners with the right skills, garage door spring repair is often best left to professionals to ensure safety and proper functionality.

10. Additional Components: Sometimes, additional components such as cables, pulleys, or brackets may need replacement along with the springs. These additional components can add to the overall repair cost.

11. Obtaining Quotes and Comparisons: To get an accurate estimate, it’s recommended to obtain quotes from multiple garage door repair service providers. Comparing these quotes will help you make an informed decision based on your budget and preferences.

Conclusion:

The cost of Garage Door Repair Little Elm TX depends on various factors, including the type of spring, extent of damage, professional repair services, brand, and local market conditions. Prioritize safety by opting for high-quality springs and professional repair services. Carefully assess your specific needs and budget to choose a solution that ensures the reliable and safe operation of your garage door. Regular maintenance and timely repairs contribute to the longevity and performance of your garage door system.

Little Elm Gates & Garage Door Repair

14809 Lone Spring Dr, Little Elm, TX 75068

1-972-597-8816

How Much Are Genie Garage Door Openers – BH Gates & Garage Door Repair


The cost of Garage Door Repair Rockwall TX can vary based on several factors, including the type of opener, features, horsepower, and whether it comes with additional accessories.

Genie is a well-known brand in the garage door opener industry, offering a range of products to suit different needs and preferences. In this comprehensive guide, we’ll explore the factors influencing the cost of Genie garage door openers and provide insights into the various options available.

1. Types of Genie Garage Door Openers: Genie offers various types of garage door openers, each catering to specific requirements:

  • Chain-Drive Openers: These are durable and affordable, using a chain to move the trolley and open or close the garage door. They are a popular choice for budget-conscious consumers.
  • Belt-Drive Openers: Belt-drive openers use a rubber belt for quieter operation compared to chain drives. They are suitable for homeowners who prioritize reduced noise during garage door operation.
  • Screw-Drive Openers: Genie’s screw-drive openers use a threaded steel rod to move the trolley. They provide a balance between price and performance, offering smooth and reliable operation.
  • Smart Garage Door Openers: Genie also offers smart garage door openers equipped with Wi-Fi connectivity, allowing homeowners to control and monitor their garage doors remotely using smartphones.

2. Motor Power: Genie garage door openers come with various horsepower options, typically ranging from 1/2 HP to 1.25 HP. The power of the motor depends on the size and weight of the garage door. Larger and heavier doors generally require more powerful motors.

3. Smart Features: Genie’s smart garage door openers come with advanced features such as Wi-Fi connectivity, smartphone control, and compatibility with virtual assistants like Amazon Alexa and Google Assistant. While adding convenience, these features can contribute to a higher overall cost.

4. Additional Accessories: Genie offers various accessories for garage door openers, including remote controls, wireless keypads, and wall consoles. These accessories can enhance the functionality of the garage door opener but may add to the overall cost.

5. Professional Installation: While some homeowners may choose to install Genie garage door openers themselves, professional installation is often recommended. Installation costs can vary based on factors such as the complexity of the installation, the type of opener, and local labor rates.

6. Brand and Quality: Genie is a reputable brand known for manufacturing reliable and durable garage door openers. While the brand’s products may have higher upfront costs, they often come with better quality and warranty coverage.

7. Warranty and Maintenance: Consider the warranty offered by Genie for its garage door openers. A longer warranty period or comprehensive coverage may contribute to the overall value of the product.

8. Local Market Conditions: Local factors, such as labor costs and market demand, can influence the overall price of Genie garage door openers and installation services.

9. Obtaining Quotes and Comparisons: To get an accurate estimate, it’s recommended to obtain quotes from multiple retailers and installation professionals. Comparing these quotes will help you make an informed decision based on your budget and preferences.

Conclusion:

Garage Door Repair Rockwall TX offer a range of options to suit different needs, including various types, motor powers, and smart features. The cost of Genie garage door openers can vary based on the type, horsepower, smart features, additional accessories, professional installation, and local market conditions. Consider your specific requirements, budget, and preferences to choose a Genie garage door opener that meets your needs for reliable and efficient garage door operation. Professional installation is advised to ensure proper functionality and safety.

BH Gates & Garage Door Repair

420 Lynne Dr, Rockwall, TX 75032

1-469-654-3876

How Do You Replace A Garage Door Opener Remote – Celina Gates & Garage Door Repair

Replacing a Celina Garage Door Repair is a common and straightforward task that allows you to continue enjoying the convenience of opening and closing your garage door with ease.

Whether you’ve lost your remote, it’s no longer functioning, or you simply want to upgrade to a new model, this comprehensive guide will walk you through the step-by-step process of replacing a garage door opener remote.

: Identify the Garage Door Opener Model

Before purchasing a new remote, identify the make and model of your garage door opener. This information is crucial for selecting a compatible remote. You can find the opener’s model number on the motor unit or refer to the owner’s manual for details.

: Determine Remote Compatibility

Once you know your opener’s model, check with the manufacturer or refer to their website to ensure compatibility with the remote you intend to purchase. Some brands have specific remotes designed for certain models or series.

: Purchase a New Garage Door Opener Remote

Visit a local home improvement store, garage door retailer, or the manufacturer’s website to purchase a new remote. Make sure the remote matches the brand and model of your garage door opener. You may opt for a universal remote that is compatible with various opener brands.

: Prepare the New Remote

Before programming the new remote, insert the batteries provided with the remote or use fresh, high-quality batteries. Ensure that the batteries are correctly placed according to the polarity indicators.

: Locate the “Learn” or “Program” Button

On the garage door opener motor unit, locate the “Learn” or “Program” button. This button is typically on the back or side of the motor unit and is essential for syncing the new remote with the opener.

: Clear Existing Codes (if necessary)

If you are replacing a lost or stolen remote, or if you want to ensure security, clear existing codes from the opener’s memory. Press and hold the “Learn” or “Program” button until the indicator light on the motor unit turns off, indicating that the codes have been cleared.

: Program the New Remote

With the garage door closed, press and release the “Learn” or “Program” button on the motor unit. The indicator light should illuminate, indicating that the opener is in programming mode. Within a short timeframe, press the button on the new remote that you want to program. Hold the button until the opener’s indicator light blinks or clicks, signifying a successful programming.

: Test the New Remote

Test the new remote by pressing the button you programmed. The garage door should respond by either opening or closing. If the door doesn’t move, double-check the programming steps and ensure that the remote is compatible with your opener model.

: Program Additional Buttons (if needed)

If your new remote has multiple buttons for controlling different garage doors or functions, repeat the programming process for each button. This allows you to operate multiple doors or features with a single remote.

: Finalize Programming

Once all buttons on the new remote are successfully programmed, press the “Learn” or “Program” button on the garage door opener one more time to exit programming mode. This ensures that the opener is back to its regular operating state.

: Store the Old Remote (if applicable)

If you’re replacing a malfunctioning remote but still have the old one, store it in a safe place. If the new remote experiences issues in the future, the old remote can serve as a backup.

: Check for Range and Interference

Test the remote’s range by operating the garage door from various distances. Ensure that there are no obstructions or interference that may affect the remote’s performance.

Additional Tips:

  1. Consider Upgrading to a Smart Garage Door Opener: If you’re replacing a remote and want to add smart features, consider upgrading to a smart garage door opener system. These systems often allow control through a smartphone app, providing additional convenience and security features.
  2. Keep Track of Programming Steps: Document the programming steps in case you need to reprogram the remote in the future or for reference if you purchase additional remotes.
  3. Consult the Owner’s Manual: Refer to your garage door opener’s owner’s manual for specific instructions and troubleshooting tips related to remote programming. Manuals provide valuable information tailored to your opener’s make and model.

Conclusion:

Replacing a Celina Garage Door Repair is a relatively simple task that allows you to maintain efficient and convenient access to your garage. By following these step-by-step instructions and choosing a compatible remote, you can successfully program the new remote and enjoy seamless operation of your garage door. If you encounter challenges or have specific questions, don’t hesitate to reach out to the manufacturer’s customer support for assistance.

Celina Gates & Garage Door Repair

211 S Ohio Dr, Celina, TX 75009

1-214-833-9968

How Do You Program A New Garage Door Opener – Valley Center Gates & Garage Doors

Programming a new Garage Door Repair Valley Center CA is a straightforward process that involves syncing the opener with your garage door system.

Whether you’ve installed a new opener or replaced an existing one, programming ensures that the opener communicates effectively with your garage door. In this comprehensive guide, I’ll walk you through the step-by-step process for programming a new garage door opener.

: Read the User Manual

Before you begin the programming process, familiarize yourself with the user manual that came with your new garage door opener. The manual contains specific instructions, safety guidelines, and troubleshooting information. Understanding the manufacturer’s recommendations is crucial for a successful programming experience.

: Gather Necessary Tools and Accessories

Ensure that you have all the necessary tools and accessories for the programming process. This may include a ladder, a screwdriver, and any additional components specified in the user manual.

: Power On the Garage Door Opener

Plug in the new garage door opener and ensure that it is properly powered on. If the opener has a battery compartment, insert the required batteries.

: Locate the “Learn” or “Program” Button

Most garage door openers have a “Learn” or “Program” button located on the motor unit. This button is crucial for initiating the programming mode. Find this button, which is typically on the back or side of the motor unit.

: Clear Previous Codes (if necessary)

If you are replacing an existing garage door opener or experiencing issues, it’s advisable to clear any previous codes. Press and hold the “Learn” or “Program” button until the indicator light on the motor unit turns off. This action resets the system and prepares it for new programming.

: Test the Safety Reversal System

Before programming, ensure that the garage door’s safety reversal system is functioning correctly. This system is designed to detect obstacles and prevent accidents. Perform a test by placing an object in the path of the closing door. The door should reverse when it comes into contact with the object.

: Set Up the Remote Controls

If your new garage door opener comes with remote controls, program them according to the instructions in the user manual. Typically, this involves pressing the “Learn” or “Program” button on the opener and then pressing a button on the remote control. Repeat this process for each remote control you want to program.

: Program the Keypad (if included)

If your new garage door opener includes a keypad for keyless entry, follow the user manual instructions to program it. This usually involves entering a PIN code and pressing the “Learn” or “Program” button on the opener.

: Adjust Opening and Closing Limits

Fine-tune the opening and closing limits of the garage door. This ensures that the door opens and closes to the correct positions. Refer to the user manual for specific instructions on adjusting the travel limits.

: Test the Garage Door

Test the garage door by using the programmed remote controls or keypad. Open and close the door multiple times to ensure smooth operation. Pay attention to any unusual noises or jerky movements, as these may indicate issues that require adjustment or troubleshooting.

: Install Safety Sensors

If your new garage door opener includes safety sensors, install them according to the manufacturer’s instructions. These sensors are typically mounted near the floor on each side of the garage door and ensure that the door reverses if an obstruction is detected.

: Finalize Programming

Once you have completed all the programming steps and tested the garage door thoroughly, press the “Learn” or “Program” button on the opener one more time to exit programming mode. This finalizes the programming process and ensures that the opener is ready for regular use.

: Troubleshooting

If you encounter any issues during the programming process or if the garage door doesn’t operate as expected, refer to the troubleshooting section of the user manual. Common issues may include incorrect programming, misalignment of sensors, or issues with the garage door itself.

Conclusion:

Programming a new Garage Door Repair Valley Center CA is a systematic process that ensures the safe and efficient operation of your garage door system. By following these detailed steps and referring to the user manual, you can successfully program your new garage door opener and enjoy seamless access to your garage. If you encounter challenges beyond your expertise, don’t hesitate to seek assistance from the manufacturer’s customer support or a professional garage door technician for further guidance.

Valley Center Gates & Garage Doors

15947 Mac Tan Ln, Valley Center, CA 92082

1-760-309-7584

How Much Does It Cost To Replace Garage Door Opener – Encinitas Overhead & Garage Doors

A smoothly functioning Encinitas Garage Door Repair is essential for the convenience and security of your home.

When it comes time to replace a malfunctioning or outdated opener, understanding the factors influencing the cost can help homeowners make informed decisions. From the type of opener to additional features, various elements contribute to the overall expense.

Types of Garage Door Openers:

  1. Chain-Drive Openers:
    • Affordable and reliable, but can be noisy.
    • Replacement cost: $150 – $400.
  2. Belt-Drive Openers:
    • Quieter operation compared to chain-drive openers.
    • Replacement cost: $200 – $600.
  3. Screw-Drive Openers:
    • Mid-range in terms of price and noise level.
    • Replacement cost: $200 – $550.
  4. Direct-Drive Openers:
    • Ultra-quiet operation with minimal moving parts.
    • Replacement cost: $300 – $700.
  5. Smart/Wi-Fi-Enabled Openers:
    • Equipped with advanced features like remote monitoring and smartphone control.
    • Replacement cost: $300 – $800.

Factors Influencing Replacement Costs:

  1. Opener Type:
    • The choice between chain, belt, screw, or direct-drive openers impacts the overall replacement cost.
  2. Horsepower (HP):
    • Higher HP openers are suitable for heavier doors but may cost more.
  3. Additional Features:
    • Smart features, battery backup, and advanced security options can increase the replacement cost.
  4. Professional Installation:
    • Hiring a professional for installation ensures proper setup but adds to the overall expense.
  5. Brand and Model:
    • Premium brands and models may come with a higher price tag.
  6. DIY Installation:
    • DIY installation can save money, but it’s crucial to have the necessary skills and tools.

Average Costs for Garage Door Opener Replacement:

  1. Basic Chain-Drive Opener:
    • $150 – $250
  2. Mid-Range Belt-Drive Opener:
    • $200 – $400
  3. Screw-Drive Opener:
    • $200 – $350
  4. Direct-Drive Opener:
    • $300 – $500
  5. Smart/Wi-Fi-Enabled Opener:
    • $300 – $600

Tips for Cost-Effective Replacement:

  1. Assess Your Needs:
    • Choose an opener that suits the size and weight of your garage door.
  2. Compare Brands and Models:
    • Research various brands and models to find the best combination of features and affordability.
  3. Consider DIY Installation:
    • If you have the necessary skills, installing the opener yourself can save on installation costs.
  4. Prioritize Essential Features:
    • Opt for features that align with your needs, avoiding unnecessary expenses.

Conclusion:

The cost to replace a Encinitas Garage Door Repair varies based on factors such as opener type, additional features, and professional installation. By understanding these elements and assessing your specific needs, you can make a well-informed decision that not only ensures the smooth operation of your garage door but also maximizes the value for your investment.

Encinitas Overhead & Garage Doors

1069 Double Ll Ranch Rd, Encinitas, CA 92024

1-858-758-9493

How Long Does Garage Door Opener Last – Solana Beach Garage & Overhead Doors

The Garage Door Repair Solana Beach CA, a marvel of convenience and innovation, plays a pivotal role in our daily routines.

It’s the unsung hero that lifts and lowers the garage door with the push of a button, providing security and ease of access. Understanding the lifespan of a garage door opener is crucial for homeowners looking to maintain a well-functioning and reliable entry system.

Factors Influencing Garage Door Opener Lifespan

1. Quality of Construction

The durability of a garage door opener is heavily influenced by the quality of its construction. High-quality materials and robust engineering contribute to a longer lifespan. When selecting a garage door opener, investing in a reputable brand known for reliability can pay off in the long run.

2. Frequency of Use

The more frequently a garage door opener is used, the more strain it experiences. A household with multiple vehicles coming and going throughout the day will put more stress on the opener compared to a less active garage. Understanding the demands on the opener helps in gauging its potential lifespan.

3. Regular Maintenance

Proactive maintenance significantly impacts the lifespan of a garage door opener. Regular checks, lubrication of moving parts, and addressing minor issues promptly can extend the device’s longevity. Neglecting maintenance may lead to premature wear and malfunctions.

4. Climate and Environmental Conditions

The climate and environmental conditions in which a garage door opener operates also play a role in its lifespan. Extreme temperatures, high humidity, and exposure to harsh elements can accelerate wear and deterioration. Adequate protection and climate-appropriate installations can mitigate these effects.

5. Type and Model of Garage Door Opener

Different types of garage door openers have varying lifespans. Chain-driven openers are robust but may experience more wear, while belt-driven and screw-driven models are known for quieter operation and durability. The specific model and its features can influence how long it lasts.

Signs of Aging and Wear

Recognizing the signs of an aging garage door opener is crucial in addressing issues before they escalate. Here are common indicators that your opener may be showing signs of wear:

1. Unusual Noises

An opener that once operated quietly may start producing unusual sounds, such as grinding, rattling, or squeaking. These noises could be indicative of worn-out components, such as gears or bearings.

2. Slow Operation

A gradual decrease in the speed at which the garage door opens or closes may suggest issues with the motor or other internal components. Slow operation can lead to inconvenience and compromised security.

3. Inconsistent Movement

If the garage door opener exhibits erratic or uneven movement, it may be a sign of misaligned tracks, damaged rollers, or other mechanical problems. Inconsistencies in movement can lead to further damage if not addressed promptly.

4. Vibrations or Shaking

Excessive vibrations or shaking during operation may indicate imbalances or misalignments. These issues can strain the opener and contribute to accelerated wear.

5. Visible Wear on Components

Inspect the physical components of the garage door opener, including the chain or belt, for visible signs of wear. Frayed edges, rust, or visible damage can be indicators that certain parts may need replacement.

Maintenance Tips for Prolonging Garage Door Opener Lifespan

1. Regular Lubrication

Ensure that all moving parts of the garage door opener, such as chains, belts, and rollers, are adequately lubricated. This reduces friction and minimizes wear on components.

2. Tighten Loose Hardware

Periodically check for loose bolts, nuts, or screws on the garage door and opener. Tightening any loose hardware helps maintain stability and prevents unnecessary vibrations.

3. Test Safety Features

Modern garage door openers come equipped with safety features such as auto-reverse mechanisms. Regularly test these features to ensure they function correctly, promoting both safety and longevity.

4. Clean and Clear the Tracks

Inspect and clean the tracks through which the garage door moves. Clear any debris, dirt, or obstructions that could impede smooth operation. Clean tracks contribute to a more efficient and durable system.

5. Check and Replace Worn-out Parts

Monitor the condition of the garage door opener’s components and replace any parts showing signs of wear. Prompt replacement of worn-out parts prevents further damage and extends the device’s lifespan.

6. Professional Inspection

Schedule periodic professional inspections to assess the overall condition of the garage door opener. Experienced technicians can identify potential issues before they escalate, ensuring optimal performance.

Considerations for Garage Door Opener Replacement

Despite proactive maintenance, there comes a time when replacing a garage door opener is the most practical choice. Consider the following factors when contemplating a replacement:

1. Age of the Opener

Most garage door openers have a lifespan ranging from 10 to 15 years, depending on usage and maintenance. If your opener is approaching or surpassing this age range, replacement may be a prudent decision to avoid unexpected failures.

2. Frequent Repairs

If your garage door opener requires frequent repairs, it may be more cost-effective to invest in a new, reliable model. Persistent issues could be indicative of internal wear that is not easily addressed.

3. Outdated Technology

Advancements in garage door opener technology offer enhanced features, security, and smart capabilities. If your current opener lacks these modern conveniences, upgrading to a newer model can provide added benefits.

4. Increased Noise Levels

As garage door openers age, they may become noisier due to worn-out components. If the noise levels become disruptive, upgrading to a quieter model can enhance the overall garage experience.

5. Incompatibility with Accessories

If you wish to integrate new accessories or functionalities, such as smart home capabilities or advanced security features, ensure your current garage door opener supports these upgrades. If not, a replacement may be necessary.

Conclusion:

In conclusion, the lifespan of a Garage Door Repair Solana Beach CA is influenced by various factors, including quality, usage frequency, maintenance, environmental conditions, and technological advancements. Regular maintenance and proactive care can significantly extend the longevity of your opener, but eventual replacement is inevitable. Recognizing signs of wear, investing in quality products, and staying informed about the latest technologies contribute to a secure and reliable garage door opener system.

Solana Beach Garage & Overhead Doors

1034 Santa Helena Park Ct, Solana Beach, CA 92075

1-858-648-5118

Page 1 of 2

Powered by WordPress & Theme by Anders Norén