Local Businesses Blog in Texas

Category: general

The Science of Grease Removal: How Professional Cleaning Experts Do It – Dallas Vent-Hood & Conveyer Oven Cleaning

In the fast-paced world of commercial kitchens, the battle against grease is a never-ending one. As a restaurant owner, I’ve come to appreciate the importance of grease removal not only for the safety and hygiene of our kitchen but also for the longevity of our equipment.

In this article, I’ll provide my own perspective on the science of grease removal and how professional cleaning experts tackle this formidable culinary adversary by following Oven Cleaning Dallas TX.

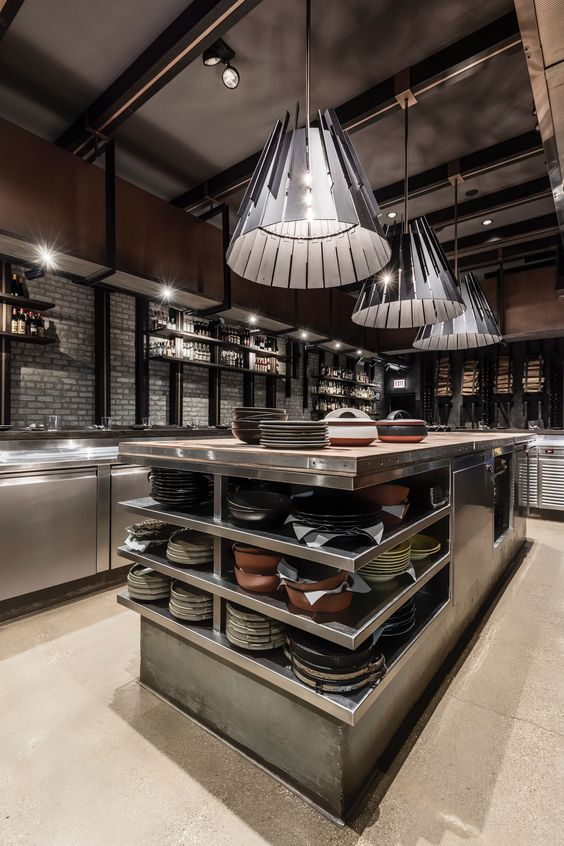
The Grease Challenge

Grease is an inevitable byproduct of cooking in a restaurant kitchen. Whether we’re frying, grilling, or sautéing, it seems like grease finds its way into every nook and cranny of our appliances and ventilation systems. Over time, this buildup can pose several challenges:

  1. Fire Hazard: Accumulated grease is highly flammable, making it a leading cause of kitchen fires.
  2. Air Quality: Grease-laden air affects the overall air quality in the kitchen, creating an unpleasant and potentially hazardous environment.
  3. Efficiency: Grease buildup can hinder the performance of appliances, leading to longer cooking times and energy wastage.
  4. Hygiene and Compliance: Maintaining cleanliness and adhering to health and safety regulations is not only crucial but also a legal requirement in the foodservice industry.

The Science Behind Grease Removal

To combat grease effectively, professional cleaning experts rely on a combination of science, specialized tools, and meticulous techniques. Here’s how it’s done:

1. Understanding the Chemistry:

Grease is composed of triglycerides, which are molecules made up of glycerol and three fatty acid chains. These fatty acids are hydrophobic, meaning they repel water. The key to effective grease removal lies in breaking down these hydrophobic bonds and emulsifying the grease, allowing it to mix with water.

2. Selecting the Right Cleaning Agents:

Professional cleaning experts use specialized cleaning agents designed to break down and emulsify grease. These agents contain surfactants, which are molecules with both hydrophilic (water-attracting) and hydrophobic (water-repelling) parts. Surfactants surround and encapsulate grease molecules, allowing them to be suspended in water.

3. Mechanically Agitating the Grease:

Once the cleaning agent has been applied, professional technicians use various mechanical techniques to agitate and dislodge the grease. This can include scrubbing, brushing, and even high-pressure steam cleaning. The mechanical action helps break apart the grease and facilitate its removal.

4. Temperature Matters:

Heat plays a crucial role in grease removal. Warm water and steam are often used to help soften and melt the grease, making it easier to clean. However, it’s essential to strike the right balance, as excessive heat can create safety hazards.

5. Using the Right Tools:

Professional cleaning experts are equipped with an array of specialized tools to access hard-to-reach areas. These tools are designed to ensure that no corner of the kitchen or appliance remains untouched.

6. Dissolving Grease and Emulsifying:

The cleaning agent’s surfactants work by surrounding and breaking down the grease molecules. They lower the surface tension of water, allowing it to penetrate and dissolve the grease. This emulsified grease can then be easily rinsed away.

The Process of Grease Removal

Here’s a step-by-step breakdown of how professional cleaning experts remove grease from various kitchen components:

1. Vent Hood Cleaning:

Vent hood cleaning is critical for fire safety and maintaining clean kitchen air. Professionals follow these steps:

  • Assessment of the hood’s condition and extent of grease buildup.
  • Application of specialized cleaning agents to the interior surfaces of the hood.
  • Mechanical scrubbing and scraping to dislodge grease and carbon deposits.
  • High-pressure steam cleaning to further loosen and remove residue.
  • Thorough inspection to ensure all residues are removed and the system is safe and efficient.

2. Oven Cleaning:

Professional oven cleaning is essential to maintain efficiency and food quality. The process typically includes:

  • Application of oven-specific cleaning solutions to all interior surfaces.
  • Scrubbing and brushing to dislodge grease and food residue.
  • Use of scrapers to remove stubborn buildup without damaging surfaces.
  • High-pressure steam cleaning to facilitate grease removal.
  • Thorough inspection to ensure the oven is clean, safe, and efficient.

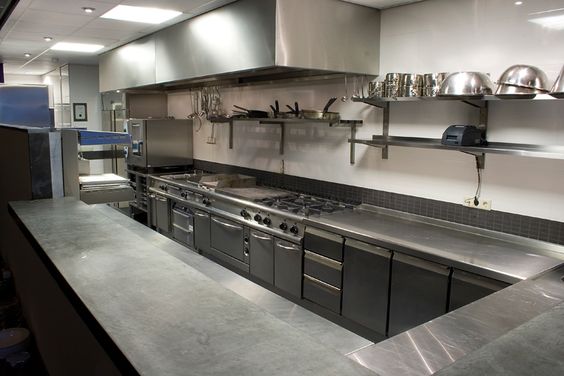
3. Stove and Range Cleaning:

Stoves and ranges are prone to grease buildup around burners and grates. The cleaning process involves:

  • Removal of burners, grates, and other removable parts.
  • Application of cleaning agents to all surfaces.
  • Scrubbing and brushing to dislodge grease and food residue.
  • Use of scrapers to remove stubborn buildup.
  • Reassembly and inspection to ensure proper functionality.

4. Kitchen Surfaces and Equipment:

Kitchen surfaces and equipment are cleaned using similar principles:

  • Application of cleaning agents to affected surfaces.
  • Scrubbing and brushing to dislodge grease and food residue.
  • Use of scrapers for stubborn buildup.
  • Thorough rinsing to remove emulsified grease.

The Role of Professionals

While daily cleaning tasks are essential for grease management, professional cleaning experts bring a combination of knowledge, experience, and specialized equipment to tackle stubborn grease buildup. Their deep cleaning services go beyond routine maintenance and ensure that every corner of the kitchen is free from grease, contributing to safety, efficiency, and food quality.

Conclusion

Overall, according to Oven Cleaning Dallas TX and As a restaurant owner, I’ve seen the transformative power of science-backed grease removal. Grease may be a formidable adversary, but with the right cleaning agents, techniques, and expertise, it can be effectively and safely eliminated. Professional cleaning experts play a crucial role in maintaining the safety and efficiency of our kitchen, ensuring that our appliances and ventilation systems have a long and productive life. In the battle against grease, science and expertise are our most powerful allies.

Dallas Vent-Hood & Conveyer Oven Cleaning

2627 Lewiston Ave, Dallas, TX 75227, United States

972-645-2861

Preventing Fire Hazards: Why Clean Your Restaurant Oven’s Ventilation System? – Denton Vent-Hood & Conveyer Oven Cleaning

As the proud owner of a bustling restaurant, I’ve always been deeply committed to the safety and well-being of my staff and guests. Creating a welcoming and enjoyable dining experience is a top priority, but it’s equally crucial to ensure that our establishment remains free from potential fire hazards.

In Oven Cleaning Denton TX, I’ll discuss why cleaning your restaurant oven’s ventilation system is a vital step in preventing fire hazards and safeguarding both your business and the people within it.

The Heart of the Kitchen

Our restaurant’s kitchen is the vibrant heart of our operation, where talented chefs craft delectable dishes that bring joy to our guests. Central to this culinary dance are our ovens, the workhorses that diligently prepare our signature recipes. However, what many restaurant owners might not fully grasp is that the exhaust system attached to these ovens plays an equally vital role. This ventilation system is responsible for safely removing hot air, smoke, steam, and cooking byproducts from the kitchen, ensuring a safe and comfortable environment.

The Hidden Danger

Over time, as our kitchens churn out meals day after day, the ventilation system can become a hidden danger zone. Grease and food particles accumulate in the ductwork and exhaust fans, creating a potentially disastrous scenario:

1. Fire Hazard: Grease buildup is highly flammable. In the event of a fire, these deposits can act as fuel, causing a rapid and uncontrollable blaze that puts lives and property at risk.

2. Decreased Efficiency: A clogged ventilation system struggles to effectively remove hot air and cooking byproducts. This inefficiency not only affects kitchen comfort but also increases the risk of overheating, appliance malfunction, and potential fires.

3. Poor Air Quality: Smoke, steam, and cooking odors can linger in the kitchen, leading to poor indoor air quality that affects the well-being of both staff and guests.

4. Health and Safety Concerns: The presence of grease buildup attracts pests and rodents, creating health and safety hazards in the kitchen.

Preventing Fire Hazards

To address these risks, it’s imperative to view ventilation system cleaning as a proactive step in preventing fire hazards:

1. Fire Prevention: Regular cleaning of the ventilation system significantly reduces the risk of kitchen fires by removing grease deposits that could fuel flames.

2. Enhanced Efficiency: A clean ventilation system operates efficiently, maintaining a comfortable kitchen environment and reducing the risk of overheating and appliance damage.

3. Improved Air Quality: Thorough cleaning prevents contaminants from re-entering the kitchen, promoting better indoor air quality for staff and guests.

4. Pest Deterrence: Regular cleaning discourages pests and rodents, reducing health and safety concerns in the kitchen.

The Cost of Neglect

One might argue that preventive maintenance, including ventilation system cleaning, comes with a cost. However, consider the long-term cost of neglect:

1. Fire-Related Costs: The cost of fire-related damage, potential legal liabilities, and increased insurance premiums far exceed the investment in regular ventilation system cleaning.

2. Equipment Replacement: Neglecting maintenance can lead to premature wear and damage to kitchen appliances, resulting in costly replacements.

3. Energy Efficiency: A clogged ventilation system forces appliances to work harder, increasing energy consumption and utility bills.

4. Health Code Violations: A failure to maintain a clean and safe kitchen can lead to health code violations, fines, and damage to your restaurant’s reputation.

5. Downtime and Loss of Revenue: Unexpected kitchen fires or equipment failures can result in unplanned downtime, leading to lost revenue and dissatisfied guests.

Choosing Professional Ventilation Cleaning Services

To fully realize the benefits of ventilation system cleaning, it’s essential to choose the right service provider:

1. Experience and Reputation: Look for well-established companies with a proven track record in the industry. Seek recommendations and read online reviews to gauge their reputation.

2. Certification and Compliance: Ensure that the cleaning company is certified and compliant with industry standards and local health and safety regulations.

3. Comprehensive Services: Select a company that offers comprehensive ventilation system cleaning services, including ductwork, exhaust fans, and exhaust vents.

4. Specialized Equipment: Inquire about the tools and methods the company uses to ensure a deep and thorough cleaning.

5. Flexibility and Scheduling: Consider a company that can accommodate your kitchen’s schedule, as many restaurants operate during non-traditional hours.

6. Safety Protocols: Ensure that the company follows strict safety protocols to minimize risks and accidents during the cleaning process.

7. Transparent Pricing: Request a detailed pricing structure that outlines the cost of services provided. Transparency in pricing is a sign of a reputable service.

Conclusion

In the restaurant industry, fire prevention isn’t just about complying with safety regulations; it’s about protecting lives, property, and the reputation of your business. Ventilation system cleaning is an investment in safety, cost efficiency, and the overall success of your restaurant.

In summary, as the owner who folioed Oven Cleaning Denton TX, I’ve seen the tangible benefits of ventilation system cleaning in our restaurant. It’s a proactive step that not only prevents fire hazards but also ensures a safe and enjoyable dining experience for our guests. It’s a testament to our commitment to providing a welcoming and secure environment, where the joy of dining is complemented by peace of mind. In the end, it’s these safety measures that help our restaurant thrive and create a lasting positive impression on our valued guests.

Denton Vent-Hood & Conveyer Oven Cleaning

8412 Bishop Pine Rd, Denton, TX 76208, United States

940-301-0181

How to Measure Windows for Replacement Like a Pro – Denton Siding & Window Replacement

As a homeowner who recently embarked on the journey of replacing my windows, I quickly realized that the success of the entire project hinged on one crucial step: measuring the windows accurately. Ensuring that you have the correct measurements is the foundation upon which you’ll make informed decisions and avoid costly mistakes when it comes to purchasing and installing new windows.

By following Window Replacement Denton TX, I will share my experiences and insights on how to measure windows for replacement like a pro.

Why Accurate Measurements Matter

Before diving into the specifics of measuring windows, it’s essential to understand why accuracy is paramount. Accurate measurements ensure a seamless window replacement process, and here’s why they matter:

1. Cost Efficiency: Accurate measurements prevent costly errors. Ordering windows that are too small or too large can lead to wasted time, materials, and money.

2. Proper Fit: Accurate measurements guarantee that your new windows will fit perfectly within the existing openings. This not only enhances the aesthetics of your home but also improves energy efficiency and insulation.

3. Customization: Accurate measurements allow you to customize your windows, ensuring they meet your aesthetic preferences and functional requirements.

4. Time Savings: Precise measurements expedite the entire replacement process, reducing the likelihood of delays or the need for rework.

Tools and Materials You’ll Need

To measure windows accurately, you’ll need a few tools and materials:

1. Measuring Tape: A reliable measuring tape is your primary tool. Choose one with both metric and imperial measurements for versatility.

2. Pen and Paper: Keep a notepad and pen handy to jot down measurements and notes.

3. Level: A small level can help ensure that your measurements are straight and true.

4. Ladder: Depending on the height of your windows, you may need a ladder to reach them safely.

5. Safety Gear: Always prioritize safety. If you’re using a ladder, make sure it’s sturdy, and consider wearing appropriate safety gear, such as gloves and safety glasses.

Step-by-Step Guide to Measuring Windows for Replacement

Now, let’s break down the process of measuring windows for replacement into simple, manageable steps.

Step 1: Choose the Right Time

Plan to measure your windows on a day with good weather conditions. You’ll want to have clear visibility and a comfortable environment to work in, especially if you need to access windows from the outside.

Step 2: Determine the Type of Window

Identify the type of windows you have. Common types include single-hung, double-hung, casement, sliding, or fixed windows. Knowing the window style will help you understand how it operates and how it should be measured.

Step 3: Measure the Width

Start by measuring the width of the window. Here’s how:

a. Interior Measurement: Measure the width from the inside of the window frame, from the left to the right. Measure in three places: at the top, in the middle, and at the bottom. Record the narrowest measurement.

b. Exterior Measurement: For added accuracy, measure the width from the outside of the window frame using the same three-point method. Again, record the narrowest measurement.

Step 4: Measure the Height

Next, measure the height of the window. Follow these steps:

a. Interior Measurement: Measure from the inside of the window frame, from the top to the bottom, in three places: on the left, in the middle, and on the right. Record the shortest measurement.

b. Exterior Measurement: For precision, measure the height from the outside of the window frame using the same three-point approach. Record the shortest measurement.

Step 5: Measure the Depth

For certain window types, like casement windows, you’ll need to measure the depth of the window frame. Measure from the inside of the frame to the outside. This measurement will help you determine the frame thickness, which is crucial when selecting replacement windows.

Step 6: Note Additional Information

Take note of any additional information that may impact your window replacement, such as:

  • The style of the window (e.g., single-hung, double-hung, casement).
  • The material of the window frame (e.g., wood, vinyl, aluminum).
  • The location of any obstructions, like radiators or furniture.
  • Any special requirements, such as tempered glass for safety or energy-efficient features.

Step 7: Verify Your Measurements

Double-check your measurements to ensure accuracy. It’s easy to make mistakes, so a second look can help avoid costly errors.

Step 8: Seek Professional Help If Necessary

If you’re uncertain about your measurements or if your windows have unique features, consider consulting a professional window installer or contractor. They can provide expert guidance and ensure that you get precise measurements.

Common Mistakes to Avoid

While measuring windows may seem straightforward, there are some common mistakes that homeowners should be aware of and avoid:

1. Assuming All Windows Are the Same: Different windows in your home may have slightly varying measurements. Don’t assume that one measurement fits all.

2. Neglecting Exterior Measurements: Exterior measurements are crucial, especially if you plan to replace the entire window unit. Skipping these measurements can lead to ill-fitting windows.

3. Not Considering Frame Thickness: For some window types, like casement windows, the frame thickness is crucial. Neglecting this measurement can result in windows that don’t fit the opening properly.

4. Overlooking Obstructions: Failing to account for obstacles like radiators, furniture, or shelving near the window can lead to measurement errors.

5. Measuring on Uneven Surfaces: Ensure that your measuring tape is level and that you measure on a flat surface to prevent inaccurate measurements.

Conclusion: Measure with Precision for Success

In summary, as stated in Window Replacement Denton TX, measuring windows for replacement may seem like a simple task, but it’s a critical step in ensuring a successful window replacement project. Accurate measurements save time, money, and frustration by ensuring that your new windows fit perfectly and operate as intended. By following the step-by-step guide and avoiding common measurement mistakes, you can tackle window replacement like a pro and enjoy the benefits of improved aesthetics, energy efficiency, and overall comfort in your home.

Denton Siding & Window Replacement

1429 Ridgecrest Cir, Denton, TX 76205, United States

940-283-7300

How to Clean Window Blinds and Shades – Plano Window Cleaning & Glass Repair

As a homeowner who enjoys the benefits of window blinds and shades, I’ve discovered that keeping them clean not only enhances the aesthetics of my home but also contributes to a healthier and more comfortable living environment. However, cleaning window blinds and shades can seem like a daunting task, given their various materials and styles.

I’ll share my personal experiences and provide a comprehensive guide from Window Cleaning Plano TX on how to clean window blinds and shades effectively.

Understanding the Different Types of Window Blinds and Shades

Before we delve into the cleaning process, it’s essential to recognize that window blinds and shades come in various materials and styles, each requiring specific cleaning techniques. The most common types include:

  1. Wood Blinds: Elegant and classic, wood blinds are prone to warping if exposed to excessive moisture. They require gentle cleaning methods.
  2. Faux Wood Blinds: Designed to mimic the look of real wood, faux wood blinds are more resistant to moisture and easier to clean.
  3. Aluminum Blinds: Lightweight and durable, aluminum blinds are a popular choice for modern homes. They are relatively easy to clean.
  4. Fabric Shades: Roller shades, Roman shades, and other fabric-based window coverings add a soft and inviting touch to your space. Cleaning methods vary depending on the fabric type.
  5. Cellular or Honeycomb Shades: Known for their energy-efficient properties, cellular shades have a unique honeycomb structure. Cleaning them requires attention to detail.
  6. Vinyl or PVC Blinds: These blinds are moisture-resistant and straightforward to clean, making them suitable for kitchens and bathrooms.

Cleaning Tools and Supplies

To clean your window blinds and shades effectively, gather the following tools and supplies:

  • A feather duster or microfiber cloth.
  • A vacuum cleaner with a brush attachment.
  • A bucket of warm, soapy water (use a mild dish soap).
  • A soft sponge or cloth.
  • A lint roller or sticky tape.
  • A small brush or toothbrush (for detailed cleaning).
  • A gentle upholstery or fabric cleaner (for fabric shades).
  • A clean, dry cloth or towel.

General Cleaning Steps for Window Blinds and Shades

Now, let’s explore the step-by-step cleaning process for various types of window blinds and shades:

1. Dusting

Start by dusting your window blinds or shades regularly to prevent the buildup of dirt and allergens. Use a feather duster or a microfiber cloth to gently wipe the surface, starting from the top and working your way down.

2. Vacuuming

For a deeper clean, use a vacuum cleaner with a brush attachment to remove dust and debris. Run the vacuum attachment along the slats or fabric, being careful not to apply excessive pressure.

3. Spot Cleaning

If you notice stains or stubborn spots on your blinds or shades, spot cleaning may be necessary. Dip a soft sponge or cloth into a bucket of warm, soapy water (using mild dish soap), wring it out, and gently blot the affected area. Avoid scrubbing vigorously, as this can damage the material.

Specific Cleaning Methods for Different Types of Blinds and Shades

Now, let’s dive into the specific cleaning methods for various types of window blinds and shades:

1. Wood Blinds:

  • Avoid excessive moisture: Wood blinds are susceptible to warping, so avoid using excessive water. Instead, use a slightly damp cloth for dusting and spot cleaning.
  • Use a wood cleaner: For deeper cleaning, consider using a wood-specific cleaner and follow the manufacturer’s instructions.

2. Faux Wood Blinds:

  • Faux wood blinds are more forgiving than real wood and can tolerate gentle scrubbing with a damp cloth.
  • Wipe them down with a soft cloth or sponge dipped in warm, soapy water for thorough cleaning.

3. Aluminum Blinds:

  • Aluminum blinds are durable and resistant to moisture.
  • Dust and spot clean using a cloth or sponge with mild soap and water.

4. Fabric Shades:

  • Roller and Roman shades can accumulate dust and stains over time.
  • Use a lint roller or sticky tape to remove loose dirt and dust.
  • For stains, consult the manufacturer’s guidelines for specific fabric cleaning recommendations or use a gentle upholstery or fabric cleaner.

5. Cellular or Honeycomb Shades:

  • The honeycomb structure of these shades can trap dust and debris.
  • Gently vacuum them with a brush attachment or use a hairdryer on a cool setting to blow away dust.
  • For spot cleaning, use a soft cloth or sponge with mild soapy water.

6. Vinyl or PVC Blinds:

  • Vinyl blinds are moisture-resistant and relatively easy to clean.
  • Dust them regularly and use a damp cloth or sponge with mild soap for thorough cleaning.

Final Steps for a Pristine Finish

After cleaning your window blinds and shades, follow these final steps for a pristine finish:

1. Rinse and Wipe

If you used a soapy solution for spot cleaning, rinse the area with a clean, damp cloth or sponge to remove any soap residue. Wipe the cleaned blinds or shades with a dry cloth to remove excess moisture.

2. Reassemble and Adjust

Reassemble any parts or components that you may have removed for cleaning, such as cords or valances. Adjust the blinds or shades to your preferred position.

3. Regular Maintenance

To keep your window blinds and shades looking their best, establish a regular cleaning schedule. Dusting or vacuuming them every few weeks can prevent dirt buildup and prolong their lifespan.

Conclusion: Enjoying Clean and Inviting Window Coverings

Cleaning window blinds and shades may seem like a chore, but it’s a rewarding task that enhances the overall cleanliness and ambiance of your living space. By following the specific cleaning methods tailored to your blinds or shades’ material and type, you can maintain their beauty and functionality for years to come.

In conclusion, based from Window Cleaning Plano TX, remember that a little regular maintenance goes a long way in keeping your window coverings clean and inviting. So, whether you have wood blinds, fabric shades, or aluminum blinds, embrace the process of cleaning your window coverings as a way to enjoy a more comfortable and visually appealing home.

Plano Window Cleaning & Glass Repair

1201 Legacy Dr #2114, Plano, TX 75023, United States

972-544-1373

Repairing Cracked or Chipped Window Glass – NRH Window Cleaning & Glass Repair

Based from Window Cleaning North Richland Hills TX and as I sat in my favorite armchair, engrossed in a good book, a sudden loud crack jolted me from my reverie. Startled, I looked towards the source of the noise, and my heart sank as I saw the jagged line running through one of my beautiful living room windows. Cracked window glass is a sight that no homeowner wants to encounter, but as I soon discovered, repairing it can be a manageable and even rewarding experience.

The Initial Shock

The first emotion that surged through me was frustration. How could this happen? I had always taken pride in maintaining my home, and the idea of having a damaged window went against that sense of pride. However, as I approached the cracked glass, I noticed that it was not shattered into pieces but had a single, long fissure. This observation brought a glimmer of hope; perhaps this damage was repairable.

Assessing the Damage

My initial reaction was to consult the internet, where I found a wealth of information on repairing cracked or chipped window glass. I learned that the extent and location of the damage play a crucial role in determining whether a repair is feasible.

For small chips and cracks, typically those smaller than the size of a quarter, repair is often a viable option. However, if the damage is larger or extends across a significant portion of the glass, replacement may be the only practical solution.

It’s essential to assess the location of the damage as well. If the crack is in the center of the glass, it may be more challenging to repair because it can compromise the window’s structural integrity. In contrast, cracks near the edges are generally easier to fix.

Gathering the Tools and Materials

After determining that my window damage was within the repairable range, I embarked on a journey to gather the necessary tools and materials. To my surprise, the list was relatively short and comprised items commonly found in a homeowner’s toolkit:

  1. Safety Equipment: Safety should always come first. I donned a pair of heavy-duty gloves, safety glasses, and long sleeves to protect myself from any potential glass splinters.
  2. Glass Cleaner: I needed to ensure that the damaged area was clean and free of debris. A quality glass cleaner and a lint-free cloth helped me achieve this.
  3. Clear Nail Polish or Epoxy Resin: For small chips and cracks, clear nail polish or epoxy resin can work wonders. These substances fill in the damaged area and prevent it from spreading.
  4. Razor Blade or Utility Knife: A razor blade or utility knife was handy for removing any loose glass fragments around the damaged area, ensuring a clean surface for the repair.
  5. Syringe or Applicator Tool: To apply the clear nail polish or epoxy resin precisely, I used a syringe or applicator tool designed for this purpose.
  6. Cellophane Tape: Cellophane tape served as a way to create a temporary barrier over the damaged area while the repair was in progress.

The Repair Process

With my tools and materials at the ready, I embarked on the repair process. Here’s how it unfolded:

  1. Safety First: Before I began, I ensured that I was wearing my safety gear. Dealing with glass can be risky, and taking precautions is essential.
  2. Clean the Glass: Using the glass cleaner and a lint-free cloth, I thoroughly cleaned the damaged area and the surrounding glass. This step is crucial because it ensures that the repair material adheres properly.
  3. Stabilize the Crack: To prevent the crack from spreading further during the repair, I used cellophane tape to create a barrier. This step is particularly important, as any movement in the glass can hinder the repair process.
  4. Apply the Repair Material: I used a syringe or applicator tool to apply the clear nail polish or epoxy resin to the damaged area. I carefully followed the manufacturer’s instructions for the product I was using, which typically involved applying a thin layer and allowing it to dry.
  5. Cure the Repair: Depending on the product, the repair may need to cure for a certain period. I ensured that the area was protected from dust and debris during this time.
  6. Check the Results: Once the repair material had cured, I removed the cellophane tape and inspected the results. In most cases, the crack or chip was significantly less visible or even completely repaired.
  7. Final Touches: I used a razor blade or utility knife to trim any excess repair material, ensuring a smooth and clean finish.

The Gratifying Outcome

As I stepped back and admired the window, I couldn’t help but feel a sense of accomplishment. What was once a disheartening crack had been transformed into a nearly invisible flaw. The repair had not only saved me the cost and hassle of replacing the entire window but had also allowed me to reclaim the beauty and functionality of my living room.

It’s worth noting that while DIY window glass repair can be effective for minor damage, there are limitations. Repairs may not be as durable or long-lasting as professional replacements, and the effectiveness of the repair can depend on factors such as the type and severity of the damage, as well as the skill of the person performing the repair.

When to Seek Professional Help

It’s crucial to recognize when a repair is beyond your capabilities or when a replacement is the better course of action. Here are some scenarios where professional assistance may be necessary:

  1. Extensive Damage: If the damage is large, covers a substantial portion of the glass, or affects the structural integrity of the window, replacement is likely the safest and most practical choice.
  2. Specialized Glass: Some windows use specialized or tempered glass that cannot be repaired. In these cases, replacement is the only option.
  3. DIY Challenges: If you’re unsure about your ability to perform a successful repair or lack the necessary tools and materials, it’s best to seek professional help to avoid causing further damage.

Conclusion

In summary, as stated in Window Cleaning North Richland Hills TX, my journey of repairing cracked or chipped window glass was a learning experience that taught me the value of proactive maintenance and resourcefulness. While the initial shock of a cracked window can be disheartening, I discovered that with the right tools, materials, and a bit of patience, many small cracks and chips can be effectively repaired.

This experience has also reinforced my appreciation for the importance of regular home maintenance. Simple tasks like cleaning, inspecting, and addressing issues promptly can go a long way in preserving the beauty, functionality, and value of our homes.

So, the next time you encounter a cracked or chipped window, don’t be discouraged. Instead, consider it an opportunity to learn, grow, and take pride in the fact that you have the skills to protect and repair one of your home’s most valuable assets.

NRH Window Cleaning & Glass Repair

7510 Davis Blvd # B, North Richland Hills, TX 76182, United States

817-601-6082

The Impact of Clean Windows on Home Security – Southlake Window Cleaning & Glass Repair

When we think about home security, we often envision alarms, locks, and surveillance cameras. But there’s one element that’s often overlooked in the realm of safeguarding our homes – clean windows. Yes, you read that right. The state of your windows can significantly impact your home’s security. As someone who’s always been passionate about maintaining a safe and comfortable living environment, I’ve come to understand the unexpected role that clean windows play in bolstering home security.

In this article, I’ll delve into the reasons why clean windows matter and share insights on how they can enhance the safety of your home based from Window Cleaning Southlake TX.

The Unseen Connection Between Clean Windows and Home Security

At first glance, the connection between clean windows and home security might seem tenuous. After all, window cleanliness isn’t typically top-of-mind when discussing security measures. However, upon closer examination, it becomes evident that there are several ways in which clean windows impact the safety of your home.

1. Enhanced Visibility

Clean windows provide better visibility both from the inside and outside of your home. When your windows are free of streaks, smudges, and grime, you can see clearly what’s happening outside. This improved visibility can help you detect any suspicious activity or individuals lurking around your property.

From the outside, potential intruders are less likely to target a home where they can be easily observed. Clean windows act as a natural deterrent, signaling to would-be burglars that your home is well-maintained and likely equipped with security measures.

2. Maintain Window Locks and Mechanisms

Regular window cleaning isn’t just about the glass; it also involves maintaining the window locks and mechanisms. Clean windows are more likely to function smoothly, allowing you to lock them securely. A window that closes and locks properly is a formidable barrier against break-ins. Conversely, dirty or corroded window locks may be less effective, compromising your home’s security.

3. Eliminating Hiding Spots

Clean windows eliminate hiding spots for potential intruders. Dirty or obstructed windows can provide cover for someone attempting to break into your home. By keeping your windows clean and free from obstacles like overgrown bushes or clutter, you reduce the opportunity for criminals to hide while attempting unauthorized entry.

4. Preventing Window Damage

Clean windows can also help prevent damage. When dirt and grime accumulate on windows, they can trap moisture and contribute to the deterioration of window frames and sills. A damaged window frame can be easier to force open, making it a vulnerability in your home’s security. Regular window maintenance, including cleaning, can help extend the life of your windows and keep them in optimal condition.

5. Window Alarms and Sensors

Many modern home security systems include window alarms and sensors that can detect unauthorized entry attempts. These systems rely on clear windows to function effectively. Dirty or obstructed windows can interfere with the performance of these security features, potentially rendering them less reliable.

Practical Steps for Improving Home Security Through Clean Windows

Now that we’ve established the importance of clean windows in home security, let’s explore some practical steps you can take to ensure your windows play their part in safeguarding your home:

1. Regular Window Cleaning

Make window cleaning a part of your routine home maintenance. Depending on your location and climate, you may need to clean your windows more frequently to prevent the accumulation of dirt and grime. Ensure that both the interior and exterior of your windows are cleaned thoroughly.

2. Maintain Window Locks and Mechanisms

Regularly inspect and lubricate window locks and mechanisms to ensure they function smoothly. If you notice any issues, such as difficulty locking a window or a loose handle, address them promptly. If necessary, consider replacing worn or damaged hardware.

3. Trim Landscaping

Keep landscaping around your windows well-maintained. Trim bushes, shrubs, and trees that could provide cover for potential intruders. By maintaining a clear line of sight to your windows, you reduce hiding spots and enhance visibility.

4. Install Window Security Film

Consider installing window security film on vulnerable windows. This protective film can make it more difficult for intruders to break through the glass, even if they attempt to shatter it. Security film can be a valuable addition to your home security measures.

5. Invest in Window Alarms

If you have a home security system, make sure it includes window alarms and sensors. Regularly test these devices to ensure they are functioning correctly. If you don’t have a security system, standalone window alarms are also available and can provide an extra layer of protection.

6. Seek Professional Help

For a thorough window cleaning and inspection, consider hiring a professional window cleaning service. They have the expertise and equipment to clean and maintain your windows effectively. Additionally, they can spot any potential issues with your windows that may require attention.

Conclusion: A Clear Path to Enhanced Home Security

Clean windows may not be the first thing that comes to mind when you think of home security, but they play a crucial role in enhancing the safety of your home. With better visibility, well-maintained window locks, and reduced hiding spots, clean windows can deter potential intruders and provide you with peace of mind.

Overall, as per Window Cleaning Southlake TX, by incorporating regular window cleaning and maintenance into your home security routine, you can ensure that your windows not only let in the light but also help keep your home safe and secure. Remember, a clear view through clean windows can be your first line of defense against unwanted visitors.

Southlake Window Cleaning & Glass Repair

1052 Summerplace Ln, Southlake, TX 76092, United States

817-839-4773

Page 2 of 2

Powered by WordPress & Theme by Anders Norén