Local Businesses Blog in Texas

Tag: Garage Door Repair Lantana TX

How To Change Liftmaster Garage Door Opener – Lantana Gates & Garage Doors

Replacing a LiftMaster Garage Door Repair Lantana TX may seem like a complex task, but with a systematic approach and the right tools, you can successfully upgrade your system.

Here’s a detailed guide to walk you through the process:

: Gather Your Tools and Materials

Before you begin, ensure you have all the necessary tools and materials:

  • New LiftMaster garage door opener
  • Screwdriver
  • Adjustable wrench
  • Ladder
  • Measuring tape
  • Pliers
  • Wire nuts
  • Power drill
  • Mounting straps

: Disconnect Power

Safety is paramount. Disconnect the power to your existing garage door opener. Locate the power source and either unplug it or turn off the corresponding circuit breaker.

: Remove the Old Opener

Use a screwdriver to remove the cover of your old opener. Take note of the wiring connections and carefully disconnect them. Unbolt the opener from the ceiling or support structure, and lower it gently to the ground.

: Install Mounting Straps for the New Opener

Position the new LiftMaster opener on the garage door ceiling, aligning it with existing mounting holes. Secure it in place using the provided mounting straps. Ensure it’s level and tightly fastened to prevent vibrations.

: Connect Wiring

Refer to the new opener’s manual for wiring instructions. Connect the wires according to the provided diagrams, using wire nuts to secure the connections. Keep the wires organized and untangled.

: Adjust Opener Settings

Follow the manufacturer’s instructions to set limits and force adjustments on the new opener. This ensures smooth and accurate operation without causing damage to the garage door.

: Test the Opener

Activate the garage door opener and test its functionality. Check for any unusual noises or jerky movements. If issues arise, consult the troubleshooting section of the manual.

: Install Safety Features

If your new LiftMaster opener includes safety features like sensors or auto-reverse mechanisms, install them following the provided instructions. These features enhance the safety of your garage door system.

: Secure the Remote Control

Program the remote control according to the instructions. Test it to ensure smooth operation. This adds convenience to your garage door system, allowing you to operate it from a distance.

: Final Checks

Inspect the entire installation to ensure everything is secure and functioning correctly. Double-check all connections, mounting straps, and adjustments. If everything looks good, congratulate yourself on a successful LiftMaster garage door opener replacement!

By following these detailed steps, you can confidently replace your LiftMaster Garage Door Repair Lantana TX, enjoying the benefits of a new and improved system. Remember, safety first, and consult the manual for your specific opener model for any manufacturer-specific instructions.

Lantana Gates & Garage Doors

1180 Central Way, Lantana, TX 76226, United States

1-940-400-3038

How To Get A Garage Door Open Without Power – Lantana Gates & Garage Doors

When confronted with the predicament of needing to open a Garage Door Repair Lantana TX, it’s essential to resort to manual methods to ensure a safe and effective resolution.

Follow these step-by-step instructions meticulously:

  1. Locate the Emergency Release Cord: Begin by identifying the emergency release cord, typically distinguished by its red color. This cord is usually found hanging from the center rail inside your garage and terminates in a handle or knob. Its purpose is to disengage the garage door opener, allowing manual operation.
  2. Position the Door: Confirm that the garage door is fully closed before attempting to release the emergency cord. This precautionary measure prevents the door from abruptly descending once disengaged.
  3. Release the Emergency Cord: With the door in the closed position, pull the emergency release cord. Apply a steady force if needed, and listen for the distinctive snap or click sound, signifying that the door is now detached from the automatic opener.
  4. Move to the Exterior: Transition to the exterior of the garage and prepare to manually lift the door. Garage doors are designed to be relatively lightweight due to counterbalancing springs.
  5. Lift the Door: Utilize the handles or the bottom edge of the door to lift it manually. Exercise caution and proceed gradually, pausing periodically to check for obstructions or unusual resistance. If the door feels excessively heavy or encounters obstacles, halt and assess the situation.
  6. Enlist Assistance if Needed: If the door proves challenging to lift alone, consider seeking assistance from a friend or family member. Having an extra set of hands can facilitate a smoother manual operation.
  7. Secure the Open Door: Once the door is fully open, prevent accidental closure by securing it in place. This can be achieved by placing a locking plier or a similar device on the track just below the roller.
  8. Reconnection when Power is Restored: When power is restored or when you’re ready to reintegrate the automatic opener, pull the emergency release cord again. The audible click indicates the successful re-engagement of the opener with the door.
  9. Test the Automatic Opener: Finally, test the automatic opener by using the remote or wall switch. Ensure that the door operates smoothly, signaling the restoration of automated access.
  10. Prioritize Safety: Throughout this process, prioritize safety. If uncertainties arise or difficulties persist, consult your garage door’s manual or seek professional assistance.

Remember, these steps are a guide, and it’s crucial to adapt them to your specific Garage Door Repair Lantana TX model and circumstances. Safety precautions should always be observed, and if in doubt, seek professional help to avoid potential mishaps.

Lantana Gates & Garage Doors

1180 Central Way, Lantana, TX 76226, United States

1-940-400-3038

How To Install Safety Cable On Garage Door Springs – Coppell Gates & Garage Doors

Installing a safety cable on Garage Door Repair Lantana TX is a critical safety measure that helps prevent serious injury or property damage in case of a spring failure.

Garage door springs are under a lot of tension, and if they break, they can cause the door to fall rapidly. A safety cable will keep the spring from flying around if it breaks, protecting you and your belongings. Here’s a step-by-step guide on how to install a safety cable on garage door springs:

Tools and Materials You’ll Need:

  1. Safety glasses
  2. Leather gloves
  3. Ladder
  4. Tape measure
  5. Adjustable wrench
  6. Vice grips or locking pliers
  7. Safety cable kit (available at most hardware stores)

Safety Precautions:

  1. Always wear safety glasses and leather gloves when working on garage door springs. The tension in the springs can be dangerous.

: Gather Your Tools and Materials Ensure you have all the necessary tools and materials mentioned above.

: Disconnect the Power For safety reasons, disconnect the power to the garage door opener. This may involve unplugging it or switching off the circuit breaker.

: Identify the Springs Locate the extension springs on your garage door. They are usually mounted on both sides of the door track and run parallel to the door.

: Measure and Cut the Safety Cable Measure the length of the spring and add a few inches to ensure it can be securely attached. Cut the safety cable to this length.

: Secure One End of the Safety Cable Using vice grips or locking pliers, clamp one end of the safety cable to the bracket at the bottom of the garage door track. Ensure it is tightly secured.

: Thread the Safety Cable Thread the other end of the safety cable through the hole in the corresponding pulley bracket on the door’s horizontal track. The pulley bracket should be located near the bottom of the track.

: Secure the Safety Cable to the Spring With the cable threaded through the pulley bracket, bring it up to the spring. Use an adjustable wrench to securely fasten the cable to the anchor point on the spring. Make sure it’s tight and cannot slip.

: Wrap and Secure the Excess Cable If you have excess safety cable, wrap it around the spring and secure it using locking pliers. Ensure there are no loose ends that could become tangled in the garage door mechanism.

: Repeat on the Other Side (if applicable) If your garage door has two extension springs, repeat the process on the other side using another safety cable.

: Test the Door After installing the safety cables on both sides (if applicable), manually open and close the garage door a few times to make sure it operates smoothly and that the safety cables do not interfere with its movement.

: Reconnect Power Once you’re satisfied with the installation and the door’s operation, reconnect the power to the garage door opener.

: Regular Inspection Periodically inspect the safety cables for signs of wear, damage, or fraying. Replace them if necessary to ensure continued safety.

Installing safety cables on your Garage Door Repair Lantana TX is a relatively simple yet crucial task that enhances the safety of your garage door system. If you’re uncomfortable or unsure about this procedure, it’s advisable to seek the help of a professional garage door technician to ensure the job is done correctly and safely.

Coppell Gates & Garage Doors

440 Shadowcrest Ln, Coppell, TX 75019, United States

1-972-449-7776

Choosing the Right Garage Door Opener: A Buyer’s Guide – Lantana Gates & Garage Doors

As a homeowner who values convenience and security, I’ve always understood the importance of a reliable garage door opener. Recently, I found myself in the market for a new one, and I quickly realized that selecting the right garage door opener involves more than just picking the first one off the shelf.

By following Garage Door Repair Lantana TX, I’ll share my journey of exploring the various options and considerations when choosing the perfect garage door opener for your home.

Why the Garage Door Opener Matters

Before we dive into the details of selecting a garage door opener, it’s essential to understand why this component is so crucial:

1. Convenience: A garage door opener makes life more convenient. No more manually lifting heavy garage doors; simply press a button, and your door opens or closes effortlessly.

2. Security: Modern garage door openers come with advanced security features, such as rolling codes, to prevent unauthorized access to your home.

3. Safety: Garage door openers include safety mechanisms, like sensors that detect objects in the door’s path, preventing accidents and injuries.

4. Energy Efficiency: Some garage door openers are designed to be energy-efficient, minimizing energy consumption during operation.

5. Noise Level: The right garage door opener can be much quieter than older models, reducing noise disturbances for you and your neighbors.

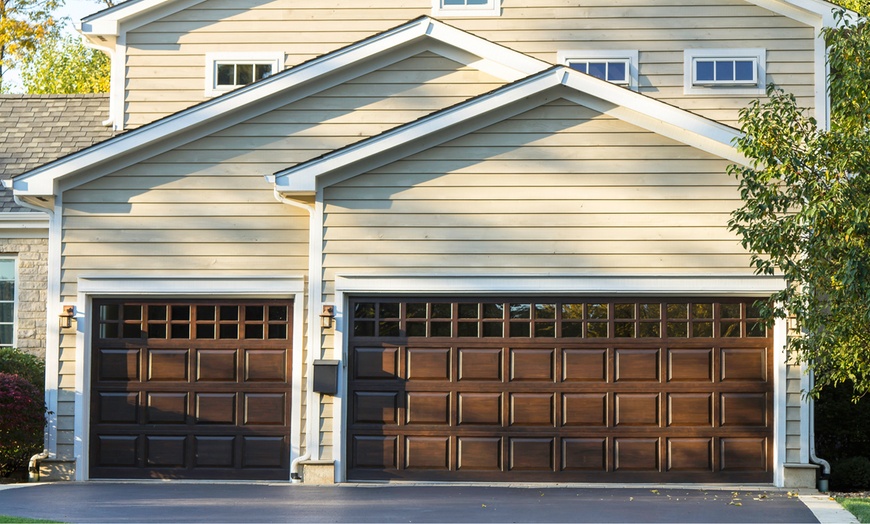
Types of Garage Door Openers

There are three primary types of garage door openers to consider:

1. Chain-Drive Openers: These are the most common and cost-effective garage door openers. They use a chain to pull or push the garage door along a track. While durable and reliable, they can be noisy during operation.

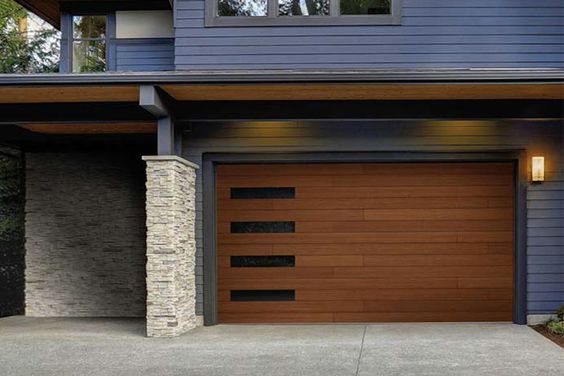
2. Belt-Drive Openers: Belt-drive openers use a rubber belt to move the garage door. They are quieter than chain-drive openers and are an excellent choice for attached garages or homes where noise is a concern.

3. Screw-Drive Openers: Screw-drive openers operate using a threaded steel rod. They are known for their simplicity and require less maintenance. However, they can be noisier than belt-drive openers.

Key Considerations When Choosing a Garage Door Opener

My journey to selecting the right garage door opener led me to consider several essential factors:

1. Garage Door Size and Weight: The size and weight of your garage door will impact the type of opener you need. Make sure the opener you choose is compatible with your door’s specifications.

2. Noise Level: Consider your tolerance for noise and the proximity of your garage to living spaces. If noise is a concern, a belt-drive or screw-drive opener may be a better choice.

3. Security Features: Look for openers with advanced security features, such as rolling code technology, which changes the access code each time the door is used, preventing unauthorized entry.

4. Safety Features: Ensure that the opener has safety sensors that detect objects in the door’s path and an auto-reverse feature to prevent accidents.

5. Remote Control Options: Check whether the opener comes with remote controls or if it’s compatible with smartphone apps for remote operation.

6. Backup Power: In regions prone to power outages, consider an opener with a backup power source, such as a battery backup system.

7. Lighting: Some openers come with built-in lighting, which can be convenient for nighttime use.

8. Smart Home Integration: If you’re a fan of smart home technology, choose an opener that can be integrated into your home automation system.

9. Warranty: Review the warranty offered by the manufacturer. A longer warranty period can provide peace of mind.

10. Professional Installation: While some homeowners may choose to install their garage door openers themselves, professional installation ensures proper setup and warranty validity.

My Choice: A Belt-Drive Opener

After careful consideration, I opted for a belt-drive garage door opener. The quiet operation was a top priority for me, as my garage is attached to my home, and I didn’t want the noise to disturb my family or neighbors. The added security features and smartphone compatibility were also appealing, providing me with peace of mind and convenience.

Additional Features to Consider

In my research, I discovered several additional features that can enhance the functionality and convenience of a garage door opener:

1. Keyless Entry: Some openers offer keyless entry systems, allowing you to enter a code on a keypad to open the garage door.

2. Battery Backup: A battery backup system ensures that your garage door can be operated even during power outages.

3. Soft Start and Stop: This feature provides smooth and gentle starts and stops, reducing wear and tear on the garage door and opener.

4. Wi-Fi Connectivity: Wi-Fi-enabled openers allow you to control and monitor your garage door from your smartphone, even when you’re not at home.

5. HomeLink Compatibility: HomeLink is a system that integrates your garage door opener with your vehicle’s controls, allowing you to open and close the garage door from your car.

6. Motion-Activated Lighting: Some openers have motion-activated lighting that turns on when you enter the garage.

Choosing the Right Garage Door Opener Brand

When it comes to garage door openers, the brand you choose can make a significant difference in terms of quality, reliability, and customer support. Here are a few reputable garage door opener brands to consider:

1. Chamberlain: Chamberlain is known for its range of reliable and innovative garage door openers. They offer various models to suit different needs and budgets.

2. LiftMaster: LiftMaster is a sister brand to Chamberlain and is often associated with high-quality, professional-grade openers.

3. Genie: Genie offers a wide range of garage door openers, including smart home-compatible models and those with advanced security features.

4. Craftsman: Craftsman garage door openers are known for their durability and affordability, making them a popular choice among homeowners.

5. Sommer: Sommer specializes in quiet and reliable garage door openers, with a focus on innovation and technology.

Installation and Maintenance

Once you’ve selected the right garage door opener, proper installation and regular maintenance are essential for its longevity and trouble-free operation. Here are some tips:

1. Professional Installation: Unless you have experience with garage door opener installation, it’s advisable to hire a professional. They can ensure that the opener is correctly set up and calibrated.

2. Regular Lubrication: Keep the moving parts of the opener well-lubricated to reduce friction and wear. Check and lubricate the chain or belt, rollers, and hinges.

3. Safety Sensor Testing: Periodically test the safety sensors by placing an object in the door’s path while closing it. The door should automatically reverse if the sensors are working correctly.

4. Visual Inspection: Conduct visual inspections to check for loose bolts, damaged cables, and signs of wear. Address any issues promptly.

5. Remote Control Battery Replacement: Replace the batteries in your remote controls and keypad as needed to ensure consistent operation.

Conclusion: A Wise Investment in Convenience and Security

Overall, as stated in Garage Door Repair Lantana TX, choosing the right garage door opener is a wise investment in convenience, security, and peace of mind. By considering factors such as type, noise level, security features, and additional options, you can select an opener that perfectly suits your needs and preferences. Remember to prioritize professional installation and regular maintenance to ensure your garage door opener remains reliable for years to come. Whether you’re upgrading an old opener or installing one for the first time, the right choice will undoubtedly enhance your daily life as a homeowner.

Lantana Gates & Garage Doors

1180 Central Way, Lantana, TX 76226, United States

940-400-3038

How To Open Garage Door With Broken Cable From Outside – Lantana Gates & Garage Doors

Opening a Garage Door Repair Lantana TX with a broken cable from the outside can be a challenging and potentially dangerous task. However, in some emergency situations, you may need to access your garage.

It’s crucial to prioritize safety throughout the process. Here’s a detailed guide in approximately on how to open a garage door with a broken cable from the outside:

Disclaimer: Before attempting to open your garage door with a broken cable, consider calling a professional garage door repair service. They have the expertise and equipment to safely address the issue. If you decide to proceed on your own, exercise caution, and be prepared to stop if the process becomes too difficult or dangerous.

Tools and Materials You’ll Need:

  1. Sturdy ladder
  2. C-clamps or locking pliers
  3. Vice grips or locking pliers
  4. A helper (if available)

: Assess the Situation Before attempting any DIY repair, evaluate the condition of your garage door. Ensure there are no obstructions in the door’s path and that it’s safe to work on. If the door is severely damaged or compromised, it’s best to call a professional immediately.

: Safety Precautions Safety should be your top priority. Ensure the area around the garage door is clear of people and objects. Wear safety goggles and gloves to protect your eyes and hands.

: Release the Emergency Cord Most modern garage doors are equipped with an emergency release cord. Locate this cord, typically hanging from the center rail of the garage door opener. Pull the cord down to disengage the opener from the door. This will allow you to manually open the door without damaging the opener.

: Disconnect the Opener To prevent the opener from attempting to raise the door while you work on it, unplug the garage door opener or turn off the power at the circuit breaker. This will ensure your safety during the repair.

: Secure the Door To prevent the garage door from falling unexpectedly, use locking pliers or C-clamps to secure it in place. Clamp them onto the track just below the bottom roller on both sides. This will prevent the door from moving while you work on it.

: Remove the Broken Cable Identify the broken cable on the side of the door where it’s still attached. If possible, unwind and remove the broken cable from the pulley system or release it from any tension. Use vice grips or locking pliers to hold the cable securely in place to prevent it from unraveling further.

: Lift the Door Manually This step may require the assistance of a helper, especially if you have a heavy garage door. Stand on a sturdy ladder to reach the emergency release cord. Pull down on the cord to disengage the door from the opener entirely.

With your helper on the other side of the door, both of you can manually lift the garage door. Use a firm and controlled motion to avoid jerking or sudden movements. Be prepared for the door to be much heavier than usual without the assistance of the opener.

: Prop the Door Open Once the door is fully open, prop it securely in place using a suitable object such as a wooden block or a sturdy chair. Make sure the door is stable and won’t accidentally close while you work on it.

: Replace the Broken Cable Now that you have access to the broken cable, carefully remove any remaining remnants. Inspect the pulley system and cables for any damage or wear. If necessary, replace the broken cable with a new one, following the manufacturer’s instructions.

: Reattach the Cable Thread the new cable through the pulley system following the same path as the old one. Ensure it’s properly seated in the pulleys and that there is even tension on both sides of the door. Use locking pliers or vice grips to secure the cable in place temporarily.

: Lower the Door Carefully release the prop holding the door open and lower it slowly to the ground. Make sure it descends evenly and smoothly. Your helper can assist in this process.

: Reconnect the Opener With the door in the closed position, reconnect the garage door opener to the door by pulling the emergency release cord in the opposite direction. This will re-engage the opener’s carriage with the door’s attachment point.

: Test the Door Plug in or turn on the garage door opener and test the door’s operation. Ensure it opens and closes smoothly without any unusual noises or resistance. If everything is functioning correctly, your repair is successful.

: Remove Safety Measures Remove the locking pliers or C-clamps from the door tracks and the emergency release cord from the engaged position. Keep these tools in a safe place for future use.

: Maintenance To prevent similar issues in the future, schedule regular maintenance for your garage door, including lubricating moving parts, inspecting cables and springs, and tightening hardware. This will extend the lifespan of your garage door and reduce the risk of future breakdowns.

In conclusion, opening a Garage Door Repair Lantana TX with a broken cable from the outside is a challenging task that should only be attempted in emergency situations and with extreme caution. If you are unsure of your abilities or the door’s condition, it’s always best to seek professional assistance. Safety should be your top priority throughout the process, and you should never compromise on it.

Lantana Gates & Garage Doors

1180 Central Way, Lantana, TX 76226, United States

1-940-400-3038

How To Register Chamberlain Garage Door Opener – Lantana Gates & Garage Doors

Registering your Chamberlain Garage Door Repair Lantana TX opener is an important step to ensure that you receive warranty coverage, product updates, and customer support.

The registration process might vary slightly based on the model and region, but here’s a general step-by-step guide on how to register your Chamberlain garage door opener:

Step 1: Gather Information
Before you start the registration process, gather the following information:

  • Model number of the garage door opener (found on the opener or in the user manual)
  • Serial number of the opener (usually located on the opener or in the user manual)
  • Purchase date and location
  • Personal contact information (name, address, phone number, email)

Step 2: Visit the Chamberlain Website
Open a web browser on your computer or mobile device and go to the official Chamberlain website. Look for the “Support” or “Customer Service” section, where you’ll likely find information on product registration.

Step 3: Find the Registration Page
Navigate to the “Product Registration” or “Register Your Product” page on the Chamberlain website. This page might be found within the “Support” or “Customer Service” section.

Step 4: Create or Log into Your Account
If you have an existing Chamberlain account, log in using your credentials. If not, you’ll need to create a new account. This account will help you manage your registered products, access support, and receive updates.

Step 5: Enter Product Information
On the registration page, you’ll be prompted to enter the information you gathered in Step 1:

  • Model number
  • Serial number
  • Purchase date and location

Step 6: Provide Personal Information
Enter your personal contact information, including your name, address, phone number, and email address. This information is used to contact you regarding product updates and support.

Step 7: Verify and Submit
Review the information you’ve entered to ensure its accuracy. Make any necessary corrections before submitting the registration form.

Step 8: Confirm Registration
After submitting the registration form, you’ll likely receive a confirmation message on the screen. Additionally, you might receive a confirmation email with details about your registered product and your Chamberlain account.

Step 9: Keep Records
It’s important to keep a record of your product registration for your own reference. Save a copy of the confirmation email and any registration confirmation number you receive.

Step 10: Take Advantage of Benefits
Once your Chamberlain garage door opener is registered, you can take advantage of the benefits that come with registration:

  • Warranty coverage: Registered products usually receive extended warranty coverage.
  • Product updates: You’ll receive information about software updates, new features, and enhancements.
  • Customer support: Access to dedicated customer support for any issues or questions you may have.

Step 11: Maintain Your Account
Keep your Chamberlain account information up to date. If you move, change your contact details, or need to update your product information, log into your account and make the necessary changes.

Remember that the specific steps for registering a Chamberlain Garage Door Repair Lantana TX opener might vary based on the model and region, so it’s recommended to refer to the user manual that came with your opener or visit the official Chamberlain website for accurate and detailed instructions. Registering your product is a simple but important step to ensure the best ownership experience for your Chamberlain garage door opener.

Lantana Gates & Garage Doors

1180 Central Way, Lantana, TX 76226, United States

1-940-400-3038

Essential Garage Door Maintenance Tasks Every Homeowner Should Know – Lantana Gates & Garage Doors

Being a responsible homeowner, I’ve learned that maintaining various aspects of my property is essential for its longevity and smooth functioning. One area that often gets overlooked is the garage door – a hardworking component that requires regular care to ensure safety, security, and reliable operation. Through my experiences, I’ve realized the importance of mastering essential garage door maintenance tasks. In this article, I’m eager to share the insights I’ve gained, highlighting the key tasks that every homeowner should know.

By incorporating these tasks from Garage Door Repair Lantana TX into your routine, you can ensure your garage door remains in excellent condition, providing years of trouble-free use.

  1. Visual Inspection: Where It All Begins

I’ve found that starting with a thorough visual inspection sets the foundation for effective garage door maintenance. This involves closely examining the door’s exterior, tracks, rollers, hinges, and springs for any signs of wear, damage, or rust. This way, I can catch issues early on and prevent them from turning into major problems.

  1. Lubrication: The Secret to Silence

I’ve learned that proper lubrication is crucial for the smooth operation of a garage door. Applying a silicone-based lubricant to the rollers, tracks, hinges, and springs not only reduces friction and noise but also helps prevent premature wear and tear.

  1. Balance Check: The Importance of Evenness

Maintaining a balanced garage door is vital for its proper function and longevity. By disconnecting the opener and manually lifting the door to about halfway open, I can determine whether the door remains in position or falls/rises. If it doesn’t stay balanced, it’s wise to call in a professional to make the necessary adjustments.

  1. Spring Inspection: Safety Above All

Safety is paramount, and garage door springs play a crucial role in supporting the door’s weight. Regularly inspecting them for wear, rust, or damage is a priority. Broken springs can be hazardous, so addressing any issues promptly is essential.

  1. Sensor Test: Ensuring Protection

Modern garage doors come equipped with safety sensors that prevent the door from closing if there’s an obstacle in the way. I’ve made it a point to test these sensors by placing an object in the door’s path and attempting to close it. If the door reverses, I know the sensors are working as intended.

  1. Weatherstripping Care: Keeping Elements Out

Weatherstripping is key to sealing the garage door against drafts, debris, and pests. Regularly checking it for damage and wear is crucial, and I replace it when needed. Proper weatherstripping not only enhances energy efficiency but also creates a more comfortable garage environment.

  1. Track Alignment: Smooth Movement Matters

I’ve realized that proper track alignment is essential for the smooth movement of the garage door. I use a level to ensure the tracks are vertical and adjust them if they’re misaligned. This helps prevent jerky movements and potential derailments.

  1. Opener Functionality Test: Remote and Manual

A well-functioning opener is crucial, so I regularly test it both with the remote control and by manually operating the door. Unusual noises or jerky movements can be indicators of underlying issues that might require maintenance or repairs.

  1. Tightening Hardware: Preventing Mishaps

The consistent movement of the garage door can cause hardware to become loose over time. I make it a point to regularly tighten bolts, nuts, and screws throughout the system to prevent accidents and ensure proper functioning.

  1. Cable Check: Safety First

Inspecting the cables that connect the springs to the bottom brackets is another important task. I look for signs of fraying, wear, or damage and promptly seek professional assistance if I notice any issues.

  1. Paint and Finish: Aesthetic and Protective Care

For wooden garage doors, periodic repainting or refinishing is necessary to protect them from moisture and the elements. I sand down rough spots and apply a fresh coat of paint or finish to keep the door looking its best.

  1. Battery Check: Remote Reliability

If my garage door opener uses batteries, I make sure to regularly check and replace them as needed to ensure the remote control’s reliable operation.

  1. Spring Cleaning: A Fresh Start

Incorporating my garage door into my spring cleaning routine has been a game-changer. Cleaning the tracks, wiping down the door’s exterior, and clearing debris from the rollers and hinges not only improves its appearance but also enhances its performance.

  1. Professional Inspection: Expert Input Matters

While I take care of many maintenance tasks myself, I understand the value of scheduling a professional garage door inspection at least once a year. Trained technicians can identify hidden issues and perform advanced maintenance tasks that might require specialized tools.

In summary, by following Garage Door Repair Lantana TX and as I’ve delved into the realm of garage door maintenance, I’ve discovered that mastering these essential tasks empowers homeowners like me to proactively care for their garage doors. Regular maintenance not only prolongs the door’s lifespan but also contributes to the security and energy efficiency of the entire property. By incorporating these tasks into your routine, you’ll ensure that your garage door operates seamlessly while providing you with the assurance that comes from a well-maintained home.

Lantana Gates & Garage Doors

1180 Central Way, Lantana, TX 76226, United States

940-400-3038

How to Adjust Garage Door With Two Springs-Lantana Garage & Overhead Doors

Adjusting a Garage Door Repair Lantana TX with two springs requires careful attention to detail and following proper safety precautions.

This guide will walk you through the steps to adjust your garage door correctly. It’s important to note that garage doors can be dangerous, so if you are unsure or uncomfortable with any step, it’s best to consult a professional.

Before starting any work on your garage door, make sure to disconnect the power to the automatic opener and secure the door in its fully open position using a locking mechanism or clamps. This will prevent any accidental movement while you are working on it.

  1. Identify the springs: Look for the two springs located on either side of the garage door. They are typically mounted parallel to the horizontal tracks, above the door. These springs are responsible for counterbalancing the weight of the door.
  2. Determine the type of springs: Garage doors usually have either torsion springs or extension springs. Torsion springs are mounted above the door, while extension springs are mounted on either side of the door.
  3. Identify the spring type: If your garage door has torsion springs, they will be located on a bar above the door. Extension springs, on the other hand, will have a pulley system and a cable running through them.
  4. Understand spring adjustment: Adjusting the springs will either increase or decrease the tension. Tightening the springs will increase the tension, making the door heavier to lift, while loosening them will reduce tension, making the door lighter. It’s crucial to make small adjustments and test the door’s balance after each adjustment.
  5. Gather necessary tools: You will need a winding bar or a socket wrench to adjust torsion springs. For extension springs, you might need pliers or a similar tool to adjust the tension.
  6. Adjusting torsion springs: Insert a winding bar into one of the holes on the winding cone of the spring. Apply pressure in the direction that tightens the spring, either by pushing or pulling, depending on the setup. Make quarter-turn adjustments at a time, alternating between each spring, until you achieve the desired tension. Test the door’s balance by lifting it manually and observing how it stays in position when released.
  7. Adjusting extension springs: Extension springs have an adjustable pulley system. You can increase the tension by moving the S-hook or the eyelet to a higher hole on the track hanger. To decrease the tension, move it to a lower hole. Make small adjustments and test the door’s balance by opening and closing it manually.
  8. Test the balance: A properly balanced garage door should stay in any position without falling or rising. If the door doesn’t remain in place when partially open, it might be unbalanced. In that case, continue adjusting the springs until you achieve the desired balance.
  9. Regular maintenance: Once you’ve adjusted the springs, it’s important to perform regular maintenance on your garage door. Lubricate all moving parts, including hinges, rollers, and tracks, to ensure smooth operation. Inspect the springs periodically for signs of wear or damage and replace them if necessary.
  10. Safety precautions: Always prioritize safety when working on garage doors. Wear protective gear, such as safety glasses and gloves, and be cautious of the tension in the springs. If you’re unsure or uncomfortable with any step, it’s best to seek professional help.

By following these steps and exercising caution, you can adjust your Garage Door Repair Lantana TX with two springs. However, if you’re unsure or encounter difficulties during the process, it’s always advisable to consult a professional garage door technician.

Lantana Garage & Overhead Doors

3501 FM 407 #15, Lantana, TX 76226

940-400-3038

Powered by WordPress & Theme by Anders Norén