
Fixing Garage Floor Coatings Omaha NE is an important step in maintaining a clean, functional, and safe space for your vehicles and storage. Whether you have a concrete or epoxy garage floor, addressing cracks, stains, and imperfections is crucial.
In this guide, I will provide you with step-by-step instructions on how to fix your garage flooring.
Before you begin any repairs, make sure to gather the necessary tools and materials. You will need the following:
- Safety equipment: Safety goggles, gloves, and a dust mask.
- Cleaning supplies: Broom, dustpan, mop, degreaser, and a pressure washer (optional).
- Filling materials: Concrete patching compound or epoxy repair kit.
- Smoothing tools: Trowel, putty knife, or a floor scraper.
- Epoxy coating (if applicable): Garage floor epoxy, roller, paint tray, and painter’s tape.
- Protective finish: Clear epoxy or polyurethane coating.
Now, let’s move on to the step-by-step process of fixing your garage flooring:
Step 1: Prepare the area Start by clearing out any items from your garage and sweeping the floor to remove loose dirt and debris. If you have oil or grease stains, apply a degreaser and scrub the area with a brush. Rinse the floor with water and let it dry. If necessary, use a pressure washer to remove stubborn stains or dirt.
Step 2: Inspect and repair cracks Carefully examine the floor for cracks, chips, or holes. If you find any, clean them thoroughly using a wire brush and remove any loose debris. For minor cracks, use a concrete patching compound. Follow the manufacturer’s instructions to mix the compound and apply it to the crack using a trowel or putty knife. Smooth the surface and allow it to dry according to the recommended time.
Step 3: Address uneven or damaged areas If there are uneven or damaged sections on your garage floor, you may need to use a floor scraper to level them out. Scrape away any loose or damaged concrete until you reach a stable surface. Once you have a smooth and level area, clean it with a brush and remove any debris.
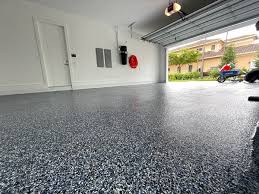
Step 4: Apply epoxy coating (optional) If you want to give your garage floor a fresh look and added protection, consider applying an epoxy coating. Begin by applying painter’s tape along the walls and any other areas you want to protect from the epoxy. Mix the epoxy according to the manufacturer’s instructions and pour it into a paint tray. Use a roller to apply an even coat of epoxy to the floor, starting from the farthest corner and working your way toward the exit. Allow the epoxy to cure as per the instructions provided.
Step 5: Apply a protective finish To enhance the durability and longevity of your garage floor, it’s recommended to apply a protective finish. This can be a clear epoxy or polyurethane coating. Follow the manufacturer’s instructions for mixing and application. Apply the coating evenly with a roller, covering the entire floor. Allow the protective finish to dry and cure according to the recommended time.
Step 6: Clean up and maintenance Once the repairs and coatings have dried completely, remove the painter’s tape and clean up any tools or materials used. Regularly sweep or mop your garage floor to keep it clean and remove any dirt or debris. Avoid using abrasive cleaners or tools that may damage the surface.
By following these steps, you should be able to fix your Garage Floor Coatings Omaha NE and restore its functionality and appearance. Remember to prioritize safety and wear appropriate protective gear throughout the process.
Garage Floor Coatings Omaha
14685 California St, Omaha, NE 68154, United States
1-402-538-8225
Leave a Reply