Local Businesses Blog in Texas

Category: GARAGE DOOR SUPPLIER Page 3 of 25

How Much Does A Double Garage Door Cost To Replace – All American Doors

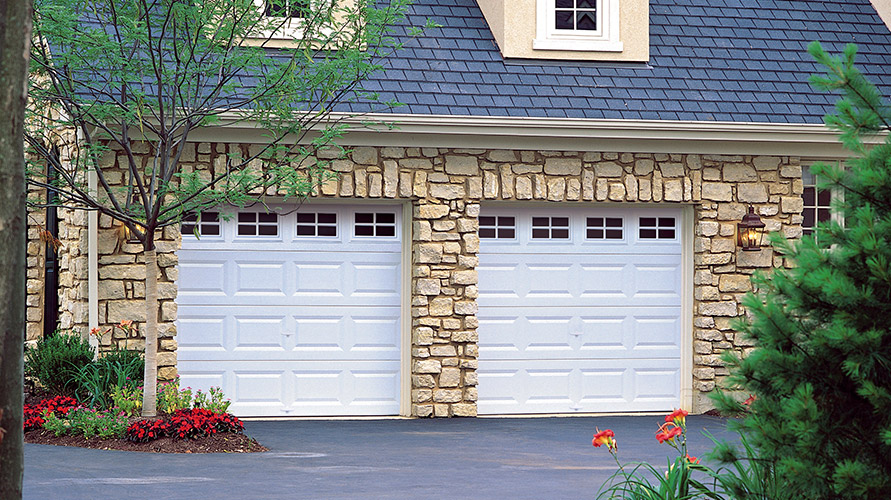
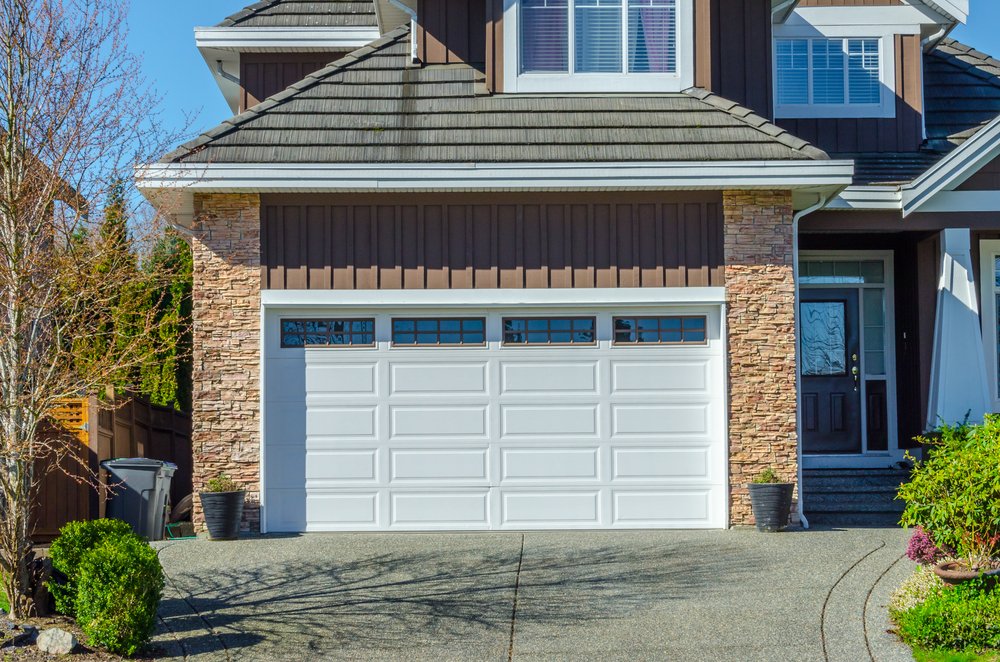
Garage Door Repair Miami FL are a common feature in many homes, providing convenient access to a two-car garage space.

Over time, garage doors may experience wear and tear due to factors such as weather exposure, frequent use, and aging, necessitating replacement to maintain functionality, security, and curb appeal.

Factors Affecting the Cost of Double Garage Door Replacement

Several factors influence the cost of replacing a double garage door, including:

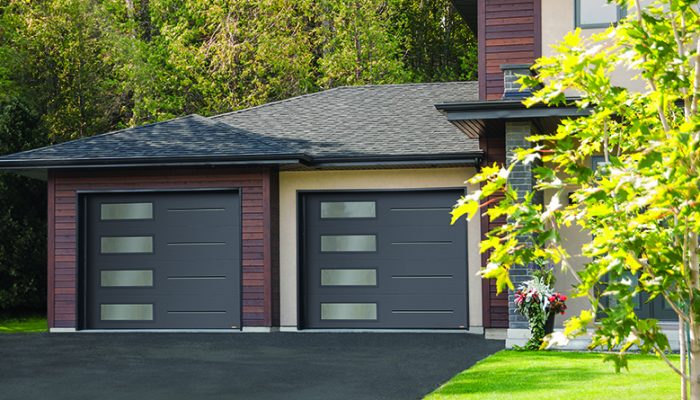
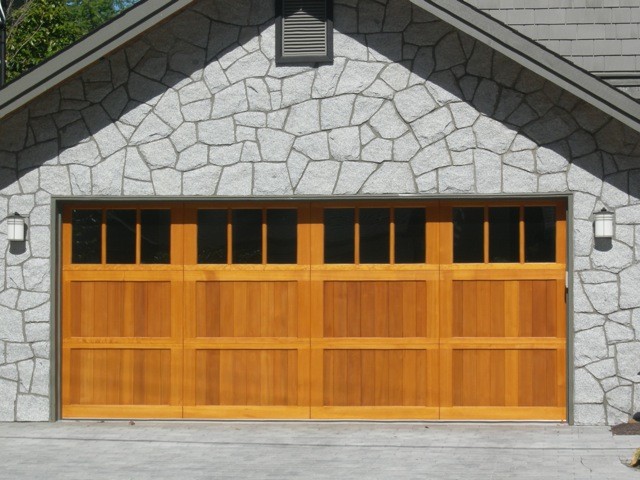
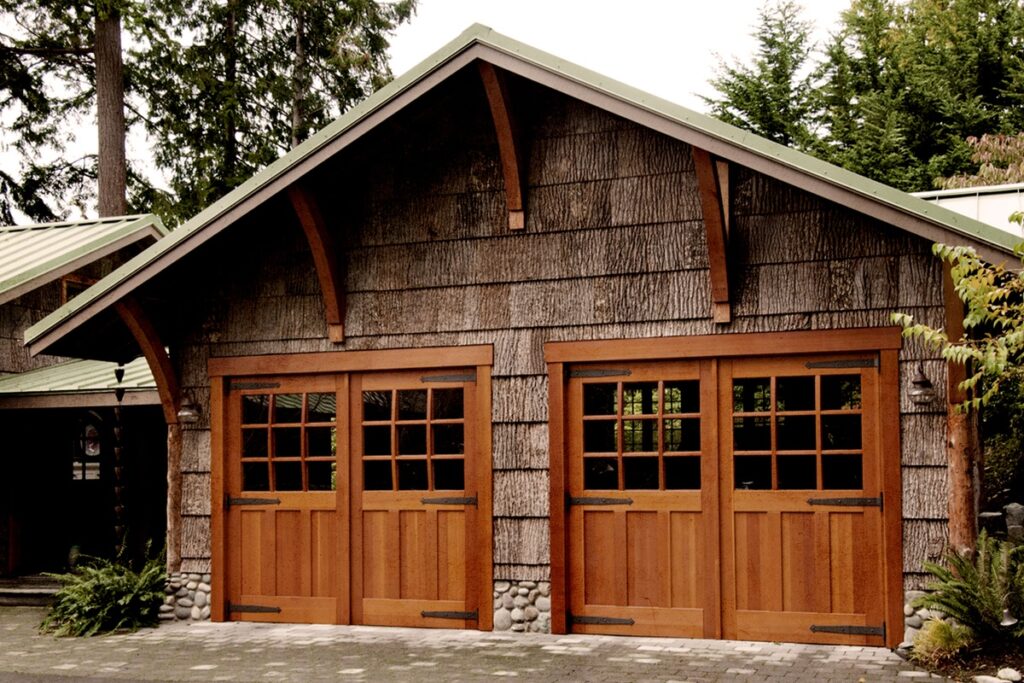
  1. Material: Double garage doors are available in various materials, each with its own cost implications. Common materials include steel, aluminum, wood, and composite materials. Steel doors are typically the most affordable option, while wood and composite doors tend to be more expensive due to their premium quality and aesthetics.
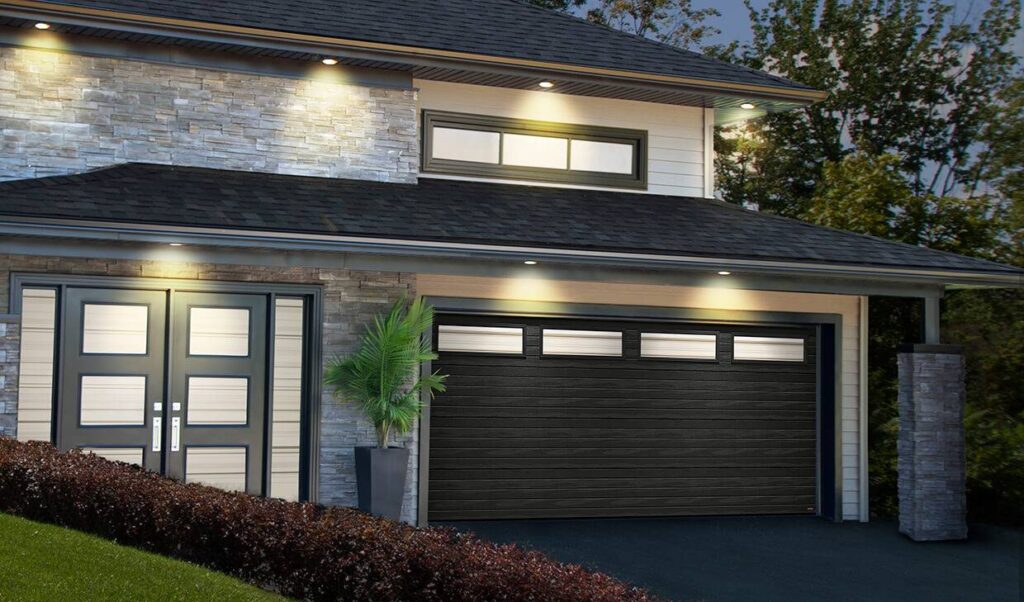
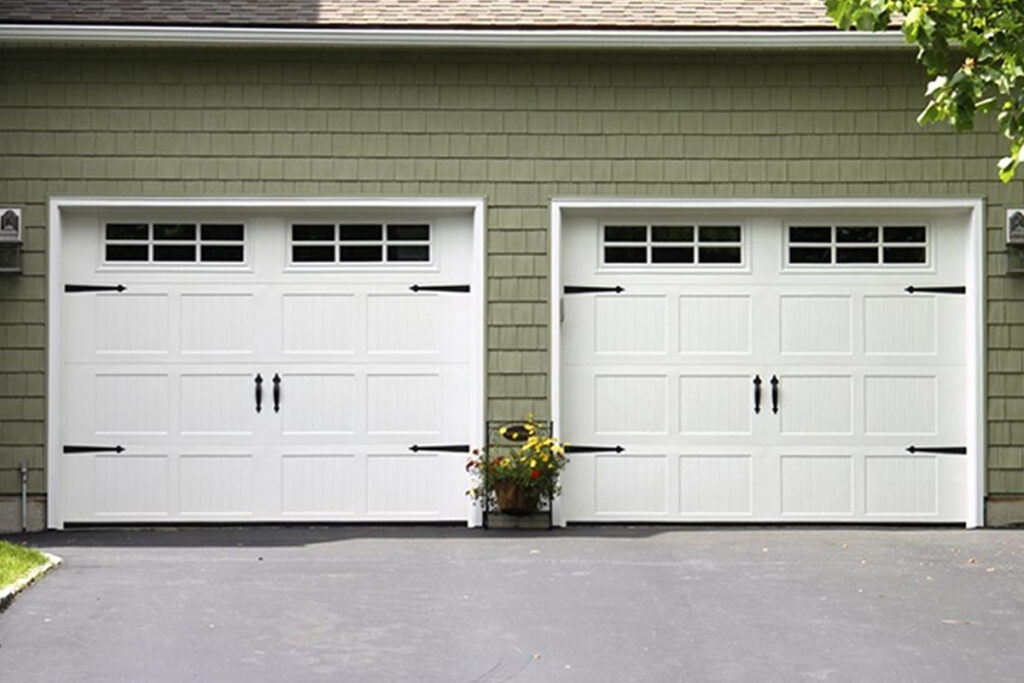
  2. Design and Style: The design and style of the garage door play a significant role in determining its cost. Basic, no-frills designs are generally more affordable, while custom designs, decorative elements, and window inserts can increase the overall cost of the door.
  3. Insulation: Insulated garage doors offer improved energy efficiency and temperature regulation, making them a popular choice for homeowners. Insulated doors typically cost more upfront but can result in long-term energy savings and increased comfort.
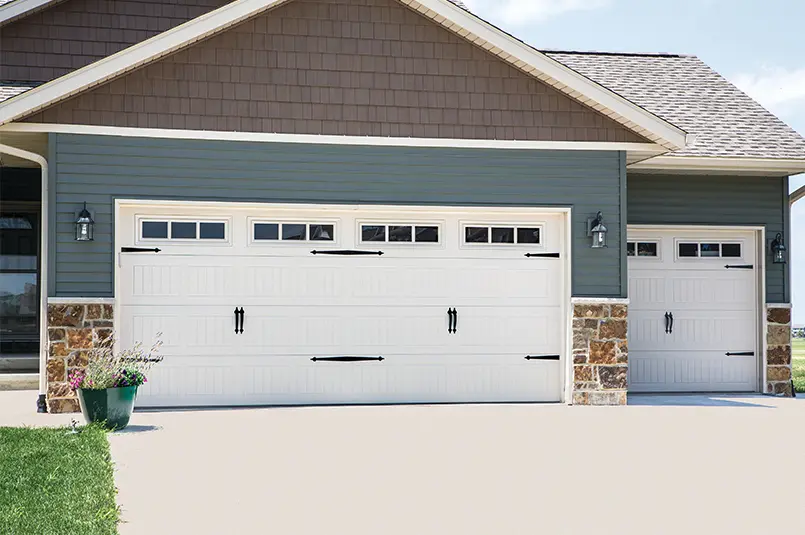
  4. Size: The size of the double garage door, including its width and height, influences the cost of replacement. Standard-sized doors are more affordable compared to custom-sized doors, which may require special ordering and installation.
  5. Installation Costs: Installation costs vary depending on factors such as labor rates, the complexity of the installation, and any additional services required, such as removing the old door, framing adjustments, and hardware installation.

Cost Range of Double Garage Door Replacement

The cost of replacing a double garage door varies depending on the aforementioned factors and can range from $800 to $5000 or more. Here’s a breakdown of the cost range based on different considerations:

  1. Material:
    • Steel Doors: $800 to $1500
    • Aluminum Doors: $1000 to $2000
    • Wood Doors: $1500 to $5000
    • Composite Doors: $2000 to $5000
  2. Design and Style:
    • Basic Designs: $800 to $1500
    • Custom Designs: $1500 to $5000
  3. Insulation:
    • Non-insulated Doors: $800 to $2000
    • Insulated Doors: $1000 to $5000
  4. Size:
    • Standard-sized Doors: $800 to $3000
    • Custom-sized Doors: $1500 to $5000 or more
  5. Installation Costs:
    • Installation costs typically range from $200 to $1000 or more, depending on factors such as labor rates, the complexity of the installation, and any additional services required.

Additional Costs and Considerations

In addition to the cost of the garage door itself, there may be additional costs and considerations to factor in:

  • Hardware and Accessories: Hardware such as hinges, rollers, tracks, and springs may need to be replaced along with the door. Additionally, accessories such as decorative handles, window inserts, and insulation kits may incur additional costs.
  • Professional Installation: While some homeowners may choose to install the garage door themselves to save money, professional installation is recommended for optimal results. Professional installers have the necessary skills, tools, and experience to ensure proper installation and functionality of the door.
  • Removal of Old Door: If replacing an existing garage door, the cost of removing the old door and disposing of it may need to be factored into the overall cost of replacement.
  • Permit Fees: Depending on local building codes and regulations, permit fees may be required for garage door replacement projects. Check with your local authorities to determine if any permits are needed and factor the associated fees into your budget.

Conclusion:

In conclusion, the cost of replacing a double garage door varies depending on factors such as material, design, insulation, size, installation costs, and additional considerations. By carefully considering your preferences, budget, and long-term needs, you can choose a replacement garage door that enhances the functionality, security, and aesthetic appeal of your home.

All American Doors

8155 NW 93rd St, Medley, FL 33166, United States

1-305-885-8088

How Program Craftsman Garage Door Opener – Anna’s Best Garage & Overhead Doors

Garage Door Repair Anna TX allows you to conveniently open and close your garage door with ease.

Whether you’re setting up a new remote or reprogramming an existing one, this step-by-step guide will walk you through the process to ensure smooth operation of your garage door opener.

1. Locate the “Learn” Button on Your Craftsman Garage Door Opener

The first step in programming your Craftsman garage door opener remote is to locate the “Learn” button on the motor unit of your opener. This button is typically found near the antenna wire and may be labeled as “Learn” or “Smart” depending on the model of your opener.

2. Press the “Learn” Button

Once you’ve located the “Learn” button, press it firmly and release it. You’ll notice that the indicator light on the motor unit will begin to blink, indicating that the opener is in programming mode and ready to learn the code from your remote.

3. Press the Button on Your Remote

Next, grab your Craftsman garage door opener remote and press the button that you want to program to open and close your garage door. Hold down the button until you see the indicator light on the remote flash or hear a beep, indicating that the remote’s code has been transmitted to the garage door opener.

4. Test the Remote

After programming the remote, it’s essential to test it to ensure that it’s working correctly. Stand inside your garage and press the button on the remote. If the programming was successful, your garage door should open or close smoothly in response to the remote’s command.

5. Repeat for Additional Remotes (If Necessary)

If you have multiple Craftsman garage door opener remotes that you want to program to your opener, simply repeat the process outlined above for each remote. Press the “Learn” button on the opener, then press the button on the remote that you want to program, and test each remote to ensure that they’re all functioning correctly.

6. Erase Existing Codes (Optional)

If you’re replacing an old remote or want to reset the programming on your opener, you may need to erase existing codes before programming new remotes. To do this, locate the “Learn” button on the opener and press it for about 6-8 seconds until the indicator light turns off. This action erases all existing codes from the opener’s memory, allowing you to start fresh with programming new remotes.

7. Secure Your Remote

Once you’ve programmed your Craftsman garage door opener remote, be sure to keep it in a safe and secure location, such as your car’s glove compartment or a designated spot inside your home. Avoid leaving the remote in plain sight, where it could be easily stolen or accessed by unauthorized individuals.

Conclusion:

Programming your Craftsman garage door opener remote is a simple process that allows you to enjoy convenient access to your garage. By following the steps outlined in this guide, you can quickly set up your remote and ensure smooth operation of your garage door opener. If you encounter any difficulties during the programming process, refer to your opener’s user manual for troubleshooting tips, or contact Craftsman’s customer support for assistance.

Anna’s Best Garage & Overhead Doors

1009 Mathew Dr, Anna, TX 75049, United States

1-469-224-1335

How To Program A Genie Garage Door Opener – MF Solutions


How to Program a Genie Garage Door Opener: A Step-by-Step Guide

If you have ChatGPT 4, then try this: https://bit.ly/Jumma_GPTs


Garage Door Repair Nile IL  allows you to synchronize it with your garage door system, enabling seamless operation and convenient access to your home. Whether you’re setting up a new Genie garage door opener or reprogramming an existing one, the process can be completed quickly and easily with the right instructions.

In this comprehensive guide, we’ll walk you through the step-by-step process of programming a Genie garage door opener, ensuring that you can enjoy smooth and reliable performance for years to come.

1. Gather Required Materials

Before you begin programming your Genie garage door opener, gather the necessary materials:

  • Genie garage door opener unit
  • Remote control transmitter or keypad
  • Ladder (if needed)
  • Pen and paper (optional, for note-taking)

Ensure that you have access to the learn button on your Genie garage door opener unit, as this will be used during the programming process.

2. Put the Garage Door Opener into Programming Mode

To begin programming your Genie garage door opener, follow these steps:

  1. Locate the “learn” or “program” button on the opener unit. This button is typically located on the back panel or side of the opener motor housing.
  2. Press and release the learn button to put the opener into programming mode. The indicator light on the opener may flash or blink to indicate that it is ready to receive programming signals.

3. Program the Remote Control

Once the Genie garage door opener is in programming mode, you can program your remote control transmitter to work with the opener. Follow these steps:

  1. Hold the remote control transmitter within range of the opener unit, typically within a few feet.
  2. Press and hold the button on the remote control that you want to use to operate the garage door.
  3. While holding the button on the remote control, press and release the learn button on the opener unit.
  4. Release the button on the remote control. The indicator light on the opener should flash or blink to indicate that the programming was successful.

4. Program the Keypad (If Applicable)

If your Genie garage door opener is equipped with a keypad for keyless entry, you can program it to work with the opener using a similar process. Follow these steps:

  1. Enter the access code into the keypad that you want to use to operate the garage door.
  2. After entering the code, press the “Enter” or “Send” button on the keypad.
  3. Then, press and release the learn button on the opener unit.
  4. The indicator light on the opener should flash or blink to indicate that the programming was successful.

5. Test the Garage Door Opener

After programming the remote control and keypad, it’s important to test the Genie garage door opener to ensure that it operates correctly. Stand within range of the opener and press the button on the remote control or keypad that you programmed. The garage door should open or close in response to the signal from the device, indicating that the programming was successful.

6. Additional Programming Options

Depending on the model of your Genie garage door opener, you may have additional programming options available, such as setting up additional remotes, adjusting the open and close limits, or activating vacation mode. Refer to the user manual for your specific opener model for detailed instructions on these additional programming options.

7. Perform Regular Maintenance

To ensure continued reliable operation of your Genie garage door opener, perform regular maintenance and inspections. Check the batteries in remote controls and keypads regularly and replace them as needed to prevent signal loss or weak transmission. Additionally, clean the contacts on the devices and the opener unit to maintain optimal connectivity.

8. Seek Professional Assistance if Needed

If you encounter difficulties or have concerns about programming your Genie garage door opener, don’t hesitate to seek professional assistance. Contact Genie customer support or a reputable garage door technician for guidance on programming the device safely and effectively.

By following these steps and exercising proper caution, you can successfully program a Genie garage door opener to work with your remote control or keypad and enjoy convenient access to your garage with just the push of a button. Whether you’re setting up a new opener or reprogramming an existing one, knowing how to program your Genie garage door opener ensures seamless integration and enhanced convenience for your daily routine.

MF Solutions

302 Cherrywood Rd. City, St. Zip: Buffalo Grove, IL 60089

1-224-434-1780

How To Program Subaru Garage Door Opener – Ryder Garage Doors

Garage Door Repair Vancouver WA allows for seamless integration, enabling you to open and close your garage door with the push of a button from the convenience of your vehicle.

Subaru vehicles come equipped with a built-in HomeLink system, which can be programmed to work with most garage door openers. In this guide, we’ll walk you through the step-by-step process of programming a Subaru garage door opener, ensuring that you can enjoy convenient access to your garage with ease.

1. Identify the HomeLink Buttons in Your Subaru

Most Subaru vehicles come equipped with a HomeLink system, which consists of three buttons located on the overhead console or rearview mirror. These buttons can be programmed to control various home automation devices, including garage door openers.

2. Clear Existing Programming (If Needed)

If your Subaru’s HomeLink system is already programmed to work with a different garage door opener, you may need to clear the existing programming before proceeding. Consult your vehicle’s owner’s manual for instructions on how to clear existing programming from the HomeLink system.

3. Put the Garage Door Opener into Programming Mode

Next, put your garage door opener into programming mode by following the instructions provided in the opener’s user manual. This typically involves pressing and holding a button on the opener unit until the indicator light flashes or a beep is heard, indicating that the opener is ready to receive programming signals.

4. Program the HomeLink Buttons in Your Subaru

With the garage door opener in programming mode, press and hold one of the HomeLink buttons in your Subaru. While holding the button, simultaneously press and release the button on the garage door opener unit. You may need to repeat this step multiple times to ensure successful programming.

5. Test the Garage Door Opener

After programming the HomeLink button in your Subaru, test the garage door opener to ensure that it operates correctly. Park your car within range of the garage door opener and press the programmed button on the HomeLink system. The garage door should open or close in response to the signal from your Subaru, indicating that the programming was successful.

6. Repeat the Programming Process (If Needed)

If you have multiple garage doors or if you’re programming additional buttons on the HomeLink system to work with the same garage door opener, repeat the programming process for each button individually. Ensure that each button is programmed to the correct garage door opener to avoid confusion and ensure seamless operation.

7. Perform Regular Maintenance

To ensure continued reliable operation of your programmed garage door opener, perform regular maintenance and inspections. Check the batteries in the HomeLink system regularly and replace them as needed to prevent signal loss or weak transmission. Additionally, clean the contacts on the HomeLink buttons and the garage door opener unit to maintain optimal connectivity.

8. Seek Professional Assistance if Needed

If you encounter difficulties or have concerns about programming your Subaru’s garage door opener, don’t hesitate to seek professional assistance. Contact a reputable garage door technician or Subaru dealership to inspect the opener unit and provide guidance on programming the HomeLink system safely and effectively.

By following these steps and exercising proper caution, you can successfully program a garage door opener to your Subaru and enjoy convenient access to your garage with just the push of a button. Whether you’re programming a new vehicle or adding additional buttons to your existing HomeLink system, knowing how to program your Subaru’s garage door opener ensures seamless integration and enhanced convenience for your daily routine.

Ryder Garage Doors

PO Box 5474 Vancouver, WA 98668

1-360-843-7981

How To Reset Garage Door Keypad Without Code – Hi-Country Dock & Door LLC

Garage Door Repair Roundup MT can be a challenging task, but it’s not impossible. Whether you’ve forgotten the code or purchased a property with an existing keypad, there are several methods you can try to reset the keypad and regain access to your garage.

In this comprehensive guide, we’ll explore various techniques and tips to help you reset your garage door keypad without the code.

Understanding Your Garage Door Keypad

Before attempting to reset the garage door keypad, it’s essential to understand its basic components and functionality.

Components of a Garage Door Keypad

A typical garage door keypad consists of a numerical keypad with buttons for entering the access code and a control panel or motor unit connected to the garage door opener.

Functionality

The keypad allows authorized individuals to enter a security code to open and close the garage door without the need for a remote control. It provides convenient access while enhancing security.

Methods for Resetting Garage Door Keypad Without Code

While resetting a garage door keypad without the access code can be challenging, there are several methods you can try:

: Factory Reset

Some garage door keypads have a factory reset option that allows you to clear the existing code and restore the keypad to its default settings. To perform a factory reset, locate the reset button on the keypad or inside the battery compartment and press and hold it for about 10 seconds. The keypad lights may flash, indicating that the reset was successful.

: Power Cycle

Disconnecting power to the garage door opener can sometimes reset the keypad and clear the existing code. Locate the power source for the garage door opener, such as the electrical outlet or circuit breaker, and disconnect it for a few minutes. Reconnect the power source and test the keypad to see if it has been reset.

: Keypad Reinstallation

Removing the keypad from its mounting location and reinstalling it can sometimes trigger a reset and allow you to enter a new access code. Use a screwdriver to remove the keypad from the wall or door frame, then disconnect the wires and remove the batteries. Wait a few minutes before reconnecting the wires and reinstalling the batteries. Mount the keypad back in its original location and follow the manufacturer’s instructions to program a new access code.

: Contact Manufacturer

If none of the above methods work, consider contacting the manufacturer of the garage door keypad for assistance. Provide them with the model number and any relevant information about the keypad, and they may be able to provide you with additional instructions or support for resetting the keypad without the access code.

Tips for Preventing Future Issues

Once you’ve successfully reset your garage door keypad, consider implementing the following tips to prevent future issues:

Record Access Code

Keep a record of your new access code in a safe and easily accessible location, such as a smartphone app, notebook, or secure online account.

Change Code Regularly

To enhance security, consider changing your access code regularly, such as every six months or whenever there is a change in household occupants.

Test Keypad Regularly

Periodically test the keypad to ensure it is functioning correctly and that the access code is still active. This will help identify any issues before they become major problems.

Conclusion:

Resetting a garage door keypad without the access code may seem daunting, but with the right techniques and persistence, it can be accomplished. By following the methods outlined in this guide and implementing preventive measures, you can regain access to your garage and ensure the security of your property.

Hi-Country Dock & Door LLC

104 Cottonwood Rd, Roundup, MT 59072, United States

1-406-320-0518

Can I Program My Phone Open My Garage Door – Affordable Garage Door Repairs of Indianapolis, LLC

With the rise of smart home technology, many homeowners are now exploring the possibility of using their smartphones to control and automate household devices, Garage Door Repair Indianapolis IN.

But can you program your phone to open your garage door? In this comprehensive guide, we’ll explore the latest smart solutions for garage door automation and how you can use your phone to operate your garage door with ease.

Understanding Smart Garage Door Openers

Smart garage door openers are devices that allow you to control and monitor your garage door remotely using a smartphone or other internet-connected devices. These devices typically connect to your home’s Wi-Fi network, allowing you to access and control your garage door from anywhere with an internet connection.

Smart Solutions for Garage Door Automation

There are several smart solutions available for automating your garage door and integrating it with your smartphone:

1. Smart Garage Door Opener Systems

Many manufacturers offer smart garage door opener systems that include a Wi-Fi-enabled garage door opener unit, sensors, and a smartphone app. These systems allow you to open, close, and monitor your garage door remotely using your smartphone, tablet, or computer.

2. Retrofit Kits

If you already have a standard garage door opener installed, you can retrofit it with a smart controller or hub that adds smart functionality. These retrofit kits typically include a device that connects to your existing garage door opener and allows you to control it using a smartphone app.

3. Smart Home Platforms

Some smart home platforms, such as Apple HomeKit, Google Assistant, and Amazon Alexa, offer compatibility with certain garage door opener systems. By integrating your garage door opener with these platforms, you can control it using voice commands or through the respective smart home app on your smartphone.

How to Program Your Phone to Open Your Garage Door

Once you’ve chosen a smart solution for your garage door automation needs, programming your phone to open your garage door is typically a straightforward process:

  1. Install the Smart Garage Door Opener: Start by installing the smart garage door opener system or retrofit kit according to the manufacturer’s instructions. This may involve mounting the garage door opener unit, sensors, and other components as needed.
  2. Download the Smartphone App: Next, download the corresponding smartphone app for your smart garage door opener system from the App Store (for iOS devices) or Google Play Store (for Android devices).
  3. Create an Account: Open the app and create an account if prompted. This account will allow you to access and control your garage door opener remotely from your smartphone.
  4. Connect to Wi-Fi: Follow the app’s instructions to connect the smart garage door opener unit to your home’s Wi-Fi network. This will enable communication between your smartphone and the garage door opener.
  5. Pair Your Phone: Once the garage door opener unit is connected to Wi-Fi, use the app to pair your smartphone with the device. This may involve scanning a QR code or entering a pairing code provided by the app.
  6. Test the System: Finally, test the smart garage door opener system to ensure that it’s functioning correctly. Use the app to open and close your garage door remotely from your smartphone and verify that the system responds as expected.

Benefits of Using Your Phone to Open Your Garage Door

There are several benefits to using your phone to open your garage door:

  1. Convenience: With your smartphone always within reach, you can open and close your garage door with just a few taps on the screen, eliminating the need for separate remote controls or keypads.
  2. Remote Access: Whether you’re at work, on vacation, or simply away from home, you can access and control your garage door from anywhere with an internet connection, providing peace of mind and added security.
  3. Integration with Smart Home Ecosystem: By integrating your garage door opener with your smartphone and other smart home devices, you can create custom automation routines and control your entire home with ease.
  4. Monitoring and Alerts: Many smart garage door opener systems offer real-time monitoring and alerts, allowing you to receive notifications on your smartphone when your garage door is opened, closed, or left open for an extended period.

Conclusion:

With the latest advancements in smart home technology, it’s now easier than ever to control and automate your garage door using your smartphone. Whether you choose a dedicated smart garage door opener system, a retrofit kit, or integration with a smart home platform, programming your phone to open your garage door is a simple and convenient way to enhance the security and functionality of your home.

Affordable Garage Door Repairs of Indianapolis, LLC

27361 Mosbaugh Rd. Arcadia, IN 46030

1-317-372-5337

How To Fix Garage Door That Won’t Stay Closed – Team Taylor Garage Doors of Lee’s Summit

A Garage Door Repair Lee’s Summit MO can be both inconvenient and potentially hazardous. It leaves your garage vulnerable to security breaches and exposes your belongings to the elements. Several factors can contribute to this issue, including misaligned sensors, worn-out components, or problems with the garage door opener.

In this comprehensive guide, we’ll explore common reasons why a garage door won’t stay closed and provide step-by-step instructions for troubleshooting and resolving the problem.

Understanding the Causes of a Garage Door That Won’t Stay Closed

There are several potential reasons why a garage door may refuse to stay closed:

  1. Misaligned Safety Sensors: Garage door safety sensors, located near the bottom of the door tracks, can become misaligned over time. When misaligned, they may falsely detect an obstruction in the door’s path and prevent it from closing fully.
  2. Obstructed Door Tracks: Objects or debris lodged in the door tracks can prevent the garage door from closing properly. Common obstructions include rocks, leaves, or even small animals.
  3. Worn-Out Components: Wear and tear on the garage door’s springs, cables, or rollers can affect its ability to close smoothly and stay closed.
  4. Faulty Garage Door Opener Settings: Incorrect settings on the garage door opener, such as the travel limits or force settings, can cause the door to reverse prematurely, preventing it from staying closed.

Steps to Fix a Garage Door That Won’t Stay Closed

1. Check Safety Sensor Alignment

Start by inspecting the alignment of the garage door safety sensors. Ensure that the sensors are facing each other and that their indicator lights are both lit. If one or both lights are blinking or off, adjust the sensor alignment until both lights are solid.

2. Remove Obstructions from Door Tracks

Inspect the garage door tracks for any obstructions, such as rocks, leaves, or debris. Use a broom or brush to clear away any debris and ensure that the tracks are clean and free of obstructions. Check the tracks for signs of damage or misalignment and make any necessary repairs.

3. Test the Door Balance

Test the balance of the garage door by manually opening it halfway and releasing it. The door should remain in place without falling or rising. If the door moves up or down on its own, it may be out of balance, indicating a problem with the springs or cables.

4. Adjust Garage Door Opener Settings

Check the settings on your garage door opener to ensure that the travel limits and force settings are correctly adjusted. Refer to the manufacturer’s instructions for your specific opener model to adjust these settings as needed. Test the door to see if it stays closed after adjusting the settings.

5. Inspect and Lubricate Moving Parts

Inspect the garage door’s springs, cables, rollers, and hinges for signs of wear or damage. Replace any worn or damaged components and lubricate all moving parts with a silicone-based lubricant to ensure smooth operation. Pay special attention to the springs and cables, as these are critical components for keeping the door closed.

Conclusion:

A garage door that won’t stay closed can be a frustrating problem, but with a systematic approach to troubleshooting, it’s often possible to identify and fix the underlying issue. By following the steps outlined in this guide, you can diagnose the cause of your garage door’s behavior and take the necessary steps to resolve it, ensuring that your garage remains secure and functional.

Team Taylor Garage Doors of Lee’s Summit

1012 NE Jib Ct STE D, Lee’s Summit, MO 64064, United States

1-816-239-2959

How Do I Get My Garage Door To Stop Squeaking – Martin Garage Door

Dealing with a Garage Door Repair Parker CO can be a nuisance, but fortunately, there are several effective methods to silence those annoying noises and restore smooth and quiet operation to your garage door.

In this comprehensive guide, we’ll explore various techniques and strategies for eliminating garage door squeaks, from simple maintenance tasks to more advanced adjustments. By following these steps, you’ll be able to enjoy a quieter garage door and a more peaceful home environment.

1. Identify the Source of the Squeak

Before you can address the squeaking issue, it’s essential to identify the source of the noise. Squeaks can originate from various parts of the garage door system, including the hinges, rollers, tracks, springs, and opener mechanism. Take some time to inspect the door carefully and listen for the source of the squeaking noise. This will help you determine which components need attention and the best approach for addressing the problem.

2. Lubricate Moving Parts

One of the most common causes of garage door squeaks is friction between moving parts. Over time, hinges, rollers, tracks, and other components can become dry and rusty, leading to squeaking and sticking. To resolve this issue, lubricate the moving parts of the garage door with a high-quality garage door lubricant or silicone-based lubricant. Apply the lubricant generously to hinges, rollers, tracks, springs, and other metal-to-metal contact points to reduce friction and eliminate squeaks.

3. Tighten Loose Hardware

Another common cause of garage door squeaks is loose hardware, such as screws, nuts, bolts, and brackets. Loose hardware can cause parts of the garage door system to vibrate and rub against each other, resulting in squeaking noises. To address this issue, inspect the hardware on the garage door and tighten any loose screws, nuts, or bolts using a screwdriver or wrench. Pay particular attention to hinges, brackets, and other hardware that may have become loose over time.

4. Replace Worn or Damaged Parts

If lubricating and tightening the hardware doesn’t eliminate the squeaking noise, it may be necessary to replace worn or damaged parts of the garage door system. Over time, hinges, rollers, tracks, and other components can wear out or become damaged, leading to increased friction and squeaking. Inspect these parts carefully and replace any that show signs of excessive wear, rust, or damage. Be sure to use high-quality replacement parts that are compatible with your garage door system.

5. Adjust the Garage Door Springs

Garage door springs play a crucial role in the smooth and balanced operation of the door. If the springs are worn, damaged, or improperly adjusted, they can cause the door to squeak and operate erratically. Inspect the springs for signs of wear or damage, such as rust, corrosion, or deformation. If necessary, adjust the tension of the springs according to the manufacturer’s instructions or seek assistance from a professional garage door technician. Properly adjusted springs will help reduce friction and eliminate squeaks.

6. Inspect and Clean the Tracks

The tracks are another potential source of garage door squeaks, especially if they are dirty, rusty, or misaligned. Inspect the tracks for debris, dirt, and rust buildup, and clean them thoroughly using a stiff brush or cloth. Ensure that the tracks are properly aligned and free from obstructions that could cause the rollers to bind or squeak. Lubricate the tracks with a silicone-based lubricant to reduce friction and ensure smooth operation.

7. Check the Opener Mechanism

In some cases, the garage door opener mechanism itself may be causing the squeaking noise. Inspect the opener for signs of wear, damage, or misalignment, and lubricate any moving parts according to the manufacturer’s instructions. If necessary, adjust the tension or alignment of the opener mechanism to ensure smooth and quiet operation. Consider upgrading to a newer, quieter garage door opener model if your current opener is outdated or worn out.

8. Test and Adjust the Balance

An unbalanced garage door can cause excessive wear and strain on the opener mechanism, leading to squeaking and other issues. Test the balance of the garage door by disconnecting the opener and manually lifting the door halfway open. If the door does not stay in place or feels heavy, it may be out of balance and require adjustment. Follow the manufacturer’s instructions or consult with a professional garage door technician to properly balance the door and eliminate squeaks.

Conclusion:

Dealing with a squeaky garage door can be frustrating, but with the right approach, you can silence those annoying noises and restore smooth and quiet operation to your garage door. By identifying the source of the squeak, lubricating moving parts, tightening loose hardware, replacing worn or damaged parts, adjusting the springs and tracks, inspecting the opener mechanism, and testing the balance of the door, you can eliminate squeaks and enjoy a more peaceful home environment. Whether you prefer to tackle the job yourself or enlist the help of a professional garage door technician, addressing garage door squeaks will improve the functionality and longevity of your garage door system.

Martin Garage Door

10411 S Parker Rd, Parker, CO 80134

1-303-663-1310

How To Align Your Garage Door Sensors – 3702 I 35 Frontage Rd #112

Properly Garage Door Repair New Braunfels TX are essential for the safe and smooth operation of your garage door system. These sensors, also known as safety eyes or photoelectric sensors, are designed to detect obstacles in the path of the door and prevent accidents or damage by stopping or reversing the door’s movement.

If the sensors are misaligned, they may fail to function correctly, compromising the safety of your garage door. In this comprehensive guide, we’ll walk you through the step-by-step process of aligning your garage door sensors, ensuring that your door operates safely and efficiently.

Understanding Garage Door Sensors

Garage door sensors are typically installed near the bottom of the vertical tracks on both sides of the garage door opening. They work by emitting an invisible beam of light between them. When an obstruction interrupts this beam while the door is closing, the sensors trigger the door to stop or reverse its movement, preventing accidents or damage.

Tools and Materials Needed

Before you begin aligning your garage door sensors, gather the following tools and materials:

  • Tape measure
  • Screwdriver
  • Level
  • Cleaning cloth
  • Marker or pen

Having these tools on hand will make the alignment process easier and more efficient.

Step-by-Step Alignment Guide

Follow these step-by-step instructions to align your garage door sensors effectively:

1. Identify Sensor Locations

Locate the sensors on both sides of the garage door opening. They are usually mounted on the vertical tracks, about 6 inches above the ground.

2. Check Sensor Alignment

Visually inspect the alignment of the sensors to ensure that they are facing each other directly and that there are no obstructions blocking the sensor beams.

3. Clean Sensors

Use a cleaning cloth to wipe the lenses of the sensors clean. Dirt, dust, or debris on the lenses can interfere with the sensor’s operation.

4. Measure Sensor Height

Use a tape measure to measure the height of each sensor from the ground. Ensure that they are positioned at the same height on both sides of the door.

5. Adjust Sensor Alignment

If the sensors are misaligned, use a screwdriver to loosen the mounting brackets holding them in place. Carefully adjust the sensors horizontally and vertically until they are perfectly aligned with each other.

6. Use a Level

Place a level across the sensors to ensure that they are aligned both horizontally and vertically. Adjust as needed until the bubble is centered.

7. Tighten Mounting Brackets

Once the sensors are properly aligned, use a screwdriver to tighten the mounting brackets securely in place to prevent them from moving out of alignment.

8. Test Sensor Alignment

Test the alignment of the sensors by closing the garage door. If the sensors are aligned correctly, the door should close smoothly without any interruptions. If the door fails to close or reverses unexpectedly, the sensors may still be misaligned, and you will need to readjust them accordingly.

9. Final Adjustment

Make any final adjustments to the sensor alignment as needed to ensure that they are working correctly. Pay attention to any potential obstructions or interferences that may affect the sensor’s operation.

10. Secure Wiring

After confirming that the sensors are properly aligned and functioning correctly, secure any loose wiring or cables connected to the sensors to prevent them from becoming tangled or damaged.

Conclusion:

Aligning your garage door sensors is a relatively simple yet crucial task that can prevent accidents and ensure the smooth operation of your garage door. By following the step-by-step guide outlined above and conducting regular maintenance checks, you can keep your garage door sensors properly aligned and functioning optimally, providing you with peace of mind and safety.

3702 I 35 Frontage Rd #112

3702 I 35 Frontage Rd #112, New Braunfels, TX 78132

1-830-387-9855

How Much Is A New Garage Door Opener Installed – MF Solutions

Installing a Garage Door Repair Niles IL involves various considerations, including the type of opener, installation requirements, additional features, and labor costs.

By understanding these factors, you can estimate the overall cost and budget accordingly for this essential home upgrade.

Factors Affecting Cost

Several factors contribute to the overall cost of a new garage door opener installation:

1. Type of Garage Door Opener

There are several types of garage door openers available, each with its own features and price points:

  • Chain-Drive Openers: These are the most common and affordable option, utilizing a chain to operate the door. While they are durable and reliable, they tend to be noisy during operation.
  • Belt-Drive Openers: Belt-drive openers offer quieter operation compared to chain-drive models, making them ideal for homes where noise is a concern. They are slightly more expensive but provide smoother and more reliable performance.
  • Screw-Drive Openers: Screw-drive openers utilize a threaded rod to move the door, offering robust performance and minimal maintenance requirements. They fall in the mid-range in terms of cost and are suitable for various garage door types.
  • Smart Openers: Smart garage door openers come with advanced features such as smartphone connectivity, remote access, and integration with home automation systems. While they offer convenience and enhanced security, they come at a higher price point due to their advanced technology.

2. Installation Costs

The installation process typically involves mounting the opener motor, installing the necessary hardware, wiring the opener to the electrical system, and programming the remote controls. Labor costs vary depending on the complexity of the installation and local labor rates.

3. Additional Features

Optional features such as battery backup, Wi-Fi connectivity, keypad entry systems, and motion sensors can add to the overall cost of the garage door opener. These features enhance convenience, security, and functionality but may come at an additional expense.

Estimating Costs

To estimate the cost of a new garage door opener installed, consider the following steps:

  1. Research: Explore different types and brands of garage door openers to understand their features and price ranges.
  2. Measurements: Measure the height and width of your garage door to ensure compatibility with the chosen opener. Consider factors such as door weight and size when selecting the appropriate opener.
  3. Get Quotes: Contact reputable garage door companies or retailers to obtain quotes based on your specific requirements. Request detailed quotes that include the cost of the opener, installation, and any additional features.
  4. Consider Additional Costs: Factor in any additional costs such as removal of the old opener, disposal fees, permits (if required), and taxes to get a comprehensive understanding of the total project cost.

Conclusion:

The cost of a Garage Door Repair Niles IL varies depending on factors such as the type of opener, installation requirements, additional features, and labor costs. By considering these factors and obtaining multiple quotes from reputable providers, you can make informed decisions and budget accordingly for this essential home upgrade.

MF Solutions

1-224-434-1780

Page 3 of 25

Powered by WordPress & Theme by Anders Norén