Local Businesses Blog in Texas

Tag: garage door repair sugar land tx

How To Remove Garage Door Panels – First Call Garage Door of Sugarland

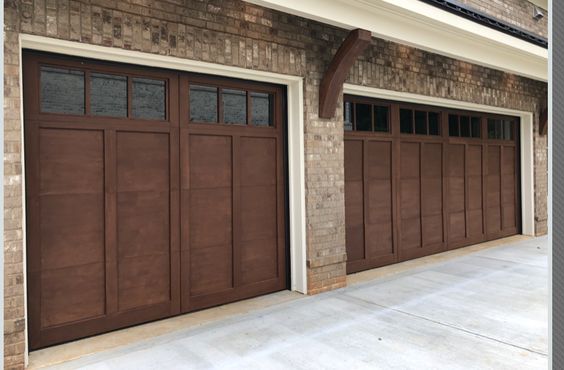
Removing Sugar Land Garage Door Repair is a task that requires precision and attention to detail to ensure the process is carried out safely and effectively.

Before diving into the step-by-step guide, it’s crucial to emphasize the importance of safety. Always wear appropriate safety gear, such as gloves and safety glasses, and take necessary precautions to avoid accidents.

: Preparation

Start by preparing the work area. Ensure there is enough space around the garage door for the panels to be safely removed and stored. Clear any obstacles that may impede the process.

: Disconnect Power

Before beginning the removal process, disconnect the power to the garage door opener. This can typically be done by unplugging it from the electrical outlet or turning off the circuit breaker connected to the garage door opener.

: Lower the Garage Door

Lower the garage door to its fully closed position. This will make it easier to access and work on each panel. If the door is equipped with an automatic opener, disengage it to allow manual operation.

: Identify Hinges and Fasteners

Examine the garage door to identify the hinges and fasteners connecting the panels. Most garage doors are constructed with multiple panels hinged together. Locate the screws or bolts securing the hinges and panels.

: Remove Hinge Fasteners

Using a suitable tool, such as a screwdriver or drill, carefully remove the fasteners (screws or bolts) that connect the hinges to the panels. Start at the bottom of the door and work your way up. If any fasteners are rusted or difficult to remove, applying a penetrating oil can help loosen them.

: Detach Hinges

Once the fasteners are removed, detach the hinges from the panels. Lift each panel slightly to release it from the hinges. It’s advisable to have a helper assist you during this step to ensure the panels are adequately supported and do not fall.

: Disconnect Rollers

If the garage door has rollers that slide into a track, disconnect them by removing the bolts or nuts securing them. Begin from the bottom and work your way up, ensuring each roller is detached from the track.

: Lift and Remove Panels

With the hinges and rollers disconnected, lift each panel upward to free it from the track. Pay attention to the weight of the panels, and if needed, have your helper assist in lifting and holding them.

: Safely Store Panels

As you remove each panel, place them in a safe and organized manner to prevent damage. If there is an intention to reuse the panels, take extra care during this step. Consider using protective coverings or blankets to prevent scratches or dents.

: Repeat the Process

Continue the process of removing panels until the entire garage door is disassembled. Keep track of the order in which the panels are removed to facilitate reinstallation.

Conclusion:

Removing Sugar Land Garage Door Repair is a methodical process that requires careful attention to each step. By following these guidelines, you can ensure the safe and efficient removal of your garage door panels. Always prioritize safety, use the appropriate tools, and seek professional assistance if needed. If you plan to reinstall the door or replace the panels, refer to the manufacturer’s instructions for guidance on proper reassembly.

First Call Garage Door of Sugarland

15500 Voss Rd ste 425, Sugar Land, TX 77498, United States

1-713-597-5105

How to Program a Garage Door Opener for Multiple Users: A Homeowner’s Guide – First Call Garage Door of Sugarland

As a homeowner who values both security and convenience, I’ve always been on the lookout for ways to enhance the functionality of my home. One aspect that often requires careful management is the garage door opener. With multiple family members and frequent visitors, programming a garage door opener for multiple users became a necessity in my household.

In this personal guide I got from Garage Door Repair Sugar Land TX, I’ll share my experiences and walk you through the process of programming a garage door opener to accommodate multiple users, making life as a homeowner more manageable.

Understanding the Importance of Multiple User Programming

Before we delve into the programming process, let’s take a moment to recognize why programming a garage door opener for multiple users is crucial:

  1. Security: By assigning unique access codes to each user, you can better control who enters your garage, enhancing overall security.
  2. Convenience: Multiple user programming eliminates the need for sharing a single remote or access code, making it more convenient for everyone in the household.
  3. Individual Access: Different family members or frequent visitors may have varying schedules and routines. Multiple user programming allows each person to have their own access code, tailored to their needs.
  4. Visitor Access: When friends, family, or service providers visit your home, you can assign temporary access codes for their convenience, ensuring they can enter the garage without revealing your permanent code.
  5. Accountability: If there are any concerns or incidents involving the garage, individual access codes can help determine who entered and when, providing accountability.

Step-by-Step Guide to Programming a Garage Door Opener for Multiple Users

Now, let’s explore the step-by-step process of programming a garage door opener to accommodate multiple users. Keep in mind that the exact steps may vary depending on your garage door opener model, so always refer to your opener’s manual for specific instructions.

Step 1: Locate the Control Panel

Begin by locating the control panel of your garage door opener. This panel is typically mounted on the wall inside your garage, near the entrance.

Step 2: Access the User Programming Menu

Access the user programming menu on the control panel. This can usually be done through the control panel’s display or keypad. Look for options related to user codes, access codes, or remote control programming.

Step 3: Add or Edit User Codes

Once you’ve accessed the user programming menu, you’ll have the option to add or edit user codes. Depending on your opener, you may need to select a specific slot or user number for each code.

Step 4: Assign Unique User Codes

Assign a unique user code to each individual who requires access to your garage. These codes should be confidential and not easily guessable. You can usually choose a combination of numbers for each code.

Step 5: Set Permissions and Restrictions

Some garage door openers allow you to set specific permissions and restrictions for each user code. For example, you can determine whether a code can open the garage door at any time or only during certain hours.

Step 6: Test the User Codes

After programming the user codes, it’s essential to test them to ensure they operate as intended. Have each user enter their code to open and close the garage door to confirm that the programming is successful.

Step 7: Maintain and Update

Regularly review and update the user codes as needed. If someone no longer requires access or if you need to grant temporary access to a visitor, edit the user codes accordingly. Keeping your codes up to date enhances security.

Additional Tips for Programming Multiple Users

Here are some additional tips to help you make the most of your garage door opener’s multiple user programming feature:

  1. Regularly Review Access: Periodically review the list of programmed user codes to ensure that only authorized individuals have access. Remove any outdated or unnecessary codes.
  2. Use Temporary Codes: If you have visitors or service providers who require temporary access, consider using temporary codes that expire after a specific period. This prevents ongoing access.
  3. Educate Users: Ensure that all authorized users are familiar with the proper use of their access codes. Emphasize the importance of keeping their codes confidential.
  4. Security Reminders: Remind users not to share their access codes with others and to change their codes periodically for added security.

My Personal Experience: From Shared Access to Individual Control

Before programming my garage door opener for multiple users, the process of managing access was quite cumbersome. With a single remote control and access code, coordinating access for family members and visitors was challenging. That’s when I decided to explore the world of multiple user programming.

Here’s how programming a garage door opener for multiple users has impacted my daily life:

Enhanced Security: Assigning unique user codes has significantly enhanced security. I have better control over who enters my garage, and I can easily revoke access when needed.

Streamlined Access: With each family member having their own user code, accessing the garage has become more convenient. No more searching for the remote or coordinating access times.

Visitor-Friendly: When friends or service providers visit, I can quickly assign temporary access codes, ensuring they can enter without disclosing my permanent code. It’s a visitor-friendly solution.

Individual Control: Each user can set their preferred permissions and restrictions, aligning with their routines. This individual control ensures that everyone can access the garage according to their needs.

Conclusion: Simplifying Home Access

Programming a garage door opener for multiple users may seem like a small addition to your home automation toolkit, but its impact on daily life is significant. It enhances security, streamlines access, and provides individual control that can accommodate various routines and schedules.

In conclusion, based from Garage Door Repair Sugar Land TX, whether you have a bustling household or frequently receive visitors, multiple user programming offers a practical solution. It’s a feature that has made a substantial difference in my life as a homeowner, offering both convenience and peace of mind. I wholeheartedly recommend exploring this option to simplify home access for your family and guests as well.

First Call Garage Door of Sugarland

15500 Voss Rd ste 425, Sugar Land, TX 77498, United States

713-597-5105

How To Connect MYQ Garage Door Opener To Wifi – First Call Garage Door of Sugarland

Connecting your MyQ Garage Door Repair Sugarland TX to Wi-Fi is a straightforward process that involves a few steps.

MyQ technology allows you to control and monitor your garage door remotely using a smartphone or tablet. Follow these instructions carefully, and you’ll have your MyQ garage door opener connected to Wi-Fi in no time.

: Gather Required Materials Before you begin, make sure you have the following items ready:

  1. MyQ-enabled garage door opener.
  2. A Wi-Fi router with an active internet connection.
  3. A smartphone or tablet with the MyQ app installed (available for iOS and Android).
  4. Your Wi-Fi network name (SSID) and password.

: Install the MyQ Smart Garage Hub If you haven’t already installed the MyQ Smart Garage Hub, follow these steps:

  1. Place the MyQ Smart Garage Hub near your garage door opener, ensuring it’s within Wi-Fi range.
  2. Connect the MyQ Smart Garage Hub to your garage door opener using the included door sensor and cables.
  3. Plug the MyQ Smart Garage Hub into a power outlet.

: Download and Open the MyQ App If you haven’t already installed the MyQ app, download it from your device’s app store (App Store for iOS or Google Play Store for Android). Open the app once it’s installed.

: Create or Log in to Your MyQ Account If you’re a new user, create a MyQ account by providing your email address and creating a password. If you already have an account, log in using your credentials.

: Add a New Device To connect your MyQ garage door opener to Wi-Fi, follow these steps:

  1. Tap the “+” (plus) symbol in the MyQ app to add a new device.
  2. Select “Garage Door Opener” from the list of available devices.

: Scan the Barcode The MyQ app will prompt you to scan the barcode located on the MyQ Smart Garage Hub. Use your device’s camera to scan the barcode.

: Connect to Wi-Fi Now, follow these steps to connect your MyQ Smart Garage Hub to your Wi-Fi network:

  1. Select your Wi-Fi network from the list of available networks.
  2. Enter your Wi-Fi network password when prompted.

: Wait for Setup The MyQ app will now attempt to connect the MyQ Smart Garage Hub to your Wi-Fi network. This process may take a minute or two. Be patient and wait for the confirmation that your garage door opener is connected.

: Test the Connection Once the setup is complete, test the connection by opening and closing your garage door using the MyQ app. Ensure that the status of your garage door (open or closed) is displayed accurately in the app.

: Configure Notifications and Additional Features Explore the MyQ app to configure notifications, schedules, and other features to customize your garage door opener’s behavior.

Congratulations! You’ve successfully connected your MyQ Garage Door Repair Sugarland TX to Wi-Fi. You can now control and monitor your garage door remotely using the MyQ app from anywhere with an internet connection. Make sure to keep your MyQ account credentials secure to maintain the security of your garage door.

First Call Garage Door of Sugarland

15500 Voss Rd ste 425, Sugar Land, TX 77498, United States

1-713-597-5105

Powered by WordPress & Theme by Anders Norén