Local Businesses Blog in Texas

Tag: garage door repair Southlake TX Page 1 of 2

Do Garage Door Remotes Have Batteries – First Responder Garage Doors


 Garage Door Repair Southlake TX remotes typically have batteries that power their operation. These batteries are essential for transmitting signals to the garage door opener and triggering its functions.

Here’s a comprehensive guide discussing garage door remote batteries:

Understanding Garage Door Remote Batteries:

  1. Battery Type: Garage door remotes commonly use small, cylindrical batteries known as coin cell batteries or button cell batteries. The specific type of battery required depends on the make and model of the remote.
  2. Battery Life: The lifespan of garage door remote batteries varies depending on factors such as usage frequency, battery quality, and environmental conditions. Generally, these batteries can last anywhere from several months to a few years before needing replacement.
  3. Replacement Frequency: It’s a good idea to replace the batteries in your garage door remote periodically, even if they haven’t completely drained. Regular battery replacement helps ensure reliable operation and prevents issues caused by weak or depleted batteries.
  4. Indications of Low Battery: When the battery in a garage door remote starts to run low, you may notice symptoms such as reduced range, intermittent operation, or the need to press the remote button multiple times to activate the opener. If you experience these issues, it’s a sign that the battery needs replacement.
  5. Battery Replacement: To replace the battery in a garage door remote, follow these steps:
    • Identify the battery compartment on the remote. This is typically located on the back of the remote and can be accessed by removing a cover or sliding panel.
    • Open the battery compartment and carefully remove the old battery, taking note of its orientation.
    • Insert a new battery of the same type and size, ensuring it is properly seated and oriented correctly according to the markings inside the compartment.
    • Close the battery compartment securely, making sure the cover or panel is firmly in place.
    • Test the remote to confirm that the new battery is functioning correctly and that the remote can communicate with the garage door opener.
  6. Battery Disposal: When disposing of old garage door remote batteries, it’s important to follow proper recycling guidelines. Many local recycling centers accept used batteries for recycling to prevent environmental contamination.

Conclusion:

By following these guidelines, you can ensure that your  Garage Door Repair Southlake TX remote operates smoothly and effectively whenever you need it.

First Responder Garage Doors

180 State St Suite 225, Southlake, TX 76092, United States

1-817-991-5551

https://maps.app.goo.gl/Mp1GYagzPQAJp2s8A

How To Program A Wayne Dalton Garage Door Opener Remote – First Responder Garage Doors


Garage Door Repair Southlake TX  Whether you’re adding a new remote control or replacing an existing one.

the following guide will help you through the programming process effectively:

1. Gather Necessary Materials:

  • Before starting the programming process, gather all the materials you’ll need, including the new Wayne Dalton garage door opener remote, the existing remote control (if available), and the owner’s manual for your garage door opener. Ensure the new remote control is compatible with your Wayne Dalton opener.

2. Identify Your Wayne Dalton Garage Door Opener:

  • It’s crucial to identify the model of your Wayne Dalton garage door opener before programming the remote control. This information can typically be found on the motor unit of the opener or in the owner’s manual.

3. Prepare Your New Remote Control:

  • Ensure the new remote control is ready for programming by removing the battery cover and inserting fresh batteries. Make sure the remote control is in good working condition and has not been previously programmed to another garage door opener.

4. Locate the “Learn” Button on Your Opener:

  • Wayne Dalton garage door openers usually have a “Learn” or “Program” button located on the motor unit. This button is often near the antenna wire or under the light cover. If you’re unsure where to find the “Learn” button, refer to your opener’s manual.

5. Enter Programming Mode on Your Opener:

  • To enter programming mode, press and release the “Learn” button on your Wayne Dalton garage door opener. The indicator light on the opener will typically begin flashing, indicating that the opener is ready to receive a new code.

6. Program Your New Remote Control:

  • With the opener in programming mode, follow the specific instructions provided in your opener’s manual for programming a new remote control. This usually involves pressing and holding a specific button on the remote control until the indicator light on the opener stops flashing or changes color.

7. Test Your New Remote Control:

  • After programming is complete, test the new remote control to ensure it’s working properly. Press the button you programmed on the remote control to open and close your garage door. If the door operates as expected, programming was successful.

8. Secure Battery Cover and Store Remote Control Safely:

  • After programming the new remote control, securely replace the battery cover and store the remote control in a safe and easily accessible location. Ensure the remote control is kept away from moisture, extreme temperatures, and other potential sources of damage.

9. Additional Considerations:

  • If you’re programming a replacement remote control, you may need to clear the memory of the opener before programming the new remote control. Refer to your opener’s manual for instructions on clearing existing programming.

Conclusion:
Garage Door Repair Southlake TX  By following these steps carefully and referring to your opener’s manual for specific instructions, you can successfully program a new remote control to operate your Wayne Dalton garage door opener with ease.If you encounter any difficulties during the programming process, consult your opener’s manual or contact customer support for assistance.

First Responder Garage Doors

180 State St Suite 225, Southlake, TX 76092, United States

1-817-991-5551

How To Reprogram Garage Door Remote – First Responder Garage Doors

Garage Door Repair Southlake TX is a simple yet crucial task to ensure smooth and reliable operation of your garage door system.

By following the steps outlined in this guide and taking necessary precautions, you can successfully reprogram your remote and regain convenient access to your garage and home.

: Preparation

1. Gather Tools and Materials

Before you begin, gather the necessary tools and materials for the reprogramming process, including the garage door remote, a ladder if needed, and the instruction manual for your garage door opener.

2. Clear the Area

Ensure that the area around the garage door opener is clear of any obstructions or hazards to prevent accidents or injuries during the reprogramming process.

3. Read the Manual

Refer to the instruction manual for your garage door opener to locate the programming button and familiarize yourself with the reprogramming process specific to your model.

: Accessing the Programming Button

1. Locate the Garage Door Opener

Locate the motor unit of your garage door opener, usually installed on the ceiling of your garage near the center of the door.

2. Find the Programming Button

Locate the “Learn” or “Program” button on the motor unit of your garage door opener. This button is typically a small, square button located near the antenna wire or on the back of the motor unit.

: Clearing Existing Programming

1. Press and Hold the Programming Button

Press and hold the programming button on the motor unit of your garage door opener until the indicator light begins to flash, usually for about 30 seconds. This clears the existing programming from the opener’s memory.

2. Release the Programming Button

Once the indicator light begins to flash, release the programming button on the motor unit. The opener is now in programming mode and ready to accept programming from the remote control.

: Programming the Remote

1. Press the Desired Button on the Remote

Press and hold the desired button on the remote control that you want to program to the garage door opener. Hold the button until the indicator light on the remote control begins to flash, indicating that the programming was successful.

2. Test the Remote

Test the programmed remote control by pressing the button to open or close the garage door. Ensure that the opener responds correctly to the remote control commands and that the door operates smoothly.

: Additional Remotes (if needed)

1. Repeat the Programming Process

If you have additional remotes that you want to program to the garage door opener, repeat the programming process for each remote individually.

2. Test Each Remote

Test each programmed remote control by pressing the button to open or close the garage door. Ensure that all remotes function correctly and that the door operates smoothly.

Conclusion:

Garage Door Repair Southlake TX is a simple and essential task that ensures convenient and reliable access to your garage and home. By following the step-by-step instructions outlined in this guide and taking necessary precautions, you can successfully reprogram your remote and enjoy seamless operation of your garage door system.

First Responder Garage Doors

180 State St Suite 225, Southlake, TX 76092, United States

1-817-991-5551

How Do I Program My Garage Door Opener Chamberlain – First Responder Garage Doors


Programming your Chamberlain Garage Door Repair Southlake TX allows you to synchronize it with remote controls, keypads, and other accessories for convenient operation.

Chamberlain offers various models of garage door openers, but the programming process is generally similar across most models. In this comprehensive guide, I’ll provide a step-by-step overview of how to program a Chamberlain garage door opener, covering the common steps and procedures.

1. Gather Necessary Materials: Before you begin programming your Chamberlain garage door opener, make sure you have the following materials ready:

  • Chamberlain garage door opener unit
  • Remote control(s)
  • Keypad (if applicable)
  • Access to the garage door opener motor unit
  • A ladder (if necessary)
  • Fresh batteries for the remote control and keypad (if applicable)

2. Access the Garage Door Opener Motor Unit: Locate the motor unit of your Chamberlain garage door opener. This is typically mounted on the ceiling of the garage near the center of the door. Use a ladder if necessary to reach the motor unit safely.

3. Locate the “Learn” Button: On the motor unit, find the “Learn” button. This button is usually located near the antenna wire and may be labeled as such or indicated by an icon. It’s usually colored differently from other buttons.

4. Clear Existing Programming (Optional): If you’re reprogramming your Chamberlain garage door opener, you may need to clear existing programming first. To do this, press and hold the “Learn” button for about 10 seconds until the indicator light on the motor unit turns off or blinks.

5. Enter Programming Mode: Press the “Learn” button on the motor unit. The indicator light will turn on, indicating that the opener is in programming mode and ready to receive signals from remotes or keypads.

6. Program Remote Control(s): For each remote control:

  • Press and release the desired button on the remote control. The indicator light on the motor unit will flash or turn off briefly to confirm that it received the signal.
  • If you have multiple buttons on the remote control, repeat the process for each button you want to program.
  • If your Chamberlain garage door opener requires confirmation, such as pressing a button on the motor unit, follow any additional instructions provided.

7. Program Keypad (if applicable): If you have a wireless keypad, follow the manufacturer’s instructions to program it. Typically, this involves entering a PIN followed by the “Learn” button on the motor unit.

8. Test the Remote Control and Keypad: After programming, test each remote control and keypad to ensure they operate the garage door opener correctly. Stand inside or outside the garage (depending on your preference) and use the remote control or keypad to open and close the door.

9. Secure the Motor Unit and Accessories: Once programming is complete and everything is working correctly, secure the motor unit back in place if it was removed. Ensure that all remote controls and keypads are stored in a safe and convenient location.

10. Troubleshooting: If you encounter any issues during the programming process or if the remote controls or keypad do not function as expected, refer to the troubleshooting section of your Chamberlain garage door opener manual. Common issues include low battery power, interference from other devices, or incorrect programming steps.

11. Additional Considerations:

  • If you have multiple garage doors or devices, you can usually program them to work with the same remote controls or keypads. Refer to your Chamberlain garage door opener manual for instructions on programming multiple devices.
  • Make sure to keep your remote controls and keypads away from extreme temperatures and moisture to prolong their lifespan.

In conclusion, programming your Chamberlain Garage Door Repair Southlake TX is a relatively simple process that can be completed in just a few steps. By following the instructions provided in this guide and referring to the manual for your specific model, you can ensure smooth and convenient operation of your garage door.

First Responder Garage Doors

180 State St Suite 225, Southlake, TX 76092, United States

1-817-991-5551

Garage Door Opener Gear Replacement Cost – First Responder Garage Doors

As a homeowner who recently found myself in the midst of a malfunctioning garage door opener, the discovery that the culprit was a worn-out gear set prompted a journey into understanding the costs associated with this seemingly small yet crucial component.

In this article, I share my insights into the factors influencing garage door opener gear replacement costs, shedding light on what homeowners can expect and how to navigate this aspect of garage door maintenance without breaking the bank as per Garage Door Repair.

Introduction: The Gears Behind the Operation

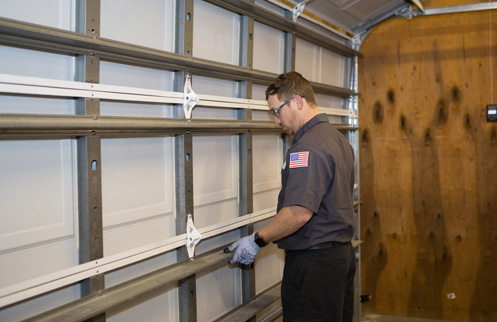
The garage door opener, a silent ally in our daily comings and goings, relies on a set of gears to execute its functions seamlessly. When these gears wear out, it can disrupt the entire operation, prompting the need for replacement. As a homeowner who recently navigated through this scenario, I found myself not only exploring the intricacies of garage door opener gears but also delving into the associated costs.

1. Identifying the Signs of Worn Gears: The Prelude to Replacement

Insights:

Before delving into costs, it’s crucial to recognize the signs of worn garage door opener gears. Unusual noises, erratic door movements, and even a complete failure to operate are indicators that the gears may be reaching the end of their lifespan.

Practical Tips:

Empower homeowners to actively listen to the sounds their garage door opener produces. A grinding noise or jerky movements during operation may signal gear wear. Recognizing these signs early allows for timely intervention and can prevent further damage.

2. The DIY Dilemma: Cost-Effective, But With Caveats

Insights:

For those inclined toward a do-it-yourself (DIY) approach, replacing garage door opener gears is indeed a feasible option. However, it comes with considerations such as the cost of the replacement gear kit and the time and expertise required for the task.

Practical Tips:

Guide homeowners on the process of sourcing a replacement gear kit specific to their garage door opener model. Emphasize the importance of matching the kit with the opener to ensure compatibility. Additionally, provide insights into the complexity of the task, encouraging DIY enthusiasts to assess their skills before undertaking the replacement.

3. Replacement Gear Kit Costs: Budgeting for the Essentials

Insights:

The heart of garage door opener gear replacement lies in the cost of the replacement gear kit. The price of these kits can vary based on factors such as the brand, compatibility with specific opener models, and the materials used.

Practical Tips:

Offer a breakdown of the factors influencing replacement gear kit costs. Advise homeowners to research and choose a kit that aligns with both their budget and the specifications of their garage door opener. While cost-effective options exist, it’s crucial not to compromise on quality for the sake of savings.

4. Professional Labor Costs: Weighing the Investment

Insights:

Opting for professional installation of the replacement gear kit incurs additional labor costs. The expertise of a garage door technician ensures a proper and efficient installation, but it comes with a price tag.

Practical Tips:

Educate homeowners on the value of professional installation. While DIY may save on labor costs, professional expertise ensures the longevity and optimal performance of the replacement gears. Encourage obtaining quotes from reputable technicians and weighing the investment against the benefits of a professionally executed replacement.

5. Considering Warranty Coverage: Factoring in Peace of Mind

Insights:

Some replacement gear kits come with warranty coverage, providing homeowners with peace of mind in case of defects or premature wear. Considering the warranty can influence the overall cost-effectiveness of the replacement.

Practical Tips:

Highlight the importance of checking whether the chosen replacement gear kit includes a warranty. While it may slightly increase the upfront cost, the long-term assurance and potential savings in case of unforeseen issues make it a valuable consideration.

6. Comparative Shopping: Maximizing Savings

Insights:

The market offers a variety of replacement gear kits, each with its own price point. Engaging in comparative shopping allows homeowners to find the best balance between quality and affordability.

Practical Tips:

Encourage homeowners to explore multiple suppliers and retailers to find competitive prices for replacement gear kits. Emphasize the importance of reading reviews and ensuring that the chosen kit meets the specific requirements of their garage door opener.

Conclusion: A Balanced Approach to Garage Door Opener Gear Replacement Costs

According to Garage Door Repair, navigating the costs associated with garage door opener gear replacement requires a balanced approach that considers both budget constraints and the desire for a long-lasting solution. As a homeowner who recently embarked on this journey, I discovered that understanding the signs of worn gears, weighing the pros and cons of DIY versus professional installation, factoring in replacement gear kit costs, considering labor expenses, and exploring warranty options are essential components of making an informed decision.

In the dynamic landscape of 2023, where homeowners seek not only cost-effective solutions but also reliability and durability, this guide serves as a compass for those facing the prospect of garage door opener gear replacement. By empowering homeowners with knowledge and practical tips, we can ensure that the heart of our garage door openers—the gears—continues to operate seamlessly, providing both functionality and peace of mind

First Responder Garage Doors

180 State St Suite 225, Southlake, TX 76092, United States

817-991-5551

How To Add Windows To Existing Garage Door – Southlake Garage Door & Gate Repairs

Garage Door Repair Southlake TX serve as more than mere entry points; they contribute significantly to the overall aesthetic appeal of a property.

Adding windows to an existing garage door not only enhances its visual appeal but also brings in natural light, transforming the space into a more welcoming and versatile area.

1. Increased Natural Light

Windows in a garage door allow natural light to flood the space, reducing the need for artificial lighting during the day. This not only saves energy but also creates a brighter and more pleasant environment.

2. Enhanced Curb Appeal

The aesthetic transformation brought about by adding windows is undeniable. It adds a touch of elegance to the exterior of your home, increasing its curb appeal and potentially raising its market value.

3. Improved Ventilation

Windows provide a means for fresh air circulation within the garage, preventing it from becoming stuffy. This is especially beneficial if you use your garage for activities beyond just parking your car.

4. Material Matters

Discuss the various materials available for garage door windows, considering factors like durability, maintenance, and cost. Whether it’s glass, acrylic, or other materials, each has its own set of advantages.

5. Design Harmony

Explore window designs that complement the overall aesthetic of your home. Whether you prefer modern, classic, or something in between, choosing a design that harmonizes with your property is crucial.

6. Privacy Concerns

Address the privacy aspect of adding windows. Look into frosted glass options or strategic window placement to maintain privacy while enjoying the benefits of natural light.

7. DIY Challenges

Delve into the challenges and considerations of a do-it-yourself installation. While it can be a rewarding project, it’s essential to highlight potential pitfalls and the importance of proper tools and skills.

8. Professional Expertise

Explore the benefits of hiring professionals for the installation. This includes precision, warranty coverage, and the assurance of a seamless integration of windows into your existing garage door.

9. Reinforcement Measures

Discuss measures to ensure that adding windows doesn’t compromise the security of your garage. Reinforcing the door and using impact-resistant glass are essential considerations.

10. Weather Stripping and Insulation

Highlight the importance of maintaining insulation after adding windows. Weather stripping and insulation solutions play a vital role in preventing energy loss and keeping the garage comfortable.

11. Regular Cleaning and Inspection

Offer practical tips for maintaining the windows, emphasizing regular cleaning and inspection routines to ensure they remain in optimal condition.

12. Addressing Common Issues

Discuss common issues that may arise with garage door windows, such as condensation or minor damage. Provide simple solutions that homeowners can implement.

13. Budget-Friendly Options

Explore budget-friendly options for adding windows, ensuring that homeowners can enhance their garage without breaking the bank.

14. Long-Term Investment

Highlight the long-term benefits of this investment, both in terms of energy savings and the potential increase in property value.

Conclusion:

In conclusion, adding windows to an existing Garage Door Repair Southlake TX is a transformative project that offers a myriad of benefits. From increased natural light to enhanced curb appeal, the decision to undertake this endeavor can significantly improve both the functionality and aesthetics of your home.

Southlake Garage Door & Gate Repairs

817-587-0445

How To Frame In A Garage Door – Southlake Garage Door & Gate Repairs

Framing a Southlake Garage Door Repair is a crucial step in the construction or renovation process. A well-framed garage door ensures stability, proper functioning, and aesthetic appeal. Before you begin, gather the necessary tools and materials, including a framing square, tape measure, circular saw, framing nails, and lumber.

Gather Information and Materials:

Start by obtaining the garage door specifications from the manufacturer. This information will guide you in determining the dimensions of the framing structure. Purchase the appropriate size and type of lumber, ensuring it meets local building codes.

Measure and Mark:

Carefully measure the width and height of the garage door opening. Mark these dimensions on the header, king studs, and jack studs. Use a framing square to ensure accurate and square measurements.

Install the Header:

The header is a horizontal beam that spans the width of the garage door opening and supports the load above the door. Cut the header to the measured width and position it on top of the opening. Secure it in place using framing nails. Double-check the level to ensure the header is straight.

Install King Studs:

King studs are vertical members that run from the bottom plate to the top plate, flanking the garage door opening. Cut two king studs to the height of the opening and position them on either side. Nail them to the top and bottom plates securely.

Install Jack Studs:

Jack studs support the header on either side of the garage door opening. Measure and cut two jack studs to fit between the top plate and the header. Nail them to the king studs and the header. Ensure they are plumb and provide proper support.

Add Trimmers:

Trimmers run from the bottom plate to the bottom of the header, providing additional support for the door frame. Cut two trimmers and position them on either side of the opening. Nail them to the king studs and the bottom plate.

Install the Sill Plate:

The sill plate sits at the bottom of the opening and provides a level surface for the garage door. Cut it to the width of the opening and secure it to the floor using anchor bolts or screws. Ensure it is level.

Add Studs:

Fill in the space between the king studs, jack studs, and trimmers with additional studs spaced at regular intervals. This provides structural integrity to the frame. Nail them to the top and bottom plates.

Check for Square:

Use a framing square to check that the frame is square. Measure diagonally from one corner to the other, and the measurements should be equal. Adjust the frame as needed to achieve squareness.

Install Bracing:

To prevent the frame from shifting or sagging, install diagonal braces in each corner of the garage door opening. Cut the braces to size and nail them securely to the studs. This step adds stability to the frame.

Double-Check Measurements:

Before proceeding, double-check all measurements to ensure accuracy. Any errors at this stage can lead to complications during the installation of the garage door.

Install Sheathing:

Sheathing adds strength to the frame and provides a surface for attaching siding. Cut plywood or oriented strand board (OSB) to fit the exterior of the frame and nail it in place. Pay attention to the seams and follow local building codes for sheathing requirements.

Apply Weather Stripping:

To enhance insulation and weather resistance, apply weather stripping around the sides and top of the garage door opening. This helps create a seal and prevents drafts.

Finish the Exterior:

Complete the exterior finish of the garage door frame according to your design preferences. This may include siding, trim, or other decorative elements.

Conclusion:

Framing in a Southlake Garage Door Repair requires precision, attention to detail, and adherence to local building codes. By following these steps, you’ll create a solid and well-supported frame for your garage door. Remember to consult the garage door manufacturer’s instructions and seek professional advice if needed during any stage of the process. With a properly framed garage door, you ensure the longevity, functionality, and aesthetic appeal of your garage.

Southlake Garage Door & Gate Repairs

817-587-0445

How To Program Liftmaster Garage Door Opener To Car – Southlake Garage Door & Gate Repairs

Programming a LiftMaster Garage Door Repair Southlake TX to your car can vary depending on the specific model of your opener and your car’s make and model.

However, I’ll provide you with a general step-by-step guide that should work for most LiftMaster openers and cars. Please consult your opener’s user manual and your car’s owner’s manual for model-specific instructions.

Before you start:

  1. Locate your garage door opener’s “Learn” button: This button is typically found on the back or side of the opener unit, near the hanging antenna wire. It may be labeled as “Learn” or “Program.”
  2. Clear existing codes: If you’ve previously programmed your opener to another car or remote, you’ll want to clear those codes first. Consult your opener’s manual for instructions on how to do this.
  3. Make sure your car is parked outside the garage: It’s essential to ensure safety and prevent any accidental door movement during programming.

Programming Your LiftMaster Garage Door Opener to Your Car:

  1. Turn your car’s ignition on: Make sure your car’s engine is running or in the “Run” position. This is a safety feature to prevent programming while the car is in motion.
  2. Press and release the “Learn” button on the garage door opener unit: You’ll have about 30 seconds to complete the next steps.
  3. Within 30 seconds, get back in your car and press the button you want to program: This is usually one of the car’s built-in buttons for garage door openers. These buttons may be located on the rearview mirror, the sun visor, or the overhead console, depending on your car’s make and model.
  4. Hold the car’s button until the garage door opener lights flash: This may take a few seconds. The flashing lights indicate that the programming was successful.
  5. Test the programmed button: Press the programmed button in your car to see if the garage door opens or closes. If it works, your programming is complete.
  6. Repeat for additional buttons: If your car has multiple buttons for garage door openers (e.g., for multiple garage doors), repeat the above steps for each button.
  7. Exit programming mode: Some cars may require you to press and hold the car’s button for a few seconds to exit programming mode.

Troubleshooting Tips:

  • If the programming doesn’t work, double-check that you pressed the “Learn” button on the garage door opener unit and the car’s button within the 30-second window.
  • Make sure the batteries in your car’s remote control are not dead.
  • If you have trouble programming, consult your car’s owner’s manual for specific instructions related to garage door opener programming.
  • If you’ve followed these steps and are still experiencing issues, you may want to contact LiftMaster customer support or consult a professional garage door technician for assistance.

Keep in mind that these instructions provide a general guideline for programming a LiftMaster Garage Door Repair Southlake TX to a car. Specific steps and requirements can vary based on your opener and car’s make and model. Always consult the user manuals provided with your equipment for precise instructions.

Southlake Garage Door & Gate Repairs

817-587-0445

What Watt Light Bulb For Liftmaster Garage Door Opener – Southlake Garage Door & Gate Repairs

Choosing the right wattage for light bulbs in a LiftMaster Southlake Garage Door & Gate Repairs opener is important to ensure proper lighting without exceeding the manufacturer’s recommendations. Light bulbs that are too high in wattage can generate excess heat and potentially damage the opener. Here’s a comprehensive guide to help you select the appropriate wattage for light bulbs in your LiftMaster garage door opener:

1. Check the Opener’s Manual:

Before choosing light bulbs, refer to your LiftMaster garage door opener’s user manual or documentation. The manual will provide specific recommendations for compatible light bulb types and wattages. Following these guidelines will help you avoid any potential issues and ensure safe and proper operation.

2. Consider the Socket Type:

LiftMaster garage door openers typically use sockets that are compatible with standard light bulbs, often E26 or E27 socket types. These sockets are designed to accommodate a range of light bulb wattages and types.

3. LED vs. Incandescent Bulbs:

LED (light-emitting diode) bulbs are energy-efficient and produce less heat compared to traditional incandescent bulbs. They are generally a safer option for garage door openers because they generate less heat, reducing the risk of damaging the opener due to overheating. Additionally, LED bulbs have a longer lifespan, which means fewer replacements.

4. Wattage Guidelines:

The wattage you choose should be based on the manufacturer’s recommendations and the capacity of the garage door opener. As a general guideline, consider the following wattage recommendations:

  • Incandescent Bulbs: If your LiftMaster opener supports incandescent bulbs, opt for bulbs in the range of 40 to 60 watts. However, keep in mind that incandescent bulbs generate more heat, so it’s advisable to lean toward the lower end of the range.
  • LED Bulbs: For LED bulbs, you can choose bulbs with wattages ranging from 8 to 15 watts. LED bulbs produce less heat and offer comparable illumination to higher wattage incandescent bulbs.

5. Look for Lumens:

Instead of solely relying on wattage, consider the brightness of the light bulb, which is measured in lumens. Lumens provide a more accurate representation of the bulb’s actual brightness. As a reference point:

  • For a 40 to 60-watt incandescent bulb, look for LED bulbs with a lumen output of around 450 to 800 lumens.
  • For a 8 to 15-watt LED bulb, aim for a lumen output of around 800 to 1200 lumens.

6. Dimmable Bulbs:

If your garage door opener has a dimming feature, ensure that the LED bulbs you choose are labeled as “dimmable.” Non-dimmable LED bulbs may not work properly with dimming features and can cause flickering or other issues.

7. Test for Compatibility:

Before installing a new light bulb, test its compatibility by turning on the garage door opener and observing the bulb’s behavior. Ensure that the bulb lights up without flickering or causing any disruptions to the opener’s operation.

8. Regular Maintenance:

Regardless of the bulb type and wattage you choose, it’s important to perform regular maintenance checks on your LiftMaster garage door opener and the light bulbs. Inspect the bulbs for signs of damage or wear, and replace them as needed to maintain proper illumination.

In conclusion, selecting the right wattage for light bulbs in your LiftMaster Southlake Garage Door & Gate Repairs opener involves considering the manufacturer’s recommendations, the capacity of the opener, and the type of bulbs you plan to use. LED bulbs are generally a safe and energy-efficient option, providing adequate illumination without generating excess heat. Always refer to the opener’s manual for specific guidelines and test new bulbs for compatibility before full installation.

Southlake Garage Door & Gate Repairs

2106 E State Hwy 114 #105, Southlake, TX 76092, United States

1-817-587-0445

Can Any Garage Door Remote be Programmed-Southlake Automatic Gates LLC

Garage Door Repair Southlake TX remotes have revolutionized the way we access and secure our garages. These handy devices offer convenience, allowing us to open and close our garage doors with a simple click of a button. One common question that arises is whether any garage door remote can be programmed.

In this article, we will explore the versatility of garage door remote programming, shedding light on the factors that determine compatibility and the steps involved in the programming process.

  1. Understanding Garage Door Remote Technology: Garage door remotes operate using radio frequency (RF) technology, which enables communication between the remote and the garage door opener. The remote sends a specific signal or code to the opener, triggering the door’s movement. This technology forms the basis for remote programming.
  2. Compatibility Factors: a. Manufacturer Compatibility: Garage door remotes are typically designed and programmed by the manufacturer of the garage door opener. As a result, compatibility between remotes and openers is often restricted within the same brand or product line. It is crucial to verify compatibility before attempting to program a remote.

b. Frequency Compatibility: Garage door remotes operate on different frequency bands, including 300 MHz, 315 MHz, and 390 MHz, among others. The remote and the opener must operate on the same frequency for successful programming. Older models might have fixed frequencies, while newer ones feature rolling-code technology, providing enhanced security.

  1. Universal Remote Controls: To address the issue of compatibility, universal garage door remote controls have been developed. These remotes are designed to work with a wide range of garage door openers from different manufacturers. Universal remotes often offer compatibility with multiple frequencies, allowing users to program them to various openers.
  2. Programming Process: a. Manual Programming: Most garage door remotes can be programmed manually, following a specific set of instructions provided by the manufacturer. These instructions typically involve a combination of button presses or switches on both the remote and the opener, syncing them together.

b. Learning Mode Programming: Some remotes and openers feature a learning mode, where the remote learns the unique code of the opener. This process involves activating the learning mode on the opener and then sending a programming signal from the remote. Once the remote and opener are paired, the programming process is complete.

c. Professional Assistance: In cases where manual or learning mode programming is not possible or proves challenging, seeking professional assistance from a garage door technician is advisable. These experts have the knowledge and tools to program remotes accurately and troubleshoot any issues that may arise.

  1. Advanced Features: Modern garage door remotes come with advanced features that enhance convenience and security. These features may include multiple button functions, keychain compatibility, rolling-code technology, and the ability to control multiple garage doors. The programming process for these remotes may be slightly more complex due to the additional functions, but the principles remain the same.

Conclusion: In conclusion, while not every Garage Door Repair Southlake TX remote can be programmed universally, there are solutions available to accommodate various opener models and manufacturers. Compatibility factors such as manufacturer compatibility and frequency play a crucial role in determining whether a specific remote can be programmed. Universal remotes offer a broader range of compatibility, while manual programming and learning mode programming are common methods for syncing remotes with openers. Seeking professional assistance is always an option when faced with challenges or complex programming scenarios. With the advancement of technology, garage door remotes continue to evolve, providing advanced features that cater to different user preferences.

Southlake Automatic Gates LLC

100 N Carroll Ave, Southlake, TX 76092, United States

1-817-631-4158

Page 1 of 2

Powered by WordPress & Theme by Anders Norén