Local Businesses Blog in Texas

Tag: garage door repair rockwall tx

How To Change Battery In Precision Garage Door Opener Keypad – BH Garage Doors and Gates


Changing the battery in a Precision Garage Door Repair Rockwall TX is a relatively simple task that can be completed in just a few steps.

Here’s a detailed guide on how to do it:

1. Gather Materials and Tools:

  • Before you begin, gather the necessary materials and tools. You’ll need a fresh 9-volt battery, a small Phillips head screwdriver, and possibly a step stool or ladder if your keypad is mounted out of reach.

2. Locate the Battery Compartment:

  • Most Precision garage door opener keypads have a battery compartment located on the back or underside of the device. Look for a small panel or cover that can be opened to access the battery.

3. Open the Battery Compartment:

  • Use a Phillips head screwdriver to loosen or remove the screws securing the battery compartment cover. Set the screws aside in a safe place where they won’t get lost.

4. Remove the Old Battery:

  • Once the battery compartment cover is removed, you’ll see the old battery inside. Carefully lift the old battery out of its compartment, taking note of its orientation and how it’s positioned.

5. Insert the New Battery:

  • Take the fresh 9-volt battery and insert it into the battery compartment, making sure to align it correctly with the positive (+) and negative (-) terminals as indicated. The terminals on the battery should match up with the contacts inside the compartment.

6. Close the Battery Compartment:

  • After inserting the new battery, replace the battery compartment cover and secure it in place using the screws you removed earlier. Make sure the cover is snugly in place to protect the battery and prevent it from falling out.

7. Test the Keypad:

  • With the new battery installed, test the keypad to ensure that it’s functioning properly. Enter your personal access code and try activating the garage door opener. If the keypad responds as expected, the battery replacement was successful.

8. Dispose of the Old Battery:

  • Safely dispose of the old battery according to local regulations and guidelines for recycling or disposing of household batteries. Many communities have designated drop-off locations or recycling centers for old batteries.

9. Maintenance Tips:

  • To prolong the life of your garage door opener keypad battery, keep the keypad clean and free of dirt, dust, and debris that could interfere with its operation. Periodically check the battery compartment for signs of corrosion or damage.

10. Replace the Battery Regularly:

  • It’s a good idea to replace the battery in your Precision garage door opener keypad proactively, even if it’s still working fine. Most manufacturers recommend replacing the battery every 1-2 years to ensure reliable operation.

Conclusion:

  • Garage Door Repair Rockwall TX By following these step-by-step instructions, you can keep your keypad functioning smoothly and ensure easy access to your garage.

BH Garage Doors and Gates

4035 N Goliad St, Rockwall, TX 75087, United States

1-214-206-5231

https://maps.app.goo.gl/iYdGkyhiGAiUXN3G7

How To Convert 2 Garage Doors Into One – BH Garage Doors and Gates


Garage Door Repair Rockwall TX Whether you’re looking to increase the size of your garage opening for easier access or to accommodate larger vehicles, this process involves structural changes to your garage.

Here’s a comprehensive guide on how to convert two garage doors into one:

1. Assess Feasibility: Before starting the conversion process, assess whether it’s feasible to merge the two garage openings into one. Consider factors such as structural support, space availability, and any potential obstacles like plumbing or electrical fixtures inside the garage.

2. Obtain Permits: Check with your local building authority to determine if permits are required for this type of renovation. Permits may be necessary to ensure compliance with building codes and regulations.

3. Plan the Design: Decide on the desired size and style of the new single garage door. Take accurate measurements of the existing openings and consider factors such as clearance requirements for vehicles, aesthetics, and functionality.

4. Hire a Professional: Converting two garage doors into one is a complex project that may require the expertise of a professional contractor. Consider hiring a qualified contractor who specializes in garage door installations and renovations to ensure the job is done safely and accurately.

5. Remove Existing Doors: Start by removing the existing garage doors and their associated hardware, including tracks, springs, and openers. Exercise caution during this step to avoid damaging the surrounding walls and structures.

6. Modify Opening: If necessary, modify the garage opening to accommodate the new single garage door. This may involve removing or relocating any existing support columns, headers, or framing members that obstruct the desired opening size.

7. Install Support Structure: Ensure that the opening is properly supported to bear the weight of the new garage door. Install any necessary reinforcement, such as additional framing, headers, or support beams, to maintain structural integrity.

8. Frame the Opening: Frame the new garage opening according to the specifications of the chosen garage door. Use high-quality lumber and construction techniques to ensure a sturdy and secure frame that can withstand the stresses of daily use.

9. Install New Garage Door: Once the opening is framed and supported, install the new single garage door according to the manufacturer’s instructions. Make sure to properly align and secure the door tracks, springs, rollers, and other hardware for smooth and reliable operation.

10. Test Operation: Test the operation of the new garage door to ensure that it opens and closes smoothly without any issues. Make any necessary adjustments to the tracks, springs, or opener settings to optimize performance.

11. Finish and Seal: Finish the surrounding walls and trim as needed to blend the new garage door seamlessly into the existing architecture. Seal any gaps or seams around the door to prevent air and moisture infiltration.

12. Optional: Upgrade Features: Consider upgrading your new garage door with additional features such as insulation, windows, decorative hardware, or smart technology for enhanced functionality and curb appeal.

13. Safety Considerations: Ensure that the new garage door meets all safety standards and regulations, including proper installation of safety sensors and auto-reverse mechanisms to prevent accidents and injuries.

14. Clean Up and Dispose: Dispose of any debris or waste materials generated during the conversion process responsibly. Clean up the work area and surrounding areas to restore order and functionality to your garage space.

15. Final Inspection: Schedule a final inspection with your local building authority to ensure that the converted garage door meets all applicable building codes and regulations.

Garage Door Repair Rockwall TX creating a larger and more functional garage space tailored to your specific needs and preferences.

BH Garage Doors and Gates

4035 N Goliad St, Rockwall, TX 75087, United States

1-214-206-5231

Top 3 Risks Doing DIY Garage Door Repair – BH Garage Doors and Gates

The Rockwall Garage Door Repair is a vital component of your home, providing security, convenience, and curb appeal. When faced with issues, the temptation to embark on DIY garage door repair may seem appealing.

However, it’s crucial to recognize the potential risks associated with attempting repairs without professional expertise. In this article, we’ll explore the top three risks of DIY garage door repair and highlight why seeking professional help is the safer and more effective choice.

1. Personal Safety Hazards:

One of the primary risks of DIY garage door repair is the potential for personal safety hazards. Garage doors are heavy and operate under tension, especially when it comes to components like springs and cables. Mishandling these components without the proper knowledge and precautions can lead to accidents and injuries.

a. Spring Tension:

Garage door springs are under significant tension to counterbalance the weight of the door. If not handled correctly, releasing or adjusting the tension on springs can result in severe injuries. The force exerted by garage door springs is powerful enough to cause fractures, bruises, or even more critical injuries. Professional technicians are trained to handle spring-related tasks safely, minimizing the risk of accidents.

b. Falling Doors:

Attempting to repair a garage door without proper support and precautions can lead to the door unexpectedly falling. This is especially true if the door is not adequately secured during repairs. A falling garage door poses a significant risk of injury, potentially causing fractures, bruises, or even more severe harm. Professional technicians employ safety measures and support systems to prevent the door from falling during repairs.

c. Pinch Points and Moving Parts:

Garage doors have numerous moving parts, including rollers, hinges, and cables. DIY repair attempts without a thorough understanding of these components can result in pinch points and entanglements. Accidental contact with moving parts can cause injuries, ranging from minor cuts and bruises to more severe harm. Professional technicians are trained to work around these components safely and know how to avoid potential hazards.

2. Lack of Expertise:

DIY enthusiasts may possess various skills, but garage door repair requires specific expertise and knowledge of the system’s intricacies. Lack of expertise is a significant risk when attempting DIY garage door repairs, as it can lead to improper diagnoses, ineffective solutions, and further damage to the door.

a. Inaccurate Diagnoses:

Identifying the root causes of garage door issues requires a comprehensive understanding of the system. DIY attempts may result in inaccurate diagnoses, addressing only the visible symptoms rather than the underlying problems. Without the proper expertise, homeowners may end up applying temporary fixes that fail to address the actual issues, leading to recurring problems.

b. Incorrect Repairs:

Garage doors are equipped with various components, each serving a specific purpose. Performing repairs without a clear understanding of these components and their functions can lead to incorrect repairs. Misaligning tracks, improperly adjusting spring tension, or using the wrong tools can exacerbate issues and cause further damage to the door. Professional technicians are trained to accurately diagnose problems and implement precise repairs.

c. Compromised Safety Features:

Garage doors often come with safety features such as photo-eye sensors that detect obstacles in the door’s path. DIY repairs may inadvertently compromise these safety features, posing risks to both individuals and property. Professional technicians are well-versed in the intricacies of garage door safety features and ensure that repairs are conducted without compromising these critical elements.

3. Increased Costs and Additional Damage:

While the initial intent of DIY garage door repair may be to save money, it can lead to increased costs in the long run. The risk of causing additional damage, the potential for inaccurate repairs, and the need for professional intervention after DIY attempts can result in higher overall expenses.

a. Additional Damage:

DIY repairs carry the risk of causing additional damage to the garage door system. A well-intentioned attempt to fix a specific issue may inadvertently lead to new problems. For example, using incorrect tools or applying excessive force during repairs can damage components, exacerbating the original issue and necessitating more extensive repairs.

b. Complications and Delays:

Inaccurate DIY repairs often result in complications and delays. If the initial repair attempts prove ineffective, homeowners may need to seek professional assistance to address the lingering problems. This not only extends the repair timeline but also increases the overall costs associated with fixing the garage door.

c. Voided Warranties:

Many garage doors and components come with warranties that are contingent on professional installation and repairs. DIY attempts may void these warranties, leaving homeowners responsible for the full cost of any necessary repairs or replacements. Seeking professional help ensures that repairs are conducted in a manner that preserves warranties and guarantees.

In conclusion, the risks of DIY Rockwall Garage Door Repair extend beyond the potential for personal injury. Lack of expertise can lead to inaccurate diagnoses, incorrect repairs, and compromised safety features. The increased costs associated with additional damage, complications, and voided warranties make DIY attempts less cost-effective in the long run. Prioritizing safety, accuracy, and efficiency underscores the importance of seeking professional help for garage door repairs. Professional technicians bring the required expertise, safety protocols, and a track record of successful repairs, ensuring that your garage door operates optimally and safely. When it comes to the functionality and safety of your garage door, professional intervention is the wise and secure choice.

BH Garage Doors and Gates

1-214-206-5231

How Much Are Genie Garage Door Openers – BH Gates & Garage Door Repair


The cost of Garage Door Repair Rockwall TX can vary based on several factors, including the type of opener, features, horsepower, and whether it comes with additional accessories.

Genie is a well-known brand in the garage door opener industry, offering a range of products to suit different needs and preferences. In this comprehensive guide, we’ll explore the factors influencing the cost of Genie garage door openers and provide insights into the various options available.

1. Types of Genie Garage Door Openers: Genie offers various types of garage door openers, each catering to specific requirements:

  • Chain-Drive Openers: These are durable and affordable, using a chain to move the trolley and open or close the garage door. They are a popular choice for budget-conscious consumers.
  • Belt-Drive Openers: Belt-drive openers use a rubber belt for quieter operation compared to chain drives. They are suitable for homeowners who prioritize reduced noise during garage door operation.
  • Screw-Drive Openers: Genie’s screw-drive openers use a threaded steel rod to move the trolley. They provide a balance between price and performance, offering smooth and reliable operation.
  • Smart Garage Door Openers: Genie also offers smart garage door openers equipped with Wi-Fi connectivity, allowing homeowners to control and monitor their garage doors remotely using smartphones.

2. Motor Power: Genie garage door openers come with various horsepower options, typically ranging from 1/2 HP to 1.25 HP. The power of the motor depends on the size and weight of the garage door. Larger and heavier doors generally require more powerful motors.

3. Smart Features: Genie’s smart garage door openers come with advanced features such as Wi-Fi connectivity, smartphone control, and compatibility with virtual assistants like Amazon Alexa and Google Assistant. While adding convenience, these features can contribute to a higher overall cost.

4. Additional Accessories: Genie offers various accessories for garage door openers, including remote controls, wireless keypads, and wall consoles. These accessories can enhance the functionality of the garage door opener but may add to the overall cost.

5. Professional Installation: While some homeowners may choose to install Genie garage door openers themselves, professional installation is often recommended. Installation costs can vary based on factors such as the complexity of the installation, the type of opener, and local labor rates.

6. Brand and Quality: Genie is a reputable brand known for manufacturing reliable and durable garage door openers. While the brand’s products may have higher upfront costs, they often come with better quality and warranty coverage.

7. Warranty and Maintenance: Consider the warranty offered by Genie for its garage door openers. A longer warranty period or comprehensive coverage may contribute to the overall value of the product.

8. Local Market Conditions: Local factors, such as labor costs and market demand, can influence the overall price of Genie garage door openers and installation services.

9. Obtaining Quotes and Comparisons: To get an accurate estimate, it’s recommended to obtain quotes from multiple retailers and installation professionals. Comparing these quotes will help you make an informed decision based on your budget and preferences.

Conclusion:

Garage Door Repair Rockwall TX offer a range of options to suit different needs, including various types, motor powers, and smart features. The cost of Genie garage door openers can vary based on the type, horsepower, smart features, additional accessories, professional installation, and local market conditions. Consider your specific requirements, budget, and preferences to choose a Genie garage door opener that meets your needs for reliable and efficient garage door operation. Professional installation is advised to ensure proper functionality and safety.

BH Gates & Garage Door Repair

420 Lynne Dr, Rockwall, TX 75032

1-469-654-3876

Tips for Garage Door Winter Maintenance – BH Garage Doors and Gates

As the chill in the air signals the arrival of winter, my thoughts turn to the often-overlooked hero of our homes—the garage door. Having weathered a year of seasons, I find myself compelled to delve into the intricacies of winter maintenance for this essential entryway.

Join me as we explore tips and tricks to ensure that your garage door not only survives but thrives in the face of frosty temperatures and unpredictable weather conditions by following Garage Door Repair.

1. Lubrication: The Winter Elixir for Moving Parts

Winter brings with it the challenge of colder temperatures, which can affect the smooth operation of your garage door’s moving parts. To combat this, regular lubrication becomes a key aspect of winter maintenance. Focus on hinges, rollers, springs, and tracks, applying a high-quality silicone or lithium-based lubricant. This not only helps prevent friction-related wear and tear but also ensures that your garage door operates seamlessly, even in the coldest temperatures.

2. Check and Tighten Hardware: Bolstering Against the Cold

As the seasons change, the contraction and expansion of materials in your garage door’s hardware become more pronounced. Take the time to inspect and tighten all nuts, bolts, and screws. This simple step not only prevents potential issues caused by loose hardware but also reinforces the structural integrity of your garage door in the face of winter’s challenges.

3. Weatherstripping: Guarding Against Drafts and Moisture

Winter is notorious for bringing biting winds and moisture, and your garage door’s weatherstripping plays a crucial role in keeping the elements at bay. Inspect the weatherstripping along the sides and bottom of your garage door and replace any damaged or worn-out sections. Properly maintained weatherstripping not only guards against drafts but also prevents moisture from seeping into your garage, safeguarding both your belongings and the door itself from potential damage.

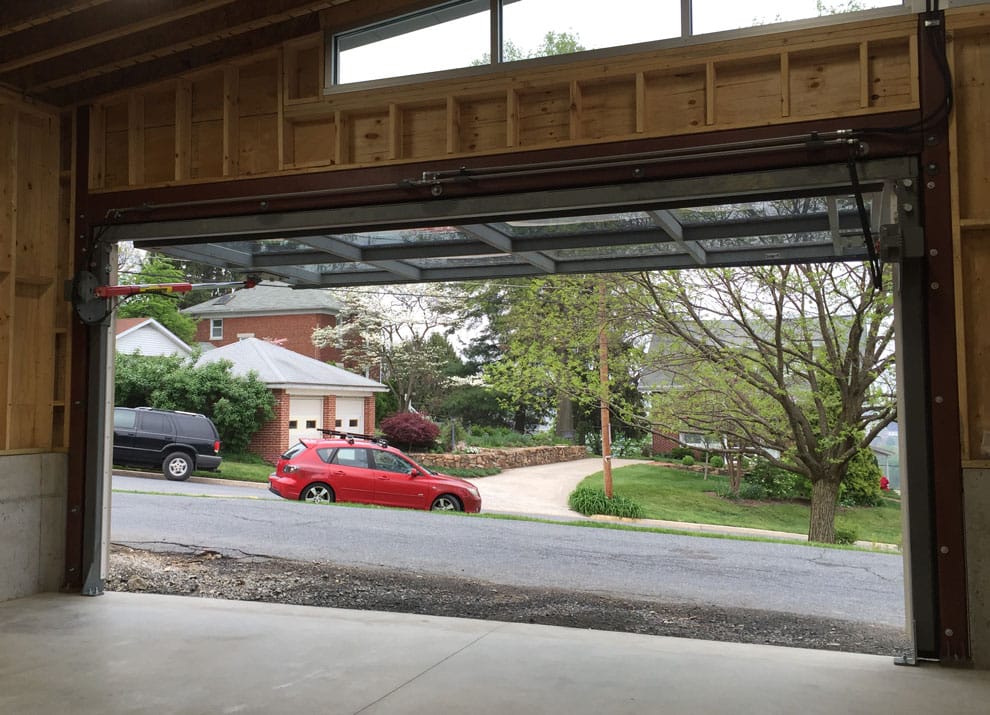
4. Clean and Inspect Tracks: Ensuring Smooth Operation

Winter can bring a variety of debris, from leaves to ice, which may find their way into your garage door tracks. Regularly clean the tracks and inspect them for any signs of misalignment or damage. Misaligned tracks can cause the door to operate unevenly or even get stuck. A thorough cleaning and inspection ensure that your garage door glides smoothly along its tracks, minimizing the risk of malfunctions during winter.

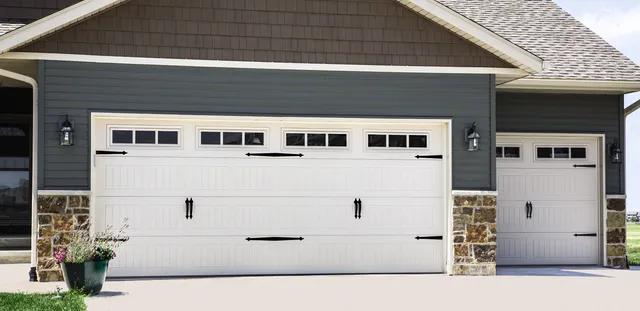
5. Test the Seal: A Defense Against Cold Infiltration

A well-sealed garage door is your first line of defense against the cold. Conduct a simple test by closing the door and inspecting the perimeter for any light seepage. If light is visible, it indicates a gap in the seal. Address these gaps promptly by adjusting the seal or, if necessary, replacing it. An airtight seal not only keeps the cold air out but also contributes to energy efficiency, helping you maintain a more comfortable temperature within your garage.

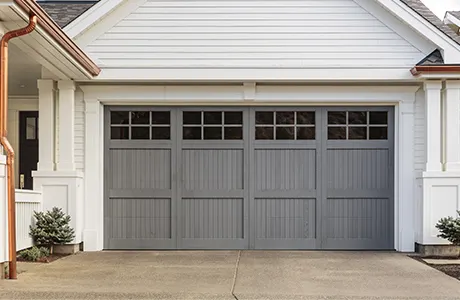
6. Insulate for Efficiency: Creating a Winter Haven

Considering the winter temperatures, enhancing your garage door’s insulation can have a significant impact on both energy efficiency and comfort. If your garage door is not already insulated, consider adding insulation panels or opting for a new, insulated door. This not only helps regulate the temperature within your garage but also reduces the strain on your heating system, potentially leading to energy savings.

7. Mind the Batteries: Remote Control Reliability

The colder temperatures of winter can affect the performance of batteries, including those in your garage door remote control. Keep an eye on the battery levels and replace them as needed. This simple step ensures that you won’t find yourself stranded outside your garage on a chilly winter morning, unable to access your car or belongings.

8. Clear Surrounding Areas: Snow and Ice Management

Snow and ice accumulation around your garage door can impede its proper functioning. Take the time to clear snow and ice from the surrounding areas, paying attention to the driveway, walkways, and the immediate vicinity of the door. This not only prevents potential safety hazards but also ensures that your garage door can open and close without obstruction.

9. Mindful Operation: Avoiding Stress in Cold Weather

In colder temperatures, your garage door’s motor and other components may experience additional stress. Be mindful of how often you open and close the door in extreme cold, and avoid repeated operations within a short timeframe. This practice helps prevent unnecessary strain on the motor and ensures the longevity of your garage door system.

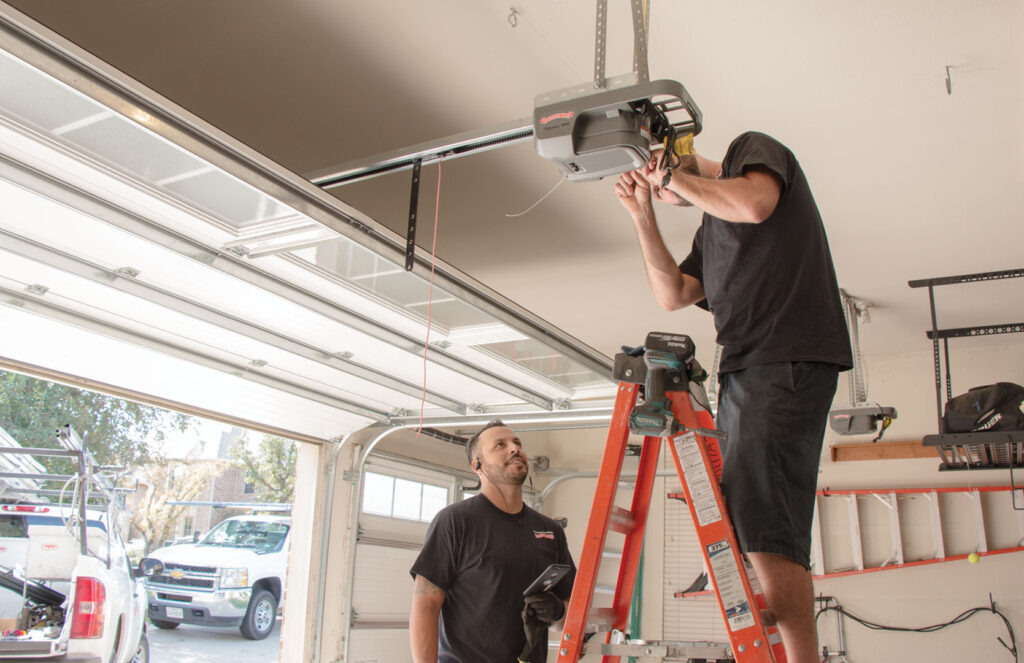
10. Professional Inspection: A Winter Checkup

Consider scheduling a professional inspection before the depths of winter set in. A trained technician can conduct a comprehensive assessment of your garage door, identifying and addressing potential issues before they escalate. From assessing the condition of springs to verifying the integrity of the motor and opener, a winter checkup provides peace of mind and ensures that your garage door is ready to face the challenges of the season.

Conclusion: Winter-Ready, Door-Strong

As I navigate the nuances of winter maintenance for garage doors, it becomes clear that a proactive approach is key to ensuring the longevity and optimal performance of this often-underestimated component of our homes. From lubrication to insulation, each step contributes to a winter-ready garage door that not only withstands the elements but also serves as a reliable and efficient barrier between your home and the cold outdoors.

Winter maintenance for your garage door is not just a checklist; it’s a holistic approach to caring for an essential part of your home. By implementing these tips and incorporating regular inspections into your routine, you can navigate the winter season with confidence, knowing that your garage door is fortified against the challenges that colder temperatures may bring.

Overall, based from Garage Door Repair and as I reflect on the lessons learned over the past year, delving into the world of garage door winter maintenance has been a journey of discovery. Here’s to a season of warmth, both in the comfort of our homes and the reliability of our garage doors—a toast to a year of resilience and preparation for the chilly months ahead!

BH Garage Doors and Gates

Rockwall, TX

972-807-7936

How To Tighten Chain On Garage Door – BH Garage Doors and Gates

Tightening the chain on a Garage Door Repair Rockwall TX opener is an essential maintenance task that helps ensure smooth and efficient operation of the door. A loose chain can lead to jerky movements, excessive noise, and even damage to the opener or door components. In this guide, we’ll walk you through the steps to tighten the chain on a garage door opener, ensuring that your garage door operates safely and effectively.

1. Preparation and Safety:
Before you begin, ensure you have the necessary tools and materials for the task:

  • Wrenches (adjustable or specific sizes)
  • Step ladder
  • Safety goggles and gloves

Remember to disconnect the power to the garage door opener before starting any maintenance work. This prevents accidental activation and keeps you safe during the process.

2. Determine the Type of Opener:
There are two main types of garage door openers: chain-drive and belt-drive. Chain-drive openers use a metal chain to move the door, while belt-drive openers use a rubber belt. This guide focuses on chain-drive openers. If you have a belt-drive opener, consult your manufacturer’s instructions or seek professional assistance for any adjustments.

3. Locate the Chain Adjustment Points:
Most garage door openers have two chain adjustment points:

  • Tension Adjustment: This adjusts the overall tension of the chain. It’s usually located near the motor unit.
  • Travel Limit Adjustment: This determines how far the door opens and closes. It’s often located near the trolley on the chain.

Refer to your garage door opener’s manual to identify the specific adjustment points for your model.

4. Measure the Chain Sag:
A slight sag in the chain is normal, but it shouldn’t be too loose. Measure the sag by lifting the chain in the middle and noting the distance it moves. A common recommendation is for the sag to be about 1/2 to 1 inch.

5. Adjust the Chain Tension:
Follow these steps to adjust the tension of the chain:

  • Locate the Tension Adjustment Nut: On most openers, there is a nut near the motor unit that adjusts the chain tension. This nut might be labeled “Tension” or “Up/Down.”
  • Loosen the Lock Nuts: Use a wrench to loosen the lock nuts on the adjustment nut. This will allow you to turn the adjustment nut more easily.
  • Tighten or Loosen the Chain: Turn the adjustment nut clockwise to tighten the chain and reduce sag. Turn it counterclockwise to loosen the chain. Keep an eye on the sag and adjust the tension until it falls within the recommended range.
  • Tighten the Lock Nuts: Once you’ve achieved the desired tension, use a wrench to tighten the lock nuts on the adjustment nut to secure the setting in place.

6. Adjust the Travel Limits:
Proper travel limits ensure that the door opens and closes smoothly without straining the opener or door components. Here’s how to adjust them:

  • Locate the Travel Limit Adjustment Screws: These screws are typically located on the chain’s trolley or near it. They might be labeled “Up Limit” and “Down Limit.”
  • Open the Door Fully: Use the remote control to open the door fully.
  • Adjust the Up Limit: Turn the “Up Limit” screw in small increments (clockwise) to decrease the door’s opening distance if needed. Test the door’s operation after each adjustment. The goal is to have the door open fully without hitting the opener’s motor or any other obstructions.
  • Adjust the Down Limit: Close the door fully. Turn the “Down Limit” screw in small increments (clockwise) to decrease the door’s closing distance if needed. Test the door’s operation after each adjustment. The door should close fully without excessive force.

7. Test and Fine-Tune:
After making adjustments, test the door’s operation by opening and closing it several times. Listen for any unusual sounds or signs of strain. If the door operates smoothly and quietly, you’ve likely successfully tightened the chain. If you encounter any issues, recheck your adjustments and make any necessary fine-tuning.

8. Regular Maintenance:
Tightening the chain is just one aspect of garage door opener maintenance. Regularly inspect the chain, lubricate it with a recommended garage door lubricant, and address any signs of wear or damage promptly.

9. Professional Assistance:
If you’re uncomfortable or unsure about adjusting the chain on your garage door opener, or if you encounter any difficulties, it’s advisable to seek professional assistance. Garage door opener systems are complex and require careful adjustments to ensure safe and reliable operation.

In conclusion, tightening the chain on a Garage Door Repair Rockwall TX opener is a task that can significantly improve the door’s performance and extend the lifespan of the opener. With the right tools, safety precautions, and attention to detail, you can achieve a properly tensioned chain that ensures smooth and efficient garage door operation.

BH Garage Doors and Gates

1-972-807-7936

How to Replace Your Garage Door Windows? – Rockwall Best Garage & Overhead Doors

Broken windows are not as bad luck as broken mirrors but they cannot be ignored. A broken garage door window is not only dangerous but can also signal to burglars that your home integrity is not important. You will need the tools and some time to replace your broken window.

Here are the steps you can follow on replacing your garage door window based from Garage Door Repair Rockwall TX:

Check out the Types of Windows You Have

Prior to 2000, garage windows consisted of individual panes made of glass and held in frames that were often made of wood. This made it easy to replace one pane of glass. Garage door windows became more common after 2000. They were composed of one long pane of glass that is held in place between two frame pieces that are screwed together. This newer type of window might be worth contacting a professional.

Measure the height and width to determine if you want to replace the window. The screws should be removed from the frame. Keep the door’s frame outside in place with a partner until you are done. Take out the old pane and dispose of it safely. Place the new pane. Place the inner frame and attach the sides.

Take out the broken glass

Use safety glasses and gloves to remove broken glass from your window. The largest piece of glass should be saved. To remove any smaller pieces of glass from the frame, use a putty knife.

Measure the window frame

Take the measurement of the thickness of the glass shard that you have set aside and then dispose of it along with the rest. Measure the height from the top to the bottom of the window frame and the width from the opening to the frame from the side. Add 1/8 inch to each measurement. This is how big the replacement pane will be.

Ask for laminated or tempered glass before you buy the new pane. Tempered glass is four times stronger than regular glass and is designed to break into smooth shards instead of sharp points. The laminated glass is protected by a thin plastic film on both sides to prevent it from breaking into small pieces.

Prepare the Window Frame

The small rectangular glazier’s points are what holds the glass in place. Any dried glaze compound or dried paint on the frame should be removed. If the putty is difficult to remove, you can soften it by coating the frame with linseed oils and letting it sit for at most one hour. To heat it, you can use a blow dryer.

Use medium-grit paper to lightly sand the frame. Use fine-grit sandpaper to re-sand the frame. Finally, clean up any dust or debris. Let dry the frame completely before applying a coat of primer.

Install the new window glasses

Lastly, as stated in Garage Door Repair Rockwall TX, use a thin line of glazing compound to the inside edges and corners of the frame. The new pane of glass should be fitted into the soft glue. It should be properly seated. Push the putty into new glazier points every 4 to 6 inches around the frame. This will help to keep it in place. The manufacturer’s instructions will be followed. Let the glazing compound dry. Paint the frame in a matching color to the rest of your window. Let it dry completely. Clear any dust and fingerprints from the glass.

Rockwall Best Garage & Overhead Doors

Rockwall, Texas 75087

469-423-8082

Powered by WordPress & Theme by Anders Norén