Local Businesses Blog in Texas

Tag: Garage Door Repair North Richland Hills TX

Raynor Garage Doors: Strength and Style in Every Design – Tarrant County Door & Gate

As a homeowner, the quest for the perfect garage door isn’t merely about functionality; it’s a pursuit of a seamless blend between strength and style, a marriage of durability and design that enhances the overall aesthetic of your home.

By following Garage Door Repair, I’ve discovered a name that resonates with both homeowners and industry professionals alike – Raynor Garage Doors. Renowned for its commitment to quality, Raynor stands as a testament to the idea that a garage door is not just an entry point but a statement piece that adds character to your home.

The Foundation: Unyielding Strength

The journey with Raynor Garage Doors begins with a deep appreciation for the foundational element of any door – strength. The brand’s unwavering commitment to creating doors that stand up to the test of time becomes immediately apparent as you explore their diverse range.

Raynor understands that a garage door is not just a design element; it’s a shield, protecting your home and valuables from the elements and potential intruders. The robust construction of Raynor doors, whether made from steel, aluminum, or wood, reflects the brand’s dedication to providing homeowners with a sense of security and peace of mind.

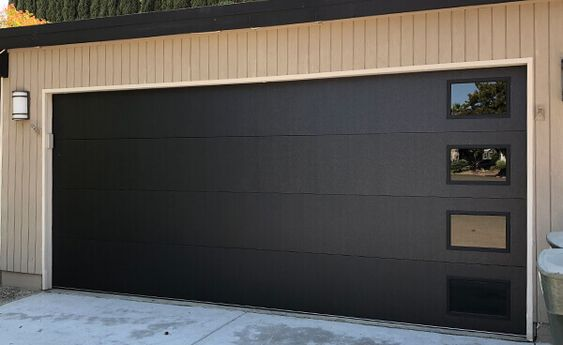
Steel: The Epitome of Durability

For those prioritizing durability without compromising on style, Raynor’s steel garage doors emerge as a standout choice. As I delved into the details, the galvanized steel construction caught my attention. This isn’t just any steel; it’s engineered to resist rust and corrosion, ensuring that your door maintains its strength and aesthetic appeal for years to come.

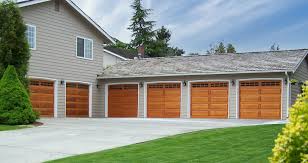
The variety in panel designs, from the classic raised panels to the sleek, contemporary flat ones, allows homeowners to choose a style that complements their home architecture. Raynor understands that a strong foundation doesn’t mean sacrificing design preferences; it’s about finding a harmonious balance.

Aluminum: A Marriage of Elegance and Resilience

Raynor’s aluminum garage doors take strength to new heights without adding unnecessary weight. The brand’s commitment to innovation is evident in the use of high-quality aluminum, providing a door that not only withstands the elements but also adds a touch of sophistication to your home.

The customization options for aluminum doors are a testament to Raynor’s belief that homeowners should have a say in the design process. Whether you prefer a modern, full-view door that floods your garage with natural light or a more traditional, sectional design, Raynor ensures that strength doesn’t compromise style.

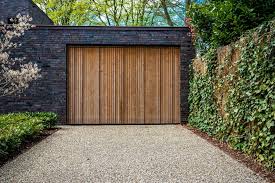
Wood: Timeless Beauty Reinvented

For those who appreciate the timeless beauty of wood, Raynor’s wooden garage doors redefine elegance. The brand’s wood collection showcases a meticulous approach to craftsmanship, with each door telling a story of artisanal skill and natural beauty.

What sets Raynor’s wooden doors apart is the use of premium wood species, carefully selected for their durability and aesthetic appeal. The intricate detailing and variety of finishes allow homeowners to choose a door that not only withstands the test of time but also becomes a focal point of their home’s exterior.

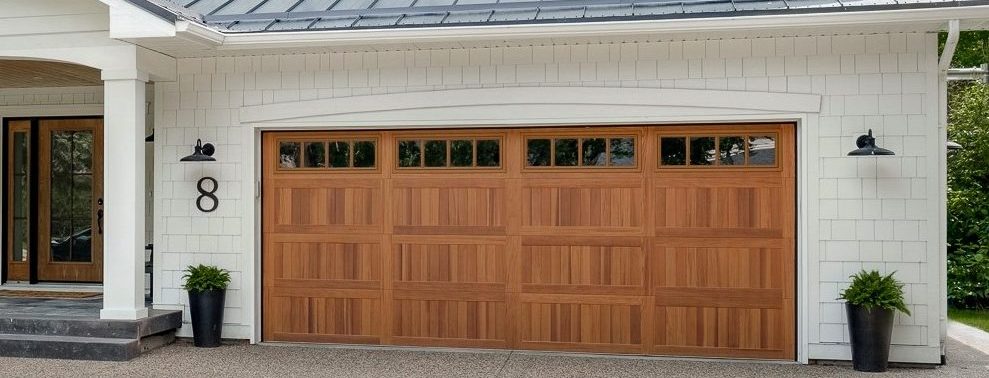
Designing Your Door: A Symphony of Styles

One of the most captivating aspects of Raynor Garage Doors is the emphasis on customization. As I explored the design options, it became clear that Raynor believes every door should be a reflection of the homeowner’s taste and the architectural nuances of their home.

The array of colors, window designs, and decorative hardware options ensures that your garage door isn’t a one-size-fits-all solution. Instead, it’s a canvas waiting for your personal touch. Whether you opt for the timeless charm of a carriage house door or the sleek, minimalist lines of a modern design, Raynor empowers you to design a door that aligns with your vision.

Insulation: Beyond Strength to Efficiency

Raynor Garage Doors doesn’t stop at providing strength and style; it recognizes the importance of energy efficiency in modern living. The insulation options available for Raynor doors are a testament to the brand’s commitment to creating doors that contribute to the overall efficiency of your home.

Whether you live in a region with extreme temperatures or simply want to minimize energy costs, Raynor’s insulated doors act as a barrier, keeping your garage space comfortable year-round. The insulation not only enhances energy efficiency but also reduces noise, creating a quieter and more comfortable environment within your garage.

Beyond the Door: Professional Installation and Service

The commitment to excellence with Raynor Garage Doors extends beyond the purchase. The brand collaborates with a network of professional installers who understand the intricacies of each door’s design. This ensures that the installation process is seamless, guaranteeing that your door not only looks impeccable but functions flawlessly.

Raynor’s dedication to customer service becomes apparent in its approach to maintenance and repairs. The brand understands that a well-maintained garage door is crucial for its longevity and performance. With regular maintenance services and prompt repair solutions, Raynor ensures that your investment remains a source of strength and style for years to come.

Conclusion: Elevating Homes, One Door at a Time

As I conclude this exploration into the world of Raynor Garage Doors, I am left with a profound appreciation for a brand that goes beyond the conventional. Raynor’s commitment to melding strength and style is not just a marketing tagline; it’s a philosophy that permeates every aspect of their design and craftsmanship.

As stated in Garage Door Repair, choosing a Raynor Garage Door is not merely selecting a point of entry for your home; it’s an investment in a statement piece that enhances curb appeal, provides security, and reflects your unique style. In the realm where strength meets style, Raynor Garage Doors stands tall, a beacon for homeowners seeking a perfect fusion of durability and design. Welcome to a world where your garage door is more than just functional – it’s an embodiment of strength and style that transforms your house into a home.

Tarrant County Door & Gate

6408 Marlette Court, North Richland Hills, TX

817-456-2958

Handling Garage Door Track Misalignment: Realigning Tracks for Smooth Operation – Tarrant County Door & Gate

In the ebb and flow of daily life, the reliability of my garage door had always been a constant. However, the sudden jarring sounds and hesitations in its movement signaled a deviation from the smooth operation I had come to expect. It was a wake-up call to the intricate dance of garage door tracks—a system that, when misaligned, could disrupt the harmonious choreography.

In this personal guide, I share the journey of handling garage door track misalignment, delving into the signs of trouble, the importance of swift intervention, and the steps taken to realign the tracks for a return to seamless functionality by following Garage Door Repair.

Introduction: The Dance of Garage Door Tracks

The garage door, a silent performer in the daily symphony of home life, relies on a well-coordinated dance of tracks to ascend and descend with grace. Little did I know that the alignment of these tracks played a pivotal role in the door’s fluid movements. The realization that misaligned tracks were the culprits behind the unexpected disruptions prompted a hands-on exploration into the world of garage door maintenance.

Understanding the Role of Garage Door Tracks:

1. Guiding the Door’s Movement:

  • Reflect on the fundamental role of garage door tracks in guiding the door’s ascent and descent.
  • Discuss how tracks work in tandem with rollers and other components for smooth operation.

2. Types of Tracks:

  • Explore the two main types of garage door tracks—vertical and horizontal.
  • Discuss the distinct functions of each type and their contribution to the overall stability of the door.

Signs of Garage Door Track Misalignment: A Call for Attention

1. Unusual Noises:

  • Insights:
    • Discuss the unexpected noises, such as scraping or grinding sounds, as indicators of track misalignment.
    • Explore the potential reasons behind the sudden and audible signs of trouble.
  • Practical Tips:
    • Share personal experiences of recognizing unusual noises and the immediate concern they raised.
    • Discuss the importance of investigating the source of the noise to pinpoint track misalignment.

2. Uneven Door Movements:

  • Insights:
    • Reflect on the impact of misaligned tracks on the smoothness of the door’s movements.
    • Discuss the noticeable imbalance in the door’s ascent or descent, such as one side lagging or the door appearing skewed.
  • Practical Tips:
    • Share observations of the garage door’s movements and the realization that something was amiss.
    • Discuss the potential risks of operating a door with misaligned tracks and the urgency of addressing the issue.

3. Gaps or Misalignment at the Joints:

  • Insights:
    • Explore the visual signs of misalignment, such as gaps or misalignment at the joints of the tracks.
    • Discuss the potential causes, including shifts in the foundation or wear and tear on the track components.
  • Practical Tips:
    • Share personal observations of inspecting the tracks and noticing visible signs of misalignment.
    • Discuss the importance of regular visual inspections to catch early indications of track issues.

4. Difficulty in Manual Operation:

  • Insights:
    • Discuss how track misalignment can manifest in difficulties when attempting to manually operate the garage door.
    • Explore the potential resistance, sticking points, or jamming that may occur.
  • Practical Tips:
    • Share personal experiences of attempting to manually operate the door and the challenges encountered.
    • Discuss the importance of addressing difficulties in manual operation as warning signs of larger issues.

Swift Action: The Importance of Timely Track Realignment

1. Preventing Further Damage:

  • Insights:
    • Explore the domino effect of track misalignment on other components of the garage door system.
    • Discuss the potential for more extensive and costly damage if track issues are left unaddressed.
  • Practical Tips:
    • Share the realization that timely track realignment is not just about fixing a current problem but preventing cascading issues.
    • Discuss the peace of mind derived from knowing that swift action can mitigate further damage.

2. Ensuring Smooth and Safe Operation:

  • Insights:
    • Emphasize the importance of smooth and safe garage door operation for daily convenience and safety.
    • Discuss the risks associated with continued operation of a door with misaligned tracks.
  • Practical Tips:
    • Share the urgency felt upon realizing the safety risks associated with track misalignment.
    • Discuss the decision-making process of prioritizing safety and seeking professional assistance promptly.

3. DIY vs. Professional Assistance:

  • Insights:
    • Reflect on the considerations for DIY track realignment.
    • Discuss the potential challenges and risks associated with attempting a DIY approach.
  • Practical Tips:
    • Share personal insights into the decision to seek professional assistance for track realignment.
    • Discuss the benefits of expertise, safety, and efficiency that professional technicians bring to the realignment process.

The Realignment Journey: A Return to Harmonious Movements

1. Seeking Professional Assistance:

  • Narrate the process of reaching out to professional garage door technicians.
  • Discuss the importance of choosing reputable and experienced professionals for the realignment job.

2. Assessment and Diagnosis:

  • Share the thorough assessment conducted by the technicians to diagnose the specific issues with the garage door tracks.
  • Discuss the communication and transparency in understanding the scope of the problem and the proposed realignment solution.

3. Realignment Process:

  • Explore the step-by-step process of realigning garage door tracks.
  • Discuss the use of proper tools, safety measures, and the seamless execution of the realignment.

4. Testing and Assurance:

  • Share the post-realignment testing phase to ensure the tracks and the entire system function optimally.
  • Discuss the assurance provided by professional technicians and the newfound peace of mind.

Conclusion: A Return to Seamless Symmetry

Overall, based from Garage Door Repair, as I stand before my garage door, now restored to its symphonic glory, the journey of handling track misalignment becomes a testament to the importance of vigilance and swift action. The unexpected disruptions in the daily dance were not just inconveniences but calls for attention to the intricate choreography of garage door tracks. In the landscape of 2023, where homes are not just spaces but reflections of functionality and precision, the garage door tracks stand as silent conductors—components that, when well-maintained, ensure a return to seamless symmetry and the reliable performance of that daily dance.

Tarrant County Door & Gate

6408 Marlette Court, North Richland Hills, TX

817-456-2958

What are the Importance of Timely Garage Door Repairs – NRH’s Gates & Garage Doors

When it comes to home maintenance, it’s easy to overlook certain aspects, especially if they seem to be working just fine. One of those aspects, which I learned the hard way, is the garage door. It’s easy to take it for granted until it suddenly stops working.

In this article, I’ll share my personal experience and insights into the importance of timely garage door repairs based from Garage Door Repair North Richland Hills TX.

The Often Neglected Garage Door

Our garage doors are a vital part of our homes, serving various functions beyond just a parking space for our cars. They act as a primary entry point, a security barrier, and play a significant role in the overall curb appeal of our homes. However, many of us tend to ignore or overlook garage door maintenance until a problem becomes too evident to ignore.

I was no different. I had never thought much about my garage door until one day, when I pressed the remote control, and nothing happened. It was in that moment of frustration and inconvenience that I realized the importance of timely garage door repairs.

Safety First

One of the key reasons why timely garage door repairs are crucial is safety. Garage doors are heavy and often operated using powerful motors and high-tension springs. When any component of the system malfunctions, it can pose serious safety risks.

In my case, the garage door’s safety sensors had stopped working. These sensors are designed to detect obstructions and prevent the door from closing on something or someone. Without functioning sensors, the risk of accidents and injuries increased significantly.

I decided to consult a professional garage door repair service immediately to address this safety concern. The technician quickly diagnosed the issue and replaced the faulty sensors, restoring the door’s safety features. This experience made me realize that waiting to address such safety concerns can have dire consequences.

Preventing Further Damage

Neglecting minor issues with your garage door can lead to more extensive damage down the road. Small problems, if left unattended, can escalate into larger, more expensive repairs. For instance, a minor issue with the door’s tracks can lead to more substantial damage if not fixed promptly.

I learned this the hard way when I noticed a strange grinding noise each time I operated my garage door. At first, I assumed it was just a minor inconvenience. However, as I continued to use the door without addressing the issue, the noise became louder, and the door started to move erratically.

It was evident that something was seriously wrong. I contacted a garage door repair professional, who discovered that the door’s tracks were misaligned. If I had addressed the issue when it was minor, I could have saved myself from a much more expensive repair and the inconvenience of a malfunctioning door.

Prolonging the Lifespan of Your Garage Door

A garage door is a significant investment, and like any other part of your home, it requires maintenance to ensure it serves you for as long as possible. Timely repairs and regular maintenance can significantly extend the lifespan of your garage door.

For example, the springs in a garage door system have a limited lifespan and need to be replaced periodically. If you neglect this regular maintenance, the springs can break suddenly, causing the door to drop unexpectedly. Not only is this a safety hazard, but it can also damage the door’s other components.

I realized the importance of this when I experienced a sudden spring breakage. The garage door came crashing down, narrowly missing my car. It was a wake-up call. I contacted a garage door repair expert who replaced the springs and advised me on a maintenance schedule to ensure the door’s longevity.

Enhancing Home Security

Our garage doors are not just access points to our homes; they also play a significant role in home security. A malfunctioning or damaged garage door can compromise the security of your home.

For example, a garage door that doesn’t close properly or one that has a broken lock is an open invitation to intruders. During my own experience, I realized that my garage door wasn’t closing all the way, leaving a gap that someone could exploit.

I promptly sought the services of a professional garage door repair technician, who identified the issue as a misaligned sensor. Once fixed, my garage door closed securely, enhancing the security of my home. This incident reinforced the importance of timely repairs for the sake of home security.

Maintaining Convenience and Efficiency

A well-functioning garage door adds convenience and efficiency to our daily routines. It’s incredible how we take this convenience for granted until it’s gone. Timely repairs ensure that your garage door continues to operate smoothly and efficiently.

In my case, a malfunctioning garage door opener caused significant delays and inconveniences in my daily schedule. It took longer to open and close the door, affecting my morning routine and causing frustration.

A professional garage door repair technician swiftly diagnosed the issue as a faulty motor in the opener. Once replaced, my garage door’s efficiency was restored, and I could once again enjoy the convenience of a smoothly operating door.

Conclusion

In summary, as per Garage Door Repair North Richland Hills TX, my personal experiences have highlighted the significance of timely garage door repairs. Safety, damage prevention, prolonging the lifespan of your garage door, enhancing home security, and maintaining convenience and efficiency are all compelling reasons to address garage door issues promptly.

While it’s easy to overlook garage door maintenance, especially when the door seems to be functioning fine, it’s important to remember that small issues can quickly escalate into more significant problems. Regular inspections and timely repairs not only ensure the longevity of your garage door but also contribute to the safety and security of your home. Don’t wait until a minor issue becomes a major inconvenience; take action to address garage door problems promptly for peace of mind and functionality.

NRH’s Gates & Garage Doors

7048 Ridge Crest Dr, North Richland Hills, TX 76182, United States

817-533-4913

How To Install Garage Door Springs Video – NRH’s Gates & Garage Doors

However, I can certainly guide you through the process of installing Garage Door Repair with a detailed step-by-step explanation.

It’s essential to exercise extreme caution when working with garage door springs, as they are under high tension and can be dangerous if mishandled. If you’re not comfortable with this type of DIY project, it’s strongly recommended to hire a professional technician for safety reasons.

Tools and Materials You’ll Need:

  • Replacement garage door springs
  • Safety glasses
  • Wrenches
  • C-clamps
  • Vice grips
  • Ladder
  • Socket set
  • Marker
  • Gloves

: Safety Precautions Safety should be your top priority. Make sure you wear safety glasses and gloves. Disconnect the power to your garage door opener to prevent accidental activation while working on the springs.

: Identify the Type of Springs Garage doors typically have two types of springs: extension springs (located on the sides of the door) and torsion springs (mounted above the door). Identify which type of spring system your garage door uses.

: Release Tension from the Old Springs For extension springs:

  • Open the garage door fully.
  • Secure the door in place using C-clamps or vice grips on the tracks to prevent it from moving.
  • Disconnect the safety cable from the extension spring.
  • Carefully remove the safety cable from the pulley.
  • Slowly and carefully release tension from the spring by gradually removing it from the pulley. Use a wrench or socket set.

For torsion springs:

  • Use a ladder to access the torsion spring assembly above the door.
  • Mark the position of the existing spring on the shaft.
  • Use two winding bars to release tension from the spring by turning it in the opposite direction of its wind. Make sure to follow manufacturer guidelines for releasing tension.

: Remove the Old Springs Once the tension is released, carefully remove the old springs from their brackets or mounting points.

: Install the New Springs

  • Install the new springs in the same position and orientation as the old ones.
  • Follow the manufacturer’s instructions for proper installation.
  • For torsion springs, wind them in the opposite direction of the winding you did during the removal process.

: Re-tension the Springs

  • For extension springs, reverse the process you used to release tension, gradually winding the spring onto the pulley.
  • For torsion springs, wind them in the proper direction according to the manufacturer’s instructions.

: Reconnect the Safety Cables For extension springs, reconnect the safety cables to the brackets.

: Test the Door

  • Carefully remove any clamps or vice grips.
  • Slowly raise and lower the door manually to ensure it moves smoothly and balances correctly.

: Reconnect Power Reconnect the power to your garage door opener and test it to ensure it’s working correctly.

: Regular Maintenance Periodically inspect and maintain your garage door springs to ensure they continue to function correctly. Lubricate them as recommended by the manufacturer.

Remember that Garage Door Repair replacement can be hazardous, and if you are not confident in your ability to do it safely, it’s always best to hire a professional technician to perform the installation.

NRH’s Gates & Garage Doors

7048 Ridge Crest Dr, North Richland Hills, TX 76182, United States

1-817-533-4913

How To Configure A Garage Door Remote – Tarrant County Door & Gate

A Garage Door Repair North Richland Hills TX remote is a convenient and essential device that allows you to open and close your garage door without manual effort. Configuring the remote properly ensures seamless functionality and enhances the security of your garage.

In this guide, we will walk you through a step-by-step process to configure a garage door remote effectively.

  1. Check Compatibility: Before you begin configuring the remote, ensure that it is compatible with your garage door opener. Read the manufacturer’s instructions or consult the user manual to confirm compatibility. Some garage door openers require specific remotes, so it is crucial to verify compatibility to prevent any issues during the configuration process.
  2. Gather Information: Make sure to gather all the necessary information before starting the configuration. This includes the make and model of your garage door opener and the remote, as well as any specific codes or frequencies required for programming.
  3. Access the Programming Mode: Most modern garage door openers come with a programming mode that allows you to sync the remote with the opener. To access the programming mode, locate the programming button on the opener, usually located near the motor housing or on the rear side of the control panel.
  4. Clear Existing Codes (if needed): If you are configuring a new remote or reprogramming an existing one, it is essential to clear any existing codes on the opener. To do this, press and hold the programming button until the indicator light blinks or turns off, indicating that the previous codes have been cleared.
  5. Set the Remote to Programming Mode: Next, put the remote into programming mode. This process varies depending on the remote’s model. Usually, you need to press a combination of buttons or hold down specific buttons for a few seconds until the LED light on the remote starts flashing.
  6. Sync the Remote with the Opener: Once both the opener and the remote are in programming mode, press the desired button on the remote that you wish to use to operate the garage door. At the same time, press and hold the programming button on the opener. The LED light on the opener should flash to indicate that the synchronization process has started.
  7. Test the Remote: After syncing the remote and the opener, test the remote’s functionality by pressing the programmed button. The garage door should respond by opening or closing accordingly. If it doesn’t work, repeat the synchronization process.
  8. Program Additional Buttons (if applicable): Many remotes have multiple buttons that can be programmed to control different doors or features. Repeat the syncing process for each button to configure them accordingly.
  9. Security Features: To enhance security, some garage door openers offer rolling codes or dip switches. Rolling codes change with each use, while dip switches allow you to set a unique code for the remote. Ensure you understand these features and utilize them if available to prevent unauthorized access.
  10. Final Checks: After configuring the remote, conduct a final check to ensure everything is functioning correctly. Test each programmed button multiple times to confirm the reliability of the remote’s functionality.

Conclusion:

Configuring a Garage Door Repair North Richland Hills TX remote is a straightforward process that, when done correctly, brings great convenience and security to your daily life. By following the steps outlined in this guide, you can easily set up your remote and enjoy the ease of remotely operating your garage door. Always refer to the manufacturer’s instructions for specific details and troubleshooting, if needed. With a properly configured remote, you’ll have peace of mind knowing that your garage and its contents are secure with just a click of a button.

Tarrant County Door & Gate

6408 Marlette Ct, North Richland Hills, TX 76182, Estados Unidos

817-456-2958

How To Open Chamberlain Garage Door Keypad – Tarrant County Door & Gate


Opening a Chamberlain Garage Door Repair North Richland Hills TX is a straightforward process that involves a series of steps to ensure a smooth and secure operation.

Whether you’re returning home or providing access to someone else, understanding the proper procedure is essential. In this comprehensive guide, we’ll delve into a detailed set of instructions, covering various scenarios and troubleshooting tips to guarantee a hassle-free experience.

1. Identify the Keypad Location: Begin by locating the Chamberlain garage door keypad on the exterior of your garage. This device is typically mounted near the entrance and resembles a small rectangular box with a numeric keypad.

2. Input the Access Code: Chamberlain garage door keypads are equipped with a numeric keypad. Enter the predetermined access code that was programmed into the keypad during the initial setup. This access code is typically a four-digit combination that you or the installer selected.

3. Press the Enter or Submit Button: After entering the access code, find the “Enter” or “Submit” button on the keypad. Press this button to confirm and submit the entered code.

4. Await Confirmation: Once the correct access code has been entered and the “Enter” button pressed, wait for the keypad to provide confirmation. This confirmation may be indicated by a light indicator or a sound signal.

5. Troubleshooting: If the keypad fails to confirm the code or if any issues arise, double-check the entered code for accuracy. Ensure that you are using the correct access code associated with your Chamberlain garage door opener.

6. Utilize Alternative Methods: In the event that the keypad does not open the garage door, consider using alternative methods. Most Chamberlain garage door openers come with remote controls that can be used to open the door. Additionally, there is a manual release mechanism on the garage door opener itself that can be employed.

7. Change the Access Code (Optional): For enhanced security, it is advisable to change the access code periodically. Refer to the Chamberlain garage door opener manual for instructions on changing the access code. This practice helps prevent unauthorized access.

8. Regular Maintenance: To ensure the smooth functioning of your Chamberlain garage door keypad, perform regular maintenance on both the keypad and the garage door opener. Check for signs of wear and tear and replace batteries if necessary.

9. Contact Chamberlain Support: If persistent issues arise or if you have forgotten the access code, reaching out to Chamberlain customer support is a viable option. They can provide guidance on troubleshooting and assist with resetting the access code if needed.

10. Additional Security Measures: Consider implementing additional security measures, such as enabling the vacation mode on your Chamberlain garage door opener when you’re away for an extended period. This mode prevents the remote controls and keypads from operating the garage door, enhancing security.

11. Familiarize Yourself with Emergency Release: In case of power outages or malfunctions, familiarize yourself with the emergency release mechanism. This manual release allows you to open the garage door manually from the inside.

12. Test the Safety Features: Chamberlain garage door openers are equipped with safety features, including sensors that detect obstructions in the door’s path. Regularly test these safety features to ensure they are functioning correctly.

By following these detailed instructions, you should be able to successfully open your Chamberlain Garage Door Repair North Richland Hills TX and access your garage. Remember to prioritize safety and security throughout the process, and consult the Chamberlain manual for model-specific details.

Tarrant County Door & Gate

1-817-456-2958

How to Program Genie Intellicode Garage Door Opener-North Richland hills Best Garage & Overhead Doors

The Genie Intellicode Garage Door Repair North Richland Hills TX opener is a popular and reliable device used to open and close garage doors. Programming it properly is essential to ensure its smooth operation and compatibility with your garage door.

In this guide, we will walk you through the step-by-step process of programming the Genie Intellicode garage door opener.

Before you begin:

  1. Make sure you have read and understood the instruction manual provided with your Genie Intellicode garage door opener. Familiarize yourself with the terminology and safety precautions.
  2. Ensure that the garage door opener is powered up and the remote control is within range.

Step 1: Identify the Learn Button:

  1. Locate the “Learn” or “Program” button on the motor unit of the garage door opener. It is usually located near the antenna wire and is labeled accordingly.

Step 2: Clear Existing Programming:

  1. Press and hold the “Learn” or “Program” button until the indicator light on the motor unit turns off. This action clears any existing programming in the opener’s memory.

Step 3: Program the Remote Control:

  1. Decide which button on the remote control you want to use to operate the garage door. The Genie Intellicode garage door opener allows you to program up to three remote controls.
  2. Press and release the “Learn” or “Program” button on the motor unit. The indicator light should now blink steadily.
  3. Within 30 seconds, press and hold the button on the remote control that you wish to program. Keep holding the button until the indicator light on the motor unit blinks rapidly and then turns off. This indicates that the remote control has been successfully programmed.
  4. Repeat steps 2 and 3 for each additional remote control you want to program.

Step 4: Test the Remote Control:

  1. Stand within range of the garage door opener and press the programmed button on the remote control. The door should open or close, depending on its current position.
  2. If the door does not respond, repeat the programming process from Step 3. Make sure to press the “Learn” or “Program” button on the motor unit first and then proceed to program the remote control.

Step 5: Program the Keypad (Optional):

  1. If your Genie Intellicode garage door opener has a wireless keypad, you can program it to open and close the door without a remote control.
  2. Locate the “Learn” or “Program” button on the motor unit and press it.
  3. Within 30 seconds, enter a four-digit PIN on the keypad and press the “Enter” button. The indicator light on the motor unit should blink rapidly and then turn off, indicating successful programming.
  4. Test the keypad by entering the four-digit PIN followed by the “Enter” button. The garage door should open or close accordingly.

Conclusion: Programming the Genie Intellicode Garage Door Repair North Richland Hills TX opener is a straightforward process that involves identifying the learn button, clearing existing programming, programming the remote control, and optionally programming the keypad. Following the steps outlined in this guide will enable you to enjoy the convenience and security offered by your Genie Intellicode garage door opener. Remember to consult the instruction manual for any specific details or troubleshooting guidelines relevant to your model.

North Richland hills Best Garage & Overhead Doors

North Richland Hills, TX 76182

817-533-4913

Powered by WordPress & Theme by Anders Norén