Local Businesses Blog in Texas

Tag: GARAGE DOOR REPAIR MILWAUKE WI

How Wide Is A 1 Car Garage Door – Raul’s Overhead Doors

Garage Door Repair Milwaukee WI is a crucial component of residential properties, providing access to a valuable space for parking vehicles, storing belongings, and more. In this comprehensive guide, we’ll delve into the dimensions of a single-car garage door,

factors influencing size, standard measurements, and considerations for selecting the right door for your needs.

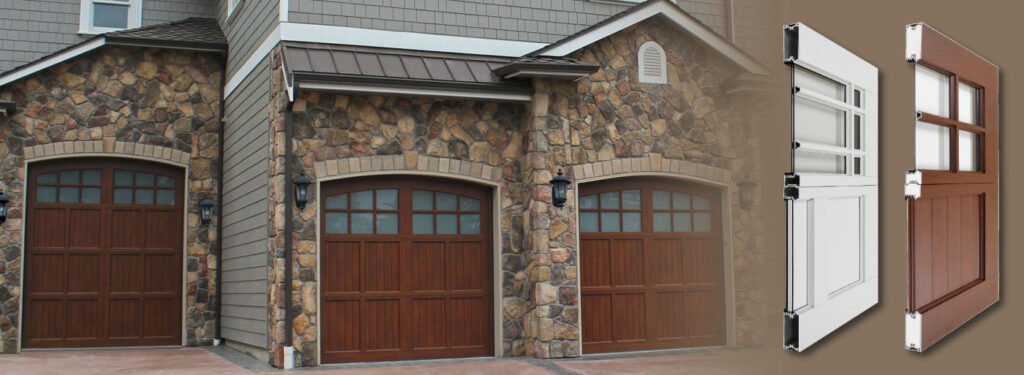
1. Understanding Single-Car Garage Door Dimensions: A standard single-car garage door typically measures 8 feet wide by 7 feet high or 9 feet wide by 7 feet high. These dimensions are designed to accommodate most standard-sized vehicles, providing ample clearance for entry and exit. The height of 7 feet ensures sufficient vertical space for most cars, trucks, SUVs, and vans.

2. Factors Influencing Single-Car Garage Door Width: Several factors influence the width of a single-car garage door, including:

  • Vehicle size: Consider the dimensions of the vehicle(s) that will be parked in the garage. Ensure that the door width provides adequate clearance on both sides for safe entry and exit.
  • Access requirements: Evaluate the ease of maneuvering vehicles into the garage and any additional space needed for opening car doors or accessing storage areas.
  • Architectural constraints: Take into account the architectural style of your home and any limitations or restrictions on garage door width imposed by local building codes or homeowners’ associations.

3. Standard Measurements for Single-Car Garage Doors: Standard single-car garage doors are available in the following sizes:

  • 8 feet wide by 7 feet high: This is the most common size for single-car garage doors, providing sufficient width and height for most vehicles.
  • 9 feet wide by 7 feet high: This slightly wider option offers additional clearance for larger vehicles or trucks and may be preferred for added convenience.

4. Considerations for Selecting a Single-Car Garage Door: When selecting a single-car garage door, consider the following factors:

  • Vehicle size and type: Ensure that the door width and height are compatible with the vehicles you own or plan to park in the garage.
  • Functional requirements: Determine if additional space is needed for storage, workspace, or other activities inside the garage.
  • Aesthetic preferences: Choose a garage door style, material, and color that complements the architectural design of your home and enhances curb appeal.
  • Budget and customization: Consider the cost of standard versus custom garage doors, as well as any additional features or upgrades you may desire.

5. Conclusion: The dimensions of a single-car garage door play a critical role in the functionality, aesthetics, and convenience of your garage space. By selecting the right width and height to accommodate your vehicles and storage needs, you can maximize the utility and value of your garage while enhancing the overall appeal of your home.

Raul’s Overhead Doors

5027 W Howard Ave a, Milwaukee, WI 53220

414-405-5791

How To Link A Garage Door Opener – Raul’s Over Head Doors

Garage Door Repair Milwauke WI to your garage door system, allowing you to control the door’s operation remotely. Whether you’re installing a new opener or replacing an old one, properly linking it is essential for smooth and convenient operation.

In this comprehensive guide, we’ll walk you through the process of linking a garage door opener step by step, ensuring that you can enjoy effortless access to your garage.

Understanding Garage Door Openers

Before diving into the linking process, it’s essential to understand the components of a garage door opener. A typical garage door opener consists of a motor unit, a remote control or keypad for operation, and sensors to detect obstructions in the door’s path. Linking the opener involves programming it to communicate with these components effectively.

Types of Garage Door Openers

There are several types of garage door openers available, including:

  • Chain Drive: These openers use a chain to operate the door, making them durable and affordable but may produce more noise during operation.
  • Belt Drive: Belt drive openers use a rubber belt to operate the door, offering quieter operation compared to chain drive models.
  • Screw Drive: Screw drive openers utilize a threaded rod to move the door, providing smooth and reliable operation with minimal maintenance.
  • Jackshaft: Jackshaft openers are mounted to the side of the garage door and operate the door directly, making them ideal for garages with limited ceiling space.

The linking process may vary slightly depending on the type and model of your garage door opener.

Preparation Steps

Before linking your garage door opener, it’s essential to take the following preparation steps:

  1. Read the Manual: Familiarize yourself with the manufacturer’s instructions and guidelines for linking the specific model of garage door opener you have.
  2. Gather Tools: Ensure you have all the necessary tools and equipment, including a ladder, screwdriver, and any additional components provided with the opener.
  3. Clear Workspace: Clear any clutter or obstacles from around the garage door opener and ensure that there is sufficient lighting for the linking process.

Linking the Garage Door Opener

Follow these steps to link your garage door opener:

  1. Power On the Opener: Plug in the garage door opener to a power source and ensure that it is functioning correctly.
  2. Set Up Remote Controls: If your opener comes with remote controls or keypads, follow the manufacturer’s instructions to program them. This usually involves pressing a specific button on the opener and then on the remote control to synchronize them.
  3. Program Homelink Compatibility: Many garage door openers are compatible with Homelink, a universal remote control system integrated into vehicles. If your opener supports Homelink, follow the vehicle’s manual instructions to link it to the opener.
  4. Adjust Settings: Use the control panel or mobile app, if applicable, to adjust settings such as the door travel limits, opening and closing speeds, and automatic light timer.
  5. Test Operation: Test the operation of the garage door opener by opening and closing the door using the remote controls or keypads. Ensure that the door moves smoothly and stops and reverses its motion if it encounters an obstruction.
  6. Fine-Tune Settings: If necessary, fine-tune the settings to achieve the desired performance and functionality. This may involve adjusting the force sensitivity or travel limits of the opener.
  7. Secure Mounting: Once you’re satisfied with the performance of the garage door opener, securely mount it to the ceiling or wall according to the manufacturer’s instructions. Ensure that all mounting brackets and hardware are tightened properly.

Common Issues and Troubleshooting

Despite your best efforts, you may encounter common issues when linking a garage door opener. Here are some troubleshooting tips:

  • Remote Control Interference: If the remote controls or keypads fail to operate the opener consistently, check for any sources of interference such as electronic devices or nearby power lines. Reposition the opener or relocate any potential sources of interference to improve signal reception.
  • Sensor Alignment: If the door fails to close properly or reverses its motion unexpectedly, check the alignment of the safety sensors near the bottom of the door tracks. Ensure that the sensors are aligned properly and free from any obstructions.
  • Power Supply Issues: If the opener fails to respond at all, check the power supply and wiring connections. Ensure that the opener is receiving power and that the circuit breaker or fuse is not tripped.

Maintenance Tips

To maintain optimal performance of your garage door opener, follow these maintenance tips:

  • Regular Inspection: Periodically inspect the opener and associated components for any signs of wear or damage. Address any issues promptly to prevent further damage or malfunctions.
  • Lubrication: Apply lubricant to the moving parts of the opener, such as the chain or belt, to reduce friction and prolong their lifespan. Follow the manufacturer’s recommendations for the type and frequency of lubrication.
  • Safety Sensor Check: Test the alignment and functionality of the safety sensors regularly by placing an object in the door’s path while closing it. Ensure that the door stops and reverses its motion as intended.

Conclusion:

Garage Door Repair Milwauke WI is a straightforward process that can be completed with basic tools and equipment. By following the steps outlined in this guide and paying attention to detail, you can ensure that your garage door opener operates smoothly and reliably, providing convenient access to your garage.

Raul’s Overhead Doors

5027 W Howard Ave, Milwaukee, WI 53220, USA

1-414-405-5791

Powered by WordPress & Theme by Anders Norén