Local Businesses Blog in Texas

Tag: garage door repair knoxville tn

How To Rewind A Garage Door Spring – Camco Commercial Door Company


Rewinding a Garage Door Repair Knoxville TN  spring is a task that requires caution, precision, and attention to safety. Garage door springs are under high tension and can cause serious injury or damage if mishandled. However, with the right tools, knowledge, and careful execution, you can safely rewind a garage door spring to restore proper tension and functionality.

Here’s a detailed guide on how to rewind a garage door spring:

  1. Understand the Types of Garage Door Springs: Garage doors typically use one of two types of springs: torsion springs or extension springs. Torsion springs are mounted above the garage door opening on a metal shaft, while extension springs are located above the horizontal tracks on either side of the door. The process of rewinding each type of spring differs slightly, so it’s essential to identify the type of spring your garage door uses before proceeding.
  2. Gather Necessary Tools and Materials: Before starting the rewinding process, gather the tools and materials you’ll need for the job. Depending on the type of spring and specific requirements of your garage door system, you may need winding bars, vice grips, adjustable wrenches, safety glasses, gloves, a ladder, and a tape measure. Additionally, ensure that you have a solid understanding of the safety precautions and procedures outlined in the manufacturer’s instructions for your specific garage door model.
  3. Secure the Garage Door: Before working on the springs, ensure that the garage door is closed and secured in place. Use locking pliers or clamps to secure the door in the closed position, preventing it from moving unexpectedly during the rewinding process. Place a ladder or step stool beneath the springs to provide stable access and support while working.
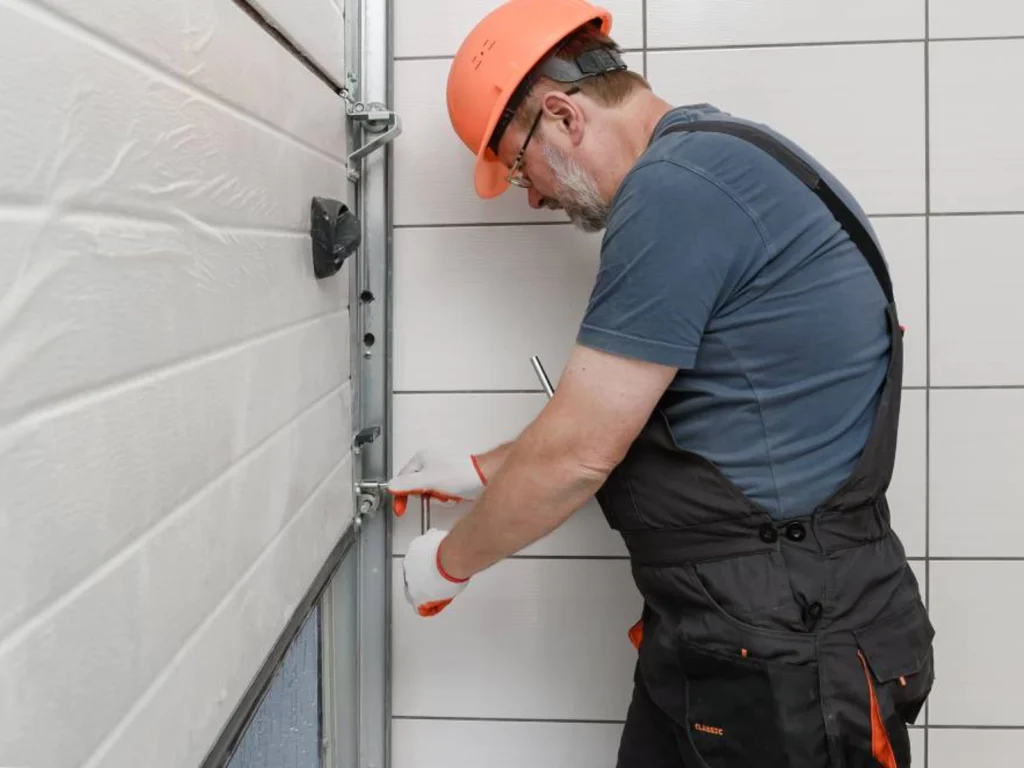
  4. Release Tension from the Spring: If you’re working with a torsion spring, use winding bars to release tension from the spring before attempting to rewind it. Insert one winding bar into the winding cone on the spring and another into the corresponding hole on the opposite side of the cone. Slowly turn the winding bars in the direction specified by the manufacturer’s instructions to release tension from the spring. Use caution and keep your body clear of the winding bars and spring at all times to avoid injury.
  5. Remove the Spring from the Shaft or Tracks: Once the tension has been released from the spring, carefully remove it from the metal shaft or tracks. If you’re working with a torsion spring, use vice grips or locking pliers to secure the spring to the shaft before loosening the set screws and sliding the spring off the shaft. If you’re working with extension springs, unhook the springs from the pulleys or brackets attached to the horizontal tracks.
  6. Inspect the Spring for Damage: Before rewinding the spring, inspect it carefully for any signs of damage, wear, or corrosion. Look for cracks, breaks, rust, or deformation that may indicate the need for replacement. If the spring is damaged or shows signs of wear, it’s essential to replace it with a new spring of the appropriate size and specifications before proceeding with the rewinding process.
  7. Determine the Number of Turns: To determine the number of turns required to rewind the spring, refer to the manufacturer’s instructions or consult a professional garage door technician. The number of turns needed will depend on factors such as the size and weight of the garage door, the type of spring, and the desired tension level. Overwinding or underwinding the spring can lead to performance issues or safety hazards, so it’s crucial to follow the manufacturer’s recommendations precisely.
  8. Secure the Spring for Rewinding: Once you’ve determined the number of turns needed, secure the spring in place for rewinding. For torsion springs, insert winding bars into the winding cones on both ends of the spring and secure them firmly to prevent slippage. For extension springs, use vice grips or locking pliers to secure the ends of the spring to the horizontal tracks or other mounting points.
  9. Rewind the Spring: Using the appropriate tools and following the manufacturer’s instructions, carefully rewind the spring to the specified number of turns. Turn the winding bars or other winding mechanism in the direction specified by the manufacturer, applying steady pressure and keeping your body clear of the spring and winding mechanism at all times. Use caution and wear safety glasses and gloves to protect against potential hazards.
  10. Test the Tension and Balance: Once the spring has been rewound to the correct number of turns, test the tension and balance of the garage door to ensure proper operation. Remove any locking pliers or vice grips securing the spring and slowly raise the garage door manually to test the balance and tension. The door should move smoothly and remain stable at all points along its travel path. If the door feels heavy or unbalanced, adjust the tension of the spring accordingly.
  11. Make Adjustments as Needed: If adjustments are needed to achieve the proper tension and balance, refer to the manufacturer’s instructions or consult a professional garage door technician for guidance. Minor adjustments can typically be made by adding or removing turns from the spring as necessary. Use caution and follow proper procedures to avoid overwinding or underwinding the spring, which can lead to performance issues or safety hazards.
  12. Perform Regular Maintenance: After rewinding the garage door spring, perform regular maintenance to keep it in optimal condition and ensure safe operation. Inspect the spring periodically for signs of wear, corrosion, or damage, and address any issues promptly. Lubricate the spring and other moving parts of the garage door system regularly with a suitable lubricant to reduce friction and prevent premature wear.

If you’re unsure about the rewinding process or encounter any difficulties, consider seeking assistance from a professional Garage Door Repair Knoxville TN  technician for expert guidance and support.

Camco Commercial Door Company

1-865-776-9455

https://maps.app.goo.gl/EHYTdzvLDSBDwnoi8

How To Install New Garage Door – Camco Commercial Door Company


In this comprehensive guide, I’ll walk you through the step-by-step process of installing a new  Garage Door Repair Knoxville TN in covering everything from measuring and preparing the opening to installing the tracks, panels, and hardware.

Step 1: Gather Tools and Materials

Before you begin, make sure you have all the necessary tools and materials on hand:

  • New garage door kit
  • Power drill with screwdriver bits
  • Level
  • Tape measure
  • Hammer
  • Step ladder
  • Sawhorses
  • Safety glasses and work gloves

Step 2: Measure and Prepare the Opening

Start by measuring the width and height of the garage door opening. Follow the manufacturer’s instructions to determine the required size of the new door. Next, prepare the opening by removing the old door and hardware, including the tracks, springs, and rollers. Make any necessary repairs to the framing or walls surrounding the opening.

Step 3: Install the Tracks

Attach the vertical track to each side of the opening using the provided brackets and screws. Use a level to ensure the tracks are plumb and securely anchored to the wall. Next, install the horizontal track along the ceiling, making sure it is level and aligned with the vertical tracks.

Step 4: Attach the Panels

Lay out the bottom panel of the new door on sawhorses and attach any weatherstripping or insulation as needed. Lift the panel into place in the opening, making sure it is flush with the floor and the vertical track. Secure the panel to the track using the provided hardware.

Step 5: Install the Rollers

Insert the rollers into the track on each side of the door panel, making sure they are properly aligned and seated. Attach the hinges to the top edge of the panel, then lift the next panel into place and secure it to the hinges. Continue this process until all panels are installed.

Step 6: Install the Spring System

Follow the manufacturer’s instructions to install the spring system for your new garage door. This may involve installing extension or torsion springs, depending on the type of door you have chosen. Be sure to use the proper tools and techniques to safely install and tension the springs.

Step 7: Attach the Hardware

Once the panels and spring system are in place, attach the hardware, including the handles, hinges, and brackets. Make sure all hardware is securely fastened according to the manufacturer’s instructions.

Step 8: Test the Door

Carefully raise and lower the door manually to ensure it moves smoothly along the tracks and operates correctly. Make any necessary adjustments to the tracks, rollers, or springs to ensure proper alignment and tension.

Step 9: Install the Opener (Optional)

If you are installing a garage door opener, follow the manufacturer’s instructions to mount the opener unit to the ceiling and attach the rail to the header above the door. Connect the opener to the door using the provided hardware and test the opener to ensure it operates smoothly.

Step 10: Seal and Insulate (Optional)

Finally, seal and insulate the door as needed to improve energy efficiency and weather resistance. Install weatherstripping along the edges of the door and apply insulation to the panels if desired.

Conclusion

If you’re unsure about any aspect of the installation process, don’t hesitate to seek professional assistance to ensure the job is done safely and correctly. With proper installation and maintenance, your new Garage Door Repair Knoxville TN will provide convenience and security for years to come.

Camco Commercial Door Company

1-865-776-9455

How To Adjust Garage Door Travel Chamberlain – Camco Commercial Door Company

Adjusting the travel limits on a Chamberlain Garage Door Repair Knoxville TN is an important maintenance task to ensure that your garage door opens and closes smoothly and safely.

The travel limits control how far the garage door moves up and down during operation, preventing it from traveling too far or not far enough. Proper adjustment of the travel limits can help prevent damage to the door and opener, as well as ensure that the door seals properly when closed. In this guide, we’ll walk you through the steps to adjust the travel limits on a Chamberlain garage door opener.

  1. Prepare Your Workspace:
    • Before adjusting the travel limits, make sure the area around the garage door opener is clear of any obstructions. You’ll need access to the opener’s control panel, which is typically located on the side or front of the unit.
    • Ensure that the garage door is fully closed before starting the adjustment process. If the door is partially open, use the wall-mounted control button or remote to close it completely.
  2. Locate the Adjustment Controls:
    • The travel limit adjustment controls are usually located on the back or side of the garage door opener near the motor unit. Look for two sets of adjustment screws labeled “Up Limit” and “Down Limit.”
    • Some Chamberlain garage door openers feature digital controls on the control panel for easier adjustment. Refer to your opener’s user manual for specific instructions on accessing and navigating the adjustment settings.
  3. Adjust the Up Limit:
    • To adjust the up limit, use a screwdriver to turn the Up Limit adjustment screw clockwise to decrease the travel distance or counterclockwise to increase it.
    • Turn the screw in small increments, testing the door’s movement after each adjustment. Open the door using the wall-mounted control button or remote and observe how far it travels before stopping.
    • Continue making adjustments until the door stops at the desired height. Ideally, the door should stop just before it reaches the fully open position to prevent strain on the opener and door components.
  4. Adjust the Down Limit:
    • Once you’ve set the up limit, it’s time to adjust the down limit to ensure that the door closes fully and seals properly. Use a screwdriver to turn the Down Limit adjustment screw clockwise to decrease the travel distance or counterclockwise to increase it.
    • Test the door’s movement by closing it using the wall-mounted control button or remote. Observe how far the door travels before stopping and adjust the down limit accordingly.
    • The door should close fully and seal tightly against the ground or weatherstripping. If the door stops too high or too low, adjust the down limit until it closes properly.
  5. Test the Door:
    • Once you’ve adjusted both the up and down limits, test the door several times to ensure that it opens and closes smoothly and stops at the correct positions.
    • Listen for any unusual noises or signs of strain during operation, as these may indicate that further adjustments are needed.
    • If the door doesn’t stop at the correct positions or if there are any issues with its movement, repeat the adjustment process until the desired results are achieved.
  6. Finalize the Settings:
    • Once you’re satisfied with the travel limits, tighten the adjustment screws to secure the settings in place. Avoid over-tightening the screws, as this can strip the threads or damage the adjustment mechanism.
    • It’s a good idea to mark the final positions of the adjustment screws with a permanent marker or pen for future reference.
  7. Perform Routine Maintenance:
    • Periodically check and adjust the travel limits on your Chamberlain garage door opener to ensure optimal performance and safety. Factors such as temperature changes, humidity, and door wear can affect the door’s operation over time.
    • Refer to your opener’s user manual for recommended maintenance intervals and procedures, as well as any additional troubleshooting tips or safety precautions.

In summary, adjusting the travel limits on a Chamberlain Garage Door Repair Knoxville TN is a straightforward process that can be done with basic tools and a little patience. By following these steps and performing routine maintenance, you can ensure that your garage door opens and closes smoothly and safely for years to come. If you encounter any issues or difficulties during the adjustment process, consult your opener’s user manual or contact Chamberlain’s customer support for assistance.

Camco Commercial Door Company

853 East Wolf Valley Rd. Heiskell, TN 37754

1-865-776-9455

How Much Is A New Garage Door Installed – Camco Commercial Door Company


Buying and installing a new Garage Door Repair Knoxville TN involves several factors that contribute to the overall cost.

From the type of garage door material to the installation fees, the total expenses can vary. Let’s break down the key elements that influence the price of a new garage door installation.

1. Garage Door Material: The material you choose for your garage door significantly affects the cost. Common materials include steel, wood, aluminum, and fiberglass. Steel doors are durable and cost-effective, while wood doors are stylish but often more expensive. Aluminum and fiberglass doors offer a lightweight option but may not be as sturdy as steel or wood.

2. Garage Door Style: Garage doors come in various styles, such as traditional, carriage house, contemporary, and more. The complexity of the design and the decorative elements can impact the overall cost. Customized or uniquely designed doors may also come with a higher price tag.

3. Size of the Garage Door: The size of your garage door plays a crucial role in determining the cost. Standard single-car garage doors are more affordable than double-car doors. Additionally, if you have a non-standard garage door size, it may require a custom order, contributing to higher costs.

4. Insulation: Insulated garage doors are more energy-efficient, providing better temperature control inside the garage. While insulated doors may cost more upfront, they can result in long-term energy savings. Consider your climate and how much time you spend in the garage when deciding on insulation options.

5. Opener System: The type of garage door opener you choose also factors into the overall cost. Chain-driven openers are usually more affordable, but they can be noisy. Belt-driven openers are quieter but may come at a higher price. Additionally, smart garage door openers with advanced features contribute to increased costs.

6. Installation Costs: Professional installation is crucial for a secure and properly functioning garage door. Installation costs vary depending on your location, the complexity of the installation, and whether any modifications are needed for your garage structure. Hiring experienced installers ensures the job is done correctly, promoting longevity and safety.

7. Additional Features: Customization options and additional features, such as windows, decorative hardware, and smart technology integration, can add to the overall expense. While these features enhance the aesthetic appeal and functionality of the garage door, they come with an extra cost.

8. Brand and Warranty: The brand of the garage door and its warranty coverage can influence the price. Established and reputable brands may have higher upfront costs but often come with better warranty terms, providing peace of mind regarding product durability and longevity.

Conclusion:

In summary, the cost of a new Garage Door Repair Knoxville TN varies based on factors like material, style, size, insulation, opener system, installation costs, additional features, and brand reputation. To get an accurate estimate, it’s advisable to obtain quotes from multiple garage door suppliers and installation professionals, considering your specific preferences and requirements. Keep in mind that investing in a high-quality garage door and professional installation pays off in the long run, enhancing your home’s curb appeal, energy efficiency, and overall securit

Camco Commercial Door Company

1-865-776-9455

How Much Does a Garage Door Cost? – Camco Commercial Door Company

When it comes to purchasing a garage door, the cost can vary depending on several factors. I’ve found that understanding these factors is crucial in estimating the cost and making an informed decision.

Let me share my insights with you that I based from Garage Door Repair Knoxville TN:

  1. Type of door: Garage doors come in different types, and each type has its own price range. I’ve noticed that sectional doors, which are the most common, tend to be more affordable compared to other types like roll-up, swing-out, or slide-to-side doors.
  2. Material selection: The material of the garage door significantly influences the cost. I’ve come across various options such as steel, aluminum, wood, vinyl, and fiberglass. Steel doors are usually the most cost-effective, while wood and custom-made doors tend to be on the higher end of the price spectrum.
  3. Size and design considerations: The size and design of the garage door play a crucial role in determining its cost. Standard single-car and double-car doors have different price points. Additionally, the design elements and style choices, such as raised panels, carriage house designs, or modern aesthetics, can also impact the overall cost.
  4. Insulation options: Insulated garage doors offer benefits like improved energy efficiency and noise reduction. However, I’ve noticed that the level of insulation, measured by the R-value, can affect the cost. Doors with higher R-values, indicating better insulation, generally come at a higher price.
  5. Wind resistance features: Living in an area prone to high winds or hurricanes, I’ve learned that opting for a garage door with wind-resistant features can be important. Doors with reinforced bracing and impact-resistant materials tend to be slightly more expensive, but the added protection they provide is worth considering.
  6. Additional features and accessories: If you desire additional features like windows for natural light or decorative hardware to enhance the door’s appearance, it’s important to factor in the associated costs. Windows and decorative hardware options may add to the overall expense of the garage door.
  7. Opener and installation: The cost of a garage door typically doesn’t include the opener or installation charges. The opener’s price can vary based on factors such as horsepower, drive type, and smart capabilities. It’s advisable to consider these costs separately when budgeting for your garage door.
  8. Warranty and service considerations: When evaluating the cost, I always take into account the warranty offered by the manufacturer and the reputation of the company providing the door. While a longer warranty and reliable customer service may result in a slightly higher upfront cost, they can provide peace of mind and save money on potential repairs or replacements down the line.

To get an accurate estimate for the cost of a garage door, I recommend reaching out to local garage door dealers or requesting quotes from reputable manufacturers and installation professionals. They can provide specific pricing information based on your preferences and requirements.

It’s important to remember that the cost of a garage door is an investment in the functionality, security, and aesthetics of your home. Taking the time to research and consider the various factors will help you find the right balance between quality and affordability.

In summary, as stated in Garage Door Repair Knoxville TN, by considering the type, material, size, design, insulation, wind resistance, additional features, opener, installation, warranty, and service, you’ll be able to make an informed decision regarding the cost of your garage door.

Camco Commercial Door Company

Knoxville, TN

865-776-9455

Powered by WordPress & Theme by Anders Norén