Local Businesses Blog in Texas

Tag: Garage Door Repair El Paso TX

How To Lock A Garage Door – El Paso Garage Door Repair

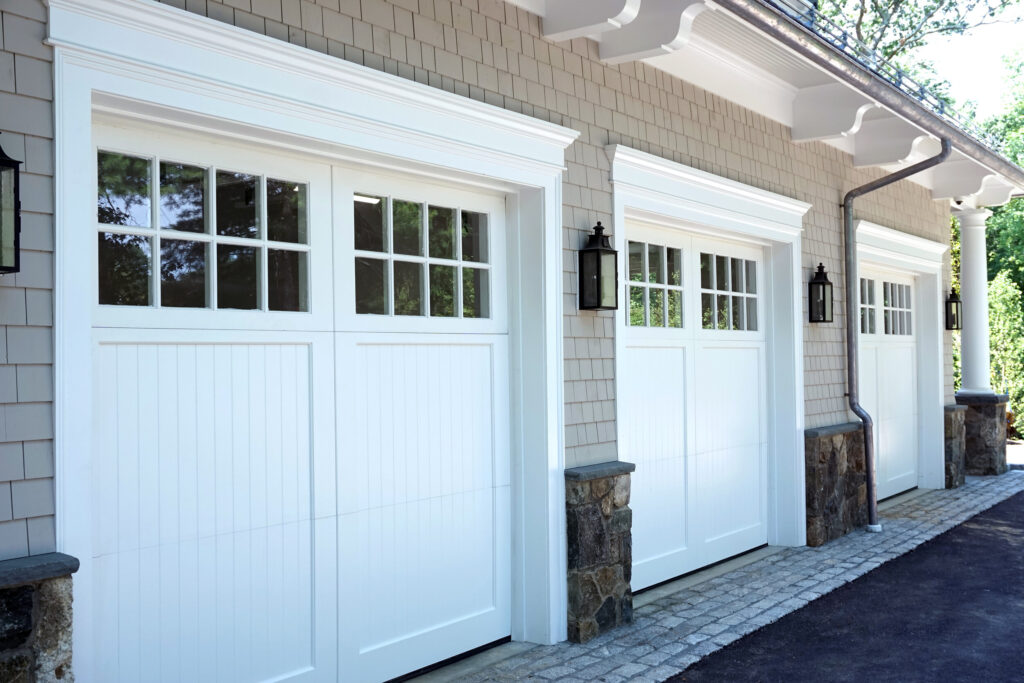
Garage Door Repair El Paso TX is an essential security measure to protect your home and belongings from unauthorized access, burglary, and intruders.

While many garage doors come equipped with built-in locking mechanisms, such as manual locks or electronic keypad systems, some doors may require additional security measures to reinforce their protection. In this guide, we’ll explore various methods for locking a garage door, including traditional locks, electronic keypads, bolt locks, and security bars, providing step-by-step instructions and tips for enhancing garage door security effectively.

1. Manual Locks: Manual locks are the most common type of lock used to secure garage doors. They typically consist of a locking handle or T-handle mechanism that engages with a track or locking bar to prevent the door from being opened from the outside. Here’s how to lock a garage door with a manual lock:

  • Close the garage door securely, ensuring that it is fully engaged with the tracks and in the closed position.
  • Locate the locking handle or T-handle mechanism on the inside of the garage door. This may be located near the bottom of the door or on one side.
  • Turn the locking handle or T-handle mechanism clockwise to engage the lock. You may need to push or pull the handle slightly to align it with the locking mechanism.
  • Test the lock by attempting to lift the garage door from the outside. The door should remain securely closed and unable to be opened without unlocking the manual lock from the inside.

2. Electronic Keypad Systems: Electronic keypad systems provide convenient and secure access to the garage without the need for keys. These systems allow homeowners to set custom access codes for family members, guests, or service providers while maintaining the security of the garage door. Here’s how to lock a garage door with an electronic keypad system:

  • Enter the programmed access code on the keypad located outside the garage door. This typically involves pressing a sequence of numbers or symbols followed by the “Enter” or “OK” button.
  • Wait for the keypad system to confirm the entry code and activate the garage door opener. The door will open automatically, allowing access to the garage.
  • Once inside the garage, close the garage door securely using the wall-mounted control panel or remote control transmitter.
  • Exit the garage and press the “Lock” or “Close” button on the keypad to deactivate the garage door opener and lock the door in the closed position.
  • Test the lock by attempting to open the garage door from the outside. The door should remain securely closed and require the entry of a valid access code to unlock and open.

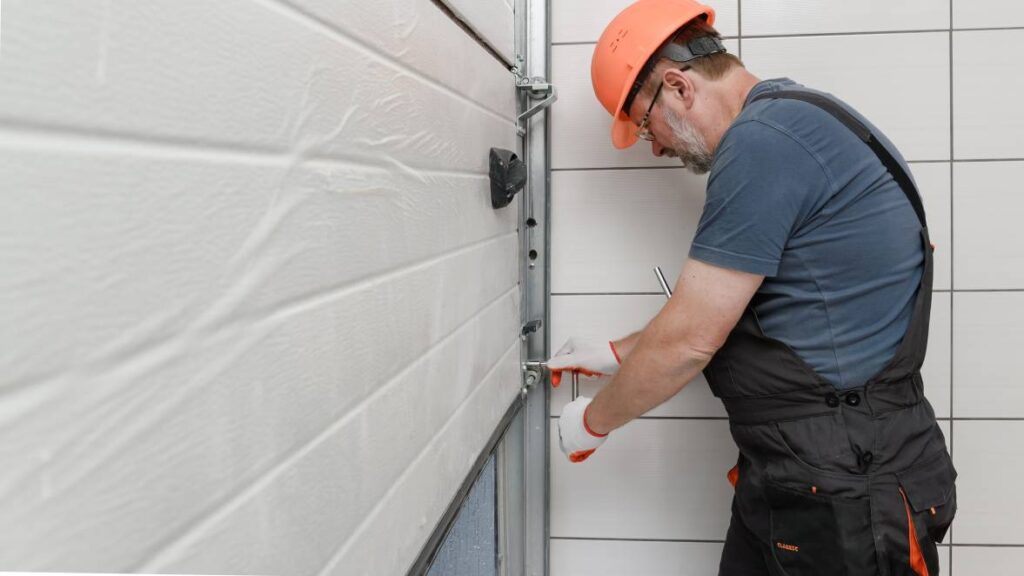
3. Bolt Locks: Bolt locks are heavy-duty locking mechanisms that provide additional security for garage doors. These locks are typically installed on the inside of the garage door and engage with the door tracks or floor to prevent the door from being lifted or forced open. Here’s how to lock a garage door with bolt locks:

  • Close the garage door securely, ensuring that it is fully engaged with the tracks and in the closed position.
  • Locate the bolt lock mechanism on the inside of the garage door. This may be a slide bolt, padlock, or deadbolt lock that engages with the door tracks or floor.
  • Activate the bolt lock by sliding the bolt or turning the key to engage the lock. Ensure that the bolt extends fully into the track or floor to provide maximum security.
  • Test the lock by attempting to lift the garage door from the outside. The door should remain securely closed and unable to be opened without unlocking the bolt lock from the inside.

4. Security Bars: Security bars are physical barriers that reinforce the garage door and prevent it from being forced open or lifted off the tracks. These bars are typically installed horizontally across the inside of the garage door and anchored to the door frame or wall. Here’s how to lock a garage door with security bars:

  • Close the garage door securely, ensuring that it is fully engaged with the tracks and in the closed position.
  • Position the security bars horizontally across the inside of the garage door, aligning them with the bottom edge of the door panels.
  • Anchor the security bars to the door frame or wall using screws, bolts, or brackets provided with the security bar kit. Ensure that the bars are securely attached and cannot be easily dislodged or removed.
  • Test the security bars by attempting to lift the garage door from the outside. The bars should prevent the door from being lifted or forced open, providing an additional layer of security against intrusion.

5. Remote Control Transmitters: Remote control transmitters are handheld devices that allow homeowners to operate the garage door opener remotely from inside a vehicle or from a distance. While remote control transmitters do not physically lock the garage door, they provide a convenient way to open and close the door securely without the need for manual intervention. Here’s how to lock a garage door using remote control transmitters:

  • Close the garage door securely using the wall-mounted control panel or remote control transmitter.
  • Activate the garage door opener by pressing the “Close” or “Down” button on the remote control transmitter. Wait for the garage door to close completely and engage with the tracks.
  • Keep the remote control transmitter in a safe and secure location, such as inside a vehicle or in a designated key holder, to prevent unauthorized access to the garage door opener.

6. Additional Security Measures: In addition to manual locks, electronic keypad systems, bolt locks, security bars, and remote control transmitters, homeowners can take additional security measures to enhance the security of their garage doors:

  • Install motion-activated lights or security cameras near the garage door to deter intruders and provide surveillance of the area.
  • Keep the garage door opener remote control transmitters secure and out of sight when not in use to prevent theft or unauthorized access.
  • Consider upgrading to a smart garage door opener system that allows remote monitoring and control of the garage door via smartphone apps or home automation platforms.
  • Conduct regular maintenance and inspections of the garage door and its components to ensure proper operation and security.

Conclusion: Locking a garage door is an essential security measure to protect your home and belongings from unauthorized access, burglary, and intruders. Whether using manual locks, electronic keypad systems, bolt locks, security bars, or remote control transmitters, homeowners can choose from a variety of methods to secure their garage doors effectively. By following the step-by-step instructions and tips outlined in this guide, homeowners can enhance the security of their garage doors and enjoy peace of mind knowing that their property is protected against intrusion and theft.

El Paso Garage Door Repair

11501 Rojas Dr suite q, El Paso, TX 79936, United States

1-915-201-3339

How To Reset Your Craftsman Garage Door Opener -El Paso Garage Door Repair


Garage Door Repair El Paso TX may be necessary to troubleshoot issues, reprogram remotes, or restore factory settings.

While the process can vary depending on the model and type of opener you have, the following steps provide a general guide for resetting most Craftsman garage door openers:

1. Locate the Reset Button: Depending on the model of your Craftsman garage door opener, the reset button may be located on the motor unit or on the remote control. Refer to your owner’s manual or inspect the opener unit for a small button labeled “Reset” or “Learn.”

2. Power Off the Opener: Before proceeding with the reset process, ensure that the garage door opener is powered off to prevent any accidents or malfunctions. You can either unplug the opener from the power source or locate the circuit breaker that controls the garage door opener and switch it off.

3. Press and Hold the Reset Button: Once the opener is powered off, press and hold the reset button for approximately 10 to 15 seconds. This action typically triggers the reset process and clears the opener’s memory, including any programmed remotes or settings.

4. Release the Reset Button: After holding down the reset button for the specified duration, release it and wait for a few moments to allow the opener to complete the reset process. You may hear a beep or see indicator lights flashing, indicating that the reset was successful.

5. Power On the Opener: Once the reset process is complete, restore power to the garage door opener by plugging it back in or flipping the circuit breaker back on. Allow the opener to power up fully before attempting to use it or reprogram remotes.

6. Reprogram Remotes (if necessary): If you reset the garage door opener to resolve issues with remotes or keypad entry, you’ll need to reprogram these devices to communicate with the opener. Follow the instructions provided in your owner’s manual for programming remotes or consult the manufacturer’s website for specific guidance.

7. Test the Opener: After completing the reset process and reprogramming any remotes, test the garage door opener to ensure that it’s functioning correctly. Use the remotes or keypad entry to open and close the garage door multiple times, observing for any irregularities or issues.

8. Adjust Settings (if necessary): If you reset the garage door opener to restore factory settings, you may need to adjust certain settings such as travel limits, force sensitivity, or lighting preferences. Refer to your owner’s manual for instructions on accessing and adjusting these settings using the opener’s control panel.

9. Seek Professional Assistance (if needed): If you encounter difficulties during the reset process or experience persistent issues with your Craftsman garage door opener, consider seeking assistance from a professional garage door technician. They can diagnose and resolve complex issues and ensure that your opener is operating safely and efficiently.

In conclusion, resetting your Craftsman garage door opener can help resolve various issues and restore its functionality. By following these steps and consulting your owner’s manual for specific instructions, you can perform a reset safely and effectively.

El Paso Garage Door Repair

11501 Rojas Dr suite q, El Paso, TX 79936, United States

1-915-201-3339

How To Program Chamberlain Clicker Garage Door Remote – El Paso Garage Door Repair

Programming your Garage Door Repair El Paso TX is a simple process that allows you to synchronize it with your Chamberlain garage door opener system.

Whether you’re setting up a new remote or replacing an existing one, this detailed guide will walk you through the step-by-step process to effectively program your Chamberlain Clicker garage door remote.

1. Identify Your Garage Door Opener Model:

Before you begin programming, it’s essential to identify the model of your Chamberlain garage door opener. This information can usually be found on the motor unit of the opener or in the owner’s manual. Knowing the model number will help you access the correct programming instructions.

2. Access the Programming Button on Your Opener:

Locate the “Learn” or “Program” button on the motor unit of your Chamberlain garage door opener. This button is typically found near the antenna wire and may be labeled as “Learn,” “Smart,” or “Program.” Press and release the “Learn” button to put the opener into programming mode. The indicator light on the motor unit will typically flash or remain solid to indicate that it’s ready to receive programming signals.

3. Prepare Your Chamberlain Clicker Remote:

Ensure that your Chamberlain Clicker garage door remote is ready for programming. Remove the battery cover from the back of the remote to access the programming button. Press and hold the programming button until you see the LED indicator light on the remote turn on or flash.

4. Press and Release the Program Button on the Opener:

While holding down the programming button on your Chamberlain Clicker remote, quickly press and release the “Learn” or “Program” button on the motor unit of your garage door opener. You’ll need to do this within a few seconds of holding down the programming button on the remote.

5. Wait for Confirmation:

After pressing the programming button on the opener, release the button on your Chamberlain Clicker remote and wait for confirmation. The indicator light on the motor unit should flash or turn off briefly to indicate that it has received the programming signal from the remote.

6. Test the Remote:

Once you’ve received confirmation that the remote has been programmed successfully, it’s time to test it. Press the button on your Chamberlain Clicker remote to open or close the garage door. If the door responds as expected, the remote has been successfully programmed.

7. Repeat if Necessary:

If you have multiple Chamberlain Clicker remotes that you want to program, repeat the process for each remote individually. Each remote will need to be programmed separately to ensure that they all work correctly with the opener.

8. Finalize Programming (Optional):

Some Chamberlain garage door openers may require additional steps to finalize the programming process. Refer to the owner’s manual for your specific opener model to determine if any additional steps are necessary.

9. Secure the Motor Unit:

Once you’ve finished programming all of your Chamberlain Clicker remotes, securely close the motor unit of your garage door opener. This may involve pressing the “Learn” or “Program” button again to exit programming mode and lock in the programmed settings.

10. Test for Functionality:

Finally, test all programmed remotes to ensure they’re functioning correctly. Open and close the garage door multiple times using each remote to verify that they all work reliably.

Conclusion:

Programming your Chamberlain Clicker garage door remote is a simple process that allows you to customize and enhance the functionality of your garage door opener system. By following the steps outlined in this guide and referring to the owner’s manual for your specific opener model, you can successfully program your remotes to work seamlessly with your Chamberlain garage door opener. If you encounter any difficulties during the programming process, consult the troubleshooting section of the owner’s manual or contact Chamberlain customer support for assistance.

El Paso Garage Door Repair

11501 Rojas Dr suite q, El Paso, TX 79936, United States

1-915-201-3339

How Much Headroom Do You Need For A Garage Door – El Paso Garage Door Repair

Headroom is a crucial consideration when Garage Door Repair El Paso TX, as it directly impacts the door’s operation and functionality.

In this comprehensive guide, we’ll explore the importance of headroom, factors influencing headroom requirements, average measurements needed, and tips for optimizing headroom in your garage.

Understanding Headroom

Headroom refers to the vertical space required above the garage door opening for the door to operate smoothly. It encompasses the space needed for the door to open fully without obstruction, allowing for the tracks and door panels to move freely.

Factors Influencing Headroom Requirements

Several factors influence the amount of headroom needed for a garage door:

1. Type of Garage Door:

  • Different types of garage doors, such as sectional, roll-up, or tilt-up, have varying headroom requirements based on their mechanisms and design.

2. Track System:

  • The type of track system used, such as standard, low-headroom, or high-lift tracks, affects the amount of headroom needed for installation.

3. Door Size:

  • The size and dimensions of the garage door, including height and width, impact headroom requirements. Larger doors generally require more headroom for smooth operation.

4. Opener Mechanism:

  • The type and size of the garage door opener mechanism can influence headroom requirements, especially if ceiling-mounted or side-mounted openers are used.

Average Headroom Measurements

While headroom requirements can vary based on the factors mentioned above, the following are average measurements for different types of garage doors:

1. Sectional Garage Doors:

  • Standard headroom: Requires approximately 12 inches of headroom clearance above the door opening.
  • Low-headroom track system: Requires around 4-6 inches of headroom clearance for installation.

2. Roll-Up Garage Doors:

  • Requires minimal headroom clearance, typically around 4-6 inches above the door opening.

3. Tilt-Up Garage Doors:

  • Requires moderate to ample headroom clearance, depending on the door’s size and design, typically ranging from 14-18 inches above the door opening.

Tips for Optimizing Headroom

To ensure adequate headroom for your garage door installation, consider the following tips:

1. Measure Accurately:

  • Take precise measurements of the available headroom space in your garage before selecting a garage door and track system.

2. Choose the Right Track System:

  • Select a track system that matches your garage’s headroom requirements and door type, such as low-headroom or high-lift tracks for limited headroom spaces.

3. Consider Alternative Installation Methods:

  • Explore alternative installation methods, such as side-mounted or wall-mounted openers, to maximize headroom clearance in your garage.

4. Consult a Professional:

  • When in doubt, consult with a professional garage door installer or technician who can assess your garage’s specific headroom requirements and recommend the best solution.

Conclusion:

Headroom is a critical factor in garage door installation, impacting the door’s operation, functionality, and clearance space. By understanding headroom requirements, measuring accurately, and selecting the right track system and opener mechanism, you can ensure smooth and efficient operation of your garage door while maximizing available space in your garage.

El Paso Garage Door Repair

11394 James Watt Dr #603, El Paso, TX 79936, United States

1-915-201-3339

How To Reset Outside Garage Door Keypad – El Paso Garage Door Repair

 Garage Door Repair El Paso TX This can be useful if you’ve forgotten the existing code or if you want to change it for security reasons.

The worker is installing the lifting gates of the garage.

In this guide, we’ll walk you through the step-by-step process of resetting an outside garage door keypad:

Materials You’ll Need:

  1. Owner’s manual for the garage door opener
  2. Ladder (if keypad is mounted high)
  3. Safety glasses (optional)

Step-by-Step Guide:

Step 1: Locate the Keypad:

Find the outside garage door keypad mounted near your garage door. It’s typically located on the wall next to the garage door or on the door frame itself. If you can’t find it, consult your garage door opener’s owner’s manual for its exact location.

Step 2: Identify the Reset Button:

Look for a small button labeled “Reset,” “Learn,” or “Program” on the keypad. This button is usually located on the back or inside the keypad’s cover. It may be recessed to prevent accidental activation.

Step 3: Access the Reset Button:

If the reset button is located inside the keypad’s cover, use a screwdriver to remove the cover and access the button. If the button is recessed, you may need to use a small tool, such as a paperclip or pen, to press it.

Step 4: Press and Hold the Reset Button:

Press and hold the reset button for about 5-10 seconds until the keypad’s lights flash or you hear a beep. This action clears the existing access code and prepares the keypad for reprogramming.

Step 5: Choose a New Access Code:

Think of a new access code that you’ll remember easily. Avoid using common or easily guessable codes, such as “1234” or “0000,” for security reasons. Aim for a combination of numbers that is memorable but not obvious.

Step 6: Enter the New Access Code:

Once the keypad is in programming mode (indicated by flashing lights or a beep), enter your chosen access code on the keypad. Press each number firmly and deliberately to ensure accurate input.

Step 7: Test the New Code:

After entering the new access code, press the “Enter” or “Open” button on the keypad to test it. The garage door should respond by opening or closing, indicating that the new code has been accepted.

Step 8: Repeat if Necessary:

If the new access code doesn’t work or if you encounter any issues during the programming process, repeat steps 4-7 to reset and reprogram the keypad. Ensure that you follow the instructions carefully and that you enter the new code accurately.

Step 9: Secure the Keypad:

Once you’ve successfully programmed the new access code, securely replace the keypad cover (if applicable) and ensure that it’s mounted securely to the wall or door frame. This helps protect the keypad from damage and ensures its longevity.

10: Remember the New Code:

Make a note of the new access code and store it in a safe place. Consider keeping a spare copy in case you forget it in the future. Avoid sharing the code with anyone you don’t trust and change it periodically for added security.

Remember to consult your  Garage Door Repair El Paso TX owner’s manual for specific instructions and troubleshooting tips if needed.

El Paso Garage Door Repair

11394 James Watt Dr #603, El Paso, TX 79936, United States

1-915-201-3339

https://maps.app.goo.gl/VAAdyzobsnjPThwx8

Repairing or Replacing Garage Door Opener Safety Release Mechanisms – El Paso Garage Door Repair

As a homeowner, the safety and functionality of my garage door opener are paramount. It’s not just about convenience but also about ensuring the security of my property and, more importantly, the safety of my family. One crucial component of any garage door opener system is its safety release mechanism. This mechanism allows for manual operation of the garage door during power outages or emergencies. However, like any other part of a garage door system, the safety release mechanism can face wear and tear over time, leading to potential safety hazards if not properly maintained.

In reference to Garage Door Repair El Paso TX, I delve into the importance of these mechanisms, signs of malfunction, and the options available for repairing or replacing them.

Understanding the Significance of Garage Door Opener Safety Release Mechanisms

Before diving into repair or replacement options, it’s crucial to understand the significance of the safety release mechanism. This mechanism serves as a crucial safety feature, allowing the garage door to be manually opened or closed in the event of a power outage or malfunction. Without a functional safety release mechanism, occupants could find themselves trapped inside or outside of the garage during emergencies, posing significant safety risks.

Signs of Malfunctioning Safety Release Mechanisms

Recognizing the signs of a malfunctioning safety release mechanism is essential for maintaining a safe garage environment. Some common indicators of issues with the safety release mechanism include:

  1. Difficulty in Manual Operation: If manually operating the garage door becomes unusually difficult or requires excessive force, it could indicate a problem with the safety release mechanism.
  2. Unusual Noises: Grinding, scraping, or other unusual noises during manual operation may suggest that the safety release mechanism is not functioning correctly.
  3. Stuck or Jammed Mechanism: A safety release mechanism that is stuck or jammed in place can prevent proper manual operation of the garage door.
  4. Inconsistent Performance: If the safety release mechanism works inconsistently or fails to engage or disengage properly, it may be a sign of underlying issues.

Repairing vs. Replacing Safety Release Mechanisms

When faced with a malfunctioning safety release mechanism, homeowners have two primary options: repairing the existing mechanism or opting for a replacement. The choice between repair and replacement depends on the extent of the damage, the age of the mechanism, and the homeowner’s budget and preferences.

Repairing the Safety Release Mechanism

If the safety release mechanism exhibits minor issues or malfunctions, repairing it may be a viable option. Some common repair tasks include:

  1. Lubrication: In many cases, inadequate lubrication can cause the safety release mechanism to malfunction. Applying lubricant to the moving parts can often resolve issues related to friction and stiffness.
  2. Adjustments: Misalignment or improper adjustment of the safety release mechanism can impede its functionality. Making necessary adjustments to realign the mechanism can restore proper operation.
  3. Replacing Worn Components: Over time, components of the safety release mechanism, such as springs or cables, may wear out or break. Replacing these worn parts can often solve issues with the mechanism’s performance.

Replacing the Safety Release Mechanism

In some cases, repairing the safety release mechanism may not be feasible or cost-effective, especially if the mechanism is significantly damaged or outdated. In such instances, replacing the safety release mechanism is the recommended course of action. When replacing the safety release mechanism, homeowners should consider the following factors:

  1. Compatibility: Ensure that the replacement safety release mechanism is compatible with your existing garage door opener system. Compatibility issues can arise if the new mechanism is not designed to work with your specific opener model.
  2. Quality and Reliability: Invest in a high-quality replacement safety release mechanism from a reputable manufacturer. Choosing a reliable product can help prevent future malfunctions and ensure long-term safety and performance.
  3. Professional Installation: While some homeowners may attempt DIY installation of a replacement safety release mechanism, hiring a professional garage door technician is often the safest and most efficient option. Professional installers have the expertise and tools necessary to ensure proper installation and functionality.

Conclusion

Overall, by following Garage Door Repair El Paso TX, the safety release mechanism is a critical component of any garage door opener system, providing manual operation capabilities during emergencies or power outages. Recognizing the signs of a malfunctioning safety release mechanism and taking prompt action to address issues is essential for maintaining a safe garage environment. Whether opting for repairs or replacement, prioritizing the safety and functionality of the mechanism is paramount. By investing in proper maintenance and addressing issues promptly, homeowners can ensure that their garage door opener’s safety release mechanism continues to operate reliably for years to come.

El Paso Garage Door Repair

11394 James Watt Dr #603, El Paso, TX 79936, United States

915-201-3339

Who Makes Craftsman Garage Door Openers – El Paso West Garage Door Repair

Garage Door Repair El Paso TX have earned a reputation for excellence in the industry, offering homeowners reliable performance and advanced technology.

By exploring the manufacturer behind the brand and the unique features of Craftsman openers, homeowners can make informed decisions when selecting a garage door opener for their home.

Manufacturer of Craftsman Garage Door Openers

  1. Sears Holdings Corporation: Craftsman garage door openers are manufactured and marketed by Sears Holdings Corporation, a well-known retail company with a long history of providing quality products to consumers. Sears has been a trusted name in home improvement and hardware for decades, and Craftsman is one of its flagship brands.
  2. Partnerships and Licensing: While Sears Holdings Corporation oversees the production and distribution of Craftsman garage door openers, the company often partners with leading manufacturers in the industry to ensure quality and innovation. Craftsman openers are known for their robust construction, advanced features, and user-friendly design, thanks in part to these strategic partnerships.

Key Features of Craftsman Garage Door Openers

  1. Smart Technology: Many Craftsman garage door openers come equipped with smart technology features, allowing homeowners to control their garage door remotely using a smartphone app. Smart features may include smartphone connectivity, remote monitoring, and integration with home automation systems.
  2. Quiet Operation: Craftsman openers are designed to operate quietly, minimizing noise and vibration during opening and closing. This makes them ideal for homes with bedrooms or living spaces located near the garage.
  3. Safety and Security: Craftsman garage door openers prioritize safety and security, incorporating features such as automatic reversal mechanisms, infrared sensors, and rolling code technology to prevent accidents and unauthorized access.
  4. Durability and Reliability: Craftsman openers are built to last, with durable construction and high-quality components that withstand regular use and environmental conditions. Many models come with warranties to provide added peace of mind to homeowners.

Considerations for Choosing a Craftsman Garage Door Opener

  1. Compatibility: Before purchasing a Craftsman garage door opener, ensure that it is compatible with your existing garage door system. Consider factors such as door size, weight, and type to determine the right opener for your needs.
  2. Features and Technology: Evaluate the features and technology offered by different Craftsman models to find one that aligns with your preferences and lifestyle. Consider whether you need smart features, quiet operation, or enhanced security capabilities.
  3. Professional Installation: While Craftsman garage door openers are designed for easy installation, professional installation may be recommended, especially for complex systems or if you’re not familiar with garage door mechanics. Professional installation ensures that the opener is installed correctly and functions optimally.

Conclusion:

Garage Door Repair El Paso TX offer homeowners a reliable and feature-rich solution for their garage door needs. With a focus on quality, innovation, and customer satisfaction, Craftsman openers continue to be a popular choice among homeowners seeking dependable performance and advanced technology. By considering factors such as compatibility, features, and installation, homeowners can choose the right Craftsman opener to enhance the convenience, safety, and security of their garage.

El Paso West Garage Door Repair

661 S Mesa Hills Dr Suite 104, El Paso, TX 79912, United States

1-915-503-2520

Powered by WordPress & Theme by Anders Norén