Local Businesses Blog in Texas

Month: November 2023 Page 3 of 7

Impact-Resistant Garage Doors – Hesperia Overhead & Garage Doors

As a homeowner, the quest for durability, security, and peace of mind is an ongoing journey. When it comes to safeguarding your property against the unpredictable forces of nature, impact-resistant garage doors emerge as stalwart guardians.

By following Garage Door Repair, in this deep dive into the world of impact-resistant garage doors, I’ll share insights into their benefits, how they stand up against the elements, and why investing in these robust doors is a prudent decision for homeowners seeking enhanced protection for their homes and loved ones.

Understanding the Need: Unpredictability of Nature

Living in a world where natural disasters can strike without warning, homeowners in various regions face the constant challenge of protecting their properties from the elements. From hurricanes along the coastlines to severe storms and high winds in other areas, the vulnerability of garage doors often becomes a focal point of concern. Traditional garage doors, while functional, may not provide the level of resilience needed to withstand the impact of flying debris or strong winds associated with severe weather events.

The Essence of Impact Resistance: What Sets These Doors Apart?

Impact-resistant garage doors are engineered with durability in mind. Unlike conventional garage doors, these specialized doors are constructed using materials and design features that enhance their ability to withstand impact, be it from heavy winds, hail, or flying debris during a storm. The key components that set impact-resistant garage doors apart include:

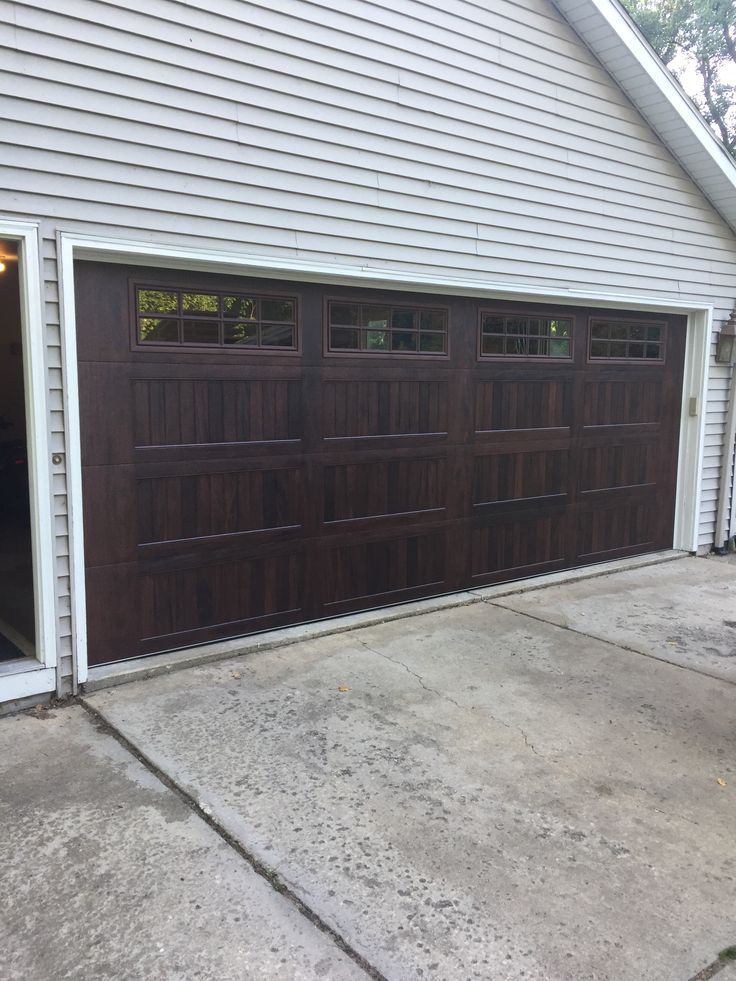
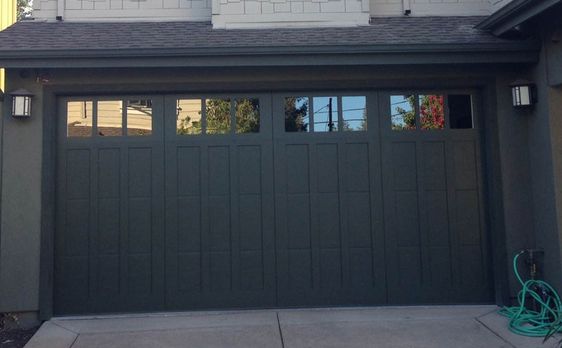
  1. Reinforced Materials: The materials used in the construction of impact-resistant garage doors are reinforced to withstand impact forces. Common materials include high-strength steel, aluminum, or fiberglass, chosen for their ability to absorb and disperse the energy generated by an impact.
  2. Multiple Layers and Thickness: Impact-resistant doors often feature multiple layers, providing an added layer of protection. Thicker doors, with reinforced cores, contribute to their ability to resist denting and damage.
  3. Durable Finishes: Specialized finishes, such as high-performance coatings or laminates, add an extra layer of durability. These finishes not only protect the door from physical damage but also enhance its resistance to rust and corrosion.
  4. Impact-Resistant Glass Options: If your garage door includes windows, impact-resistant glass is an essential feature. This type of glass is designed to withstand impact and prevent shattering, ensuring that even in the event of a storm, your garage remains a secure space.
  5. Structural Reinforcements: Reinforcements in the form of braces, struts, and heavy-duty hardware contribute to the overall structural integrity of impact-resistant garage doors. These reinforcements distribute the force of an impact more evenly, reducing the likelihood of structural failure.

Benefits of Impact-Resistant Garage Doors:

  1. Enhanced Storm Protection: The primary benefit of impact-resistant garage doors is their ability to withstand severe weather conditions. From hurricanes to powerful storms, these doors act as a protective barrier, reducing the risk of damage to your home and belongings during extreme weather events.
  2. Reduced Insurance Costs: Many insurance companies recognize the value of impact-resistant garage doors in mitigating storm damage. As a result, homeowners with these doors in place may qualify for reduced insurance premiums, providing a tangible financial benefit over time.
  3. Increased Home Value: Investing in impact-resistant garage doors not only enhances the safety of your home but also contributes to its overall value. Potential buyers often appreciate the added security features, making your property more attractive in the real estate market.
  4. Energy Efficiency: Impact-resistant garage doors, particularly those with insulation features, contribute to the overall energy efficiency of your home. They help regulate temperature, keeping your garage cooler in the summer and warmer in the winter, which can have a positive impact on your energy bills.
  5. Enhanced Security: The reinforced materials and structural features of impact-resistant garage doors contribute to enhanced security. These doors are more resistant to forced entry, providing an additional layer of protection for your home and belongings.
  6. Minimal Maintenance: While providing robust protection, impact-resistant garage doors are designed to require minimal maintenance. Their durable finishes and materials resist rust, corrosion, and other forms of deterioration, ensuring that they retain their functionality and appearance over the long term.
  7. Noise Reduction: The multiple layers and reinforced construction of impact-resistant garage doors also contribute to noise reduction. If your garage is used as a living space, a workshop, or a home gym, the sound insulation properties of these doors can significantly improve the overall comfort of the space.

Choosing the Right Impact-Resistant Garage Door:

  1. Assessment of Local Climate: Before selecting an impact-resistant garage door, assess the specific weather conditions in your region. If you live in an area prone to hurricanes, high winds, or severe storms, prioritize doors with the highest impact resistance ratings.
  2. Material Selection: Consider the material options available for impact-resistant garage doors. Steel, aluminum, and fiberglass are common choices, each offering unique benefits. The choice of material may also affect the overall aesthetic of the door, so factor in your design preferences.
  3. Impact-Resistant Glass Options: If your garage door includes windows, opt for impact-resistant glass options. This ensures that even in the face of flying debris, the glass remains intact, maintaining the structural integrity of the door.
  4. Insulation Features: If energy efficiency is a priority, consider impact-resistant garage doors with insulation features. These doors not only provide storm protection but also contribute to maintaining a comfortable temperature within your garage.
  5. Professional Installation: The proper installation of impact-resistant garage doors is critical to their performance. Enlist the services of experienced professionals who are knowledgeable about the specific requirements of impact-resistant doors and can ensure that they are installed correctly.

Conclusion: Fortifying Homes with Impact-Resistant Strength

In conclusion, the investment in impact-resistant garage doors goes beyond aesthetics; it’s a strategic decision to fortify your home against the unpredictable forces of nature. These doors stand as a testament to innovation in home security, offering a reliable barrier against storms, high winds, and potential impacts.

As a homeowner, according to Garage Door Repair, the peace of mind that comes with knowing your property is well-protected is invaluable. Impact-resistant garage doors not only contribute to the safety and resilience of your home but also provide a tangible return on investment through reduced insurance costs and increased property value. In the face of uncertainty, these doors become more than just functional; they become guardians, ensuring that your home remains a secure and sheltered haven for you and your loved ones.

Hesperia Overhead & Garage Doors

18361 Bear Valley Rd # 4, Hesperia, CA 92345, United States

760-990-1054

How To Install Garage Door Springs – Torrey Pines Garage & Overhead Doors

Installing Garage Door Repair La Jolla CA is a task that requires precision, attention to detail, and a strong emphasis on safety.

It’s important to follow a systematic approach to ensure a smooth installation process. Here’s a comprehensive guide in approximately to help you install garage door springs:

: Safety Precautions Before diving into the installation process, prioritize safety. Equip yourself with safety glasses and gloves to protect your eyes and hands. Garage door springs are under tension and can be hazardous, so exercise caution throughout the installation.

: Gather Tools and Materials Ensure you have all the necessary tools and materials at your disposal. This includes a ladder, winding bars, wrenches, a tape measure, safety glasses, gloves, and the garage door springs kit specifically designed for your door’s size and weight.

: Identify the Type of Springs Determine whether you have torsion springs or extension springs. Torsion springs are typically mounted above the garage door, while extension springs are positioned on both sides.

: Measure and Order Correct Springs Measure the height of your garage door to determine the appropriate size of springs. Order a garage door springs kit that matches your door’s specifications. Using the correct size is crucial for the proper functioning and balance of the garage door.

: Release Tension on Existing Springs (if applicable) If you’re replacing old springs, release the tension before attempting to remove them. Use winding bars to carefully unwind the existing springs. Follow the manufacturer’s instructions for your specific type of springs, and take your time to ensure safety.

: Remove Old Springs Once the tension is released, proceed to remove the old springs. Utilize wrenches to loosen and disconnect them from the brackets. Pay close attention to the orientation of the springs, as you’ll need to install the new ones in the same manner.

: Install New Springs Position the new springs according to the manufacturer’s instructions. Ensure they are securely attached to the brackets. For torsion springs, slide them onto the torsion tube and secure them with set screws. If you have extension springs, attach them to the pulley system.

: Wind Torsion Springs For torsion springs, use winding bars to wind them. Follow the specific winding instructions provided by the manufacturer, making sure to wind each spring evenly. Wear safety glasses and maintain a firm grip on the winding bars during this step.

: Adjust Spring Tension Carefully adjust the tension on the springs to achieve proper balance. An imbalanced garage door can lead to operational issues. Test the door manually to ensure smooth movement and that it stays in position when partially open.

: Install Safety Cables (for Extension Springs) If you have extension springs, it’s crucial to install safety cables through them. This precautionary measure prevents the springs from becoming projectiles in the event of a break. Thread the cables through the extension springs and secure them to the brackets.

: Test the Garage Door Manually test the garage door to ensure it operates correctly. If you encounter any issues or if the door doesn’t move smoothly, revisit the installation steps and make necessary adjustments. A well-balanced door is essential for optimal performance.

: Lubricate Moving Parts Apply lubricant to moving parts such as springs, rollers, and hinges. This reduces friction, ensuring smooth operation. Regular lubrication also extends the lifespan of these components.

: Safety Precautions Throughout the process, maintain a focus on safety. Be cautious when working with tensioned springs, and if you’re uncertain about any step, consult the manufacturer’s instructions or seek professional assistance.

: Seek Professional Help if Necessary If you’re uncomfortable with any part of the installation or encounter difficulties, it’s wise to seek professional assistance. Garage door technicians have the expertise to handle the task safely and efficiently.

In conclusion, installing Garage Door Repair La Jolla CA is a task that demands meticulousness and a commitment to safety. Take your time, follow the steps carefully, and prioritize safety at every stage of the process. If in doubt, don’t hesitate to seek professional help to ensure a secure and functional garage door.

Torrey Pines Garage & Overhead Doors

8980 Villa La Jolla Dr #5, La Jolla, CA 92037, United States

1-858-207-4777

Holmes Garage Doors: Reliable and Affordable Choices – Braintree Garage & Overhead Doors

In the pursuit of enhancing the aesthetic and functionality of my home, I found myself exploring the realm of garage doors. Among the myriad of options, Holmes Garage Doors emerged as a brand synonymous with reliability and affordability.

By following Garage Door Repair, I delve into the qualities that make Holmes Garage Doors a dependable choice for homeowners seeking both reliability and budget-friendly options.

A Foundation of Reliability

Holmes Garage Doors has cultivated a reputation built on the bedrock of reliability. For homeowners seeking a long-lasting and dependable garage door solution, the assurance that comes with the Holmes brand stands out. From residential to commercial applications, Holmes doors have proven themselves as stalwart guardians, standing up to the test of time and daily use.

Diverse Range of Options

One of the remarkable aspects of Holmes Garage Doors is the diversity of options available to homeowners. Whether one’s preference is for traditional designs that exude timeless charm, contemporary styles that embody modern aesthetics, or a specific material choice, Holmes caters to various tastes and architectural preferences.

As a homeowner, the ability to choose a garage door that not only complements the aesthetic of my home but also aligns with my personal style became a crucial consideration. Holmes’ versatility ensures that homeowners can find a door that not only serves its functional purpose but also becomes a seamless extension of their home’s overall design.

Affordable Excellence

Holmes Garage Doors successfully strikes a delicate balance between reliability and affordability, making them an attractive option for budget-conscious homeowners. The brand’s commitment to providing quality products without exorbitant price tags addresses a common concern for those seeking value in their home improvement investments.

As I navigated the landscape of garage door options, the affordability of Holmes doors became a key factor in my decision-making process. The realization that dependable quality doesn’t have to come with a hefty price tag added a layer of appeal to the Holmes brand.

Durability in Design

Exploring the construction of Holmes Garage Doors, I discovered a commitment to durability intricately woven into every design. Whether opting for steel, wood, or other materials, Holmes ensures that their doors withstand the rigors of daily use and the challenges posed by varying weather conditions.

Durability, a quality often synonymous with reliability, became a focal point for me. The understanding that Holmes doors not only provide a robust barrier but also minimize the need for frequent maintenance added to the overall cost-effectiveness of their products.

Energy Efficiency Considerations

In an era where energy efficiency is a key consideration for homeowners, Holmes Garage Doors steps up to the plate. Their doors are crafted with an acute awareness of the impact on a home’s energy efficiency, featuring designs that contribute to temperature control and insulation.

The realization that my garage door could play a role in enhancing the energy efficiency of my home resonated with the broader trend of sustainable living. Holmes’ commitment to energy-conscious designs aligned with my aspiration for a home that not only looks good but also operates efficiently.

DIY-Friendly Installation

For homeowners inclined towards a hands-on approach, Holmes Garage Doors caters to the DIY spirit. The brand understands that not everyone may opt for professional installation, and their doors are designed with user-friendly features that facilitate straightforward installation processes.

As someone who enjoys taking on home improvement projects, the prospect of a DIY-friendly installation process added a layer of convenience and potential cost savings. Holmes’ acknowledgment of the DIY community reflects their commitment to making their products accessible to a broad spectrum of homeowners.

Minimal Maintenance Requirements

Holmes Garage Doors, in their pursuit of providing reliable solutions, minimizes the maintenance demands placed on homeowners. The materials used, coupled with thoughtful design elements, contribute to doors that require minimal upkeep.

The notion of spending less time and effort on maintenance while enjoying the benefits of a reliable garage door became a significant factor in my decision-making process. Holmes’ commitment to reducing the hassle of upkeep further reinforced the brand’s dedication to offering a dependable and hassle-free product.

Customer-Centric Warranty

A testament to Holmes Garage Doors’ confidence in their products is the customer-centric warranty they offer. This warranty not only provides homeowners with peace of mind regarding the reliability of their purchase but also reflects the brand’s commitment to customer satisfaction.

The knowledge that the manufacturer stands firmly behind their product, offering a warranty that caters to the needs and concerns of homeowners, added an extra layer of assurance for me. The customer-centric approach demonstrated Holmes’ dedication to ensuring a positive experience for every homeowner.

Positive Customer Experiences

As I delved into reviews and testimonials, a recurring theme emerged – positive customer experiences with Holmes Garage Doors. Homeowners expressed satisfaction not only with the reliability and affordability of the doors but also with the brand’s customer service.

Real-life stories of Holmes doors enduring years of use without compromising on performance reinforced my confidence in the brand. The consistent praise from homeowners who had entrusted their homes to Holmes further validated the brand’s status as a reliable and customer-focused choice.

The Holistic Choice

In conclusion, my exploration into Holmes Garage Doors revealed a brand that goes beyond being merely reliable and affordable – it embodies a holistic approach to serving homeowners. The diverse range of options, coupled with a commitment to durability, energy efficiency, and customer satisfaction, makes Holmes a comprehensive choice for those seeking a garage door solution that stands the test of time without breaking the bank.

According to Garage Door Repair, choosing Holmes Garage Doors is not just a practical decision; it’s an investment in a reliable, affordable, and enduring component of one’s home. Whether looking for a traditional carriage-style door or a modern design, Holmes provides options that align with the diverse needs and preferences of homeowners, making them a trusted ally in the quest for a dependable and budget-friendly garage door solution.

Braintree Garage & Overhead Doors

0 Campanelli Dr, Braintree, MA 02184, United States

781-678-4910

How Much Wind Can A Garage Door Withstand – Denzels Garage Doors

Garage Doors Repair are designed to withstand varying degrees of wind pressure, depending on factors like their size, material, and construction. Generally, garage doors are rated for specific wind speeds to ensure they can endure different weather conditions.

When selecting a garage door, it’s essential to consider the wind load requirements for your specific location. Wind load is measured in pounds per square foot (PSF) and indicates the amount of force the door can resist. Garage doors in hurricane-prone areas, for example, may need to meet higher wind load standards.

The garage door’s material and construction play a crucial role in its wind resistance. Reinforced materials, proper installation, and additional bracing can enhance a garage door’s ability to withstand high winds. Regular maintenance and inspections are also important to ensure the door remains in optimal condition.

In conclusion, the wind resistance of a Garage Doors Repair is not solely determined by the number of words, but rather by factors such as design, materials, installation, and adherence to local building codes. Always consult with a professional to ensure your garage door meets the specific wind load requirements for your area.

Denzels Garage Doors

1-619-496-9419

How do I Fix a Garage Door that is Sagging in the Middle? – Dedham Garage & Overhead Doors

As a diligent homeowner, the discovery of a sagging garage door became a call to action. Recognizing the potential issues and safety concerns associated with a misaligned door, I embarked on a journey to understand the underlying causes and explore effective DIY solutions to bring my garage door back to its upright position.

I share my experience, insights, and a step-by-step guide from Garage Door Repair for fellow homeowners facing the challenge of a sagging garage door.

Chapter 1: Diagnosing the Sag

The first step in addressing a sagging garage door is identifying the extent of the issue. I carefully observe the door in both the closed and open positions, looking for signs of unevenness or misalignment. Common indicators of a sagging door include gaps between the door and the frame, uneven movement, and difficulty in smoothly opening or closing the door.

Chapter 2: Understanding the Causes

Understanding the causes of a sagging garage door is crucial for effective resolution. Common factors contributing to sagging include worn-out or damaged rollers, imbalanced spring tension, loose hardware, or issues with the door’s track alignment. By pinpointing the root cause, I lay the groundwork for targeted and efficient repairs.

Chapter 3: Safety First – Disengaging the Opener

Before attempting any repairs, I prioritize safety by disengaging the garage door opener. This prevents unintentional movements and ensures a secure environment for the repair process. Disconnecting the opener also allows me to manually move the door, assessing the extent of the sag and identifying specific areas that require attention.

Chapter 4: Inspecting and Replacing Rollers

Worn-out or damaged rollers are a common culprit in a sagging garage door. I conduct a thorough inspection of the rollers, looking for signs of wear, cracks, or misalignment. If any issues are identified, I proceed to replace the affected rollers with new, high-quality ones. This simple yet effective step significantly contributes to restoring the door’s smooth operation and eliminating the sag.

Chapter 5: Balancing the Spring Tension

Proper spring tension is critical for a garage door’s balance and alignment. I carefully assess the tension of the extension or torsion springs, ensuring they are in good condition and properly adjusted. If adjustments are necessary, I follow manufacturer guidelines or seek professional advice to achieve the correct spring tension, promoting an even distribution of weight across the door.

Chapter 6: Tightening Loose Hardware

A sagging garage door may result from loose or deteriorating hardware. I meticulously inspect all nuts, bolts, screws, and other fasteners, tightening any that have come loose. Reinforcing the connection points between the door panels, tracks, and other components enhances stability and contributes to the overall alignment of the door.

Chapter 7: Aligning the Tracks

Misaligned tracks can exacerbate a sagging garage door. I carefully examine the tracks, looking for gaps, bends, or obstructions. Using a level, I ensure that the tracks are perfectly aligned both horizontally and vertically. If adjustments are needed, I gently tap the tracks into the correct position, restoring proper alignment and reducing the strain on the door.

Chapter 8: Adding Reinforcements

For a more comprehensive solution, I consider adding reinforcements to address specific areas of weakness in the garage door structure. This may involve installing struts or braces to provide additional support to sections of the door that are prone to sagging. Reinforcements offer a proactive measure to prevent future sagging and enhance the overall strength of the door.

Chapter 9: Lubricating Moving Parts

Proper lubrication is essential for the smooth operation of a garage door. I apply a silicone-based lubricant to all moving parts, including hinges, rollers, and springs. This minimizes friction, reduces wear and tear, and promotes fluid door movement. Lubrication not only addresses current sagging issues but also contributes to the long-term health of the garage door system.

Chapter 10: Testing and Fine-Tuning

After completing the repairs, I reconnect the garage door opener and conduct a series of tests to ensure the door operates smoothly and evenly. I observe its movement, checking for any signs of lingering sagging or unevenness. If adjustments are still needed, I fine-tune the components until the door moves seamlessly, providing reassurance that the repair efforts have been successful.

Chapter 11: Seeking Professional Assistance

While many sagging garage door issues can be resolved through DIY efforts, there are instances where professional assistance may be necessary. If the sagging persists despite my best efforts, or if there are underlying structural issues, consulting a qualified technician ensures a thorough assessment and appropriate solutions.

Conclusion: A Straight and Secure Future

In conclusion, according to Garage Door Repair, addressing a sagging garage door is a task that requires a combination of observation, diagnosis, and targeted repairs. By understanding the causes, conducting a systematic inspection, and implementing DIY solutions such as roller replacement, spring tension adjustments, and track alignment, I have successfully restored my garage door to its upright position. This experience not only saved on repair costs but also empowered me with the knowledge to maintain the longevity and functionality of my garage door. As I look to the future, I am confident that these steps will contribute to a straight and secure path for my garage door, ensuring smooth and reliable operation for years to come.

Dedham Garage & Overhead Doors

3 Allied Dr #303, Dedham, MA 02026, United States

781-650-7642

Garage Door Opener Capacitor Replacement Instructions – Riverside Garage & Overhead Doors

As a homeowner, the realization that my garage door opener’s capacitor was the culprit behind its erratic behavior prompted a journey into the realm of DIY repair.

This article serves as a comprehensive guide, chronicling my experience and providing step-by-step instructions for successfully replacing a garage door opener capacitor. Join me on this DIY symphony as we restore harmony to the garage door’s operation as stated in Garage Door Repair.

Chapter 1: Gather Your Tools and Materials

The first movement in this DIY symphony involves gathering the necessary tools and materials. Here’s your checklist:

  • Replacement Capacitor: Ensure it matches the specifications of your garage door opener, including voltage rating and capacitance.
  • Screwdriver Set: To remove the cover and access the capacitor.
  • Multimeter: Essential for testing and confirming capacitor health.
  • Safety Gear: Gloves and safety glasses for protection.

Chapter 2: Disconnect the Power

Before diving into the repair, prioritize safety. Disconnect the power supply to the garage door opener. This may involve unplugging it or turning off the circuit breaker. Confirm that there’s no electricity flowing to the unit before proceeding.

Chapter 3: Access the Capacitor

The next movement involves accessing the capacitor. Most garage door openers have a cover or housing that conceals the internal components. Use your screwdriver set to carefully remove the cover, exposing the capacitor and other components.

Chapter 4: Identify the Faulty Capacitor

With the capacitor exposed, employ your multimeter to test its voltage. If the reading is below the specified voltage or exhibits erratic behavior during operation, it’s a clear indication of a faulty capacitor. Note down the specifications of the existing capacitor for accurate replacement.

Chapter 5: Remove the Faulty Capacitor

The removal of the faulty capacitor marks a significant step in the repair process. Identify the capacitor’s terminals and carefully disconnect them. Depending on the type of capacitor, this might involve unclipping, unscrewing, or desoldering. Exercise caution and refer to your garage door opener’s manual for specific guidance.

Chapter 6: Install the Replacement Capacitor

The replacement phase begins with installing the new capacitor. Align the replacement capacitor with the terminals, ensuring the correct polarity. Secure the connections, whether through clipping, screwing, or soldering, depending on the design.

Chapter 7: Confirm Proper Connection

Before reassembling the cover, double-check the connections to ensure they are secure and match the capacitor’s polarity. Mistakes at this stage could lead to further issues, so take your time to confirm everything is in order.

Chapter 8: Reassemble the Cover

With the new capacitor securely in place, it’s time to reassemble the cover. Use your screwdriver set to affix the cover back onto the garage door opener. Ensure a snug fit, as the cover provides protection to the internal components.

Chapter 9: Reconnect Power and Test

Reconnect the power supply to the garage door opener. This moment of truth involves testing the newly installed capacitor. Activate the garage door opener and observe its operation. A smooth and consistent performance indicates a successful replacement.

Chapter 10: Fine-Tune if Necessary

If the garage door opener exhibits any unexpected behavior or if the symptoms persist, revisit your work. Check the connections, confirm the capacitor’s compatibility, and consult your garage door opener’s manual for troubleshooting tips. Fine-tune until the desired performance is achieved.

Chapter 11: Celebrate Your DIY Victory

The final movement in this DIY symphony is a moment of celebration. You’ve successfully replaced the garage door opener capacitor, restored functionality, and empowered yourself with a newfound understanding of your home’s mechanics.

Conclusion: DIY Empowerment and Efficient Repair

According to Garage Door Repair, embarking on the journey to replace a garage door opener capacitor is not just a repair task; it’s an opportunity for DIY empowerment. Armed with the right tools, a compatible replacement capacitor, and a step-by-step guide, homeowners can efficiently address issues and restore their garage door opener to optimal performance.

As I stand in front of my smoothly operating garage door, the satisfaction of a DIY victory echoes louder than any symphony. With these step-by-step instructions, you too can orchestrate a successful repair, turning a potentially daunting task into a harmonious DIY achievement.

Riverside Garage & Overhead Doors

3410 Torrey St, Riverside, CA 92503, United States

951-494-6436

How To Fix A Bent Garage Door – Denzel Garage Door Repair

Fixing a bent Garage Door Repair Carlsbad CA is a common repair task that homeowners may encounter due to various reasons, such as accidental impact or weather-related issues.

Repairing a bent garage door involves assessing the extent of the damage and taking appropriate steps to restore its structural integrity. Here’s a detailed guide to help you fix a bent garage door:

: Assess the Damage

Before beginning any repair, carefully examine the extent of the damage. Identify the areas that are bent or warped and assess whether the damage is minor or more severe. Understanding the scope of the problem will guide you in choosing the appropriate repair method.

: Gather Necessary Tools and Materials

To fix a bent garage door, you’ll need some basic tools and materials. These may include:

  • C-clamps
  • Adjustable wrench
  • Hammer
  • Wood block
  • Plywood
  • Metal reinforcement strut (if needed)

: Secure the Garage Door

For safety reasons, ensure that the garage door is securely closed before starting the repair. If the door is partially open, carefully lower it to the closed position.

: Use C-Clamps to Secure the Door in Place

To prevent the garage door from moving during the repair, use C-clamps to secure it in place. Place the C-clamps on both sides of the door track, securing the door to the track. This ensures stability during the repair process.

: Identify Bent Sections

Identify the specific sections of the garage door that are bent. Pay attention to horizontal or vertical panels that may be affected. Understanding which sections require repair will help you focus your efforts on those areas.

: Straighten Minor Bends

For minor bends or dents, you can attempt to straighten the affected areas. Use a wood block and a hammer to gently tap and reshape the bent sections. Work gradually, applying light pressure to avoid causing additional damage.

: Reinforce with Plywood

If the garage door panels are severely bent, you may need to reinforce them with plywood. Place a piece of plywood on the interior side of the damaged panel and secure it with C-clamps. This additional support will help straighten the panel without causing further damage.

: Consider a Metal Reinforcement Strut

In cases of extensive damage, installing a metal reinforcement strut can provide additional support and stability. These struts are designed to strengthen the garage door panels and prevent further bending. Follow the manufacturer’s instructions for proper installation.

: Check for Proper Alignment

After straightening the bent sections, carefully release the C-clamps and operate the garage door manually or using the opener. Ensure that the door moves smoothly along the tracks and that it is properly aligned. If there are any issues with alignment, adjustments may be necessary.

: Lubricate Moving Parts

Once the garage door is back in operation, lubricate the moving parts, including hinges, rollers, and tracks. Proper lubrication helps reduce friction and ensures smooth operation.

: Test the Garage Door

Test the garage door by opening and closing it several times to ensure that it operates smoothly and without any issues. Pay attention to any unusual noises or resistance, as these may indicate further problems.

: Seek Professional Help if Needed

If the damage is extensive or if you are unsure about the repair process, consider seeking professional help. Garage door repair professionals have the expertise and tools to handle more complex issues and ensure that the door is repaired safely and effectively.

Conclusion:

Fixing a bent Garage Door Repair Carlsbad CA is a task that can be tackled with the right tools and a methodical approach. Assessing the damage, securing the door, straightening minor bends, reinforcing with plywood or metal struts, and checking for proper alignment are key steps in the repair process. Regular maintenance and addressing minor issues promptly can help prevent extensive damage to your garage door. If you encounter challenges or if the damage is severe, don’t hesitate to consult with a professional garage door repair service for expert assistance.

Denzel Garage Door Repair

2380 Camino Vida Roble, Carlsbad, CA 92011, United States

1-760-970-8179

How To Change Code On Liftmaster Garage Door Opener – Denzel Garage Door of Long Beach

Changing the code on your LiftMaster Garage Door Repair Long Beach CA is an essential aspect of maintaining home security.

Whether you’re updating the code for added protection or need to reset it for various reasons, the process is relatively straightforward. In this detailed guide, we’ll take you through the step-by-step procedure to change the code on your LiftMaster garage door opener.

1. Locate the Learn Button: Start by identifying the Learn Button on your LiftMaster garage door opener. This button is typically on the motor unit and may be colored red, purple, or another distinctive color. Its function is to facilitate the programming of new codes.

2. Clear Existing Codes: To ensure a clean slate, press and hold the Learn Button until the indicator light on the garage door opener turns off. This action erases all existing codes, preparing the opener for the new one.

3. Choose a New Code: Before proceeding, decide on a new and secure code for your garage door opener. Opt for a combination that is not easily guessable, avoiding predictable sequences or commonly used numbers.

4. Access the Keypad or Remote: If your LiftMaster garage door opener is equipped with a keypad or remote control, locate the programming button or keypad cover. This is where you’ll initiate the process of changing the code.

5. Enter Programming Mode: For keypads, enter your existing PIN and press the “Program” or “Learn” button. If working with a remote, press and hold the button you wish to program until the indicator light starts blinking. This signals that the device is ready for programming.

6. Input the New Code: While in programming mode, enter the new code on the keypad or remote. For remote controls, release the button after inputting the code.

7. Test the New Code: To confirm the successful programming of the new code, press the corresponding button on the keypad or remote. The garage door should respond by either opening or closing. If there is no response, repeat the code entry process to rule out any errors.

8. Repeat for Additional Devices: If you have multiple remotes or keypads, it’s crucial to repeat the programming process for each device. This ensures that all devices are synchronized with the updated code.

9. Resetting Remotes: To deactivate a remote, press and hold the Learn Button until the indicator light blinks rapidly. Following this, press the button on the remote that you wish to deactivate. This removes the specific remote’s code from the opener’s memory.

10. Understand Security Features: LiftMaster garage door openers often come with advanced security features like rolling code technology. Refer to your user manual for specific instructions on programming and understanding these features.

11. Battery Check: For keypads or remotes that operate on batteries, check their power levels. Weak batteries can impede the programming process, so replace them if necessary to ensure optimal performance.

12. Final Checks: After completing the programming process, conduct a comprehensive test by using all programmed remotes and keypads. This ensures that every device works correctly with the newly programmed code. If any issues persist, consult the user manual or contact LiftMaster customer support for further assistance.

13. Secure the Manual: Store your garage door opener manual in a secure location for future reference. The manual contains model-specific information and troubleshooting tips that may prove valuable in the future.

14. Consider Professional Assistance: If you encounter difficulties during the code-changing process or prefer professional guidance, don’t hesitate to contact LiftMaster customer support or enlist the services of a qualified technician. These experts can provide tailored assistance based on your specific garage door opener model.

By following these detailed instructions, you should be able to successfully change the code on your LiftMaster Garage Door Repair Long Beach CA, enhancing the security of your home.

Denzel Garage Door of Long Beach

1635 Cedar Ave, Long Beach, CA 90813, United States

1-562-337-3432

Garage Door Spring Repair Cost – Ontario Garage & Overhead Doors

As a homeowner navigating the intricate world of garage maintenance, one of the unsung heroes that emerged on my radar was the garage door springs. These seemingly inconspicuous components play a pivotal role in the seamless operation of the garage door, and my journey into understanding their repair costs proved to be enlightening.

According to Garage Door Repair, I’ll share my personal exploration into garage door spring repair costs, shedding light on the factors influencing them and the valuable lessons I learned along the way.

The Importance of Garage Door Springs: A Prelude

Before delving into the realm of repair costs, it’s essential to grasp the significance of garage door springs:

1. Counterbalancing Act:

Garage door springs counterbalance the weight of the door, making it easy to lift and lower manually or with the assistance of an automatic opener.

2. Extension Springs vs. Torsion Springs:

Garage doors typically utilize either extension springs or torsion springs. Extension springs extend and contract, while torsion springs twist to provide the necessary force for smooth door movement.

3. Frequent Usage:

Given the frequent use of garage doors, the springs bear a substantial workload. Over time, wear and tear can occur, necessitating repair or replacement.

Understanding Garage Door Spring Repair Costs

1. Type of Springs:

The type of springs in your garage door significantly influences repair costs. Torsion springs are generally more expensive to repair or replace than extension springs due to their complexity and the expertise required for installation.

2. Number of Springs:

The number of springs in your garage door configuration is a crucial factor. Single-car garage doors typically have one spring, while double-car garage doors may have two or more. Repairing or replacing multiple springs naturally incurs higher costs.

3. Professional Labor:

Engaging professional services for garage door spring repair is a prudent choice. Professional technicians possess the expertise to diagnose issues accurately and ensure safe and effective repairs. Labor costs, therefore, contribute significantly to the overall repair expenses.

4. Additional Components:

In some cases, the repair may involve replacing other components, such as cables, rollers, or bearings. These additional parts contribute to the overall cost and may vary based on the extent of the damage.

5. Emergency Repairs:

Garage door spring issues often require immediate attention, especially if the door becomes inoperable. Emergency repair services may come at a premium, reflecting the urgency and prioritized scheduling.

My Personal Journey: Lessons Learned

1. Proactive Maintenance:

Regular maintenance and lubrication of garage door springs can extend their lifespan and minimize the likelihood of sudden failures. Simple tasks, such as visual inspections and applying lubricant, proved to be valuable in preventing extensive damage.

2. Recognizing Warning Signs:

Understanding the warning signs of failing springs became crucial. Unusual noises during door operation, visible wear and tear, or a door that doesn’t stay open are indicators that shouldn’t be ignored. Addressing issues promptly can mitigate repair costs.

3. Professional Assessment:

When faced with a malfunctioning garage door, seeking a professional assessment was non-negotiable. DIY attempts at spring repair can be dangerous and may lead to more extensive damage or personal injury. Investing in professional expertise ensures a safe and effective resolution.

4. Budgeting for Unforeseen Expenses:

Including garage door maintenance and potential repairs in my home maintenance budget became a proactive measure. Allocating funds for unforeseen expenses ensures that garage door issues can be addressed promptly without causing financial strain.

5. Seeking Multiple Quotes:

When contemplating garage door spring repairs, obtaining quotes from multiple reputable service providers proved beneficial. Comparing costs, along with reviews and recommendations, allowed me to make an informed decision and ensure fair pricing.

Tips for Homeowners Facing Garage Door Spring Repairs

1. Regular Maintenance is Key:

Incorporate regular maintenance tasks into your routine, including visual inspections, lubrication, and tightening of hardware. Proactive care can prevent major issues.

2. Know Your Garage Door System:

Understanding the type of springs in your garage door and their expected lifespan empowers you to make informed decisions about repairs and replacements.

3. Don’t Ignore Warning Signs:

Unusual noises, visible wear, or operational irregularities are warning signs that merit immediate attention. Ignoring these indicators may lead to more extensive and costly repairs.

4. Safety First:

Garage door spring repairs involve tension and can be hazardous. Prioritize safety by avoiding DIY attempts and entrusting the task to qualified professionals.

5. Obtain Multiple Quotes:

When seeking professional services, obtain quotes from multiple reputable providers. This allows for a comprehensive comparison, ensuring fair pricing and quality workmanship.

Conclusion: Navigating the Springs of Home Maintenance

My journey into the world of garage door spring repair costs revealed the integral role these components play in the functionality of my home. Recognizing the factors influencing repair expenses and adopting a proactive approach to maintenance have proven invaluable in ensuring the longevity and reliability of my garage door system.

As a homeowner and based from Garage Door Repair, facing garage door spring issues is not just about managing repair costs; it’s about safeguarding the functionality and safety of an essential part of the home. By incorporating regular maintenance, recognizing warning signs, and seeking professional expertise when needed, you can navigate the springs of home maintenance with confidence, ensuring that your garage door continues to serve its purpose effectively and safely.

Ontario Garage & Overhead Doors

1353 E 7th St, Ontario, CA 91764, United States

909-442-4206

How Professional Garage Door Maintenance Extends Your Door’s Life – Denzel Garage Door Repair

As a homeowner, the garage door is often an unsung hero, providing not just a functional entry point but also a layer of security and aesthetic appeal. Yet, like any mechanical component, a garage door requires regular care and attention to ensure its optimal performance and longevity.

I delve into the significance of professional garage door maintenance and how entrusting this task to the experts can be a proactive investment in extending the life of this essential home feature based from Garage Door Repair.

Understanding the Anatomy: The Components at Play

Before we explore the benefits of professional garage door maintenance, it’s crucial to understand the intricate components that work harmoniously to facilitate the door’s operation:

1. Springs:

The torsion and extension springs bear the brunt of the door’s weight, providing the necessary counterbalance for smooth opening and closing.

2. Rollers and Tracks:

Rollers glide along the tracks, ensuring a seamless and frictionless movement as the door operates. Well-maintained tracks are essential for the door’s stability.

3. Cables:

Cables work in conjunction with the springs to support the door’s weight and maintain proper tension.

4. Hinges and Brackets:

Hinges allow the door panels to articulate, while brackets secure various components in place.

5. Opener:

The garage door opener, with its motor and drive system, automates the door’s movement and plays a pivotal role in the overall functionality.

The Proactive Approach: How Professional Maintenance Makes a Difference

1. Identification of Wear and Tear:

Professional garage door technicians possess a trained eye to identify signs of wear and tear that may go unnoticed by the untrained observer. Catching these issues early on prevents them from escalating into more significant problems.

2. Spring Tension Adjustment:

Torsion and extension springs operate under considerable tension. Professional technicians can adjust the tension to ensure optimal balance, preventing premature wear and potential safety hazards.

3. Lubrication of Moving Parts:

Regular lubrication is crucial for the smooth operation of moving parts such as rollers, tracks, and hinges. Professional maintenance includes strategic lubrication to minimize friction and reduce wear on these components.

4. Alignment Checks:

Proper alignment is essential for the smooth movement of the door along the tracks. Professional technicians can detect and rectify misalignments, preventing strain on the rollers and ensuring the door’s stability.

5. Cable Inspection and Tensioning:

Cables, working in tandem with the springs, play a critical role in supporting the door’s weight. Professional maintenance involves thorough inspection and tensioning to prevent issues such as fraying or slack.

6. Opener Calibration:

The garage door opener requires precise calibration for efficient operation. Professional technicians can calibrate the opener’s settings, ensuring it responds accurately to commands and minimizing unnecessary strain.

7. Safety Sensor Alignment:

Modern garage doors are equipped with safety sensors that detect obstacles and prevent the door from closing if there’s an obstruction. Professional maintenance includes aligning these sensors to guarantee their effectiveness.

8. Weather Stripping Inspection:

Weather stripping along the edges of the door serves as a barrier against the elements. Professional maintenance involves inspecting and replacing weather stripping to maintain an effective seal.

The Lifecycle Extension: How Your Door Benefits Over Time

1. Prevention of Costly Repairs:

Addressing minor issues through regular professional maintenance prevents them from evolving into major, costly repairs. Proactive care is a cost-effective strategy in the long run.

2. Enhanced Safety:

A well-maintained garage door is a safer one. Professional technicians ensure that safety features, such as sensors and auto-reverse mechanisms, are in optimal condition, reducing the risk of accidents.

3. Consistent Performance:

Professional maintenance contributes to the consistent and reliable performance of your garage door. Whether it’s opening smoothly or responding promptly to commands, a well-maintained door instills confidence in its daily operation.

4. Longevity of Components:

Each component of the garage door, from springs to cables, benefits from regular care. By addressing wear and tear and ensuring proper tension and alignment, professional maintenance extends the lifespan of these crucial parts.

5. Energy Efficiency:

A properly sealed and maintained garage door enhances energy efficiency by preventing drafts and minimizing heat loss. This contributes to a more comfortable and energy-conscious home environment.

6. Peace of Mind:

Knowing that your garage door is in optimal condition brings peace of mind. You can rely on its performance and longevity, eliminating the stress and inconvenience of unexpected malfunctions.

My Personal Experience: From Reactive to Proactive Maintenance

Initially, my approach to garage door maintenance was reactive—I addressed issues as they arose. However, a series of unforeseen repairs prompted me to reconsider this approach. Embracing professional maintenance transformed my perspective:

1. From Repairs to Prevention:

Shifting from repairing specific issues to preventing them altogether became a game-changer. Professional technicians not only addressed existing concerns but also implemented measures to prevent future issues.

2. The Cost-Effective Advantage:

The cost-effectiveness of professional maintenance became evident over time. What seemed like an additional expense revealed itself as a proactive investment in avoiding larger, more expensive repairs down the road.

3. Confidence in Operation:

Experiencing the consistent and reliable operation of my garage door instilled a newfound confidence. No longer did I approach each opening and closing with trepidation; I knew my door was well-maintained and dependable.

4. Extended Lifespan:

Observing the extended lifespan of my garage door components, from springs to cables, affirmed the value of regular care. The door operated as smoothly as it did on the first day, showcasing the impact of professional maintenance on longevity.

5. The Gift of Time:

Professional maintenance not only preserved the lifespan of my garage door but also granted me the gift of time. No longer did I spend weekends troubleshooting and fixing issues; instead, I enjoyed the convenience of a door that required minimal intervention.

Conclusion: A Longevity Blueprint for Your Garage Door

In the realm of home maintenance, the garage door often takes center stage as a vital yet sometimes overlooked component. Embracing professional garage door maintenance is not just a reactionary measure but a proactive blueprint for extending the life of this essential feature. The investment in regular care pays dividends in terms of cost savings, enhanced safety, and the peace of mind that comes with a consistently reliable garage door.

As a homeowner, according to Garage Door Repair, the longevity of your garage door becomes a testament to the value of professional maintenance—a commitment to preserving not just a mechanical device, but a cornerstone of convenience, security, and everyday functionality within your home.

Denzel Garage Door Repair

2380 Camino Vida Roble, Carlsbad, CA 92011, United States

760-970-8179

Page 3 of 7

Powered by WordPress & Theme by Anders Norén